
.JPG)
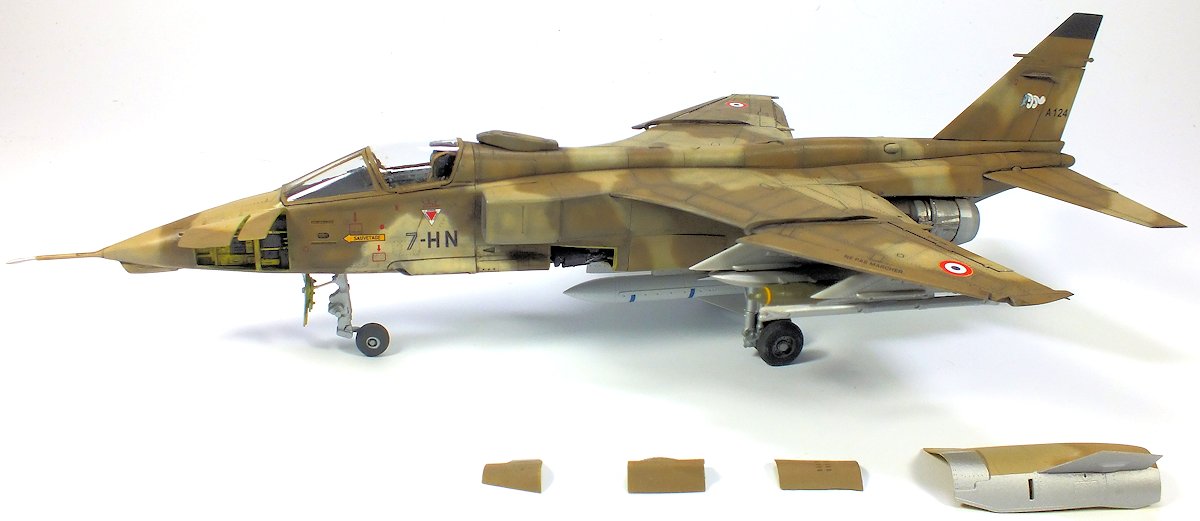
In today’s news Ethelian finishes his 1/48th kit of the Kittyhawk
models Jaguar A to an excellent standard. We left this kit at the sealed up
and ready to paint stage – let’s see how Eth got it over the final hurdle…
Kittyhawk Models
1/48th scale
Kit no: KH80106
Injection moulded & PE Parts
While the glue was drying the ordnance were
assembled. Some research was needed to
here to find out what weapons load would be appropriate. I settled on the AS 37
on the centreline pylon, four 250kg bombs on the two inboard wing pylons, one
Magic 2 and the Barracuda pod on the outer two pylons. Kittyhawk provide a good
choice of weapons load out so you can mix and match as you want.

As always before the painting started in earnest the model was washed with warm
soapy water to remove all the dirt and grease that accumulates during the build
stage. Once the model was dry the surfaces were buffed up to a nice shiny
finish. This provides a good clean smooth surface for the application of the
paint.
A primer coat of Halfords Grey acrylic primer was sprayed
over the whole model and left for 24 hours to dry. Halfords primer is excellent
and even if you puddle it slightly it will shrink back and leave a smooth
finish. The model was pre-shaded with a dark brown, try to avoid using black as
this provides too harsh a contrast. Then inside the panel lines I sprayed
white, again to provide a good contrast when the final colours were applied.

With the pre-shade applied the first camouflage
colour was applied, Lifecolor Sand (LC-UA019). For this model it was decided to
spray the paint only in the areas it was needed and not to spray the whole
model in the sand colour. When this was dry the second colour, Lifecolor Dark
Earth (LC-UA529) was applied. Both colours were sprayed on in several coats to
build up the opacity of the paint while still leaving a certain amount of the
pre-shade showing through, more of a hint of the pre-shade is what is required.

The instructions would have you spray the underneath
in light grey; however this is incorrect as French Jaguars were painted
aluminium underneath. So Alclad II Aluminium was applied in several coats using
an Iwata Eclipse airbrush with the compressor set at 12psi.


Most photographs of the Jaguar A that I have show the
left hand side of the front fuselage in a different shade of sand, although the
instructions say this should be grey, again wrong. So a slightly lighter shade
of Lifecolor Sand was applied in this area then the model was left to dry
before the decal application.
When the paint was dry, several coats of Alclad II Gloss
lacquer were applied. This is an excellent lacquered and so far I have had no
problems using it. With the lacquer dry it was time to apply the decals.
Kittyhawk decals go on very well, and the decals in
the Jaguar are up to the usual standard, however I did have an issue with the
unit number below the cockpit and this had to be replaced with some generic
numbers/letters from Syhart decals. There is an omission from the decal
instructions concerning the placement of the roundels on the engine covers, so
pay attention here. Otherwise there was not an issue and the decaling went
quickly and easily.


When they were dry, another two coats of Alclad Gloss
lacquer was applied and then it was time for the weathering. Flory Models Dark
Dirt wash was generously applied to the model and left to dry for an hour or so
before it was removed with a dampened kitchen towel, making sure to go with the
air flow. When this was dry, two coats of Alclad Matt lacquer was applied and
the model set aside for the final assembly
While the decals were drying, the ordinance was
painted and decaled.

So what are the impressions of this kit now that it
is complete?
The one thing that really impressed me about the
Kittyhawk Jaguar is the level of surface detail. This is easily on a par with
anything by Tamiya or Hasegawa in this scale. Some of the surface detail is so
delicate that it would be easy to obscure it with the paint or the weathering
but with care it is possible to make this detail stand out.
.JPG)
On the negative side the issues with the construction
instructions and the painting instructions are an annoyance and could put
modellers off this kit. However with patience and lots of dry fitting it is not
so difficult to resolve these issues and they should not be allowed to deviate
from what is an excellent kit.
.JPG)
The fit of the parts, in certain places, is not on a
par with Tamiya, a certain amount of fettling is definitely needed and this is
an area that Kittyhawk needs to address. The mistakes in the painting and decal
instructions should not really occur in a modern kit but with good references
these are easily overcome and again should not be allowed to detract from the
overall quality of the kit.
.JPG)
.JPG)
Comparing this kit to any by Tamiya or Hasegawa may
seem a little bit harsh considering that Kittyhawk are a new company and this
is only their third kit. However due to the level of surface detail and the
overall quality of this kit, mistakes in the instructions notwithstanding, it
is a valid comparison and one that does Kittyhawk credit.
.JPG)
.JPG)
.JPG)
.JPG)
.JPG)
I would like to thank Glen from Squadron for
entrusting me with the build of this kit and I have already started to build
the second release in this series - the RAF Jaguar.
Ethelian
