
Eduard have just
released their version of the Sukhoi Su-27 in 1/48th scale in a
limited edition boxing of only 1500 kits. This kit has a past and Eduard has
added to the retooling of the kit with several extra detail parts. The kit has
not been without discussion on the forums so we thought we would get our hands
one of the limited number to investigate for you today, let’s have a look …

Great modern looking boxart 

The Contents are a'plenty 


Upper surfaces


There is also a gap at the rear where the top and bottom are
secured together on the flanks in front of the horizontal stabilizers. These
are shown squeezed together in the picture below, the joint’s gap however isn’t
that hard to fix. You need to firmly place the halves together and then after
both sides are glued simply smooth over with putty and then rescribe the lines
you will lose from the putty. When you think about it a bit of proper
“modelling” and you will be left with the rest of the kit which goes together
very nicely with no real other seam areas to deal with except maybe the intakes
underneath which require some filler to smooth out the gaps.
Some filler and all is solved here 


The kit above details up with some nice looms to be found on the PE sheet shown later in the review


Eduard's additions will make it look a bit better


I like what Eduard have done here with this guard -

the old and the new - can you guess which one is which? Of course the brassin is on the right


The real seat and resin together


To think once you would have been happy for these parts! Not any more these old kit bits are goooone


 The engine intakes are again another excellently crafted part of this model, lots of fine rivet detail and some vents which will detail up nicely under a wash. There will of course be a gap running down the centre but some putty will fix that. I have seen some people make the underside of the intakes a bit thinner to become scale correct which is an easy and eye pleasing correction to add to your model. Other additions here are the leading edge slats (which when applied may need an anchoring point to firmly secure them to the front wing fillet) these are thin and to scale and will give depth to the front of the wing area.


Sprue C contains
the horizontal tail surfaces which again are excellent in surface detail and
shape. You have the option of positionable flying surfaces with this tail and
like the wings, tails and ventral fins these are well detailed and should weather
up very nicely.


The Pylons are pretty good shape wise
 The Photo Etch Sheets
come in two flavours. The pre-painted
instrument panel sheet which I mentioned earlier is just a no brainer
unless you like to paint your own cockpits. These speed up the build no end -
the improvements are easy to apply and are included of course in coloured parts
of the instructions. This sheet includes lots of parts for the side consoles and
the ejection seat. These are a great inclusion.
The Photo Etch Sheets
come in two flavours. The pre-painted
instrument panel sheet which I mentioned earlier is just a no brainer
unless you like to paint your own cockpits. These speed up the build no end -
the improvements are easy to apply and are included of course in coloured parts
of the instructions. This sheet includes lots of parts for the side consoles and
the ejection seat. These are a great inclusion.


The decal sheet - some interesting choices there

The decals held to the light to show detail and minimal carrier film

 The colours are strong and consistent and the whites are not
translucent. A great set of decals in five different marking choices, each from
varied sources and locations which I like in a decal set. Cartograf printed and
designed by Eduard they have done really well here.
The colours are strong and consistent and the whites are not
translucent. A great set of decals in five different marking choices, each from
varied sources and locations which I like in a decal set. Cartograf printed and
designed by Eduard they have done really well here.


 This is not the perfect flanker, but no one else has done it in
ANY other scale either after many tries. Eduard
has come close with this release and what they have included in this release. I
think Eduard has done well with this boxing.
This is not the perfect flanker, but no one else has done it in
ANY other scale either after many tries. Eduard
has come close with this release and what they have included in this release. I
think Eduard has done well with this boxing.


Review:
Eduard Kit no: 1167. The Su-27 Flanker B in 1/48th 

Scale: 1/48th
Material: Styrene + Resin + Photo Etched + Canopy Masks
Styrene Sprues: 6 + 1 clear
Decals for five Aircraft

The new Eduard kit of the 1/48th scale Su-27 is a
limited edition kit, only 1500 will be released worldwide, so on paper the
combination of an interesting/cool subject in a popular scale in these numbers
looks to be a no brainer. However the forums as usual have been “active” with
their own buzz about the kit. “Too Expensive” is the main buzz word. Well that
may have been the case if nothing of quality was added. However there has been
some re-tooling going on from the original Academy kit, and Eduard have added
their own “Brassin” line improvements in resin, plus new photo etch details, a
canopy mask in kabuki and decals by Cartograf of five subjects to sweeten the
deal a lot more. We will compare prices after we look at the kit.
There are six large sprues of a dark duck egg blue styrene and one
clear styrene for various lenses and of course the aircraft canopy. Included
are two sheets of Photo Etched, one coloured for the cockpit parts mainly and
another bare silver coloured for the external additions and corrections to the
base kit, of course there is a coloured instruction booklet in the usual Eduard
style and lastly the extra “Brassin” additions which make up the full package.
You can get a good handle on this kit by reading the detailed and
easy to follow fifteen page instruction booklet. This is printed in glossy
black and white A4 pages with bits of colour to denote the Photo Etched and “Brassin”
resin replacements. I think they are well thought out and logical. They demystify
an otherwise tricky little kit once all of the extras are taken into account.

That is enough about this until the aircraft’s colours - let’s
look at the styrene itself first, starting with the plastic - the base for this
kit.

We really have to discuss the history of this kit if we want
to examine this current release. The original Academy kit of the Su-27B flanker
was released just before the last millennium (wow – 1994 - the old days hey?)
and was well received and criticised in equal parts. Modellers were happy for
the release and the surface detail and shape of the kit on the whole but were
unhappy with the lack of details in the cockpit tub and instrument panel, the
after burners, the nose cone and the tyres. Seeing this Academy has only just
this year updated their Flanker in a partial new tooling of their kit this
year. Eduard has used this as the base of their limited release. What has
changed you ask?

On the Dark Duck egg blue sprues there is no errata of flash
and no sink marks detectable. There are of course injection pin marks but all
are in sensible place on the kit so as to no see them when in construction. If
you look at the sprues there are some subtle changes to them which we will go
through in order of the changes on each sprue. We will look at the substitutes
that Eduard offers on the way through as well.

The two fuselage
halves are quite sensibly sandwiched together in the fashion of an F-16 kit
– The top and bottom half of the airframe are joined as to lessen the joins
going across the kit. The seams instead here run horizontally here across the
leading wing extensions which runs nearly right up until the radar dome.

Under the fuselage

There are however two places that will need attention with
some filler. All of the Academy flankers I have seen made up has had the gap at
the front filled.


The panel lines and surface detail itself is still very good
and the recesses aren’t too deep – areas around the guns and tail sections
especially where the aircraft can take some weathering will come out pretty
accurately when compared with the aircraft in real life. A really good job was
done on this and nothing needed to be changed here. The width of the kit is correct
as to the drawings I have (but then again who says the drawings are ever accurate)
but the length is still about one and a half centemetres too short as the length of the plane when conceived
in kit form by Academy did not take into account the pilot probe. I haven’t been
the first one to see this, but the problem would be very very hard to fix
without a complete re-tool.

The bottom of the fuselage near the round part of the
intakes needs- like the Academy kit – a small round fillet removed from it to
be correct as well – this has been done in many online builds and is easy to
rectify with some minor surgery. Shame Academy will have to live with it (and
us I suppose in this instance) and they didn’t do anything about it.

The kit above details up with some nice looms to be found on the PE sheet shown later in the review

The other area for discussion with this kit is the nose cone. Academy’s version on the
first flanker was just a little bit squat; they bulged a bit towards the tip of
the nose – ever so slightly as you can see in this picture –

Well nothing has been changed here which is disappointing as
the nose cone itself came as a separate piece. This could have been re-done
pretty easily here in this instance – I suppose the tool makers thought they
got it right! I would have really liked Eduard to have added a solid resin nose
instead in hindsight. Easily fixed though (if you feel the need) with
aftermarket add on from a company called Pisco
who sell them at Linden Hill Exports or alternatively the Fairy-hobby nose cone set (who also do
a slightly broader canopy than this kit has) – directly from the maker – just
email haneto0801@hotmail.com
 Both
of these sets look more correct but only with the help of a plan or after it
has been pointed out would you notice. It depends on the type of modeller you
are as to whether you would replace this part – as I said only someone really
in the know would notice. Buying one of the aftermarket noses would slightly increase
the length of the kit to make it closer to the correct length though so it’s
worth thinking about for a pretty low cost.
Both
of these sets look more correct but only with the help of a plan or after it
has been pointed out would you notice. It depends on the type of modeller you
are as to whether you would replace this part – as I said only someone really
in the know would notice. Buying one of the aftermarket noses would slightly increase
the length of the kit to make it closer to the correct length though so it’s
worth thinking about for a pretty low cost.
A closer look at the radardome


Above you can see the kit - after the initial straight part of the radardome the kit part remains a bit to bulbous and more so from front on while the real thing below is sharper - there isn't much in it but for some it matters - forearmed is forewarned


While we have talked about the canopy the clear sprue has
the two part canopy there but the slightly narrow profile at the top has been
kept. It should be a little bit more bubble shaped at the top with a pinched
lower section like on the F-18. Again Fairy Hobby makes a beautiful and
cheap crystal clear alternative. You will not have to remove the seam on the
kit canopy as well if you have this. It isn’t a big deal though if you are
armed with some progressively finer grit sanding sticks, the seam will take
just a few moments of work to correct.

The "pinched" look of the canopy above is evident here with the bubble like top part - the kit part is more squarer and narrower.
The transparencies include the infra-red glass of the Air to air missiles and the Head-up-display.

There is a part A and
a Part B film included for the HUD as well.

Moving onto Sprue A
- we can see that there has been some changes. The ejector seat for example has
been given more detail and the a harness is now added to the padded seat part,
this will not matter to a lot of people as Eduard have supplied a superior
“Brassin” upgrade which comes in two main parts and pretty much leaves the
initial plastic kit in the dust.

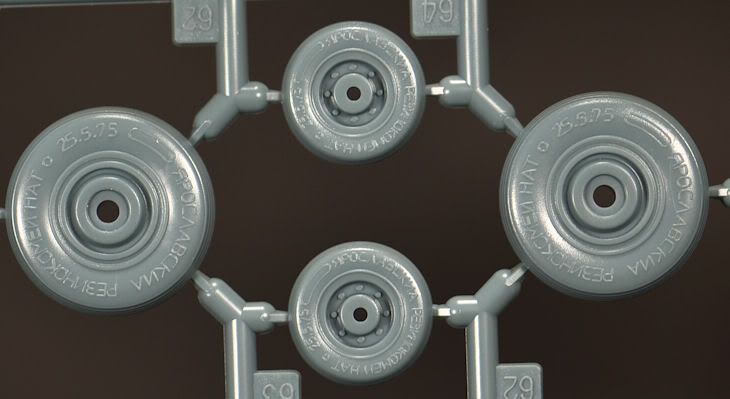
Well for one gone are the horrible rubber tyres - not many
people were happy about these – so it was a good idea to change this. From a
lot of feedback out there rubber tyres I would think are only liked by about
10% of people out there. These look very detailed with raised detail of the
writing of the tyres (just a little too raised for me) this is easy to fix
though just a little sand with fine sandpaper an all will be looking very nice.
The rear wheels are not bulged but are a pretty good replica
The Nose wheels are a good match as well - bolts and tread look good

The instrument panel has also been changed in the new
tooling, though again Eduard have bypassed this as well with a coloured Photo
Etched set which again is a much better alternative to the raised detail
styrene offered in the original or updated
tooling. Having the Eduard P/E coloured parts is a fast and very nice
way to model, I used to think they are cheating but they raise the bar so much
its almost silly not to use them if you have them.
New tool - why bother...
The real thing

When you can work with this who needs the styrene original - my camera recorded this a little too grey - the colour is more of a blue grey in real life on the sheet

Also on Sprue A – The Afterburner cans are a bit to “pointed”
at the rear of the aircraft. – Pictures of the Flanker at rest show a slight splaying
at the rear end. Whether this will catch your eye or not is the choice you will
make in just modelling it straight from the box or using some aftermarket
external ‘cans. I would leave them; they look good enough to me.
 Again, the
interior detail of the original isn’t 100% correct – but Eduard have added a
Photo Etched ring inside to further detail this area – this is an improvement
over the original by quite a bit.
Again, the
interior detail of the original isn’t 100% correct – but Eduard have added a
Photo Etched ring inside to further detail this area – this is an improvement
over the original by quite a bit.

The kit and the real deal

The landing gear is on sprue A as well and it is quite
satisfactory. Some have said it is a bit flimsy but careful construction and
handling will look after any concerns you may have. It looks accurate to shape
and scale thickness. Eduard has again added PE details to this part of the kit
so the landing gear should look great once all put together.
In addition on sprue A there is another correction by Eduard
themselves – this is the mudguard of the KN-27 front wheel. Eduard have mad an
excellent replacement (it looks a little bit like a cyber-man’s helmet) of this
mudguard in the “Late” production style of mudguard with the one rounded-off
rectangular hole shape and the slots in the rear which were absent on the early
guards. An excellent addition.
The original and the "Brassin"

I like what Eduard have done here with this guard -

The seat was a sore point on the original Academy release they have re-tooled it - but not a bother with this as Eduard have given us a Brassin alternative - this plus the Photo Etch in colour just makes the even updated styrene seat look as bad in comparison as the old one - a non issue here just replace it!


The headrest


Sprue B in my box
was cut into two halves neatly down the middle – I have looked at pictures of
the original academy sprues to see what might have been added and I cannot see
anything. It seems they were cut in half simply to fit in the box.

Sprue B consists of many of the other external details like
the engine intakes and the horizontal tail surfaces. These tail surfaces are
joined together (2 parts to each) and show some excellently restrained surface
detail. The ventral tails are also the correct shape and thickness, again the
refined rivet detail shines as one of the best features of this donor kit.

Great rivets and vents!

The Guys at Eduard have added some excellent photo etched
FOD grilles to insert inside these intakes – carefully painted the intake will
look excellent. We also have the underside grilles in PE so they are extremely thin, Just as they should be.
Excellent PE FOD guards make the difference between good and great here

Again the excellent surface detail and shape with these horizontal tails is pleasing
The other parts of the C sprue are the airbrake which really
should go in a closed position as the insides are nothing to write home to mum
about. A hydraulic ram is provided for that option, but unless you want to show
the aircraft slowing down or taxying after landing the detail isn’t strong
enough to display it open. It would be closed at rest anyway.
The next option came up with some stick on the original
Academy release. It looks like Academy has re-tooled the soft details and the
depth of the original cockpit tub. Really it was a waste of time with to re-do
it on this kit though as Eduard’s Excellent “Brassin” replacement leaves this
one too in the dust for detail. The dials, pedals and switches are excellent in
this resin alternative. With the seat and coloured PE this will build up into a
really impressive cockpit.
there is no choice really whether to use the Kit or the Brassin add on (below)

Another no brainer!

Sprue D contains
all the missiles you could shoot at an F-35 – as well as their pylons, there
are fourteen missiles in total. Most of these come with their tails already
attached but four of the AA-10’s have tails on the tail part on the sprue to be
attached. The radar guided (R-27RE) and infra-red (R-27TE) AA-10 “Alamos” are good in shape but need a nick taken from the
rear of the front guide fins just to get rid of the square appearance - no big deal here - and as a nice bonus the clear transparency
sheet has the infra-red clear part included on that as a clear part.

There is a nasty seam running the lenth of one of the smaller of the AA-10’s
but of course that is what a hobby knife is for. The smaller still four AA-11
Archer/ R-73’s are good if you do not look too hard at the little knobs on the
front which should be very tiny fins/angle of attack sensors. The shorter range
AA-8 APHID / R-60 is good but the tails are a little too big.


If I was
modelling all of these missiles I would cut off their fins and make my own from
metal/tin or the thinnest card plastic I could find. They are adequate but even
better would be to plum for some of the brand new missiles (the AA-10 family)
Eduard is bringing out- including missile
carts, in February . Here is the link
– they are sure impressive and a shame they are not included with the kit in its
limited release - maybe a Royal release later?


The Pylons are pretty good shape wise


The regular unpainted
PE sheet contains some things mentioned earlier which I think are
excellent additions to this kit and which bring it way ahead of any flanker in
this scale (including the new Academy single seat Su 27 kit to come.) The FOD doors, lower shutters and afterburner
insides I have mentioned are complimented with great bits like wheel well
detailing and wiring and cockpit ”shelf” detail which will look just great
under some paint.

The surface of the canopry frame has great detail

The Canopy masks save time and make you look like a champ


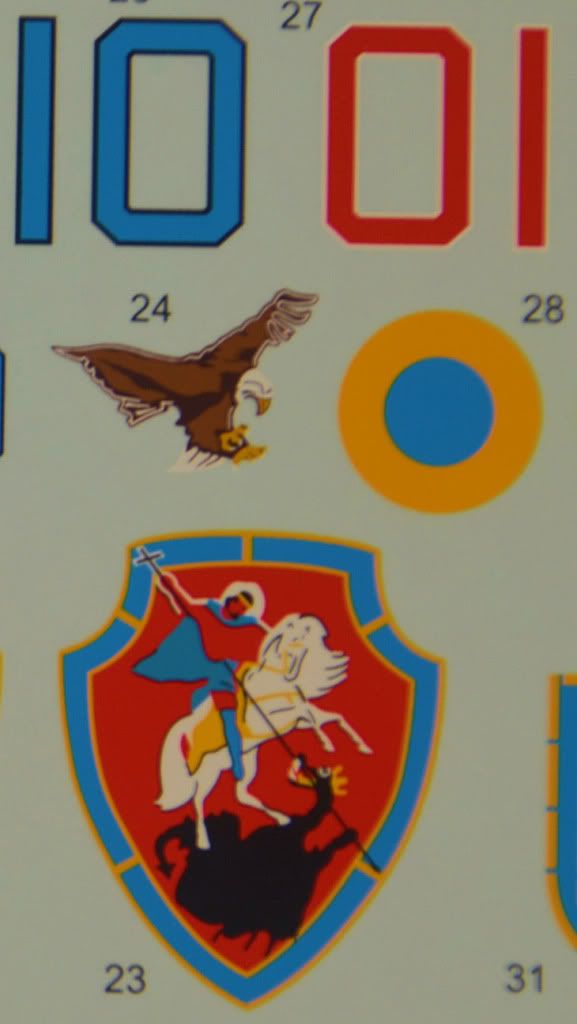
The large decal sheet is printed by Cartograf. I was really impressed by these decals. The absolute lack of nearly any visible
carrier film and the detail of the decals here are a great sight to any modeller. The fine printing can be seen
against my “massive” 20P coin I put next to the sheet.


The detail on the real aircraft

There is an addendum page of stencil placements included in the instructions
which is good because with the flanker there are MANY! They are tiny – but they
are clear, even to my old eyes.

Decal
choices:
Su-27SK,
Indonesian Air Force, 11th Sqdn, Hasanuddin Air Base, August, 2003


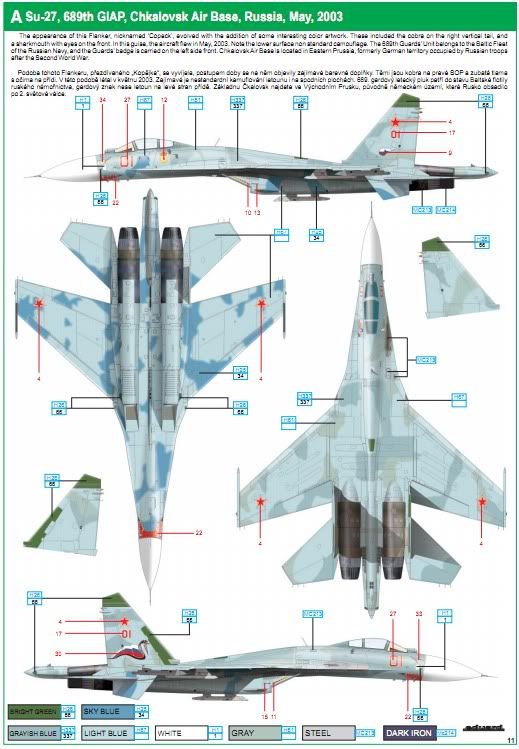
Su-27,
689th GIAP, Chkalovsk Air Base, Russia, May, 2003

Su-27,
Uzbek Air Force, 62nd Fighter Regiment, Karshi Air Base, 2010

Su-27,
Ukrainian Air Force, 831st Tactical Aviation Brigade, Mirgorod Air Base, 2009


Su-27,
54th GvIAP / 148th Combat & Training Centre, Savasleyka AB, Russia,1998

The colours have been identified on the instructions by Eduard in
Gunze / Mr Color shades (more different brands in this please as they are
expensive in Europe)
The price: A lot of
chatter about this, and lets look at it - Often a reviewer who disregards this isn’t
being true to his audience so I wont ignore it - The question is does a 1/3 more expensive than a
similar sized limited edition Mig 29 kit in the same scale by Eduard make sense? The
asking price on the Eduard website is 1800.0 Czech Koruna, this equals USD$93/£60
and I have found it for £61 + 3.50 delivery in the UK.
Well some say just get the older Academy kit and various add-ons
from other companies as an alternative. There is merit in that but I like the choices
of the package on offer here. The decals, Brassin and PE really make the parts of
the model you really want to show off look amazing. This is a money/fun issue
with me. With all of the quality add-ons supplied I think it would be worth £60
if I was to buy it at the shops. It definitely isn't worth my time shopping around
for all of the different bits if you only had the Academy kit to work from.
The Brassin Extras - along with the decals, masks and P/E they sell the kit for me.


I
am a little sad that some of the easy to fix inaccuracies have not been
corrected in the re-tooling. Ironically the things that have been made better
have also been made redundant by Eduard’s Limited edition add-ons. I would add
a replacement nose and bubble canopy to this but that would be it.
If you are a Flanker fan - and there are many out there - you will
like this kit as it is a real improvement over the Academy offering in 1/48th.
I would get this over the cheaper Academy kit (forthcoming and past) just for
the quality of the add-ons the potential they give to this model. It will sell
quickly as the release is limited to 1,500 kits worldwide. I would get in quickly if I were
you.
Adam Norenberg
Thanks to Eduard for this Kit. It is available at the link in
the banner below.