

Big “Phans” of the Phantom – Didier and Nic bring you this
build of Revell’s F-4F boxing in 32nd scale with the help of some
alternate decals bringing some colour to the all over grey – see what he thought
of this new (re-released with new decals) kit in today’s build review..
Review Build: F-4F
Phantom II WTD61 Flight Test
Revell of Germany
Kit# 04895
1/32nd Scale
Number of parts 283
Decal set with markings for the unique livery of F-4F Phantom II 38+13 Final Flight WTD-61 Flight Test, Manching 30 July 2013
Revell model kits are available from all good toy and model retailers. For details visit www.revell.de/en
Kit# 04895
1/32nd Scale
Number of parts 283
Decal set with markings for the unique livery of F-4F Phantom II 38+13 Final Flight WTD-61 Flight Test, Manching 30 July 2013
Revell model kits are available from all good toy and model retailers. For details visit www.revell.de/en
Ode to the Phantom…Model by Didier Thomas
Inbound with a dust-trail behind it, swinging its clipped
wings to the right and turning at 13 degrees per second before the gear goes
down. Nose up high and flaps down, the aircraft touches down with a puff of
white smoke from the main wheels, moments before the drag chute deploys. I must
have been 10 years old on one of my first airshows, but that’s when I fell in
love with the Phantom II.

Less than 13 years after the Second World War, the first
flight of the F-4 Phantom II took place. It is pretty amazing that today,
almost 60 years later, this fantastic looking jet is still in active duty. The
Phantom, any one of its many versions, is an impressive model in any
collection, no matter what scale you build it in.

Revell is known for its well-priced large scale models. This
F-4F Phantom – less than 40 euro, which is an absolute “Phantastic” price, by
the way - is a very impressive model that was first introduced twenty years ago
in 1995. And although modelling has evolved a lot in the last two decades, this
Phantom remains a very nice kit indeed, which can be built into a winner. So,
whenever Revell releases it again, basically, that’s just plain good news in my
book!
Recently, Revell re-released the excellent kit with some
very striking decals for a Phantom II of the German WTD61 Flight Test. The
decals, which were designed by Sylvain
of Syhart Decals, are very nicely done and ... well, huge. (Size of the
kit: 597 mm long, 366 mm wide)

Another Phantom enthusiast, Didier, was very eager to build
it. So, as soon as it arrived, he started building!
The cockpit of the Phantom is probably one of the most
complex and impressive ones in the business. Revell provides a decent base, but
Didier wanted to add some of the details.

Here are a couple of
cockpit shots of the real thing and all of the intricate detail inside...


A mix of kit parts, Eduard photo-etched parts, the odd resin
left over, lots of evergreen and some Quickboost seats: the cockpit started to
take shape pretty nicely.


The kits seats are pretty nice, but the resin seats from Quickboost
(QB 32 069) are better (as they should be.) You can still add more
details like tubes, lines, etc. It takes some careful painting, but it is a
real plus!

Here’s the real
thing: a lot of room for those that want to super-detail.

With all the detail added, careful painting is necessary. It
were a couple of busy nights for Didier, but a little test fitting showed that
is sure is worth the time.

When the Phantom is on the ground, two doors on the
aircraft’s belly are in open position to get some hot air out. Here’s a recent
photo of it on a Turkish Rhino:

So, Didier started cutting and scratching, the basic form is
a rectangular box and rounded card to represent the internal shape.


The compressors of the Phantom are visible through the large
air intakes, so care was taken to paint them just right.

Although the decals in the box are very nicely designed and
printed, it was just a little too bright for Didier, so he got himself a set of
AirDoc decals for another German
F-4F.


The construction of the kit is very straightforward. The
fuselage is made-up out of 4 parts and with some tweaking and a little putty,
they work out just fine. The wing-to fuselage joint is very sharp and needs no
extra work – well done, Revell! By now, things were going so fast, that Didier
had his airbrush out before his camera...
The grey paint went on without a problem. With a lighter
shade of grey, some panel lines were accentuated:

You think that looks
a little too much contrast? Just take a look at this!

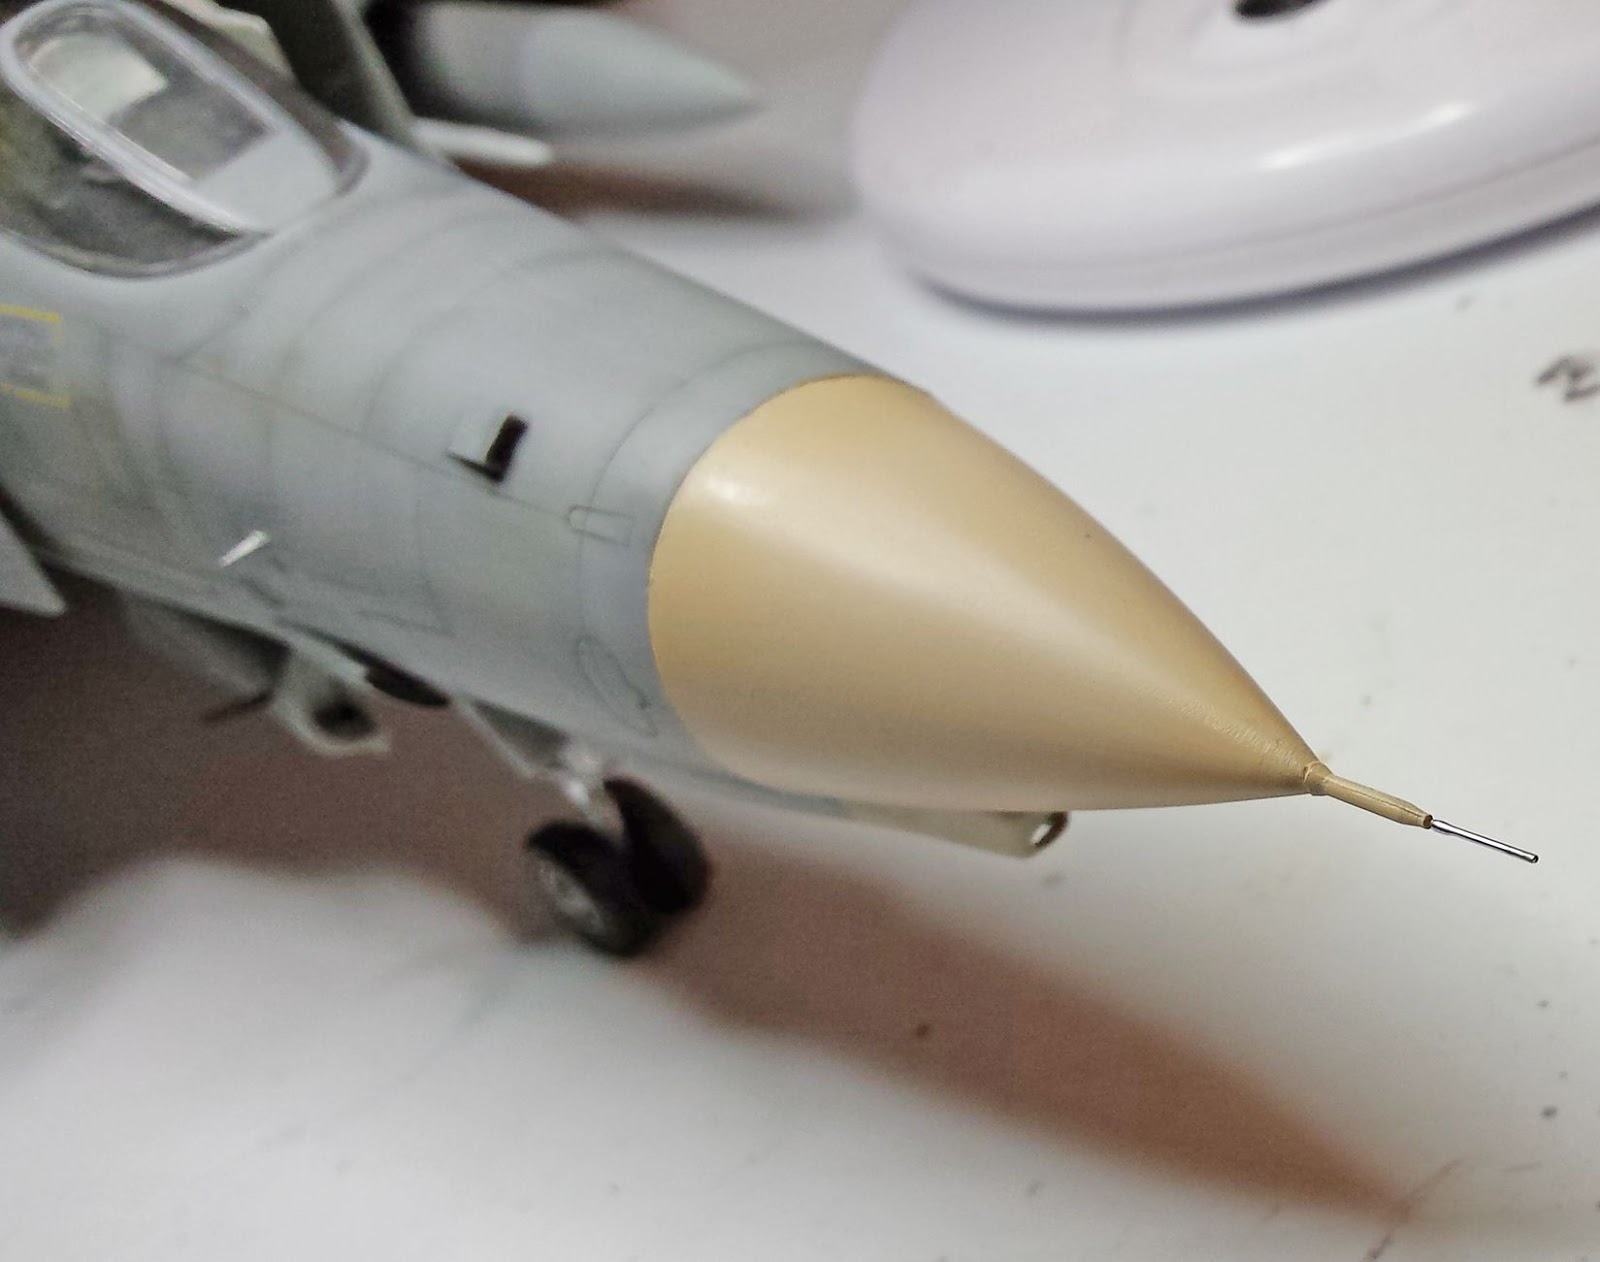
The nose was masked and painted flesh. The pitot-tube was
replaced with some micro-tube. Looks just that little more realistic that way.
The shape of the nose is a little too sharp and some after-market replacement
parts are available, but the kit part was used in this build.
Unmasking the cockpit is always a special moment. And it has
to be said: the busy cockpit sure looks nice inside the grey and weathered
fuselage!

The canopies are very nicely shaped, but they can use some
extra detail. The F-4E
interior 1/32 Cat.no.32503 detail set
is a really big help here;


it’s not very expensive and brings
out a lot of highly visible detail. To make sure none of the transparent parts
would be scratched, the insides were masked off.

Here are the canopies
with the photo-etched parts added:

The tailplanes of the kit are very fragile and they broke
off a few times during the final construction of the kit. So, in the end, parts
of the aft fuselage needed to be repainted and the tailplanes got a metal
insert in order to get them onto the kit. The downward angle of the tailplanes
needs to be precise: these compensate the aerodynamic effect of the upward placed
wingtips. The Luftwaffe Phantoms have unslotted tailplanes, opposed to most
F-4E‘s.

Now it was about time to get started on the weathering of
the big Phantom. A wash and some scratches made it look a lot more realistic.
Checking out some reference books, footsteps of pilots and ground crew were
noticed on top of the air intakes, so these were simulated too! For this,
Tamiya weathering masters were used. See how nice this kit is engraved and riveted?

The exhaust nozzles in the kit are replaced by a set of
Aires exhausts, which are a big improvement.

To get some variation in the grey, some areas were a painted
in a slightly off shade. Like the tip of the droptank. The kit also comes with
a ladder, which is a nice touch.

The AirDoc decals
“1/32 Luftwaffe F-4F Phantom II Part 1 -
Norm 90J Air Defence Camouflage [AIRM3201]” went on quite easy although
some of them are quite large and fragile, just like this blue text on the nose.


The last thing to do, was weathering the exhausts and the
titanium parts of the tail planes. Alclad Magnesium was used, followed by
translucent blue and red Alclad colours, as well as Tamiya clear orange.

With this part done and all the tiny details glued, the kit
was finished and it was time for some photos. Because it’s a rather big kit
(about 60 cm long) it isn’t the easiest kit to photograph...


Compare this photo
with the real thing and see how right the weathering looks!

Here’s a photo of the
forward fuselage:

This is a photo of
the finished main gear. It might be straight from the box, but it sure looks
convincing!

And one final shot of
the kit with the ladder installed:

This kit really doesn’t show its age. Even twenty years
after it was introduced, it still is a great kit. The lines of this magnificent
aircraft are beautifully reproduced in this large scale Revell kit. Probably
one of the most amazing parts of this kit, apart from the details, recessed
panel lines, rivets, landing gear, fit, etc. is the price. I mean, 40 euro for
such a kit, that’s just a give-away. 

So get one while they are still available and if you find an
RF-4, get that one too! I really can’t wait to get a Revell US F-4G Wild
Weasel. It will be very hard to find outside the US, though.
A big thank you to Revell for bringing this big Phantom back
and for sending us one to review. I’m sure it will be a success with any livery
at this price! – I really got to get me another one soon....
Model: Didier Thomas
Text: Nicolas Deboeck
Thanks to Revell of
Germany for sending this kit for us to review and build - Revell model kits are
available from all good toy and model retailers. For details visit www.revell.de/en