Well MiniArt have
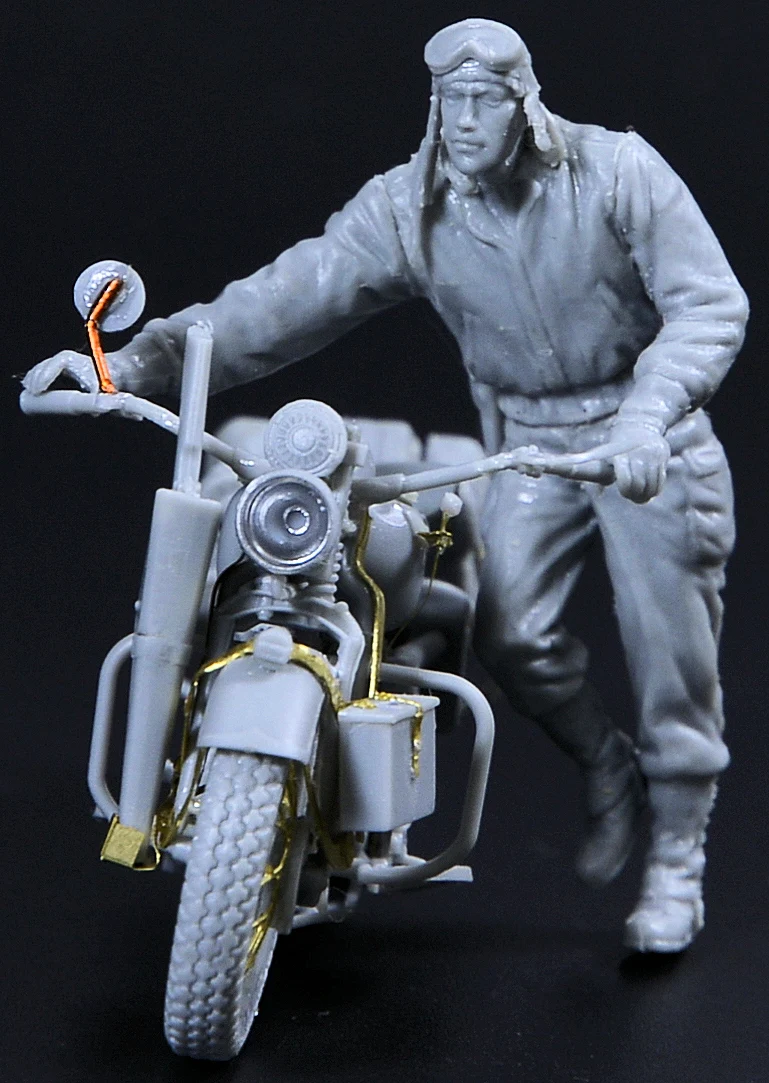
combined their excellent WLA Motorbike with this new GI who looks like he is
out of fuel or luck – This new “in Progress” list. Let’s have a look at him in
our preview…
MiniArt Models
Kit no# 35182
1/35th scale
This kit contains 127
parts.
Box contains a model
of one motorcycle with one figure.
Two marking choices are offered with this combo
BOX: 290x190x45 mm
It is ever astounding us here at TMN at the complexity of new models hitting the market, and customer's demands of equally lifelike figures to ride and to interact with the riders of that kit. MiniArt’s WWII WLA Harley Davidson Motorcycle is a complicated but oh-so very rewarding kit to make and as i have made one before in the past I found the levels of detail far exceed the much older Tamiya kit of the WLA made decades ago. It is true and no surprise to many people who read this - even before we get started with this review to say that this kit brings the WLA bike into the 21st century.
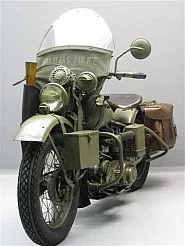
Need an introduction to the "Liberator?"
Need an introduction to the "Liberator?"
The Harley WLA was often called 'The Liberator' as it was
seen ridden by soldiers liberating occupied Europe – it was used in many of the
theatres of war the US had its troops in, as well as any of the Allied nations
who also used this bike.
The bike and the packs and personal protection
holsters were a useful addition to any rider out there all alone on the
battlefield as well as a heavy duty carrying rack in the rear that could
support an ammunition box or two radios, and saddlebags could be hung from its
sides. A scabbard placed up front was sized large enough for the driver to tuck
a Thompson submachine gun or a rifle or carbine in. On the other side of the
front wheel, another ammo box could be attached.
The model we are looking at today is a bit of a combo and a
good idea from Miniart. Instead of selling single figures to suit their bikes,
cars and trucks they all a new combo vehicle/ figure pack. Topped with
attractive artwork and some interesting ideas these are very popular – and with
good reason.
The kit combines this award winning motorcycle kit with the
new figure of a G.I. pushing his WLA motorbike. These are from MiniArt’s new
series of moulds that has been long promised and about time. This company is really
evolving into a top producer of models and it is good that they are making new
stuff with ever increasing quality. The bar is being raised for injection
moulded kits. Let’s take a look at this set and build it to see how he fits
into our expectations.
We start off with some attractive boxart in the usual MiniArt
“white box” style, isolating the subject so you see exactly what you are
getting. The artist has done a good job of making the rider and bike seem of
the time and evocative with a big goofy –like face.
We open the box to find mostly space inside. The one motorcycle
sprue, a clear transparency and the photo etched sheet as well as one figure in
grey also in there. The instructions make up the rest of this box, let’s look
at them for a second.
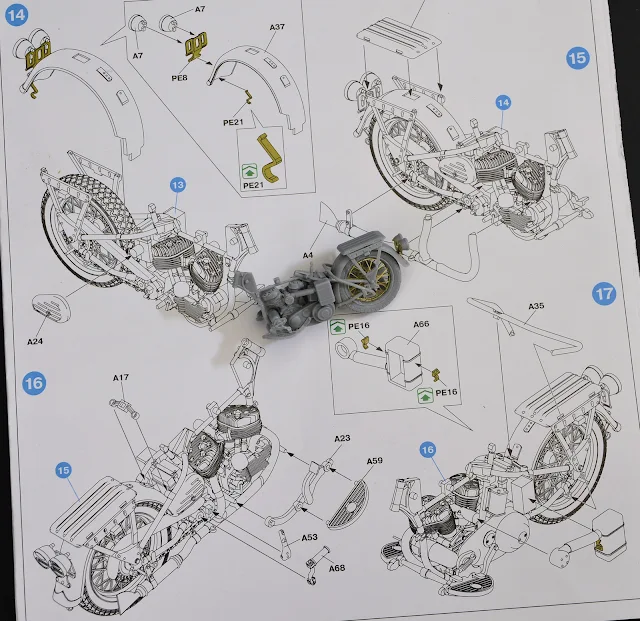
The coloured
instructions are a simple thing to follow. Unlike myself however you must
look at them hard! I will point out a few things I got wrong later in the build
because I assumed certain things. Although most of the build IS easy enough to
follow. The assembly of the figure is a no brainer and he is not covered in the
instructions. You won’t need any for him trust me.
There are two coloured callouts in many shades noted for
you. I guess pretty soon we will just see AMMO colours listed in this part. I
hope we continue to see all colours from all brands here.
A small decal sheet is provided as markings for
the bike, there are indeed two speedos and sets of markings so you may use another
on one of your other bikes if you have one.
The small sheet of
photo etch is particular to this bike and its brothers in the series. There
are the spokes for the wheels and the straps or bracing for other parts of the
bike. As well as this a few tiny bits of PE aren’t too much to make you swear
and genuinely add something to the look at the end.
The plastic: Being
a mix of older and newer kits I will talk about the older bike kit first. For
those of you who have made the bike this is well moulded plastic with not a lot
of clean up. Some of the parts especially around the engine are fine and can
get a bit mushed so be careful of those fine but nicely detailed parts. There
is no real flash problems or other injection foibles.
The sprue of the bike
And a clear sprue for
the windscreen and lights. Only the light need be used on this kit unless you want to add the front sheild to the bike - your choice...
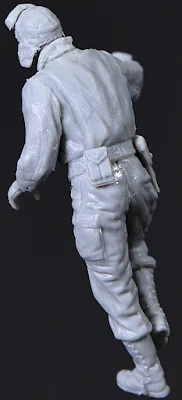
The “Pusher”: This
G.I. is moulded on a single sprue out of grey plastic but I can see his details
are finer than the older figures I looked at in the last MiniArt set I reviewed.
The "pusher
man" – sprue, back and front
Twelve parts make him up including leather straps for his
helmet and pistol holster, he is largely devoid of flash and with enough wrinkles
and folds in the material to make him look long, lean and convincing enough to
be a soldier of the time.
A simple construction he goes together without any real
problems for the modeller and no real gaps in the body to fill. We will look
good with a little more clean-up and some paint.
We will run through most of the steps for making this bike
and hopefully point out a few bits I have noticed to make your construction
easier.
Making the bike – step by step:
Step 1: This kit
comes with the spokes in photo etch. Helpfully these wheel spokes come with
parts in plastic that help mould them into the shape they need to go to. These
bits of plastic simply sandwich together to make the shapes for these spokes to
fit into the ties. They are a godsend! I have made bike spokes without these hand parts before and that experience sucked. I like it MUCH better this way.
Step 2: The other
photo etch also comes with some bending assistance. The part A6 is a template
to bend the brackets of PE that is used to hold the stowage and weapon holster
of the bike. Again these are great – you will have to do some tiny adjustments –
but this is a great step in the right direction to get the angles right.
Step 3: The next
step is all plastic. The two tyres are moulded in a “sandwich” style. I used to
loath these but experience has shown me that I was doing it wrong the whole
time. You simply cut them out put them together with a clamp that will not make
contact with any seeping glue and use the thin type liquid cement. Use capillary
flow of the thin glue to make is seep into the crevasses of the tyres and this
go together so very nicely.
Having these types go together without the old fashioned
seams that need to be paired of the tyres is a great way to do it. Do it like
this and this is the result you will get….
Step 4: Next you have
the wheels and tyres to put together using superglue – the very thin type is best – to make
them fit. Some people have reported a problem with them in the past and I had a
similar problem. I left a mm if tab on the spokes from the PE sprue – and that
located in the recess of the tyres. I simply filled in the rest of any gaps
with thin superglue.
Steps 5-11:
Involve the putting together of the two-cylinder 750 engine inside the frame.
At first I thought that you should maybe make the engine, paint it and the
chassis around it. The truth is you can brush paint this pretty nicely and a
careful hand will save any needing to put it all in with superglue after it is
painted.
I will say however take more care then I did with the ribbed cylinder heads because in hindsight mine look a little damaged and sloppy. I will clean them up before paint though with tin glue and some sharp knife work.
Step 12 & 13:
involved me using the tyre I had already assembled and inserting it into the
frame of the bike. You will have to make sure that you have the wheel dead
straight because you do not want wonky wheels with this kit…
You can see here I stuffed
this up by putting the chain OVER the frame – I will fix it in post…I promise!
Steps 14 – 17: More
putting bike parts on. Some photo-etch for the rear light bracket, the rear
mudguard and frame to hold it up and all of the other engine and filter parts.
Steps 18 – 23: Involve more parts wrapping around the now
very dense and detailed body of the bike The fuel tank is a fiddly construction
around the frame of the bike. The underside guard is an easy attachment with
the aid of Photo etch (mainly for detail) and the other photo etch of the gear
selector is easy to do once you superglue the knob to the tiny PE stem. It
looks worse than it actually is in practice, and it gives a lot of fine detail
to the piece.
The seat and the saddle bags go on last in my case – they fall
off constantly otherwise and the fact that they are a leather colour just add
to the reason that says paint them and glue them on separately.
You could probably beat up the saddle bags also on the bike. I noticed that the pack on the rear pan in the test shots is missing from this release - no biggie but juz sayin'
The front wheel will get you if you are not paying
attention. Steps 24 & 25 involve
you making the double fork assembly for the sturdy forks that quite a lot sit
on and attach to on the bike. Dry fit before
you glue with these parts and follow the instructions to the letter or you
could end up with a mushy front fork set.
Steps 26 – 30 involve
all of your earlier photo etch bending being applied to the constructed front
forks. You should start at the parts that wrap in behind the light on the front
of the mudguard. Glue that in place and THEN wrap your pre-formed shapes to the
wheel taking care to keep it all straight aligned.
Yeah it’s fiddly and you need to wrangle the PE a little but
it looks very nice all together. The handlebars attach to the forks over the
frame. They can turn but it’s best to cement them in place – It’s NOT a toy and
it won’t last of you treat it like one.
Step 31: The handle bars are pretty easy to put together – I did not use the plastic mirror stem supplied with the kit but I went for a bit of wire instead as this can be bent to your taste later. I drilled in a small stub hole in the handlebars for this to securely locate in.
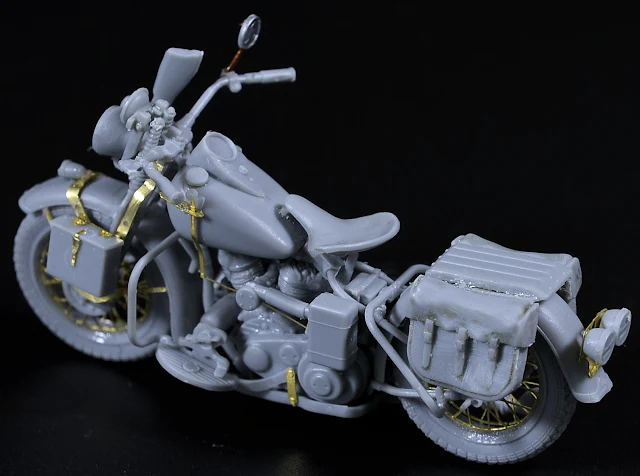
Here is the bike all together. It can still do with a clean-up
and I need to fix that chain but it’s the best 35th scale bike I have
made. The Vulcan model Zundapp K800 kit is of a similar quality but this is
more refined than that.
Here's the bike all together...
And here he is either stuck or taking it to the garage –
either ran out of petrol, broken down or just pushing it to the side of the
road. I think I still need to clean it up a little before I paint it – but I really
like it so far before paint. The bike just needs a lense but that is being added after painting.
I had fun and frustration making this kit. Most of the
frustration was my own doing however, from not reading or concentrating hard
enough on what I needed to do rather than exactly how I should do it. I also
had a lot of model making fun. The finished scenario and model are great
however and I cannot fault the kit for me having a short span of attention.
A great kit – well detailed and accurate – what more could
you ask for?
Well done MiniArt
Adam Norenberg
Thanks to MiniArt for sending this kit to us to make - Keep an eye on the MiniArt Site or just lock in here
for more info on MiniArt’s new stuff.


