
 Clayton has already built the 72nd scale Pz. Kpfw II Ausf L Luchs from Flyhawk Model. Now see how it comes out under some painting and weathering and skilled hands - this tiny tank sure does punch above it's weight...
pain
Painted & Weathered: Pz. Kpfw II Ausf L Luchs
From: Flyhawk Model
1/72nd scale
Product number: FH3002S
Includes: Plastic sprues (213pcs) Resin x I , Photoetch (44pcs), Waterslide decals
Includes: Plastic sprues (213pcs) Resin x I , Photoetch (44pcs), Waterslide decals
Price: ¥3,420/ USD $32.73/ €28.96 from Hobbylink Japan

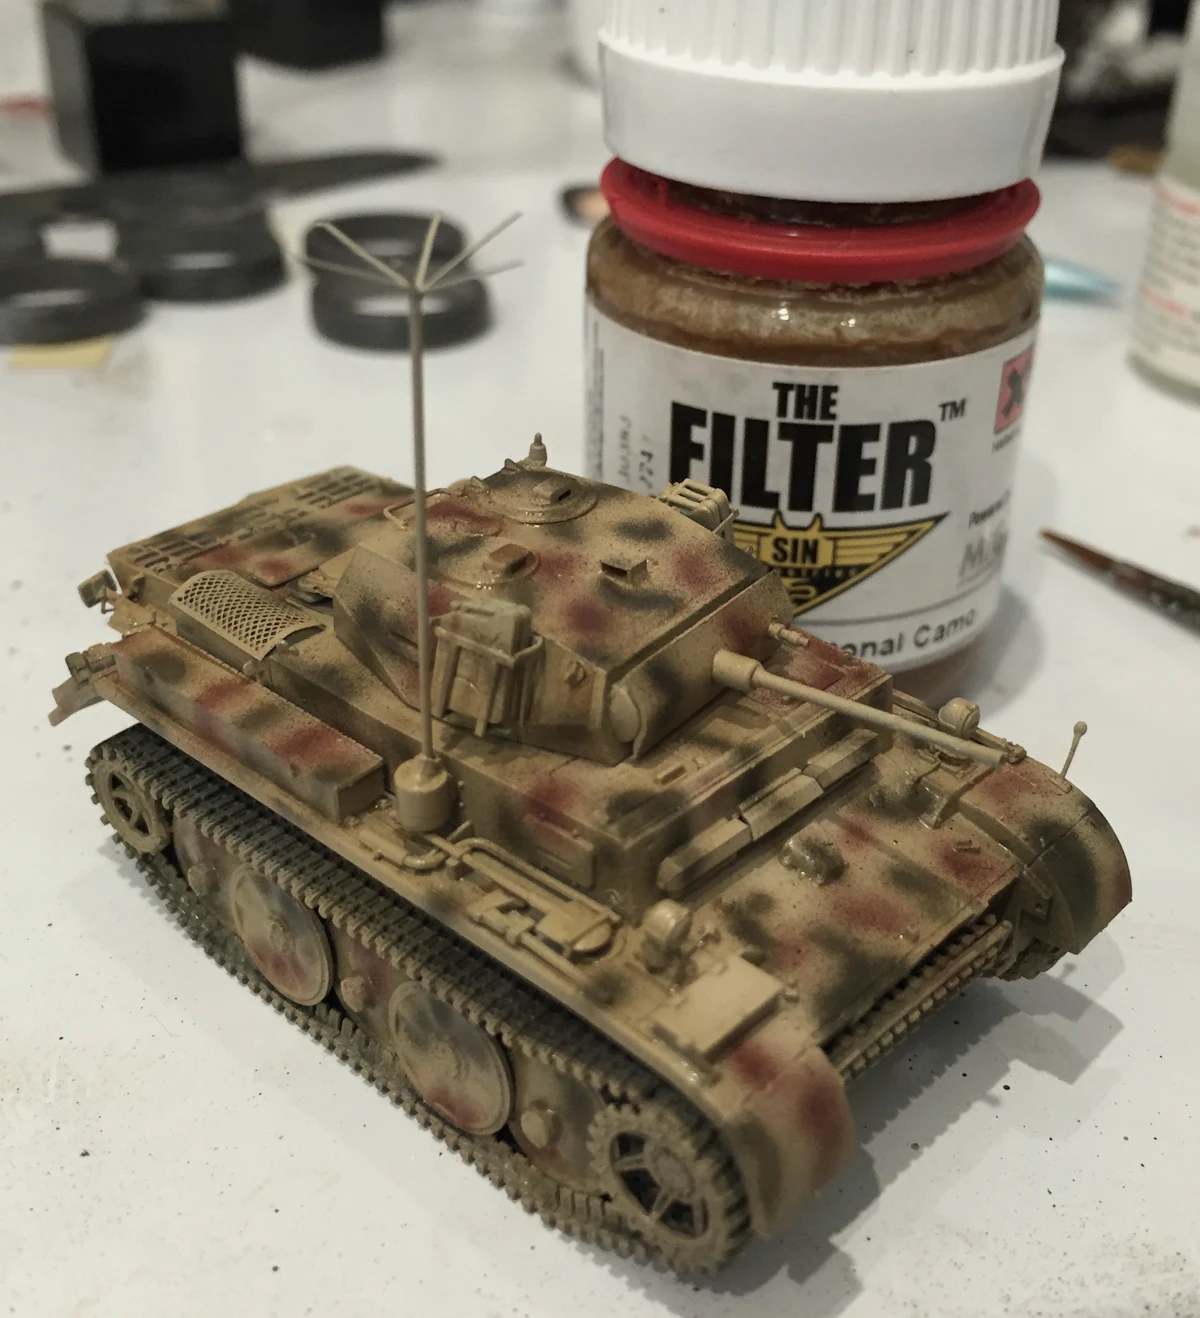
....So, here we have this tiny tank, asking for a 3 tone camouflage scheme. What could go wrong, right! In fact, the challenge here was not so much the size, but the fragile parts around the model when trying to handle it.

The brackets around the turret were OK because the jerry cans offered support, but the width indicators I had added and the star aerial needed to be treated with great care.
The principles of painting and weathering this little model were really no different to the larger 1/35 tanks, just scaled down.
There is always more than one way to achieve a result, but this was the path I took for this beautiful little Luchs.
PAINTING & WEATHERING
The entire model received an all over coat of Alclad white Microfiller. This would ensure the etch parts and the styrene would all take the paint well and offer a good base to build from.

I decided to use some old Tamiya paints I had for this one. The entire model was coated in XF59 Desert Yellow and a heavily thinned flat brown and then Dark Green pattern was airbrushed on. I should have taken a little more time on this one. The thinner the mix the cleaner my pattern became, but this was something I would clean up later.

Once dry, the model had an all over coat of a Tan Filter. The filter helped to unify the colours and even out the pattern. I would go on to blow in a cleaner line of the dark yellow in some spots to ensure that disruptive camo was clearly defined and not just a blur of paint.
The details around the model such as tracks, tools and metal parts are hand painted using Vallejo acrylics.
Fine chips and scratches were carefully brush painted in a few places, and were further enhanced with a few dabs from a sponge. A very dark Brown colour is used at this stage, but care must be taken to ensure this is refined. This can get really messy, really fast.

A heavily thinned oil was added to the details around the model. Here I have used Raw Umber thinned with an odourless thinner


The model now gets an overall gloss coat using Tamiya X-22 Gloss. Decals are now attached.

Some additional wear and tear is added to the model using a thinned AMMO enamel – Rainmarks Effects. A brush loaded with white spirit helps direct this effect.

The figure is brush painted, again using Vallejo acrylics. Not my finest work, but it is tiny! I find a complimentary figure in the stash and have decided to make a little vignette for this one.

The model received an all over matte varnish. I use the matte varnish from AMMO.
Gunmetal pigment is now used to spark up the metal parts of the model. The barrel, the machine gun, tools, jack, and even some of the edges around the tool boxes.


A small landscaped base is made using plaster and pigments and grass clumps I had in the stash. The landscaped setting really helps to set the model off and give a sense of reality. The bottom half of the model is lightly sprayed in a similar earthy tone to the base to help visually connect it to the base.
So there it is. The Flyhawk Panzer II LUCHS.
The pictures really don’t do it justice. This model is tiny, and presents better in the flesh than the camera would suggest.


I really did enjoy this little model. It was very rewarding watching it take shape. I would happily recommend these little kits to the advanced modeller or someone out there looking to step their 72nd scale models to the next level. Incredible value for money.


Clayton Ockerby
See more of Clayton’s work at his (all new) website “Workbench Hobbies” or join him on his Facebook page
