

Andy King has already given us his In-Box review and the first part of his build guide of MiniArt's new 35th scale T-55A EARLY Mod.1965 kit. Join him today as he shows you the second and final part of the construction progress before he starts painting and weathering this little beauty...

Build Guide Pt. II: T-55A EARLY Mod. 1965
From MiniArt
Kit No #37057
1:35th scale
Series: Military Miniatures
Box size: 386 x 240 x 80 mm
Parts QTY: 898
Product Link on the MiniArt Website
Instruction download link
In-Boxed: 1:35th scale T-55A EARLY Mod. 1965 from MiniArt
Build Guide Pt I: 1:35th scale T-55A EARLY Mod. 1965 from MiniArt - Nothing dull in this Hull...
We continue on from where Andy left us last week - the hull is finished, now fo rthe turret, tracks and extra finishing touches...
Step 27 concerns the construction of the fenders and once again I jumped ahead of the instructions and glued the fenders to the hull sides. This is because the surface area is very narrow when gluing them into position and I had to use masking tape to hold them in place, I also reinforced the joints with superglue. The hull and fenders were then left to set before adding the rest of the details.

The fuel lines were replaced with 0.6mm copper wire as the kit items broke either with cutting them from the sprue or during clean up, the kit parts were used as templates.

The fenders were glued into place before adding any detail as it would be impossible otherwise.The retaining wires for the front fenders were also replaced using 10amp fuse wire.

You have two types of fuel tank to choose from plus two types of lid for the large stowage box on the left fender and it’s important to check the colour options at the rear of the instructions as it points out which bits go with which vehicle.

The brush guards for the headlights were replaced with 15amp fuse wire as I managed to break the kit items too.
Removing the fuel pipes for the exterior tanks was just as I predicted earlier on as they broke so instead I substituted them for 0.6mm dia copper wire and used the kit items as templates, the same for the springs on the front mudguards using 10amp fuse wire and headlight brush guards except I used 15amp fuse wire to replace these.
No wire is supplied for the tow cables on the right fender so I cut two lengths of picture hanging wire to 102mm, the wire was then annealed over an open flame otherwise it is too stiff to use. After drilling out the tow hooks to make the holes deeper the wire was then super glued in.

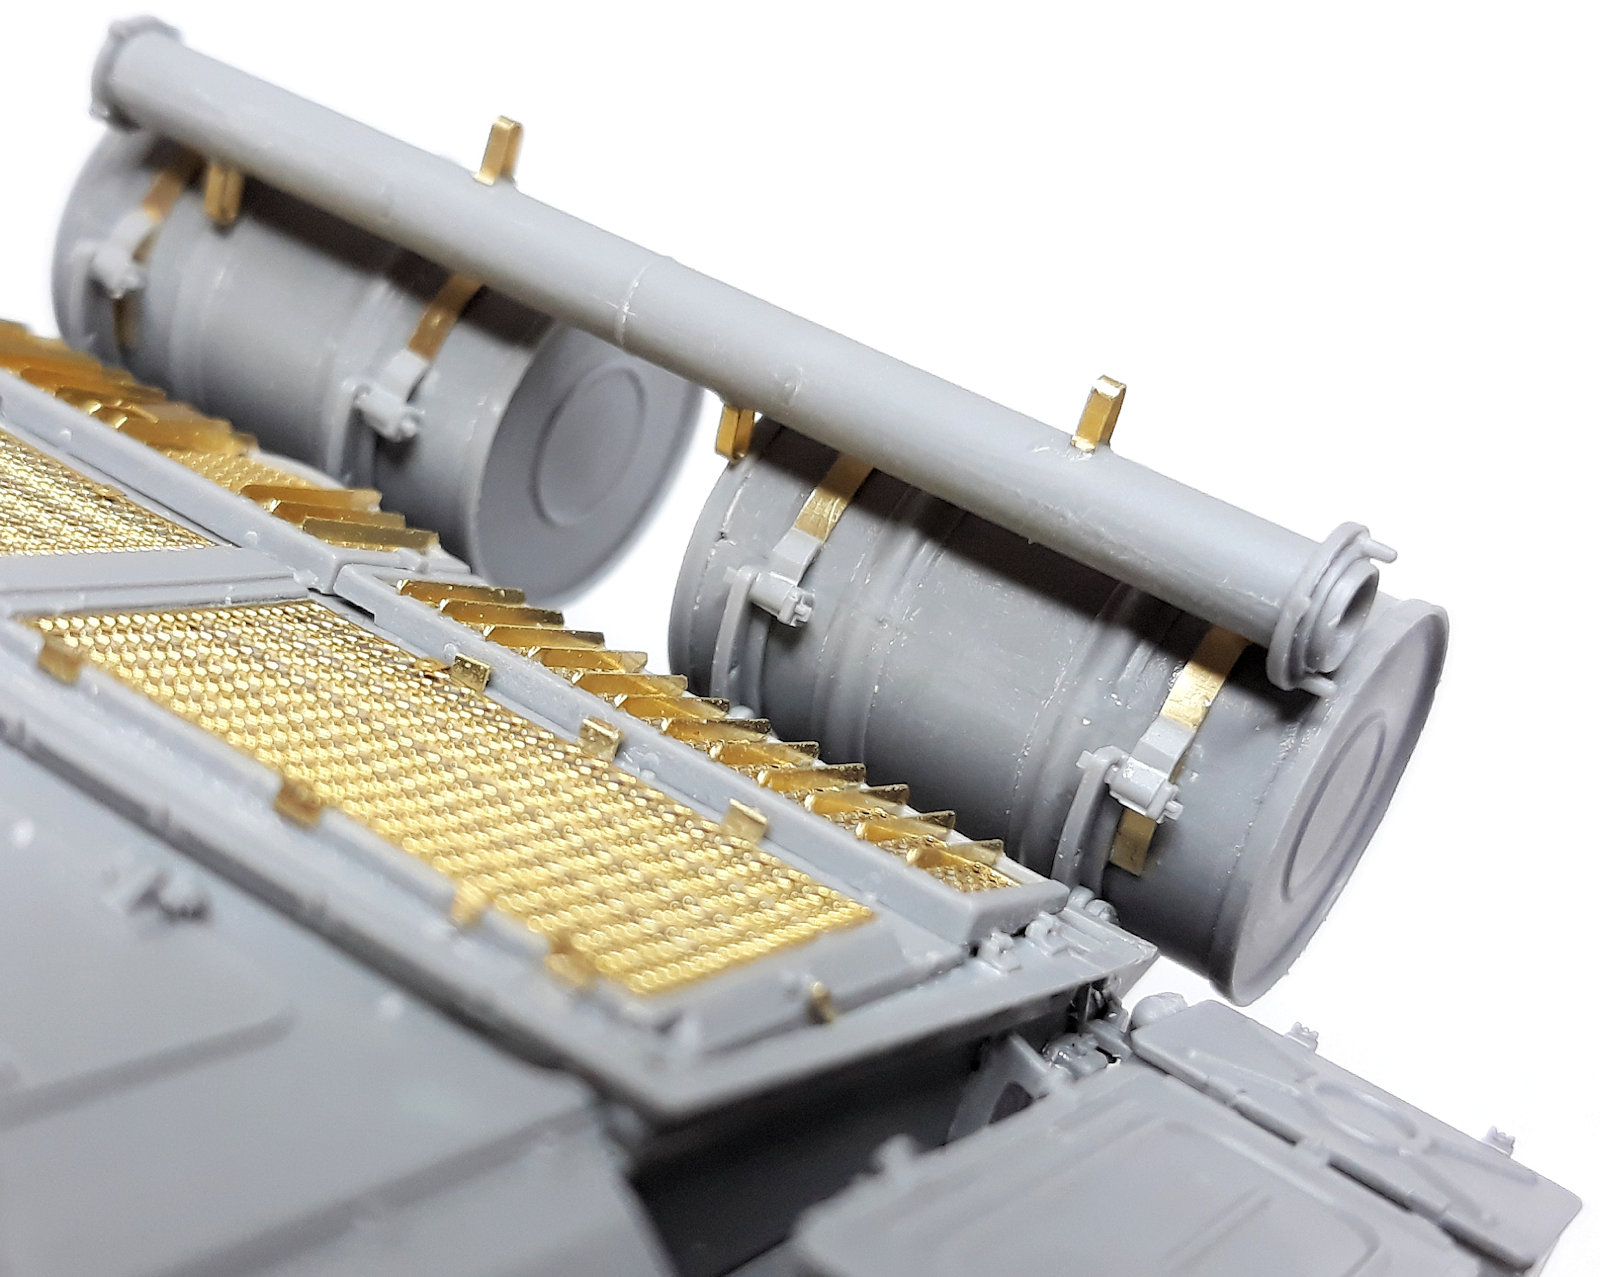
The rear auxiliary fuel tanks were fitted and although I didn’t spot it until they were in place the etch straps are too long and need trimming by about 2mm. The snorkel tube can be fitted either above or below the fuel tanks so I put mine above just for the hell of it.
As you can see the etched straps one on side of each fuel drum are too long. It was too late to correct this when the photo was taken.


As I had jumped back and forth during the build I went back through the instructions to see if I had missed anything before starting on turret (which I had). The next phase was the turret assembly and the turret ring and base were glued together before adding any detail.


This was all pretty straightforward and the only things I replaced here were the tie downs on the turret rear as the etch is too flat, the grab handles in the hatches and cable ducting on the upper turret using fuse wire, the short aerial in front of the commander’s hatch was replaced with fine wire.
 I even managed to break the clear rangefinder cover so using clear styrene sheet, a piece was glued onto the base and when dry sanded to shape. For the photo it was tacked into place using a tiny amount of liquid glue and will be removed before painting the model.

All the periscopes were masked off where the crew would look through them and then base coated with Tamiya X-25 green, hopefully when the masks were removed it would give them a green tint after painting.

The commander’s cupola looks quite busy with the various periscopes. After masking the vision blocks top and bottom the periscopes were painted with Tamiya X-25 Clear Green.

With the build virtually complete it was time to fit the tracks so I cut all the links from the sprues and cleaned them up, which took some time due to there being four sprue attachment points on each one.

Working one side at a time the wheels, drive sprockets and idlers were fitted loosely on the axles then ninety track links were glued together in one length then left for about thirty minutes, after which they were wrapped around the running gear and joined underneath. I had to remove one link each side as the track was slightly too long, after which they were glued to the wheels, sprockets and idlers then left to set.
Individual track links….you either like them or loathe them, personally I prefer them to rubber band tracks as you can get the right amount of track sag without having to drill holes in the hull to pin rubber tracks into place.
 I put all the track links together then run liquid glue between the joints, the tracks are then left to set for 20 or 30 minutes. All the wheels, sprockets and idlers are placed loosely on the axles then the length of track is wrapped around them (making sure you have them the correct way around), joining them together at the bottom. After repeating the process for the other side the model is left to set thoroughly.

This is a very detailed model but you really need to study the instructions because they will catch you out as they did me. On a couple of occasions, they were a bit vague in areas, at one point I was scratching my head as to how the turret base fitted as the drawing is not that clear.

And that was that, the build was complete!
Some aspects I found frustrating were the amount of parts over many sprues when building assemblies such as the suspension as these alone involved up to five sprues, having to jump backwards and forward through the instructions during construction was a bit time consuming too. The method of attaching the road wheels by putting the axles through them and gluing them to the swing arms just did not work either and although it was good to see details such as fuel lines these just mostly broke when removing them from the sprue or during clean up, hence the replacement with fuse wire.


In conclusion this is definitely not a ’shake and bake’ kit and for beginners it would be overwhelming but if you have a few armour kits under your belt then as long as you take my tips into consideration like assembling the hull and turret before adding the detail, and most importantly taking your time the kit will turn out just fine.


Andy King

No wire is supplied for the tow cables on the right fender so I cut two lengths of picture hanging wire to 102mm, the wire was then annealed over an open flame otherwise it is too stiff to use. After drilling out the tow hooks to make the holes deeper the wire was then super glued in.

The rear auxiliary fuel tanks were fitted and although I didn’t spot it until they were in place the etch straps are too long and need trimming by about 2mm. The snorkel tube can be fitted either above or below the fuel tanks so I put mine above just for the hell of it.
As you can see the etched straps one on side of each fuel drum are too long. It was too late to correct this when the photo was taken.
All the fuel lines and tow cables in place, the latter will be removed for painting.

As I had jumped back and forth during the build I went back through the instructions to see if I had missed anything before starting on turret (which I had). The next phase was the turret assembly and the turret ring and base were glued together before adding any detail.

The turret and it’s base were assembled before detailing.


The turret roof plates were a good fit.

This was all pretty straightforward and the only things I replaced here were the tie downs on the turret rear as the etch is too flat, the grab handles in the hatches and cable ducting on the upper turret using fuse wire, the short aerial in front of the commander’s hatch was replaced with fine wire.
 I even managed to break the clear rangefinder cover so using clear styrene sheet, a piece was glued onto the base and when dry sanded to shape. For the photo it was tacked into place using a tiny amount of liquid glue and will be removed before painting the model.
All the periscopes were masked off where the crew would look through them and then base coated with Tamiya X-25 green, hopefully when the masks were removed it would give them a green tint after painting.

The commander’s cupola looks quite busy with the various periscopes. After masking the vision blocks top and bottom the periscopes were painted with Tamiya X-25 Clear Green.

With the build virtually complete it was time to fit the tracks so I cut all the links from the sprues and cleaned them up, which took some time due to there being four sprue attachment points on each one.

Working one side at a time the wheels, drive sprockets and idlers were fitted loosely on the axles then ninety track links were glued together in one length then left for about thirty minutes, after which they were wrapped around the running gear and joined underneath. I had to remove one link each side as the track was slightly too long, after which they were glued to the wheels, sprockets and idlers then left to set.
Individual track links….you either like them or loathe them, personally I prefer them to rubber band tracks as you can get the right amount of track sag without having to drill holes in the hull to pin rubber tracks into place.
 I put all the track links together then run liquid glue between the joints, the tracks are then left to set for 20 or 30 minutes. All the wheels, sprockets and idlers are placed loosely on the axles then the length of track is wrapped around them (making sure you have them the correct way around), joining them together at the bottom. After repeating the process for the other side the model is left to set thoroughly.
This is a very detailed model but you really need to study the instructions because they will catch you out as they did me. On a couple of occasions, they were a bit vague in areas, at one point I was scratching my head as to how the turret base fitted as the drawing is not that clear.

And that was that, the build was complete!
Some aspects I found frustrating were the amount of parts over many sprues when building assemblies such as the suspension as these alone involved up to five sprues, having to jump backwards and forward through the instructions during construction was a bit time consuming too. The method of attaching the road wheels by putting the axles through them and gluing them to the swing arms just did not work either and although it was good to see details such as fuel lines these just mostly broke when removing them from the sprue or during clean up, hence the replacement with fuse wire.
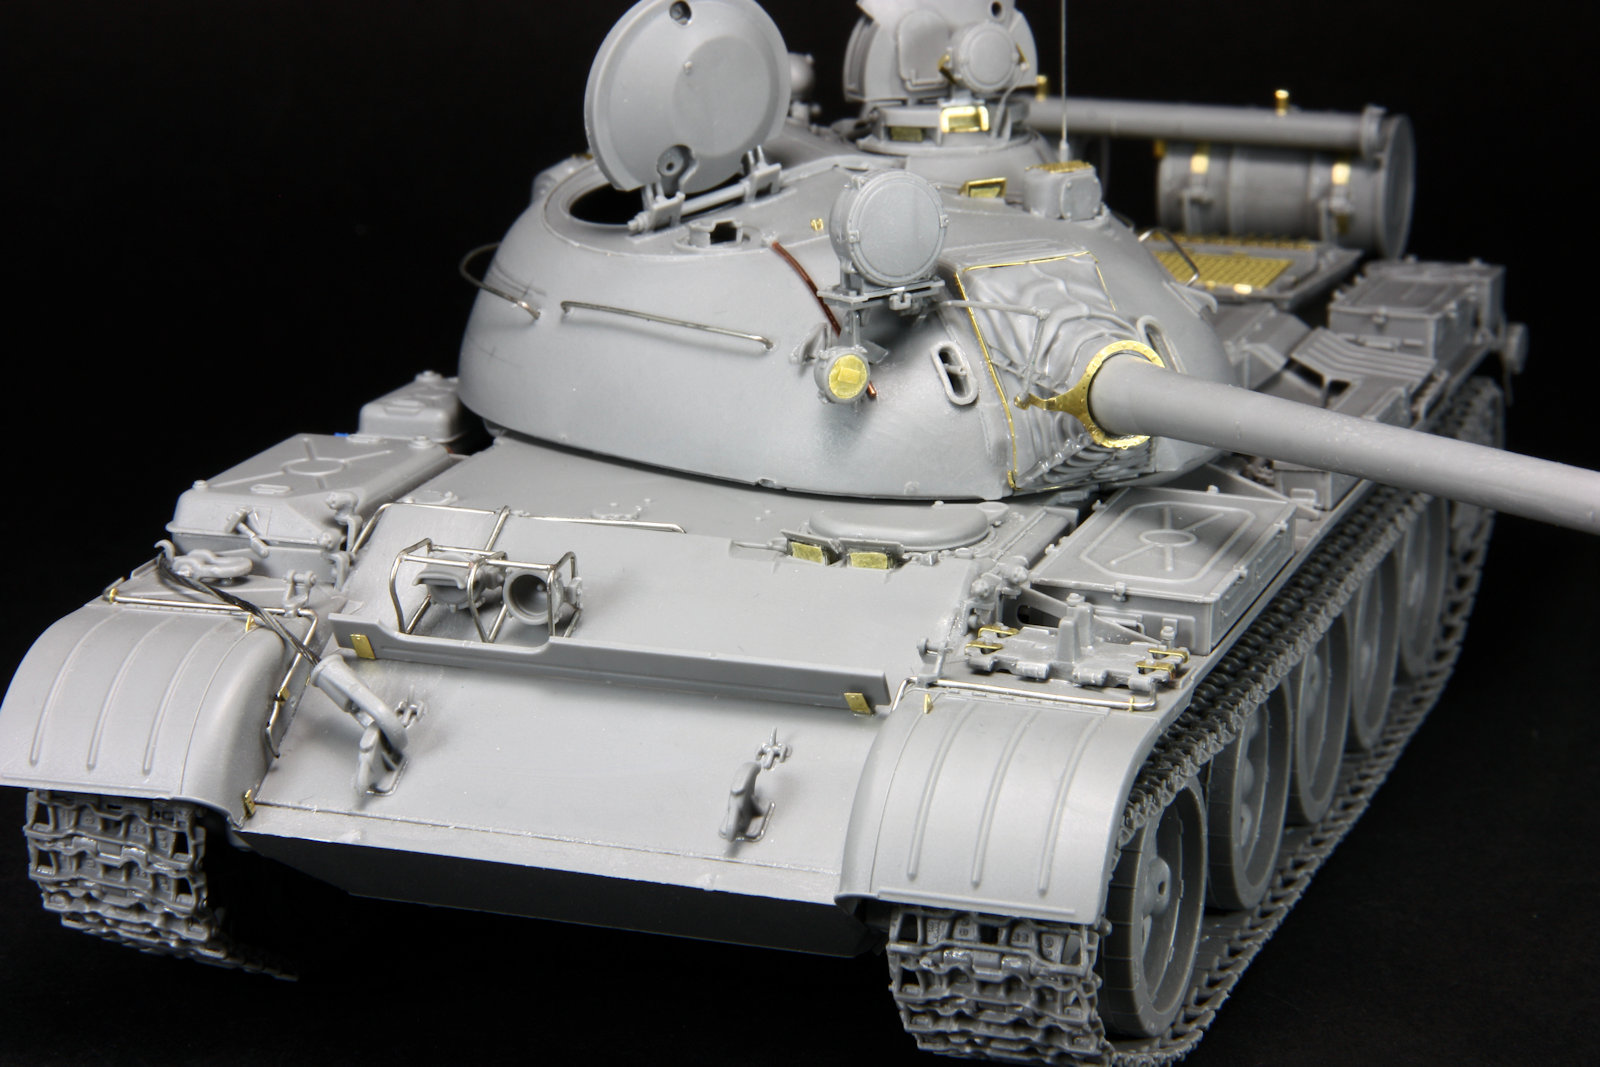
A walk around the whole completed kit...


In conclusion this is definitely not a ’shake and bake’ kit and for beginners it would be overwhelming but if you have a few armour kits under your belt then as long as you take my tips into consideration like assembling the hull and turret before adding the detail, and most importantly taking your time the kit will turn out just fine.


Andy King
Many thanks to the guys at MiniArt in Ukraine for sending the kit. Stay tuned for Andy's painting and weathering of this kit here on TMN in the next instalment.
