


by ModelCollect
1/72nd scale
Plastic Injection Moulded kit
Four decal choices
Price: A$169.07 AUD
From the Modelcollect Website.


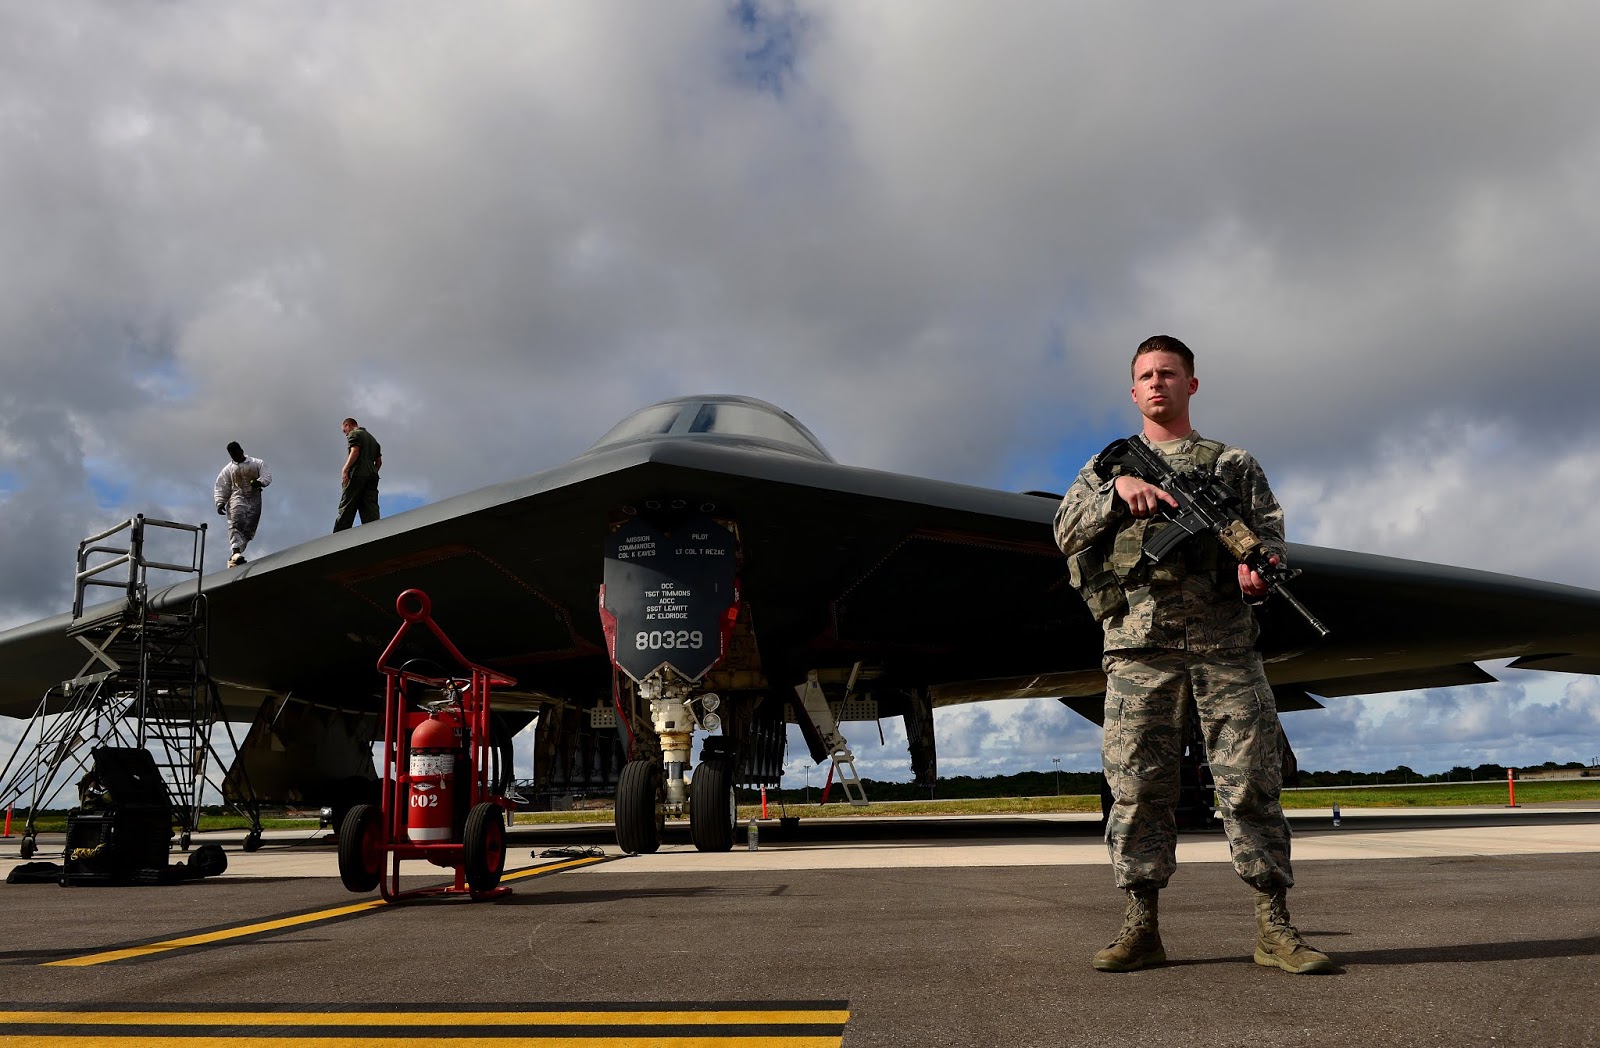
The Northrop B-2 Spirit is a multi-role bomber capable of delivering both conventional and nuclear munitions. It is a dramatic leap forward in technology, representing a major milestone in the U.S. bomber modernization program.


The revolutionary blending of low-observable technologies with high aerodynamic efficiency and large payload capacity gives the B-2 important advantages over existing bombers. Its low observability provides greater freedom of action at high altitudes, increasing its range and providing a better field of view for aircraft sensors. Its unrefuelled range is approximately 6,000 nautical miles.


B-2 Spirit by the numbers...
Primary function: multi-role heavy bomber
Contractor: Northrop Grumman Corp.
Contractor Team: Boeing Military Airplanes Co., Hughes Radar Systems Group, General Electric Aircraft Engine Group and Vought Aircraft Industries, Inc.
Power plant: four General Electric F118-GE-100 engines
Thrust: 17,300 pounds each engine
Wingspan: 172 feet
Length: 69 feet (20.9 meters)
Height: 17 feet (5.1 meters)
Weight: 160,000 pounds (72,575 kilograms)
Maximum takeoff weight: 336,500 pounds (152,634 kilograms)
Fuel capacity: 167,000 pounds (75750 kilograms)
Payload: 40,000 pounds (18,144 kilograms)
Speed: high subsonic
Range: intercontinental
Ceiling: 50,000 feet (15,240 meters)
Armament: conventional or nuclear weapons
Crew: two pilots
Unit cost: Approximately $1.157 billion (fiscal 1998 constant dollars)
Initial operating capability: April 1997
Inventory: active force: 20 (1 test)
Maximum speed: Mach 0.95 (550 knots, 630 mph, 1,010 kilometres per hour) at 40,000 feet altitude
Cruise speed: Mach 0.85[63] (487 knots, 560 mph, 900 kilometres per hour) at 40,000 feet altitude
Range: 6,000 nautical miles (11,100 kilometres (6,900 miles))
Service ceiling: 50,000 feet (15,200 meters)

The B-2 Bomber in 72nd scale: Previous B-2's in 72nd scale...
There have been two kits of the B-2 Spirit in injection moulded plastic so far - well, one of the B-2 Spirit and a kind-of model in the first instance, the Revell 72nd scale spurious idea of the B-2 before the Spirit was rolled out. This kit had many of the ideas of the real thing but none of the accuracy.
"Stealth B-2 Advanced Technology Bomber - Birds of Prey Series"
From: Revell
Model Nr. #4577
1/72nd scale
Released: 1987

"Northrop B-2 Stealth Bomber"
From: Testors
Model Number: #7571
1/72nd scale
Released: 1991
Later, in 1991 after the official roll out of the real thing on 17th July 1989 when the aircraft was rolled out of its hangar to a fascinated public. Testors entered the fray with this kit that resembled the real thing a lot more - but still had many errors in shape and size.

ModelCollect's 1/72nd scale USAF B-2A Spirit Stealth strategic Bomber
From: Modelcollect
Model Number: #72201
1/72nd scale
Released: 2018
The first kit had different decals and Mk.84 bomb-load. This model is in most other ways identical to the kit we are looking at today.

ModelCollect's 72nd scale USAF B-2A Spirit Stealth Bomber with Mop GBU-57:
The kit we are looking at today is the second in Modelcollect's line of new-tooled B-2 kits in 72nd scale. This model differs in of course the boxart, the decal and aircraft choices and of course the bomb-load of a pair of Massive Ordnance Penetrator (MOP) GBU-57 bombs. I can say that I like the box-art more on this offering, maybe it is a lighter box colour? maybe it shows more of the curves of this awesome looking aircraft off a little better?
 The large box opens up to reveal a rather full load of the large aircraft! Wing / fuselage and the two wing tips bottom and tops secured in some foam. On top of these are the sprues, mostly wrapped individually or in two's, the coloured photo-etch small sheet, the decals and the Instruction Booklet. I think we will start there and talk thru the construction before we look at the parts.
 Instructions


 Step Five sees us adding the commander & pilots three-part ejector seats to the rails we have just put into place. Step Six is the time for the first coloured photo-etch is applied now to the flat panels of the consoles to the side and centre of the crew.
Model Number: #7571
1/72nd scale
Released: 1991
Later, in 1991 after the official roll out of the real thing on 17th July 1989 when the aircraft was rolled out of its hangar to a fascinated public. Testors entered the fray with this kit that resembled the real thing a lot more - but still had many errors in shape and size.

ModelCollect's 1/72nd scale USAF B-2A Spirit Stealth strategic Bomber
From: Modelcollect
Model Number: #72201
1/72nd scale
Released: 2018
The first kit had different decals and Mk.84 bomb-load. This model is in most other ways identical to the kit we are looking at today.

The kit we are looking at today is the second in Modelcollect's line of new-tooled B-2 kits in 72nd scale. This model differs in of course the boxart, the decal and aircraft choices and of course the bomb-load of a pair of Massive Ordnance Penetrator (MOP) GBU-57 bombs. I can say that I like the box-art more on this offering, maybe it is a lighter box colour? maybe it shows more of the curves of this awesome looking aircraft off a little better?


The very small A5 sized colour covered and simple black and white inside instruction booklet that is included in the kit seems to be at odds with the large size of this aircraft model. Instead of taking pictures of the booklet I scanned it and now we will look at the steps with a little insight from yours truly of what to look for.

The sprue map showing the basic outlines of the seven traditional sprues in a quite dark grey, the upper and lower fuselage and wing pieces, the clear transparency for the cockpit glazing, the coloured photo-etch sheet and the decals sheet.

One second before we start to "Fill you in"...
Before we start looking at the build steps I would say that anyone looking at the model plastic will notice there are some rather over-scale panel lines on the kit. If you think these are too large you will want to fill all of the deeper panel lines so only a slight seam is visible with something like a Mr Surfacer putty before the kit build commences and you are handling the model and all of it's parts that protrude from it.
 We will take you through the model parts after we look at the instructions and build steps you could take.
Build Sequence:
I do not want to say the cliche "construction starts with the cockpit" so I won't, but it does - here at Step One. Although you will not really be able to see any of the parts once the model is closed up the option is here for completists to make a full two-seater 'pit. Here in Steps 1 & 2 sidewalls and internal walls are built.
Before we start looking at the build steps I would say that anyone looking at the model plastic will notice there are some rather over-scale panel lines on the kit. If you think these are too large you will want to fill all of the deeper panel lines so only a slight seam is visible with something like a Mr Surfacer putty before the kit build commences and you are handling the model and all of it's parts that protrude from it.

I do not want to say the cliche "construction starts with the cockpit" so I won't, but it does - here at Step One. Although you will not really be able to see any of the parts once the model is closed up the option is here for completists to make a full two-seater 'pit. Here in Steps 1 & 2 sidewalls and internal walls are built.

Step three and four see the bulkheads behind the Pilot & Mission Commander are put into place with the brackets that hold the ejector seat rails also secured at this time. The B-2 has a crew of two pilots - a pilot in the left seat and mission commander in the right, compared to the B-1B’s crew of four and the B-52’s crew of five. You will notice that there are no colour call outs for the interior of the aircraft given in these instructions so do your research here.


In step seven and eight the almost wrap-around front instrument panel and consoles are added and then the photo etch is then placed on that. Control sticks are added. This is a pretty simple build so far, and some of the steps could well be amalgamated into one the build is that easy at this point.

Step 9 - The sturdy landing gear is then secured inside the landing gear bays along with the sidewalls and their bases to the underside of the aircraft (that is if you would like to display the aircraft with the wheels lowered) there are no instructions for showing the aircraft with gear up, but this is a pretty simple task one would think - an omission no less - as is the lack of colour call outs for the gear and the gear bays, both of these are white. Step ten sees the insides of the bombay walls placed into the same underneath half of the aircraft as the wheel wells.

Step Eleven sees the modeller adding the front and rear bulkheads of the bomb bays which are fairly well detailed for a 72nd scale aircraft while step twelve has us making the interior walls that house the four General Electric F118-GE-100 engines of the B-2.

In Step thirteen we are called to complete the structure of the landing gear bays and bomb bays with their "roof". Some of you may want to make these in completion and then join them together before they are secured to the kit, while others will want to paint each of the wall compartments individually and then join them together before adding them, the choice is yours, but I would be dry fitting all of these components before I continued in any way. In step fourteen we put together the pair of MOP GBU-57 bomb-load.

Providing your bomb bay is all painted and weathered up and also providing you want to add these MOP's Step fifteen is the time to add them according to the instructions. A placement guide is included in red here. Step sixteen has us working on the lower fuselage more in adding the access compartment and ladder for the crew. I would add the access ladder as one of the last things myself as there is a LOT more handling of this aircraft before it is finished.

Step Seventeen: Some lay-up work is now paying off, with the cockpit tub that we have already made in the first few steps being added. Again you need to check to see what colours need to be added to the cockpit, while step eighteen has us adding to the top of the air intakes in either closed or open status, as well as the in-flight refuelling receptacle (again - either open or closed) to the spine of the aircraft at this point.

Step Nineteen & Twenty: The complete air intakes and a fairly basic looking set of four engines are put together at this opening. The intakes are not seamless, but you do not really see inside them very far as is the design feature of this aircraft.

Step Twenty-one see the intakes and engines put into place before the whole set up that you have made so far is secured together when the upper and lower parts of the wing/ fuselage are mated in step twenty-two. Notice that there needs to be fifty grams of nose weight put into the aircraft's most forward spot at this point. If you could fit more I would, as the landing gear is strong and I think it could take it. No one likes a tail-sitter!

Speaking of strong, in step twenty-three the landing gear wheels, made up of two halves and hubs are added to the landing gear you have already placed in-situ. Step twenty-four is the simple placement of the arms for the bay doors being put into place. If you are worried about the fitting of the wings I would leave all gear, wheels etc off the aircraft until the fuselage and wings are mated securely.

More appendages in Step Twenty-five and Twenty-six. Parts A-28-A-31 are the front perforated air spoiler that shield the bomb bay from the air rushing into the path of any ordinance about to be dropped. the bombay doors are now added also. Again, there is no description of how you would display the bombay closed, and one must simply use their brains and dry fitting skills to make sure the gear doors fit the faceted edges if they want to seal it all up which would be the option used 99% of the time on the real aircraft (but not on a model) one would think.

Again in Step Twenty-seven and twenty-eight the gear is put together and then inserted int he bay. With all of these gear and anything protruding from the aircraft I would leave until AFTER the wings are secured on. The handling that needs to go into making the wings fit in preliminary testing tells me this.

Steps Twenty-nine and thirty are again something that could well be displayed on the same page. The front gear door and side door are added here.

Steps Thirty-one and Thirty three are the next logical steps you should be doing. Securing the lower and upper halves of the wings together before control surfaces are added. The wings are secured at seams in the wings in real life - but those of you who do not want a trench in the seam lines of the aircraft will fill these seams with Mr-Surfacer to or likewise materials. This filling of all of the larger panel lines so only a slight seam is visible before the kit build commences is a good idea.

NOW is the time to add the control surfaces in Steps Thirty-two and thirty-four. They really do add to the kit's wings, however there is no internal detail to them, so Eduard's set will have to be added to fully flesh them out.

Steps Thirty-five & Thirty-six: Notches and sockets are in used in the wings and the "beaver" tail control surfaces. These wings will need something more than regular Tamiya extra thin or Revell Contacta glue. Some modellers will even insert rods into them to help secure them for life. In a test fit I found that they were very "gappy", so I would try to dry fit these wings at the earliest opportunity so you do not need to rough-house the model making them fit. "Measure twice, cut once" is your mantra here.

The main parts of the kit arrived encased securely in shaped foam that stops any rattling around inside the box. The rest of the parts as I mentioned at the start of the review were in plastic bags, but a few of these were packed in two-too a bag which opens up the possibility damage in transit. Mine arrived in good condition all up.

As we have shown you briefly at the start of this review, the surface area of this kit is cris-crossed with panel lines that for my eyes and taste are a little too deep. Some, who put a lot of paint on the model might like this, but I would be almost filling these seams with Mr. Surfaces or some disolvable putty that you can paint into the cracks..


The Underside of the Fuselage:
Underneath the B-2 we see exactly the same surface detail that will need filling, the faceted openings of the bomb bay and gear bays. FYI, if you want to portray the gear or bomb bays open you will have to trim the interior of the zig-zag faceted doors to suit.


One thing I noticed was the pronounced large curve on the underside of the B-2's front. This is captured pretty well in the kit I felt.

When comparing aircraft shapes you need to be super careful as a few degrees out in angle can mean something looks totally out of shape.The front is hard comparison as you must get your picture to match exactly the same angle.
The two halves pressed together - the shape of the top of the fuselage is hard to nail down, with only pictures of comparison to make a guess on the exact shapes, but on something that constantly curves in and out of focus it is hard to say whether the shape is superior or not.


Two things from this (similar) angle. The rear of the fuselage doesn't look high enough and the "chin" at the underside front does not look like it is at a steep enough angle. Again, these are not at the same angle exactly.


From the Starboard side with a more square on picture...


The "Beak" of the B-2 has been captured pretty well here in my opinion. Again it is a hard shape to replicate this shape. The top of the beak looks a bit anaemic to my eye, but again angles can be deceptive.


Overall, I think the hard to replicate shape is covered in this release. The good news is that if you want to add something to the shape of the aircraft (that is if you find concrete evidence in the shape) you can add some without the constant worry of having to add scribed or raised panel lines.
The Wings:
The rings of the aircraft come in two main parts, again with the same trenches that adorn the fuselage that you may or may not appreciate (up to you) both otherwise. I noticed that the wingspan on the kit is 72.8cm - and if you multiply this by 72 (the kit's scale) you get the correct wingspan of 52.4 Metres, that is a win for Modelcollect!

The top and bottom of the wings fit together to make the main wing section....


The joints of the wing to the fuselage are supported and located by a lug and socket joint. This has to go straight into the joint, not wiggled in, so you may have to snip or to trim the tab to help it get in there. I would DEFINITELY dry fit the wings before gluing them.

Before we go any further the wings joined up to the fuselage ( the top half of the kit). Already here I can sense fit issue - my mediocre modelling skills sense is twitching, and I am certain you will have to dry fit and fiddle with these wings before securing them. Another win however for Modellcollet is that the front angle of 35 degrees is correct when comparing the model to scale plans so the main feature of the kit, the wing is at the right angle.

Sprue A (X2)
This sprue is duplicated in the kit, and it contains both the main landing gear (one each) and the wheels for these and the front gear wheels also, the interior of the air intakes, spoilers for the bomb bay, the ejection seats, the bomb bay racks and bombay door brackets.

The reverse side of this sprue shows the interior of the ribbed turbofan engines and the fan blades - not that anyone will see these.

The main rear wheels are a good replica of the real thing however they are not weighted like the original is so slightly.


The spoilers that diffuse the air travelling over the bomb bay so the release of the weapon is not effected are here, I would sand them very thinly, or even use the Eduard photo-etch set. I do like the fine holes, though there are eight on the aircraft and ten holes across on the kit part....


The rear gear leg - one on each of the very sturdy legs on the rear are enough i think to bear the considerable weight of the kit. For the main part the connecting pins are in the best places for an easy removal - no scarring on the oleo hydraulic thank goodness. There is a lot of detail here on the real thing, and it is only basically captured here.

The interior of the air intakes needs some cleaning, but you will not see it inside the kit anyway as is the nature of the shrouded intakes on the B-2

The ACES 5 Ejection seat that this kit uses is actually pretty well moulded in 72nd, much better when you think of some of the 48th scale kits I have seen


Sprue B
The faceted edges of the landing gear and bomb bay doors are on this sprue, along with the interior of the cockpit floor and the rails of the bombay and the "ceiling" that it hangs from.


A rare picture of the bomb bay open and unladen for comparison.

Sprue C:
Mostly internal parts on this sprue, with the air intakes and internal walls of the bomb bay, the front landing gear and gear cover door and some other unremarkable parts.


Sprue D
Flaps ahoy! with the control surfaces of the aircraft that are for the most part posable. The Mid, Inboard and outboard elevons, split rudder and "Beaver" tail or as it is known in proper aviation circles as the "Gust Load Alleviation System" The wings have separate flaps and two-piece split-brake rudders with the internal detail of the control surfaces - so any actuators will have to be either scratch build or, more simply, use the Eduard photo-etch set to make these really pop.


The tail in take off position.

Sprue L:
This model differs in of course the boxart, the decal and aircraft choices and of course the bomb-load of a pair of Massive Ordnance Penetrator (MOP) GBU-57 bombs.This sprue is the only new one to the kit which houses the two new GBU-57's

The B-2 Spirit stealth bomber is the only aircraft in the U.S. Air Force currently able to carry and release the heaviest U.S. bomb, the 30,000-pound GBU-57 Massive Ordnance Penetrator. MOP was tested on a B-52, but the older bomber does not carry the massive bunker-busting munition operationally. The is a 20-foot long, GPS-guided bomb believed to be able to penetrate 200 feet of concrete before exploding, making it the preferred non-nuclear weapon for destroying deeply buried targets.

These fit into the bomb bay as seen in the instructions and picture below.


Sprue Z:
This clear sprue has the only real piece of the kit that needs it - the cockpit glazing. There was a hep of consternation about this in the development phase which I have been told is fixed. What the cockpit glazing in the kit still needs is a tint that you see in the glass on all of the pictures I have seen of the aircraft.


Photo-Etch Sheet:
The small but very nicely included Photo-etch sheet pretty much eliminates any need for any aftermarket in the cockpit. The seats and other surfaces you say may be a little basic (everyone says that) but most of the insides aren't seen, and after a layer of smoke to tint the window glazing these panels in the "turned off" mode show the cockpit glass pretty well I think.


Markings and Colours of the B-2:
Two Bobs decals are responsible for the decal research and the sheets themselves are printed by Cartograf - so this is a great combination I would tend to trust. Unless you want to depict another B-2 these are a safe choice. Individual aircraft peculiarities and small panels as well as the grey walkways and "No Step" markings are included.

Some close ups of the smaller writing and the different kites included in the marking choices.


Colours of the B-2 Spirit:
FS 17875 & FS 36118 are the only two colours mentioned in the whole instruction book in painting the aircraft so you are kinda on your own and references will be a LOT of help as the colour of the b-2 has changed a lot in my eyes over the last two decals. It started off looking very dark and now seems to be a mix of medium and dark gull grey. The colours, like the angle of this aircraft. The look of these colours can vary A LOT depending on your paint tastes, so do some testing - you do not want this too light or two dark.
Just look at the colour variance of the panels of the B-2 in this shot...

Aircraft Marking Choices:
There are three aircraft mentioned in the colour camouflage guides although there are four markings included in the kit (oops)

Aircraft included in this kit markings are:
B-2A Spirit, USAF 82-1067 "Spirit of Arizona"
509th Bomb Wing Whiteman AFB, MO December 2017

B-2A Spirit, USAF 82-1069 "Spirit of Indiana"
509th Bomb Wing, 393rd Bomb Squadron Whiteman AFB, MO June 2014

B-2A Spirit, USAF 88-0328 "Spirit of Texas"
509th Bomb Wing, 303rd Bomb Squadron Whiteman AFB, MO May 2014

Also included on the decal sheet but not mentioned in the instructions:
B-2A Spirit, USAF 93-1087 "Spirit of Pennsylvania"
509th Bomb Wing, 303rd Bomb Squadron Whiteman AFB, MO May 2014

In summary.
I think you can tell if you have made it this far in the review that there are some roadblocks in this kit for the modeller, and it will not be an easy kit to make. These can be fixed. Sink marks and deep panel lines can be filled with Mr Surfacer, Some of the omitted details in the control surfaces can be fixed with the Eduard kit while fitting the wings without problems will just take good old elbow grease and patience.

Although it is a bit of work, the outcome once you complete this model will be stunning for a modeller with enough balls and foresight to take it on.
Adam Norenberg
Thanks to Modelcollect for sending this model to us to review for you all
