


Construction Review Pt.I: Mikoyan MiG-25RBT Foxbat B
From ICM
Kit # 72172
Scale: 1:72nd
Started: Feb
2019
Finished: April 2019
Price: AUD$ 52/ GBP£ 28/ EUR€ 32/ USD$ 36 from Hobbylink Japan


The MiG25-RBT was a further improved reconnaissance-bomber,
being fitted with Tangaz ELINT equipment. The RBT retained the NATO codename
Foxbat-B.

GENERAL THOUGHTS -
ICM's 1:72 MiG-25RBT Foxbat B (72172)
Coming into this build my only experience with ICM aircraft
models was based on their much older 1:48 P-51 family. These kits, which dated
from circa 1990's, were a solid starting point for a Mustang build but nothing
to rave about. I was far more familiar with ICM's range of 1:48 figures as
these are very nice and readily available. They even pop up from time to time
bundled with the likes of Tamiya etc.
It was around 2014/15 that ICM started to get serious about
aircraft models once again with the release of new tooled Ju-88's and Do-17's
in 1:48th. Even this did not really pique my interest and it was not until 2016
when ICM released a new tooled MiG-25 family in 1:48 I started paying
attention. During 2017/18 ICM have gone from strength to strength with new 1:32nd tool releases and a bunch more great figures.
Having built the challenging Kittyhawk 1:48 MiG-25PD I was
not interested in another 1:48 build but when ICM scaled down their MiG-25 to
1:72 and released it as the recon RBT version I was up for it.
To date, ICM has announced three boxings of the MiG-25 in
1:72nd scale, each of them variants of the recon-version, the RBT, RB and most recently
RBF. I expect (hope) that they will eventually release the interceptor version
(PD/PDS) in 1:72 as well (like they did in 1:48)

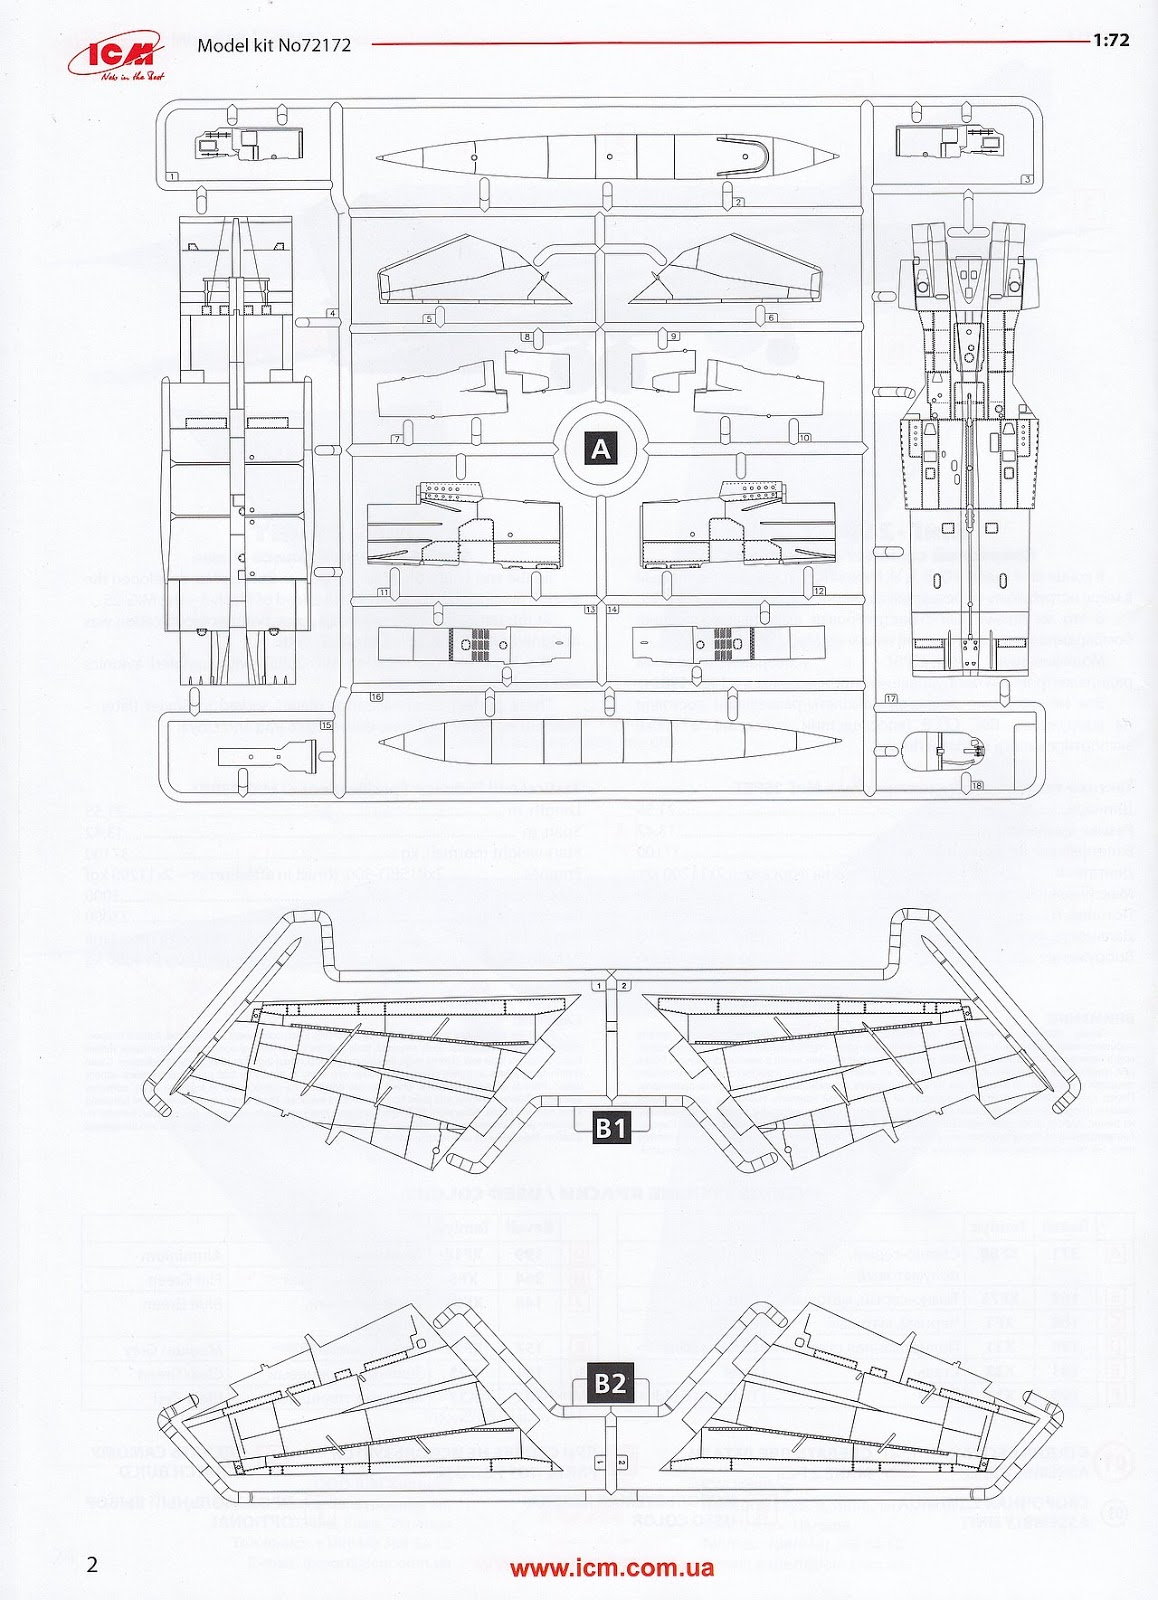
When ICM say these kits are "100% New Moulds" they are not kidding. They bare little
or no resemblance to their earlier cousins. The precision of the detailing, the
engineering/fit and attention to detail is excellent, on par with Hasegawa
and dare I say approaching Tamiya.
I'll admit that I initially thought the parts breakdown,
especially for the main fuselage, seemed excessive for 1/72 scale. However,
after building the kit I now feel that the breakdown is actually sensible and
the fit being so good that the extra seams caused little or no problems.

If I had one thing to feedback to ICM it would be their
suggested assembly sequence. In just about every step I found myself deviating
from their build order because to not do so would have caused me more work with
alignment and/or seams further down the track.

With so many parts to this model, it's important that you
ensure all the sub-assemblies will align properly when eventually bought
together at the end and so I spent plenty of time test fitting, thinking about
the optimal assembly sequence and fine-tuning the alignment of the parts as the glue
dried.
ICM includes a sensible number (four) of marking options on
the decal sheet covering two Soviet and Iraqi / Libyan aircraft. They also
provide a comprehensive set of Cyrillic stencils.
Two of the four marking choices here...


BUILDING - ICM's 1:72
MiG-25RBT Foxbat B (72172)
The cockpit and nose wheel well are best assembled in place
against each fuselage half. The fit is gap-free and thus allows you to paint
each half and then bring together with the fuselage later on without the worry
of avoidable gaps.

As I plan to have the canopy closed (with a pilot in place)
I did not feel the need to add any extra detailing here.

The surface details are nicely done and it was at this point
that I first deviated from ICM's suggested build order. The nose is designed to
be modular (to allow ICM to release different variants no doubt) and as is
normal they suggest you glue the two nose halves together and then mate them to
the forward fuselage. This is not required until close to the end of the build
at step 67. I have learnt that it's best to instead glue each nose half to the
corresponding fuselage half and by doing so achieve a much better join than
otherwise possible. Trying to fight a poorly aligned nose to fuselage join down
the track is thus easily avoided.

As I planned to have the model displayed in flight I needed
a pilot. ICM do not provide one in the box so I raided my spares. He is
actually from a Hasegawa S-3 Viking and needed some minor knee surgery to get
his legs to cooperate. I also made some enhancements to the helmet to make it
look a bit closer to the Russian style. The seat harness was made from strips
of Tamiya tape which were sealed in place under a coat of clear gloss.

A test fit of the pilot and seat revealed the need for some
height adjustment and this was taken care of with some 20" card.

A final test fit of all the associated parts before paint is
best practice. Not shown here but I also fitted the clear parts to ensure they
would seal closed properly as well.

The cockpit and wheel well were primed in black and then
MRP-001 Russian Turquoise was applied to the cockpit. The wheel wells (main and
nose) on the MiG-25 are natural metal and so I used my go-to metal paint,
Alclad ALC-101 Aluminium.

Detail painting was done by hand with Vallejo acrylics and a
light wash using MiG Oilbrushers followed.

The pilot and seat were likewise painted (no, I'm not a figure painter). Again knowing that the canopy would hide much, if not all, detail in the cockpit I did not attempt to overdo this stage.


Knowing how grubby wheel wells can get I applied a generous
wash here and sparingly cleaned off the excess. In 1:72 I felt no desire to
enhance the adequate detailing provided by ICM.

As I planned to have the aircraft in flight, with the
undercarriage down (aka landing or taking off) I need to lengthen (extend) the
drop of the nose wheel strut. A couple of cuts and a brass rod for strength did
the job.

The Milliput was used to cover the brass rode and simulate the canvas
boot. A test fit of the nose wheels showed that my adjustments had not
interfered with their location.

With the forward fuselage complete my attention turned to
the larger and more complicated intake and rear fuselage parts. ICM details a
modular, and to my mind, overly complicated sequence of assembly for the intake
trunking and alignment with the fuselage sections. Instead, I pretty much
assembled the entire intake front to back in one step. I didn't see any reason
this module could not be attached later to the fuselage as one piece. This module
was later painted inside using an airbrush from the front and rear.

As the glue was drying on the intake assembly I attached it
to the fwd. fuselage to ensure the parts were aligned properly. As I worked on
this section (which has a lot of parts) my respect for the ICM engineering grew
as I realised everything fitted wonderfully and sat in the right place with me
having to fight it.

The main wheel wells are very well detailed as are the main
gear struts. Unfortunately, it is necessary to attach the main gear into the bay
during assembly of the fuselage. The strut is sandwiched between the inner and
outer walls of the well and this needs to be done during assembly and not left
to the end. The good news is that the fit of the support holes was very solid.

The main wheel hubs are well done as is the ribbing on the
tire, although it should be said that this should be raised and not recessed.

The "side" of the fuselage is provided by ICM as a
separate part which sandwiches the main gear strut in place when attached.
Multi-part fuselages like this are normally susceptible to alignment challenges
but not so here. Well done ICM.

Now was the time to paint the interior of the wheel well and
once again I used Alclad ALC-101 Aluminium with a heavy wash of MiG 1618 PLW
Deep Brown.

Whilst in a painting mood I dealt with the wheels using
Tamiya XF-85 Rubber Black and MRP-032 Green For Wheels. To bring out the detail
in the wheel hubs I applied a wash of Mig PLW Deep Brown.

The intake assembly was now mated to the rear fuselage
(minus the forward fuselage which again deviated from the ICM guidelines).

The sidewalls and main gear struts were added next. The
sidewalls are cleverly held in exact position with a rear internal bulkhead and
the same bulkhead used to properly align the intakes.

A view from below better shows the fit of the sidewalls and
how virtually no alignment problems arose in this area. The protruding main
gear was a constant source of worry for me as I half expected I would break it
off at any moment.

The fuselage top was next and this clicked reassuringly in
place and was then glued with Tamiya Extra Thin liquid glue.

The engine exhaust
tubes were also installed now thus giving the upper part a solid mating surface
to ensure perfect alignment.


To complete the main fuselage assembly the tails were added
as were the top of the intakes. To eliminate seams I used tape to protect the
surrounding panel lines and applied Tamiya Basic Putty.

The vertical tail parts
are unusual in that they combine the tail, fuselage side and ventral fin in one
piece. This is the first time I have ever seen this way of approaching it.

A couple of the seams for the side panels and tail did not
fall on natural panel lines. These were filled with Tamiya basic putty and
sanded smooth. The tape is to ensure the messy putty stays where it should.

The massive Tumansky R-15 engines are one of the signature
features of the MiG-25, propelling it to speeds in excess of Mach 2.4. The ICM
engines are actually fairly basic especially the outer nozzle petals but when
combined and suitably painted do an acceptable job for 1:72.


With the main fuselage complete its time to finalise
preparations of the forward fuselage before mating. The canopy and windscreen
are masked and a coat of the interior green applied so as to be visible through
the canopy later on. Note how good the fit of the clear parts are to the
fuselage, something I was now starting to take for granted with this kit.

The camera bay has four camera ports which ICM provides as
shallow recesses with no centre hole. It occurred to me that these would look
more realistic by simply drilling out the centre parts and allowing the dark of
the interior to show thru. The clear camera window still has enough bevelled
edge to rest upon.

The fit of the camera bay to the nose underside is possibly
the worst I encountered in this build. I needed to fill the seams with super
glue, sand smooth and re-scribe to get a suitable result. Speaking of
re-scribing work the whole nose is full of small panels and rivet work that
sits right across the join and must be dealt with.

The camera port windows have been secured using PVA clear
glue and I'm glad I drilled out the centres as the dark interior looks better
for sure. All of the panel lines and rivets around this nose section have been
reworked and sharpened as I plan to use a wash after painting.

With all preparation complete the two fuselage
sub-assemblies are bought together. The fit is spot on with only the smallest
amount of sanding needed to blend the seam.

It’s also worth noting that the
alignment of the two parts is perfect as well, which is important as even a
small mis-alignment at this point would stand out like a sore thumb.

The final touches are now added including the wings, which
have handy alignment tabs to ensure they sit correctly. I needed a small seam
of Milliput along the wing join to smooth it over. The flaps and ailerons are
provided as separate parts which was appreciated as I wanted to lower the flaps
a small amount. As I was not using the large centreline fuel tank I needed to
plug the mounting holes with plasticard.

Only a minimum amount of masking prior to the first coat of
paint and I've found that using foam for deep holes like intakes and wheel
wells is a big time saver. Of course, masking tape is still ideal when you need
a sharp edge in places like the intake edges.

Masking the protruding main gear
struts was a bit fiddly especially around the back where the gap is very tight.

This is the end of Part I of this Construction build - Join us at this link when Gary Paints, weathers, finishes and makes this aircraft come to life in the air in the final product...

Gary Wickham.
Thanks to the people at ICM for sending us this kit for Gary to build and review. It is available now through their many distributors worldwide.

Appendix: Instructions...


