Our man Lukas is past halfway through his build of the new Copper State Models 32nd scale Nieuport XVII (Early version) biplane. This part of the story shows his progress on the fuselage, masking & sealing it all up and adding the first layers of paint to the model part of his build guide here on TMN.
Build Guide: Nieuport XVII Early version
From Copper State Models
1/32nd scale
Kit No # CSM32-001
Kit includes:
-5 plastic frets
-Instruction in colour
-Film for windscreen
-Photo-Etch parts included
-Decals for 4 markings printed by Cartograf
Price: € 75.02
Product Link on the CSM Website
Today:
Guide Pt.II: Painting the wings & fuselage
It has been while(…again) since my first part on this bird but after acquiring new camera gear and saying goodbye to my old camera I think I am finally on the final stretch of finishing this bird. As a result you will get few different backgrounds across the pictures as some of it was with my old camera on old background, some with old camera and new background and then finally the best should be the best looking ones :) Please bear with me as I am still trying to adjust myself to this new piece of technology.
Last time I left you with finished cockpit ready to be closed into fuselage forever. Before I was able to do that I assembled the tale.
It is a few pieces of plastic and if I end up building late version in the future I would consider leaving it opened and show all internal rigging without the top itself.
Only needed a tiny bit of putty here and there on the edges but nothing too serious to slow you down.
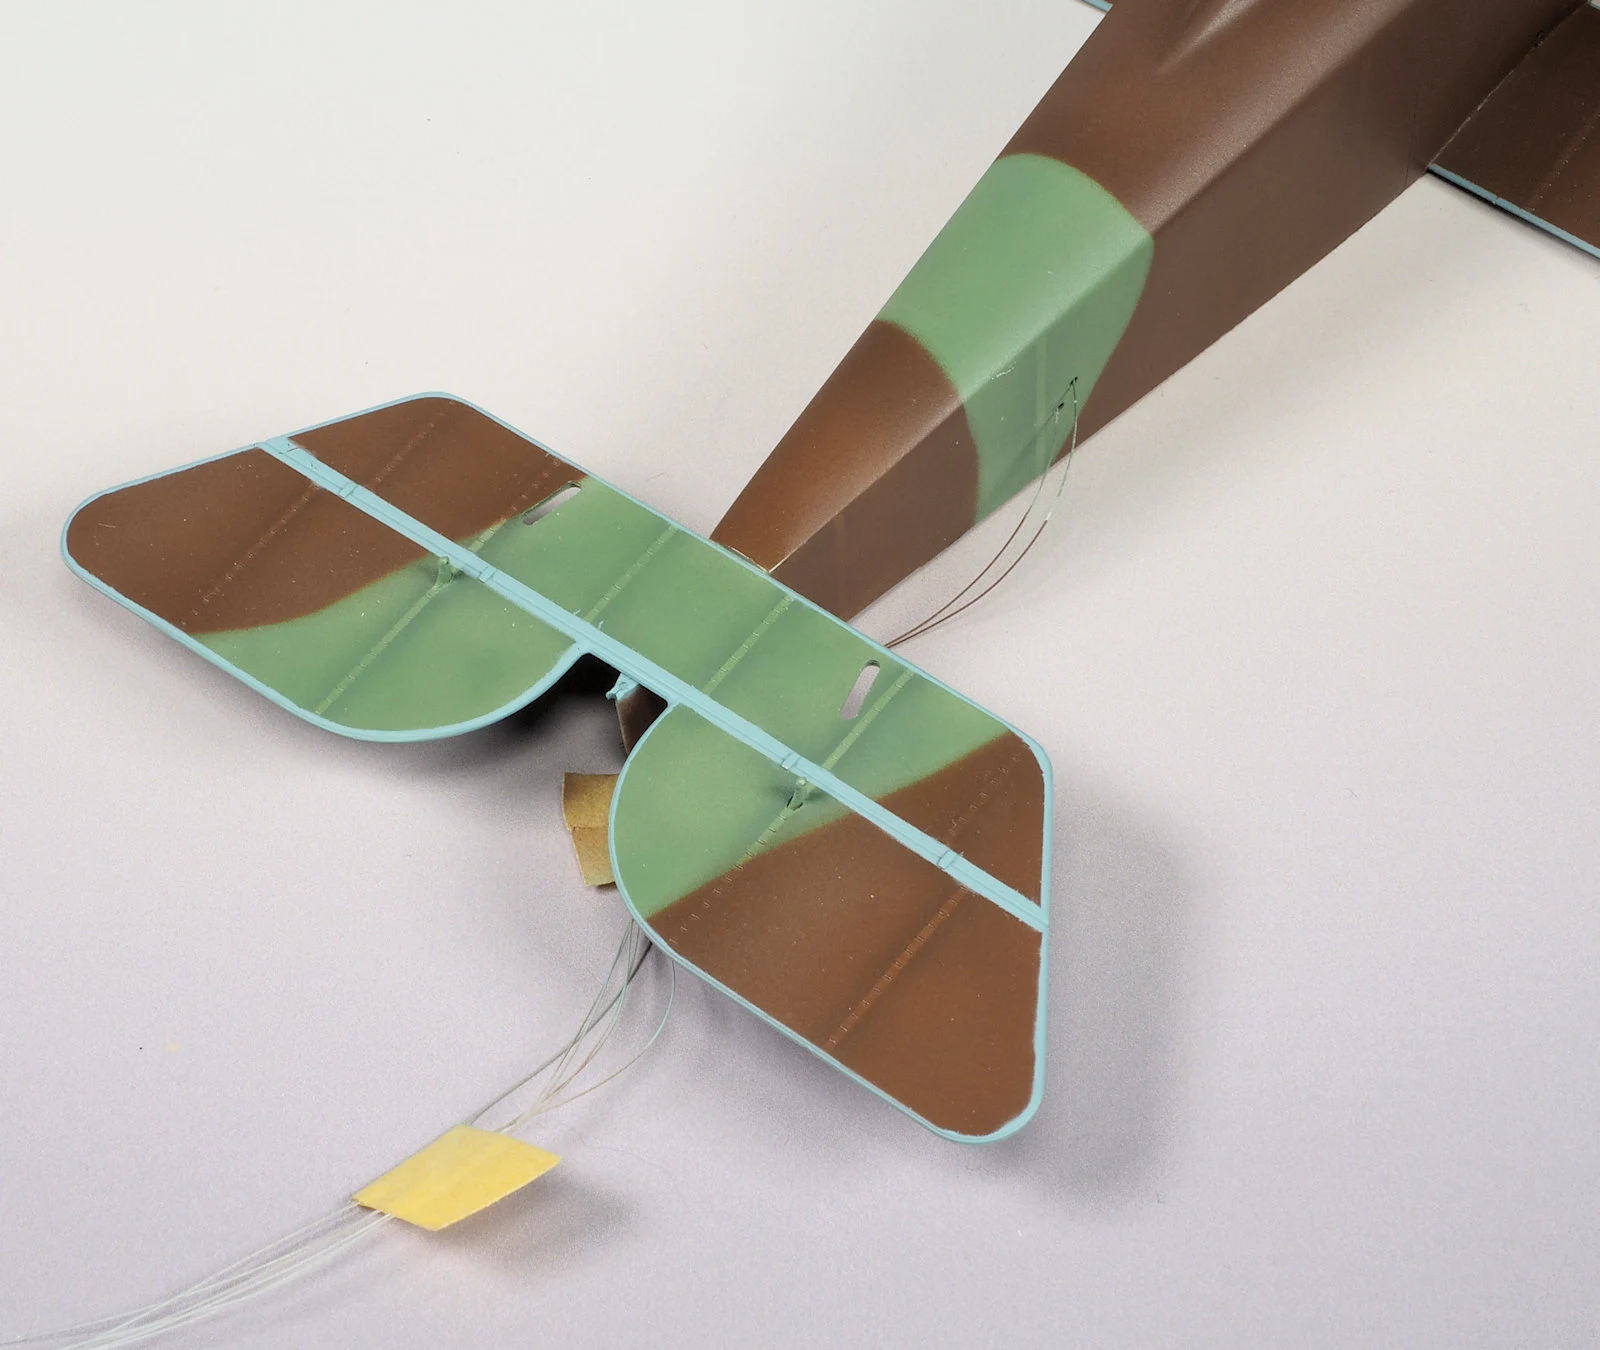
After this was finished I moved onto joining both sub-assemblies together. Prior to that I only had to battle rigging cables and their correct placement through correct openings on its tale. I made sure to leave them longer as I know that will make it easier for a person like me to fit them later on.
Dry fitting is also advisable as and even with that, I end it up with few gaps between cockpit sidewalls and its tale. A few clamps were fixed that alongside with some putty and little bit of sanding.
Having said that I blame my hands and eyes for not doing a better job with dry fitting - something I thought I have done enough times. Once secured in position, I glued horizontal control surfaces into place and apply surfacer to the whole thing to see if there were any imperfections.
When this was ok I proceeded with top wing construction. Very straight forward with only a few pieces, you do have posable surface option here.
I added some brass pins to securing the ailerons and prevent any snaps while handling it later on.
Now about 1km of masking tape was applied to create the “unique” ribs look that would not be this pronounced on the real plane but I think when not overdone and correct layer of camouflage paint applied it draws little more attention plus I like to punish myself with more masking and wasting some tape…
Insignia on bottom wings. I trimmed the bottom part of large insignias where there was a little bit of extra to cover the bit between wings and ailerons. Mainly because I didn’t see the need for fighting my decals to go into that gap as it won’t be visible.
Insignia on top wings - seemed most unique out of all choices as the majority of Nieuports didn’t carry these on top wings and therefore this marking has won my heart
The markings on the side of the fuselage are next. Now looking back on it I there is something somewhat strange about their positioning but it could be just because my lines on the plane not exactly matching the instructions and therefore my brain is trying to trick me. Nevertheless, decals worked beautifully - fast surface helped of course.
And now last two things for today before I wrap this up - wooden surfaces. I am already excited about the contrast between wooden texture on the main struts and wing surface on the completed model.
The top wing middle section after a little bit of masking and some oil paint. This should be rather nice especially when that clear film goes on this centrepiece.
Well, I think that is it for now. let's get some fishing line and then onto the engine. Thanks for staying with me on this, third part coming shortly - hopefully no more broken cameras.
Here is the link to Part III to this build guide here on TMN...
Lukas Kasuba
Build Guide: Nieuport XVII Early version
From Copper State Models
1/32nd scale
Kit No # CSM32-001
Kit includes:
-5 plastic frets
-Instruction in colour
-Film for windscreen
-Photo-Etch parts included
-Decals for 4 markings printed by Cartograf
Price: € 75.02
Product Link on the CSM Website
Previous Parts in this story:
Today:
Guide Pt.II: Painting the wings & fuselage
It has been while(…again) since my first part on this bird but after acquiring new camera gear and saying goodbye to my old camera I think I am finally on the final stretch of finishing this bird. As a result you will get few different backgrounds across the pictures as some of it was with my old camera on old background, some with old camera and new background and then finally the best should be the best looking ones :) Please bear with me as I am still trying to adjust myself to this new piece of technology.
Last time I left you with finished cockpit ready to be closed into fuselage forever. Before I was able to do that I assembled the tale.
It is a few pieces of plastic and if I end up building late version in the future I would consider leaving it opened and show all internal rigging without the top itself.
Only needed a tiny bit of putty here and there on the edges but nothing too serious to slow you down.
After this was finished I moved onto joining both sub-assemblies together. Prior to that I only had to battle rigging cables and their correct placement through correct openings on its tale. I made sure to leave them longer as I know that will make it easier for a person like me to fit them later on.
Dry fitting is also advisable as and even with that, I end it up with few gaps between cockpit sidewalls and its tale. A few clamps were fixed that alongside with some putty and little bit of sanding.
Having said that I blame my hands and eyes for not doing a better job with dry fitting - something I thought I have done enough times. Once secured in position, I glued horizontal control surfaces into place and apply surfacer to the whole thing to see if there were any imperfections.
When this was ok I proceeded with top wing construction. Very straight forward with only a few pieces, you do have posable surface option here.
I added some brass pins to securing the ailerons and prevent any snaps while handling it later on.
Now about 1km of masking tape was applied to create the “unique” ribs look that would not be this pronounced on the real plane but I think when not overdone and correct layer of camouflage paint applied it draws little more attention plus I like to punish myself with more masking and wasting some tape…
Ribs outlined after masking tape removed.
A basecoat of camouflage paint on the lower wing and the lower fuselage was masked and airbrushed on.
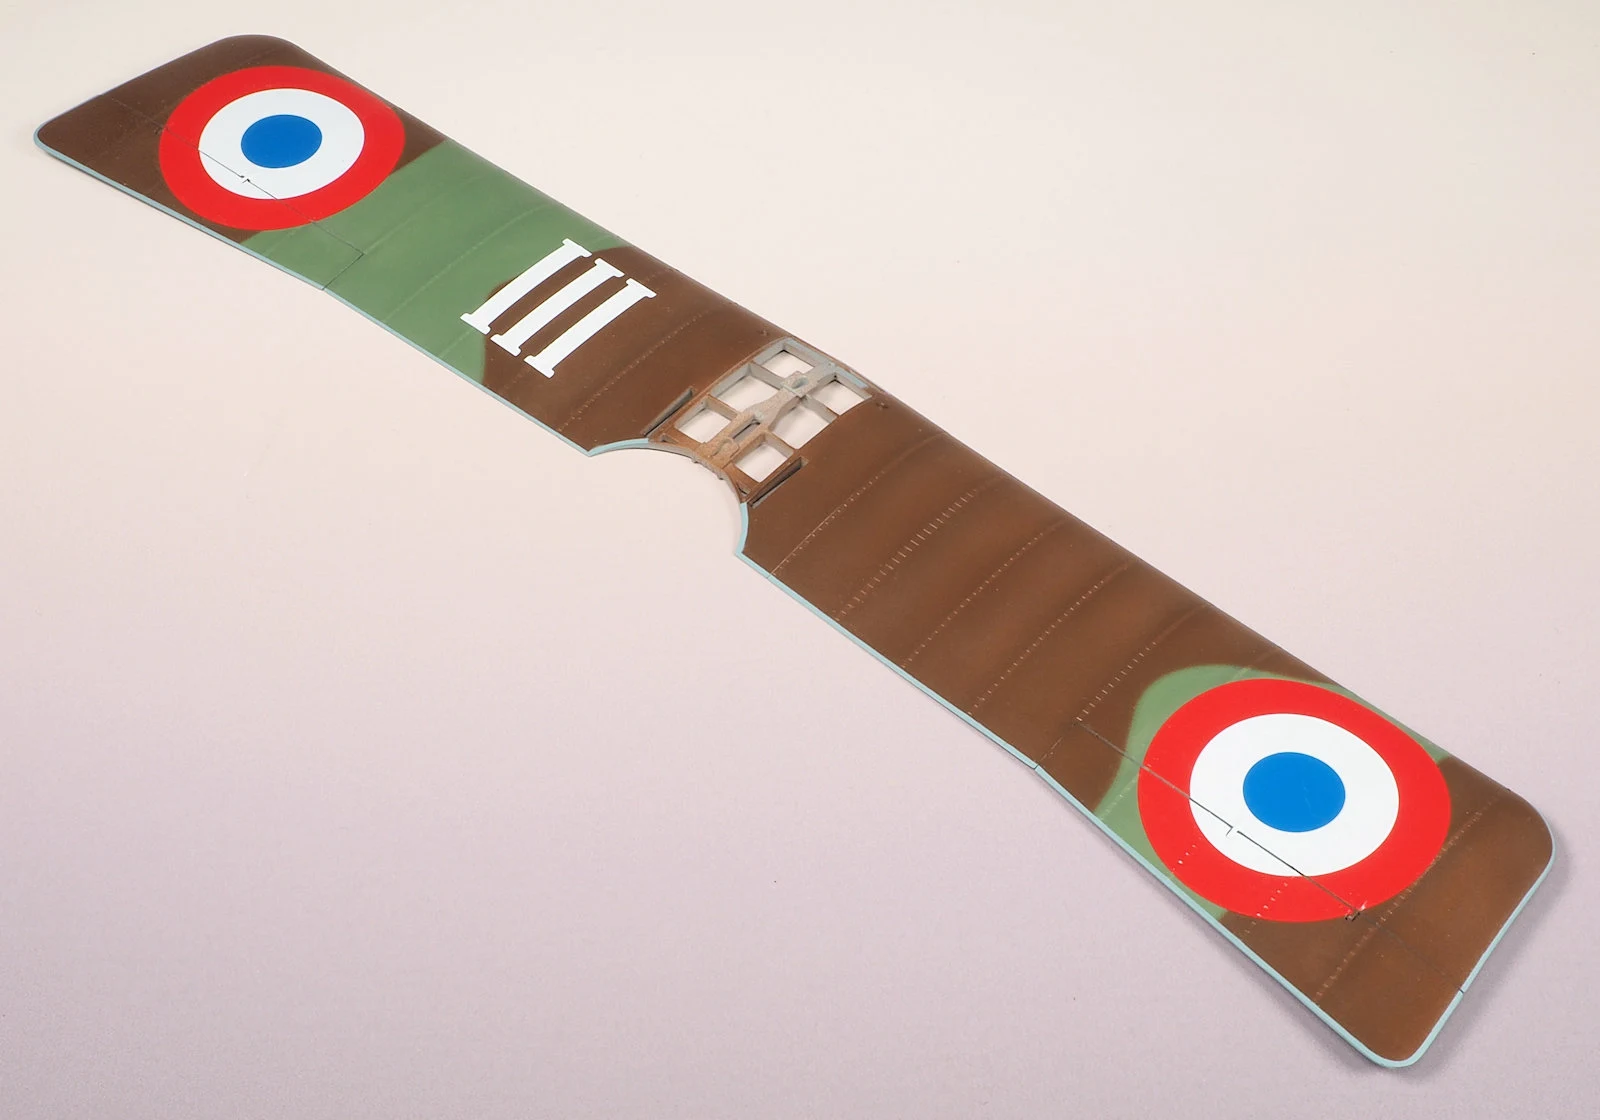
Painted top wing - top side
Painted top wing bottom side.
While waiting for paint to cure properly I tackled vertical control surfaces and decided that quick masking job would be better than fighting the decals on the fin - even though you will see below that decals worked a treat on insignias and other markingsInsignia on bottom wings. I trimmed the bottom part of large insignias where there was a little bit of extra to cover the bit between wings and ailerons. Mainly because I didn’t see the need for fighting my decals to go into that gap as it won’t be visible.
Insignia on top wings - seemed most unique out of all choices as the majority of Nieuports didn’t carry these on top wings and therefore this marking has won my heart
The markings on the side of the fuselage are next. Now looking back on it I there is something somewhat strange about their positioning but it could be just because my lines on the plane not exactly matching the instructions and therefore my brain is trying to trick me. Nevertheless, decals worked beautifully - fast surface helped of course.
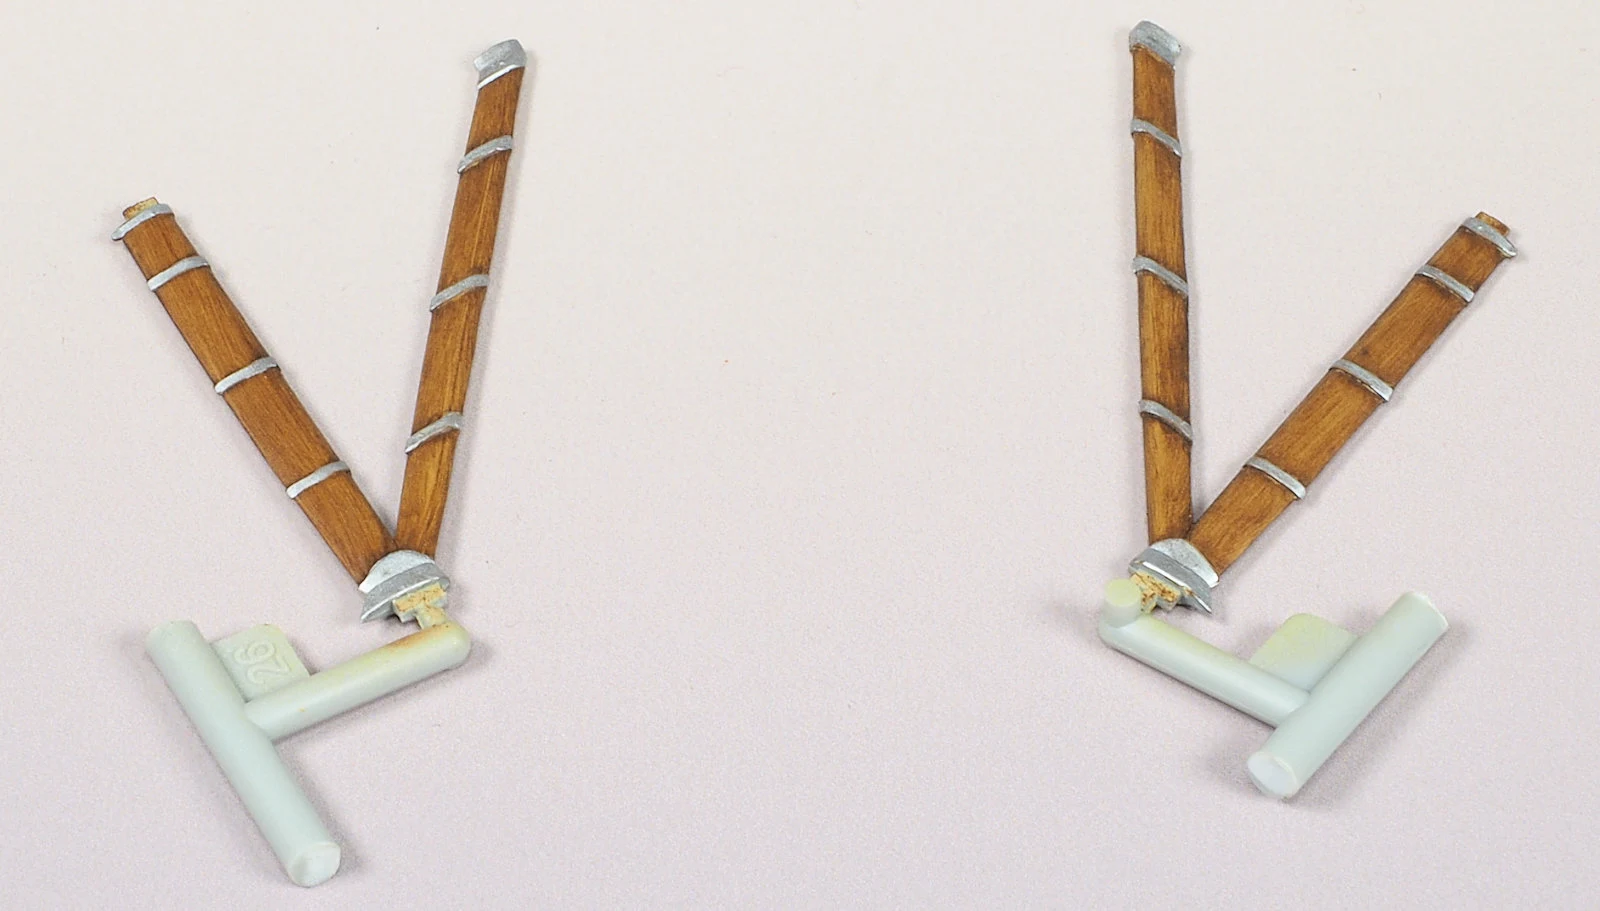
And now last two things for today before I wrap this up - wooden surfaces. I am already excited about the contrast between wooden texture on the main struts and wing surface on the completed model.
The top wing middle section after a little bit of masking and some oil paint. This should be rather nice especially when that clear film goes on this centrepiece.
Well, I think that is it for now. let's get some fishing line and then onto the engine. Thanks for staying with me on this, third part coming shortly - hopefully no more broken cameras.
Here is the link to Part III to this build guide here on TMN...
Lukas Kasuba
Thank you to Copper State Models for sending this kit to Lukas to review & build


