


From Hypersonic Models
1/48th scale
Kit No #HMK 4801
Full injection moulded plastic kit
Price: ¥2700
Product Link on the Hypersonic Models Website


Optional parts for both an early "Buick" powered or the later "Chevy" powered cart are included. The starter probe can be built retracted or extended. Photo-etched detail parts such as grille mesh, control panel, handles etc. are included.

The AG-330 Start Cart is used to mechanically rotate the SR-71's J-58 turbo-ramjet engines for starting. The first generation AG-330 start carts utilized two Buick 401 Nailhead V8s that were completely uncorked to get the engines fired off, and around 1970 Chevrolet LS-7 454s took over the role.
The AG-330 cart is positioned directly under the SR-71 engine nacelles. The J-58 is bought up-to 4500rpm for ignition via a gearbox and mechanical starter probe that connects the AG-330 to the J-58 from underneath. Once the engines were at 4550 RPM, the engine was hit with a shot of triethyl borane (TEB), a chemical that ignites with oxygen.

Over the service life of the AG-330, it was most commonly seen in one of two paint schemes. The yellow scheme seems to be mostly used in the early days with the green found on late carts. Hypersonic provide painting details (and decals) for both styles.

The comprehensive (Cartograf) decal sheet comprises full instrument gauges for the control panel, maintenance stencils and lots of numbers and letters for individual cart serials and markings.
ASSEMBLY - Hypersonic Models - AG-330 Start Cart 1/48th scale
The kit sprues are contained on four small sprues, These come packaged in a sturdy cardboard box along with the photo-etch fret, decals and a set of printed full-colour assembly instructions. Only one of sprues C or D will be used depending on which version of the AG-330 you choose to build, the Buick or Chevy powered model.

Construction starts with the main chassis. Locating pins and their corresponding holes all line up nicely, which is not something you can take for granted with some model manufacturers these days.

Ensure part A6 is vertically aligned properly as it is important at a later stage.

The tow rod and steering linkages are next. In 1:48th these are quite delicate, particularly parts A19 and A20. As per the painting instructions (thoughtfully included at each step and for each part), these are all to be the same as the body colour so do not need to paint separately.

 To avoid the hassle of cleaning up the sprue attachment points on the tiny steering rods I decided to simply replace them. Some spare sprue was stretched over a naked flame and then cut to length. The "U" ends were removed from the original parts and simply glued to the new sprue rods. This solution also resulted in a rod that was properly round (with no mould parting lines).
Next step is to attach the base of the main cart to the lower chassis. Once again the alignment holes resulted in everything matching as designed.


At this point, you need to decide which variant of the cart you wish to make. I chose the early "Buick" cart, simply because I liked the look of the small metal exhaust doors on the side and because it was painted in yellow (not very scientific I know). Most folks will decide which version to make based on the actual aircraft model they want to pair it with.
"A" version, "Early Buick"

"B" Verison, "Late Chevy"

It's certainly worth paying attention to the assembly sequence guide in the Hypersonic instructions for this step. Start with the rear sides (step 1), add the front sides (step 2) and finally the centre sides (step 3). You will notice now why I told you to get the vertical alignment of part A6 correct back in step 1, it's kind of important.

To complete the body assembly we just need to add the one-piece top to the cart. If you have aligned the sides properly in the previous step the top simply clicks into place with only a couple of spots that needed some minor sanding.

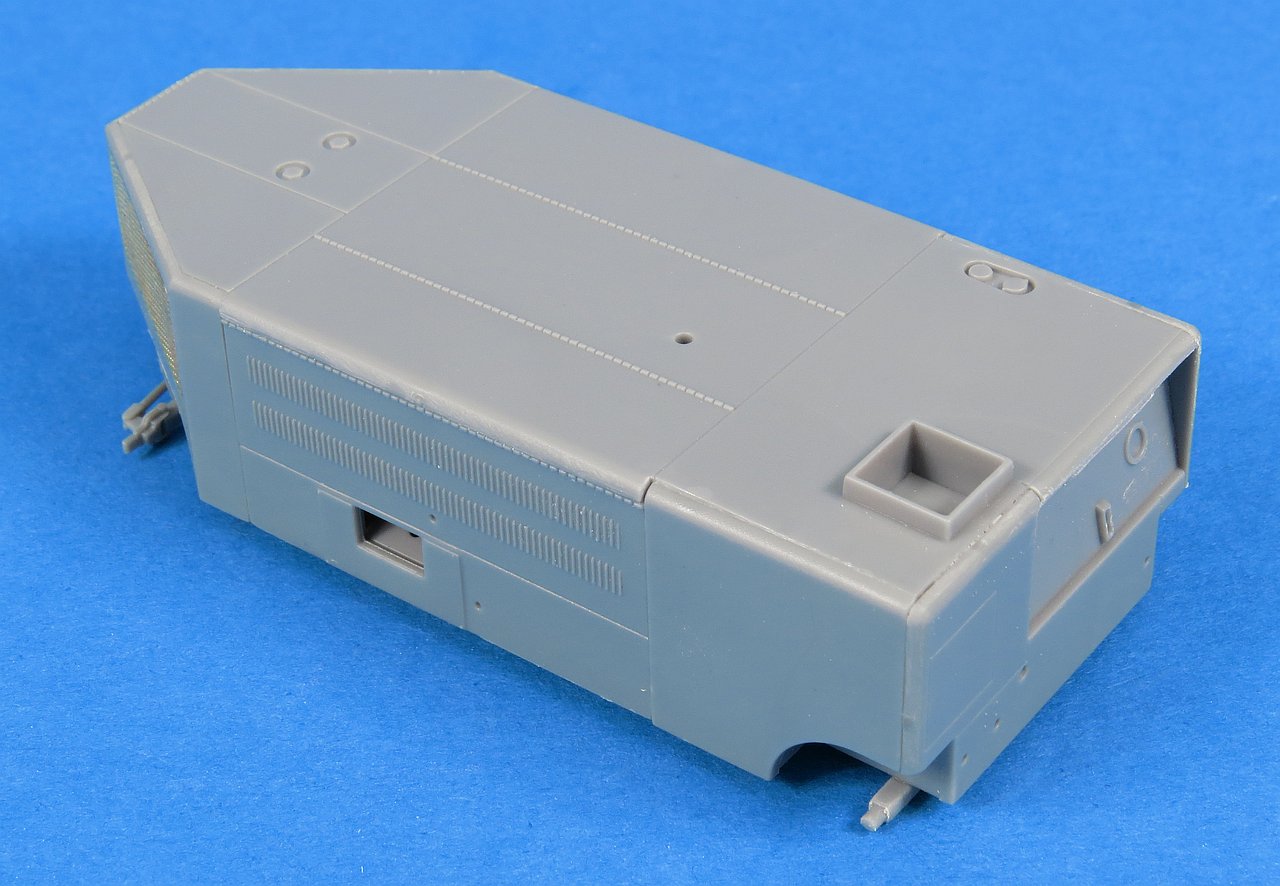
At this point, we need to break out the photo-etch fret. The PE parts are very easy to remove thanks to extremely small attachment points.


The control panel PE part fits very neatly into the plastic recess. I have recently switched away from using super (CA) glue for working with larger PE parts (that often need some adjustment time) like this in favour of a more forgiving glue such as MiG Ammo "Ultra Glue". This type of glue gives you ample opportunity to position the PE part perfectly before the glue grips.

Each of the kits one-piece wheels are moulded with a "weighted" flat edge, so make sure you pay attention when glueing them onto the axles.

There is also more PE work to be done around the front end of the cart with the air grills and assorted tie-downs and braces.

The result...

The AG-330 connects to the J-58 engine via an extendable probe which mechanically locks into place. Hypersonic provides options for both an extended (part B7) and stowed probe.


The exhaust configurations are also different between the "Buick" and "Chevy" carts. The correct parts can be found on the same sprue you used for the cart sides (C or D). I found the exhaust tubes for the Buick engine were the only ones I encountered in this kit that had any flash on the parts.


At this point, you are pretty much ready for paint. Hypersonic provides detailed information on the most common schemes but it is worth doing your own research if you have a particular aircraft, base or cart in mind.

The "mostly" finished cart after I did a little bit seam clean up around the top edges. Next step for this guy will be some primer and then (eventually) a coat of colour.

Hypersonic provides a comprehensive sheet of stencils. Four complete sets of numbers (0 thru 9) are provided in black and white to allow you to model a specific serial number for your cart. The decals are printed by Cartograf so you know quality is ensured.

Here is an example of the finished cart (borrowed from the Hypersonic Facebook page). I think you will agree it looks very convincing and will add a lot to the authenticity of your SR-71 kit or airbase scene diorama setting.

 FINAL THOUGHTS - Hypersonic Models - AG-330 Start Cart 1:48
So I wondered why would Hypersonic release a kit of an SR-71 only start-cart when there is no current (or half-decent) SR-71 kit available in 1:48? What was Hypersonic planning that would make this release relevant/attractive to modellers?
While checking out the Hypersonic website and Facebook page I found an announcement of a joint project with Gas Patch models for a planned future release of a new tooled SR-71 in 1:48th - Aha! it all made sense now.
Whilst tooling up a new SR-71 is a long way from a simple start cart, if what Hypersonic has shown us here (and in previous resin sets) is a guide then it will be something very special. I hope they can pull it off, it will be one hell of a model.
For the moment however the full SR-71 is a twinkle in someone's eye but if you want to grab the start cart in preparation it's retailing for around the US$25 mark, which seems quite reasonable for what is included.
Highly recommended.
Gary Wickham
Thanks to Hypersonic for sending this to Gary to make and review for you all - you can get this kit at the Product Link on the Hypersonic Models Website

Appendix: Instructions


