Clayton Ockerby has already built a great version of the 16t Strabokran and the accompanying Ferdinand Jagdpanzer Sd. Kfz. 184 kit from Amusing Hobby. See how the Ferdinand is painted and weathered w/ AK Real Colors to complete the story of this big kit...
Painting & Weathering: Ferdinand Jagdpanzer Sd. Kfz. 184
From Amusing Hobby
1/35th Scale
Kit No: # AMH35A030
Injection moulded sprues in tan
Clear parts & photo-etched parts
Item Size/Weight: 39.8cm x 26.3cm x 19.5cm / 1680g
Product Link on the Amusing Hobby Website
I now set in place my chipping colours. SMS paints are a lacquer-based paint manufactured in Australia. The model was first sprayed in German Red Brown and then loosely shaded with camo black. The colour was chosen to represent the chipping we will see in later steps. I keep these colours darker than normal because they will present better on the finished model given there will be a camouflage pattern to follow.
Now back to my new favourite paints – AK Real Colors. The Real Color range is also a lacquer based acrylic and is a really nice paint to work with. Prior to painting, the model was given two coats of hairspray and left to dry for about an hour. I left about 15 minutes between hairspray coats too for the record. I then sprayed Dunkelgelb as the base colour and then highlighted it using a mix lightened with Off White. As you can see, the coverage was excellent and none of the chipping colour is skewing the finish or colour.
Once the Dunkelgelb layer was dry (note - the lacquer paints dry very quickly… I waited about an hour but could have probably painted sooner), the model received another coat of hairspray. By laying this second layer of hairspray I am hoping the next layer of camouflage will chip from the Dunkelgelb, and if we go a little deeper than the hairspray under the Dunkelgelb will activate, exposing the chipping colour we sprayed earlier. It’s also worth noting I only used one layer of hairspray this time as I wanted the chipping to be a little more subtle for this layer.
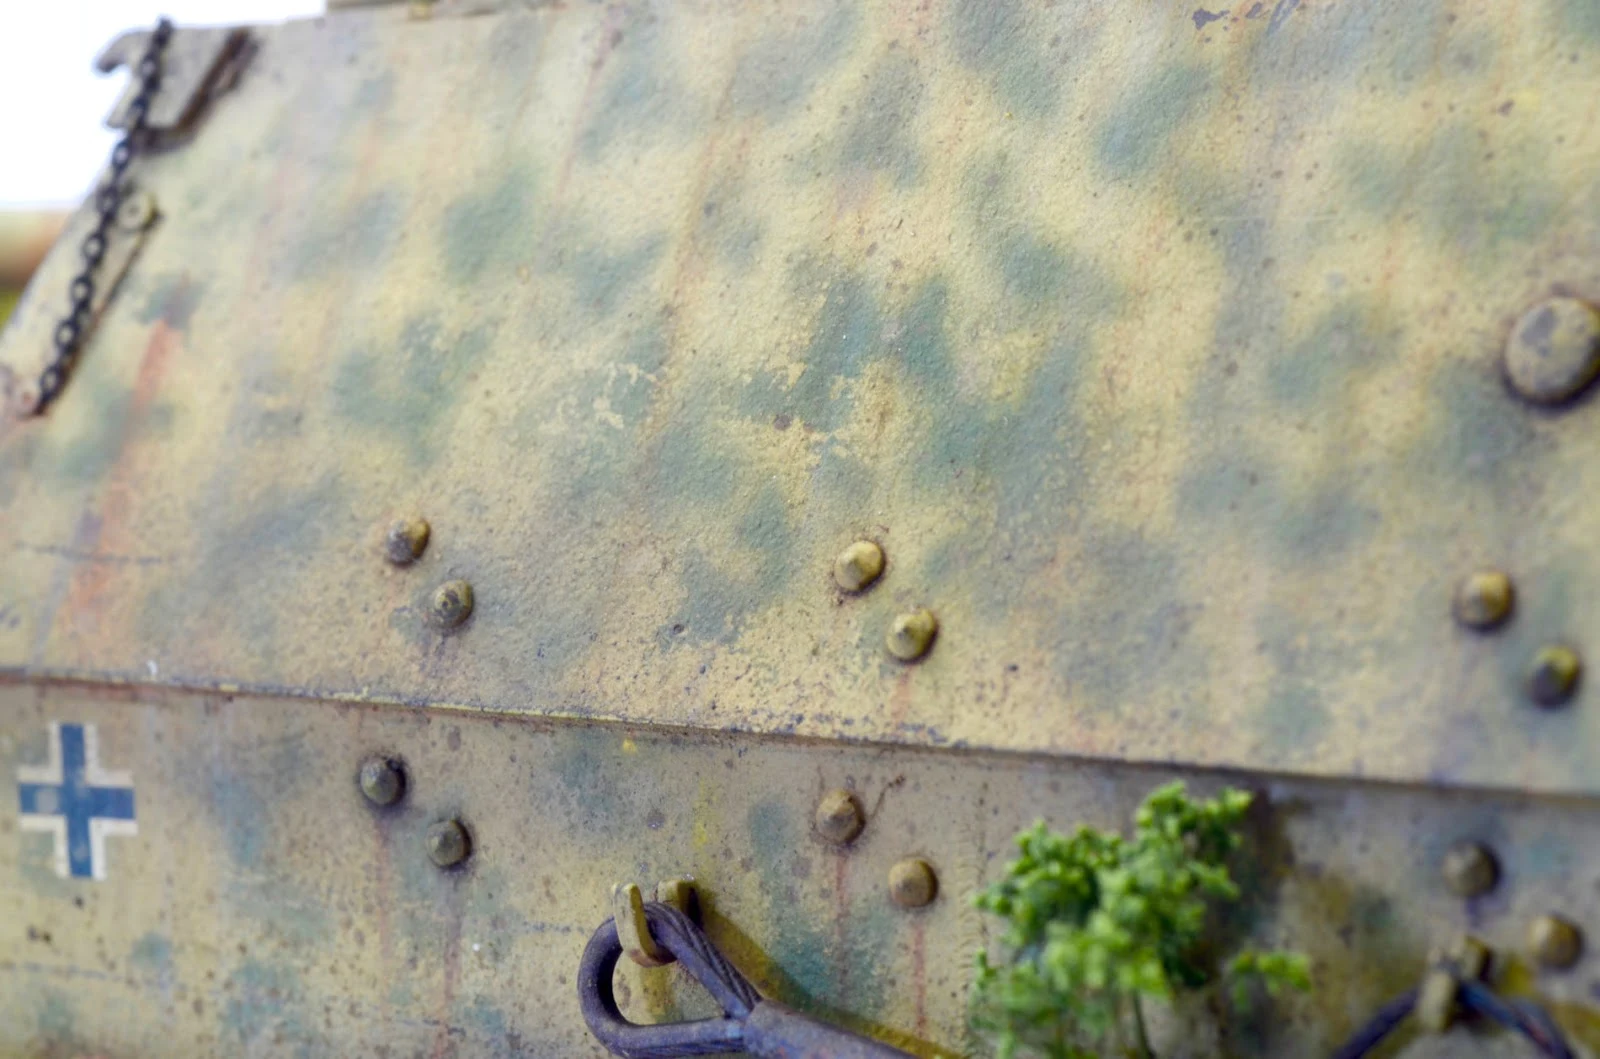
After 15 minutes or so, using the airbrush, I sprayed a thinned mix of AK Real Color Olivgrun. The pattern was sprayed freehand and followed as best I could the imagery supplied with the instructions (although there was a reasonable amount of artistic license at this stage)
Now the fun part! The chipping! Using a variety of old brushes and dull objects like toothpicks and the ends of the paintbrushes, the chipping begins. Moisten the surface with water and start scrubbing away. The Lacquers chip differently to some of the more fragile acrylics, so be warned, you will have to work for it, but it does present very well. Also, note the Olivgrun chipping from the Dunkelgelb. This was the second layer of hairspray doing its job. It adds an extra dimension to the weathering.
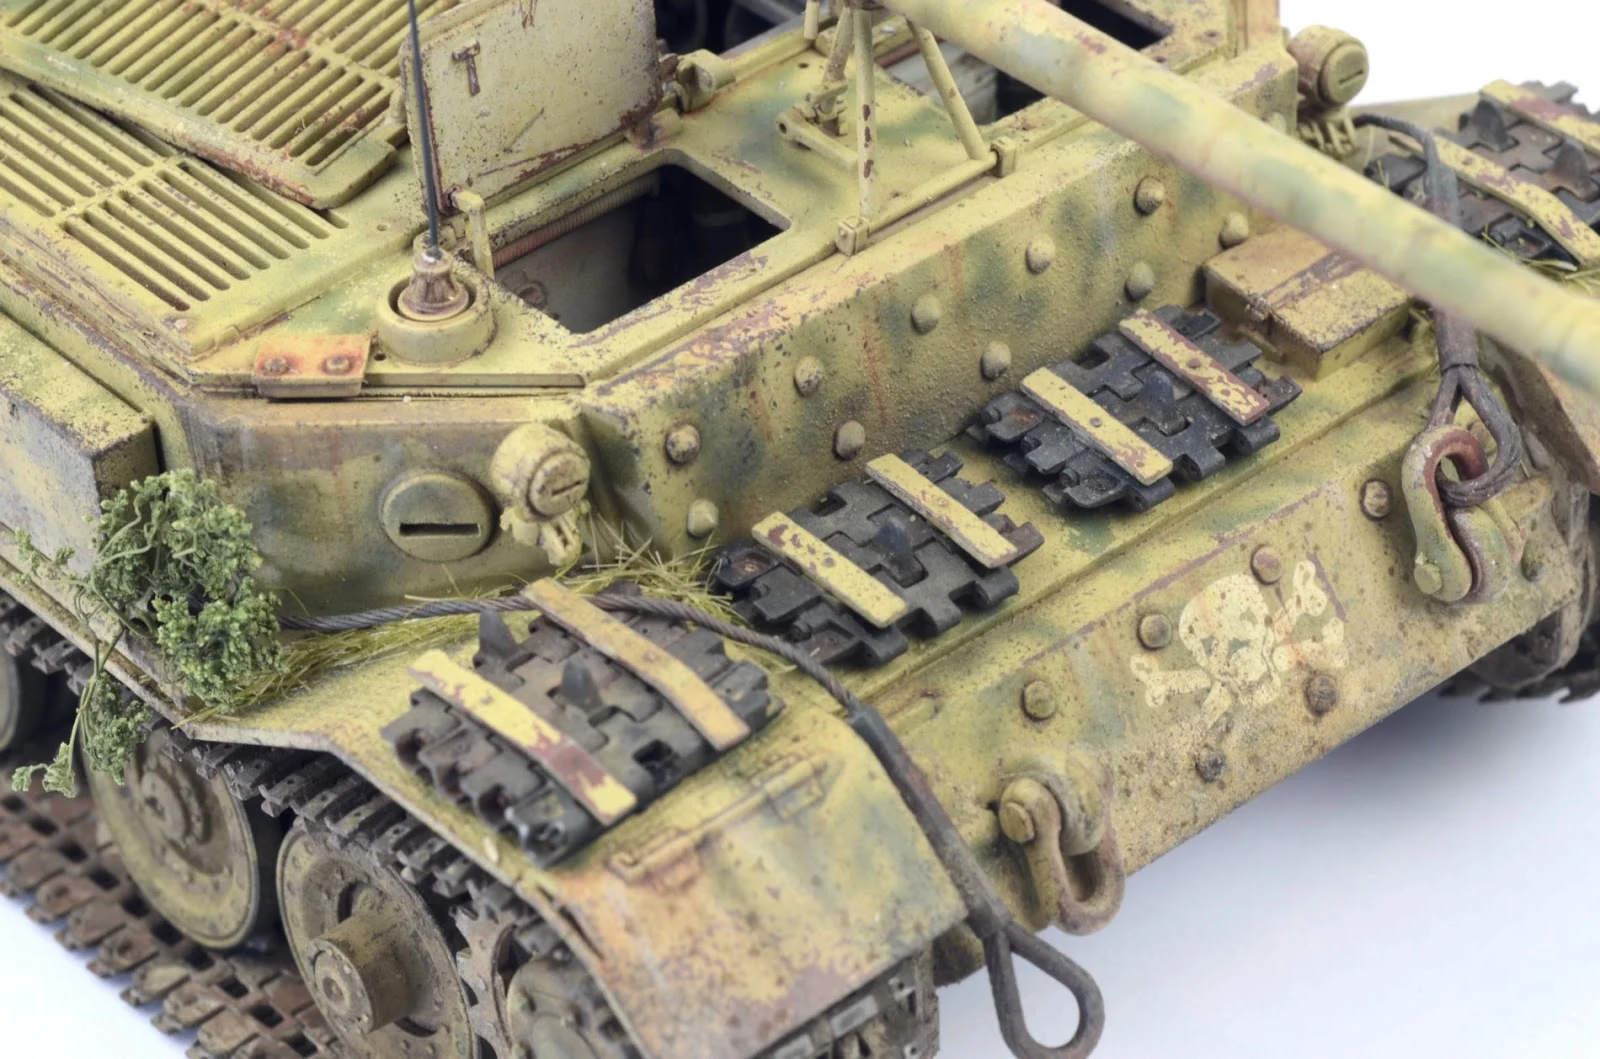
A quick couple of coats of gloss varnish (AK real color again) and once dry the decals are applied. The Skull and Crossbones was a clear winner when it came time to pick which scheme I was going to do…so here you see them set in place. One gripe I have with the schemes supplied with this kit is there is no indication of where or when the examples served. I have tried to find some pictures of this vehicle but keep coming up short. If anyone knows anything about it, I would love to hear from them or look at any pictures out there.
Decals are sealed with a satin varnish and left to dry for 24 hours. A pin wash using Sienna and Raw Umber is now applied to the recesses and rivets.
One of my favourite things to do when painting is post-shading. Using a highly thinned mix of Flat Black (AK) and Linoleum Blown (Tamiya) I spray forced shadows along the lower edges of the panels and around hatches. This is only supposed to be a subtle shading technique and it is really easy to push this one too hard. If you get it right it can add dimension and depth, but if you go too far it will just make a mess of your paintwork.
You don’t want to remove it all. You want to leave a stained and weathered look to your model. Remember to work in small areas and remove the paint in a vertical manner. You can always go back and add to this effect, so keep it refined at the start and then build up your layers.
A textured mud paste is now dabbed on around the underside of the model using an acrylic-based product. The paste is applied using a sponge and is left to dry.
Whilst the mud is drying, additional chipping is added to the hatches around the model. This is done simply by using a piece of sponge and dabbing on the appropriate colour for the chips.
As mentioned in the build review, I have chosen to use a set of Friulmodel white metal tracks I had in the stash. I absolutely am hooked on these metal tracks at the moment. They just look so good! The only downside is you can detect the pin sticking out of the links…but when applied to the model it will be very hard to see.
The tracks were constructed and washed in an acetone bath and then cleaned with water. Once dry they were then treated to a soaking of the AK Burnishing fluid. The results are just stunning.
Using a sanding stick, the high points of the tracks are now sanded off. The result is a very life-like representation of a track in use.
The Fruils were also employed for the spare links they fit to the front of the model. The brackets were all chipped prior to fitting them to the model. Once the pieces come together the result is very satisfying to my eye.
Some more pronounced streaking is now applied to the edges of the model using enamel paints – By using a similar method as we did with the oil dots earlier, we drag the paint down vertically leaving a subtle hint of the paint and producing the illusion of dirt and rain marks.
Hatches and tow-cables are now all attached to the model. The tow cables received the same treatment as the tracks in the Burnishing Fluid and came up a treat. Obviously, you still need to paint the plastic parts, but the metal cable looked quite authentic.
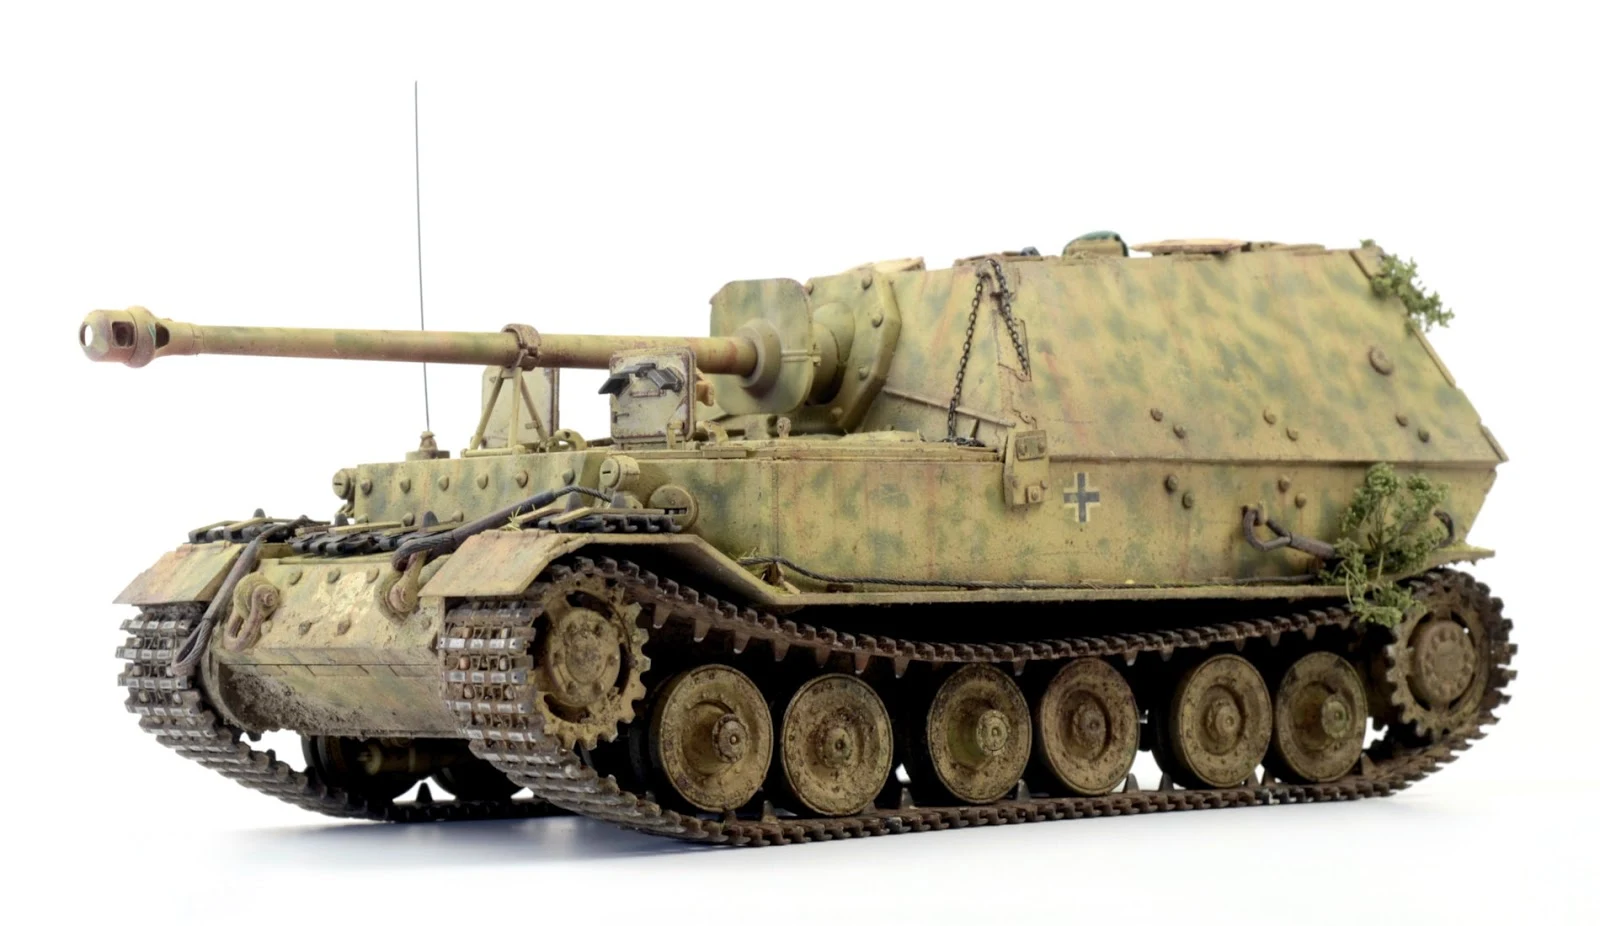
Earth toned pigments and now applied to the wheels. This is tapped on in a dry form and then using a white spirit with a touch of earth-toned enamel paint is set in place using a pipette and dropping the fluid over the pigments. After about 24hours it dries and using a soft brush the excess is moved from the part revealing the crusty, dirty effect. Variety of tone and texture is the key to a successful result. You can see the acrylic mud effect in behind the wheels to add bulk. The pigments on the wheels should be far less prominent given they are moving parts on the real vehicle.
Messy work now, so excuse the state of my workbench! Enamel Earth effects are now splattered along the lower edges of the model by loading up an old brush and flicking it at the model. This is about adding another layer to the weathering in an effort to help sell the illusion of a working vehicle.
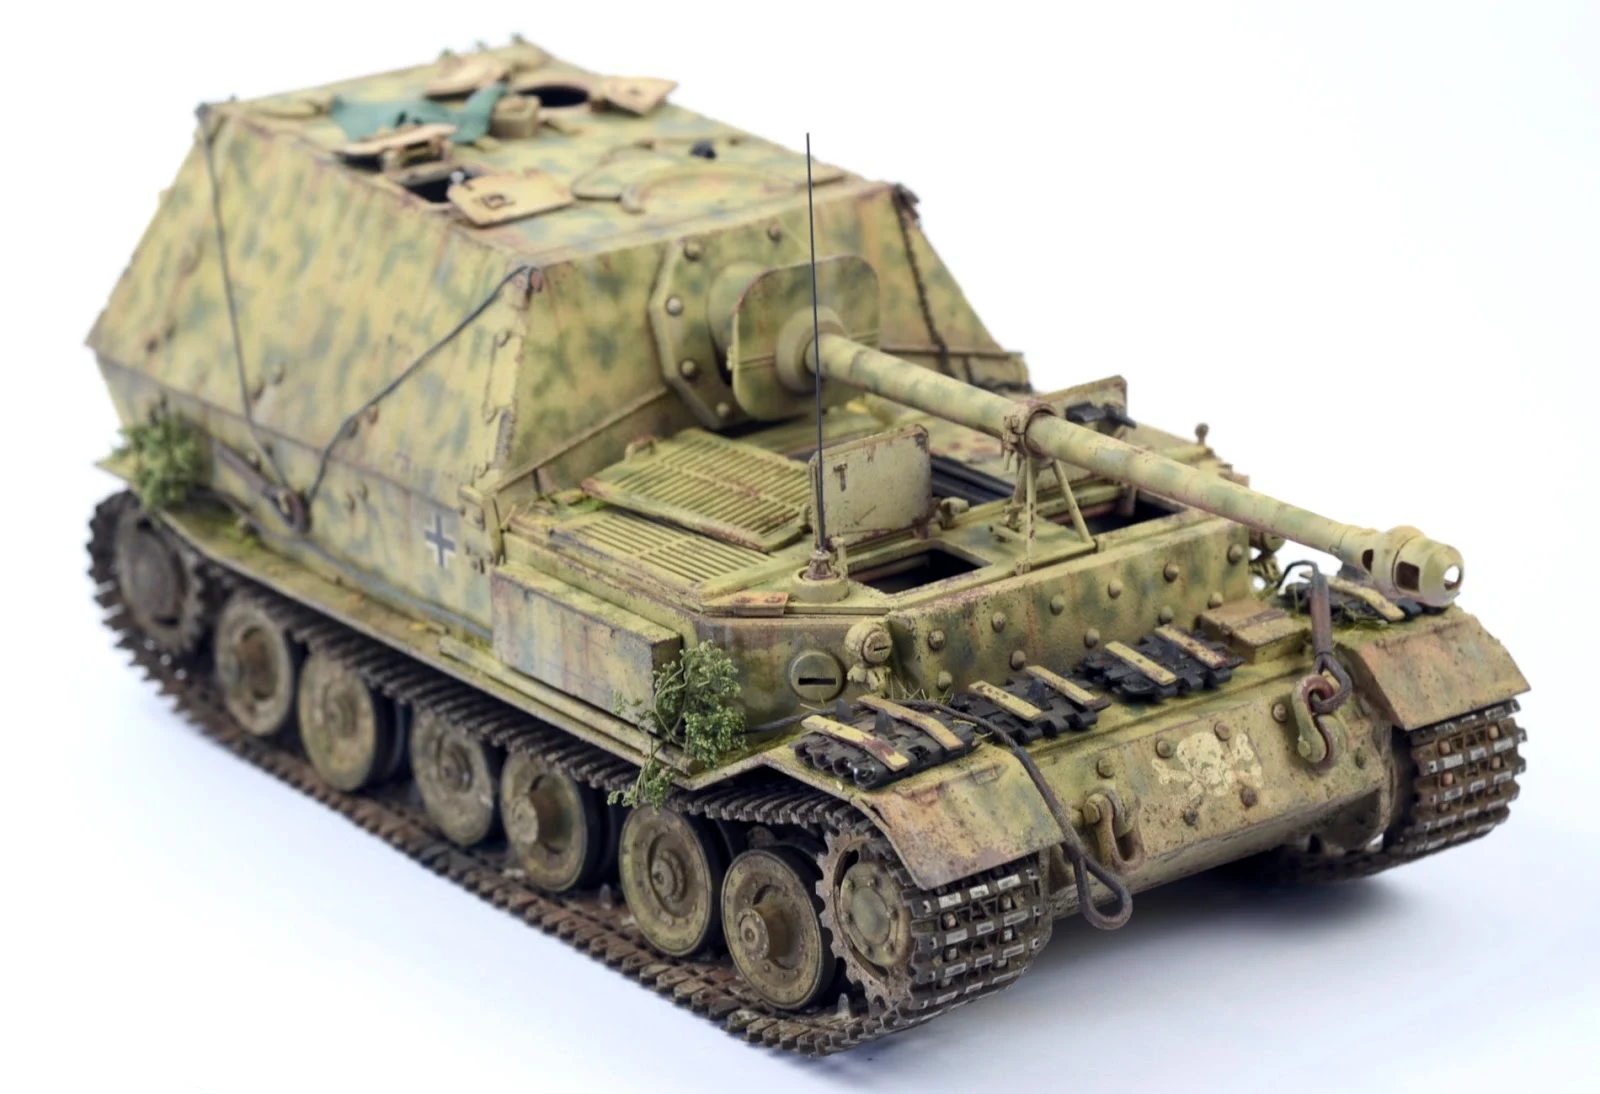
Organic matter, or organic looking matter more to the point, can help bring a model to life. Small deposits of static grass are applied to some of the horizontal surfaces of the model and set in place with ‘Sand and Gravel’ fixer from AK. I also used some clippings from an actual plant to serve as foliage the crew had thrown on the vehicle in the field.
Other textural elements like this lead wire and some old chain are added around the model to help bring it to life. Wire was often seen strung around German vehicles and used to attach foliage to enhance camouflage. Attaching this was just about adding another layer and element to build up the visual appeal of the model.
Conclusion
There is a heck of a lot of model in this release, and as you can see, it actually builds up into a really nice-looking kit. When paired with the Fries Kran you really do get a lot of bang for your buck with this kit. The challenge will be how to get the most out of the full interior kit and being able to display it in an accurate way on the crane. For me, it was just a little too difficult to find the pieces of the puzzle and references in order to display it accurately on the crane with the lid off, so I chickened out a little and took the safe option. There is no doubting the Ferdinand and Fries Kran pair beautifully and have the potential to feature in a diorama down the track at some point.
Definite thumbs up for this one.
Clayton Ockerby
Painting & Weathering: Ferdinand Jagdpanzer Sd. Kfz. 184
From Amusing Hobby
1/35th Scale
Kit No: # AMH35A030
Injection moulded sprues in tan
Clear parts & photo-etched parts
Item Size/Weight: 39.8cm x 26.3cm x 19.5cm / 1680g
Product Link on the Amusing Hobby Website
Today - Part III: Painting & Weathering: Ferdinand Jagdpanzer Sd. Kfz. 184
When last we looked at this model, we were at the stage where the entire model had been primed using a Tamiya primer from a rattle can. To be honest, I would only prime about 40% of the time before I paint, but I chose to do so with this one to get a better look at some of the gaps I was needing to fill and clean up. The primer gave me an even finish to better inspect the areas in question. I guess an argument can be made that it also gives us a truer base for the layers of paint that are about to follow, but the opacity of the paints I will be using is very high, and in reality, the light base makes very little difference. I now set in place my chipping colours. SMS paints are a lacquer-based paint manufactured in Australia. The model was first sprayed in German Red Brown and then loosely shaded with camo black. The colour was chosen to represent the chipping we will see in later steps. I keep these colours darker than normal because they will present better on the finished model given there will be a camouflage pattern to follow.
Now back to my new favourite paints – AK Real Colors. The Real Color range is also a lacquer based acrylic and is a really nice paint to work with. Prior to painting, the model was given two coats of hairspray and left to dry for about an hour. I left about 15 minutes between hairspray coats too for the record. I then sprayed Dunkelgelb as the base colour and then highlighted it using a mix lightened with Off White. As you can see, the coverage was excellent and none of the chipping colour is skewing the finish or colour.
Once the Dunkelgelb layer was dry (note - the lacquer paints dry very quickly… I waited about an hour but could have probably painted sooner), the model received another coat of hairspray. By laying this second layer of hairspray I am hoping the next layer of camouflage will chip from the Dunkelgelb, and if we go a little deeper than the hairspray under the Dunkelgelb will activate, exposing the chipping colour we sprayed earlier. It’s also worth noting I only used one layer of hairspray this time as I wanted the chipping to be a little more subtle for this layer.
After 15 minutes or so, using the airbrush, I sprayed a thinned mix of AK Real Color Olivgrun. The pattern was sprayed freehand and followed as best I could the imagery supplied with the instructions (although there was a reasonable amount of artistic license at this stage)
Now the fun part! The chipping! Using a variety of old brushes and dull objects like toothpicks and the ends of the paintbrushes, the chipping begins. Moisten the surface with water and start scrubbing away. The Lacquers chip differently to some of the more fragile acrylics, so be warned, you will have to work for it, but it does present very well. Also, note the Olivgrun chipping from the Dunkelgelb. This was the second layer of hairspray doing its job. It adds an extra dimension to the weathering.
A quick couple of coats of gloss varnish (AK real color again) and once dry the decals are applied. The Skull and Crossbones was a clear winner when it came time to pick which scheme I was going to do…so here you see them set in place. One gripe I have with the schemes supplied with this kit is there is no indication of where or when the examples served. I have tried to find some pictures of this vehicle but keep coming up short. If anyone knows anything about it, I would love to hear from them or look at any pictures out there.
Decals are sealed with a satin varnish and left to dry for 24 hours. A pin wash using Sienna and Raw Umber is now applied to the recesses and rivets.
One of my favourite things to do when painting is post-shading. Using a highly thinned mix of Flat Black (AK) and Linoleum Blown (Tamiya) I spray forced shadows along the lower edges of the panels and around hatches. This is only supposed to be a subtle shading technique and it is really easy to push this one too hard. If you get it right it can add dimension and depth, but if you go too far it will just make a mess of your paintwork.
It’s also worth noting the AK lacquer and the Tamiya mix perfectly well together.
Back to the oil paints now in an effort to give the model a little more life. Small dots of yellow, white, buff and raw umber are applied to the model. Then using a flat brush moistened with white spirit the dots are dragged down through the panel, essentially as gravity would on the real thing. You don’t want to remove it all. You want to leave a stained and weathered look to your model. Remember to work in small areas and remove the paint in a vertical manner. You can always go back and add to this effect, so keep it refined at the start and then build up your layers.
A textured mud paste is now dabbed on around the underside of the model using an acrylic-based product. The paste is applied using a sponge and is left to dry.
Whilst the mud is drying, additional chipping is added to the hatches around the model. This is done simply by using a piece of sponge and dabbing on the appropriate colour for the chips.
As mentioned in the build review, I have chosen to use a set of Friulmodel white metal tracks I had in the stash. I absolutely am hooked on these metal tracks at the moment. They just look so good! The only downside is you can detect the pin sticking out of the links…but when applied to the model it will be very hard to see.
The tracks were constructed and washed in an acetone bath and then cleaned with water. Once dry they were then treated to a soaking of the AK Burnishing fluid. The results are just stunning.
Using a sanding stick, the high points of the tracks are now sanded off. The result is a very life-like representation of a track in use.
The Fruils were also employed for the spare links they fit to the front of the model. The brackets were all chipped prior to fitting them to the model. Once the pieces come together the result is very satisfying to my eye.
Some more pronounced streaking is now applied to the edges of the model using enamel paints – By using a similar method as we did with the oil dots earlier, we drag the paint down vertically leaving a subtle hint of the paint and producing the illusion of dirt and rain marks.
Hatches and tow-cables are now all attached to the model. The tow cables received the same treatment as the tracks in the Burnishing Fluid and came up a treat. Obviously, you still need to paint the plastic parts, but the metal cable looked quite authentic.
Earth toned pigments and now applied to the wheels. This is tapped on in a dry form and then using a white spirit with a touch of earth-toned enamel paint is set in place using a pipette and dropping the fluid over the pigments. After about 24hours it dries and using a soft brush the excess is moved from the part revealing the crusty, dirty effect. Variety of tone and texture is the key to a successful result. You can see the acrylic mud effect in behind the wheels to add bulk. The pigments on the wheels should be far less prominent given they are moving parts on the real vehicle.
Messy work now, so excuse the state of my workbench! Enamel Earth effects are now splattered along the lower edges of the model by loading up an old brush and flicking it at the model. This is about adding another layer to the weathering in an effort to help sell the illusion of a working vehicle.
Organic matter, or organic looking matter more to the point, can help bring a model to life. Small deposits of static grass are applied to some of the horizontal surfaces of the model and set in place with ‘Sand and Gravel’ fixer from AK. I also used some clippings from an actual plant to serve as foliage the crew had thrown on the vehicle in the field.
Other textural elements like this lead wire and some old chain are added around the model to help bring it to life. Wire was often seen strung around German vehicles and used to attach foliage to enhance camouflage. Attaching this was just about adding another layer and element to build up the visual appeal of the model.
Conclusion
There is a heck of a lot of model in this release, and as you can see, it actually builds up into a really nice-looking kit. When paired with the Fries Kran you really do get a lot of bang for your buck with this kit. The challenge will be how to get the most out of the full interior kit and being able to display it in an accurate way on the crane. For me, it was just a little too difficult to find the pieces of the puzzle and references in order to display it accurately on the crane with the lid off, so I chickened out a little and took the safe option. There is no doubting the Ferdinand and Fries Kran pair beautifully and have the potential to feature in a diorama down the track at some point.
The Ferdinand in a close up walk around...
A wider view of the whole tank destroyer - wow!
The kit has a few fit ‘challenges’, but nothing that can’t be overcome by most modellers. This mainstream release of the full interior Ferdinand is a welcome release and should excite all, you 1/35th scale armour builders. The pairing with the Crane is just icing on the cake.
The whole contents of the kit - the crane and Ferdinand together (- with two crew from other kits thrown in)...
This is an interesting kit with a great deal of appeal. For those who enjoy being consumed with super-detailing the interior, then the bones are there for you to ‘detail up’ till your heart's content! For the rest of us, the ‘out of box’ interior, with a basic paint job, gives us enough of a look through the hatches to bring the model to life.Definite thumbs up for this one.
Clayton Ockerby
Thank you to Amusing Hobby for sending this kit to Clayton to build for us - you can see more of Amusing Hobby's kits on their Website.
Thanks also to AK Interactive for sending the paints & weathering gear to Clayton to use so well on this model
See more of Clayton's amazing works on his modelling website "Workbench Hobbies" or his FB page


