


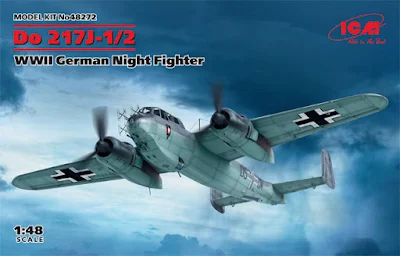
Construction Review: Do 217J-1/2 WWII German Night Fighter
From ICM
Kit No #48272
1/48th scale

ICM's new 48th scale Do 217J-1/2 WWII German Night Fighter is the next 48th scale kit to come from ICM and it trails on last years N-1 variant of the kit. This is an earlier type and there are a few differences in this boxing - but some of you might not be familiar with it - this is some history of the type...
History of the Do 217J-1/2...
The Do 217J was a dedicated night fighter and included a J-1 and J-2 form. In 1941, with Germany under increased night-time attack by the bombers of RAF Bomber Command and with shortages of the Messerschmitt Bf 110 and the preferred Junkers Ju 88C night fighters.


Do 217J Nose of prototype Do 17Z-10 Kauz II night fighter, similar to that of the Do 217J, equipped with Matratze (mattress) 32-dipole radar antenna for its UHF-band early model Lichtenstein BC AI radar gear

The new kit from ICM:
This new kit is in 1/48th scale, and it is a progression from their other Dornier 217 kit, the Do 217N-1 Nightfighter that was released last year.

 The kit is moulded in a light grey styrene and is relatively flash free although there are a couple of minor sink marks here and there. Mould pin marks are confined mainly to out of the way areas but there are some on cockpit parts such as the armoured seat back for the pilot and part E18 and these need filling.
Detailing is OK but there is PLENTY of scope for extra detail should you wish. Some parts such as the 'towel-rail' aerial under the rear fuselage and FuG202 radar aerials on the front are over scale but this is due to moulding limitations however there are aftermarket replacements available.


 Four painting options are included and the decals are well printed and in register. Anyway, that's enough of that and I'll just get on with building it.
Part one.
In this first part I'll concentrate on the different assemblies and starting with the cockpit there are various bits to make such as the sidewalls, seats and instrument panels. It should be noted that the edge of the co-pilots fold up seat should locate in the slot on the fuselage side and not the base as shown in the instructions.
 Although I wanted to build the model straight from the box to show the readers what they get for their money, I just had to add from scratch belts and buckles to the seats plus levers for the engine controls on the side and roof consoles as a minimum. Again you can go wild here if you have the references.

 The instructions call for the cockpit to be painted in RLM 02 Grau but to me, it should be the darker RLM 66 Schwarzgrau as the German Air Ministry ordered cockpits to be painted in RLM 66 from late 1941 and the Dornier 217J appeared in 1942. Whether I'm correct or not is another matter as the subject of Luftwaffe paint can be a real can of worms however I decided to stick my neck out and paint it in the darker grey later on.
Before any paint was sprayed I decided to deviate from the kit instructions and build the rest of the model as sub-assemblies such as the engines, undercarriage, cowlings etc. The cowlings are made up from three pieces and fit together reasonably well, unfortunately, the joints are not on natural panel lines so these need filling and sanding with the panel lines re-scribing after.

 The exhausts are moulded solid and unless you choose option 4 with the exhaust shrouds fitted these really need to be drilled out, No doubt some enterprising aftermarket manufacturer will make resin replacements sooner or later for these and the cowlings, but until then you are stuck with the kit parts. I put the engines together as supplied in the kit as once they are in place you will see very little of them.
The engine nacelles went together fairly well but there were some big gaps on both front and rear bulkheads. I used thin styrene to fill in the corners of the front and made new bulkheads for the rear.


 The undercarriage was assembled next as rather usefully it can be added after the model is painted. What I did notice after assembly is that the undercarriage legs are just a butt-fit to the front bulkhead and will have no strength whatsoever.
 To solve this I drilled holes in the top of the undercarriage legs with matching holes in the bulkheads and glued copper wire into the top of the legs.
 The fasteners for the mudguards on each gear leg were replaced with copper wire as during clean up I managed to break both of them. The plastic in the kit is fairly soft and forgiving to a point but on parts like this, it is very easy to break them.
 The wheels were glued together and then set the joints were cleaned up and the tread on the tailwheel re-scribed.
That about wraps up the first part of this build review, the second part will concentrate on the final assembly. So far the fit of the model has been pretty good and hopefully, that trend will continue with the rest of it.
 Stay tuned for the rest of the construction and then the painting parts coming soon here on TMN...
 Part II of the story is Here...
Andy King


Detailing is OK but there is PLENTY of scope for extra detail should you wish. Some parts such as the 'towel-rail' aerial under the rear fuselage and FuG202 radar aerials on the front are over scale but this is due to moulding limitations however there are aftermarket replacements available.
Fine detail on the wing surfaces are a good start...

Internal stations in the cockpit are fairly well detailed, but pictures inside the Do 217 are hard to track down...

The engine parts are included including everything that you would see from a close cowling

Part one.
In this first part I'll concentrate on the different assemblies and starting with the cockpit there are various bits to make such as the sidewalls, seats and instrument panels. It should be noted that the edge of the co-pilots fold up seat should locate in the slot on the fuselage side and not the base as shown in the instructions.


Before any paint was sprayed I decided to deviate from the kit instructions and build the rest of the model as sub-assemblies such as the engines, undercarriage, cowlings etc. The cowlings are made up from three pieces and fit together reasonably well, unfortunately, the joints are not on natural panel lines so these need filling and sanding with the panel lines re-scribing after.


The engine nacelles went together fairly well but there were some big gaps on both front and rear bulkheads. I used thin styrene to fill in the corners of the front and made new bulkheads for the rear.


First, the plastic card was inserted...

Then cut to shape to eliminate the gap in the forward gear housing...


That about wraps up the first part of this build review, the second part will concentrate on the final assembly. So far the fit of the model has been pretty good and hopefully, that trend will continue with the rest of it.


Andy King
Thanks to ICM for sending this to Andy to build and review for you - You can find out more about this kit or the rest of the range on the ICM Website

