Meng's new combination of the Israel Main Battle Tank Merkava Mk.4/4LIC with the very imposing looking Nochri-Kal Mine Roller System is the subject of Paul Lee's latest build. See how he made this imposing tank in his one-pat build review in today's news...

Construction Review: Meng's 35th scale Merkava Mk.4/4LIC w/Nochri-Kal Mine Roller System. 
From Meng Models
Kit no# TS-049
1/35th scale
Type: Polystyrene, photo-etch, and waterslide decals multimedia Kit
Product Link on the Meng Website Israel Main Battle Tank Merkava Mk.4/4LIC w/Nochri-Kal Mine Roller System. - "The Shield On Mount Zion". This machine came from a requirement for design made under external pressure 50 years ago to the classic tank family now, the Merkava tanks have been in service with the Israeli Defence Force (IDF) for half a century. They are a typical representative of the pragmatism of the Israeli armed forces. During this long period of time, they have been both the sharpest spearhead of the Israeli armoured units and the strongest shield of Jews on Mount Zion.
Now, the Merkava Mk.4 not only faces enemy tanks but also has to deal with the elusive armed personnel who are equipped with individual anti-tank weapons. In response to such threats, the Merkava Mk.4 can carry a “Droid” active protection system. Unlike the “Trophy” protection system that performs hard kills of the incoming threats, the “Droid” system doesn’t directly destroy the rounds, but the system can fire laser beams to interrupt or disturb the guidance of threats so as to protect the tank from being hit.
On the 50th anniversary of the Merkava main battle tank family, MENG will release a new Merkava tank model kit, the TS-049 Israel Main Battle Tank Merkava Mk.4/4LIC w/Nochri-Kal Mine Roller System.
Product Link on the Meng Website Israel Main Battle Tank Merkava Mk.4/4LIC w/Nochri-Kal Mine Roller System. - "The Shield On Mount Zion". This machine came from a requirement for design made under external pressure 50 years ago to the classic tank family now, the Merkava tanks have been in service with the Israeli Defence Force (IDF) for half a century. They are a typical representative of the pragmatism of the Israeli armed forces. During this long period of time, they have been both the sharpest spearhead of the Israeli armoured units and the strongest shield of Jews on Mount Zion.
Now, the Merkava Mk.4 not only faces enemy tanks but also has to deal with the elusive armed personnel who are equipped with individual anti-tank weapons. In response to such threats, the Merkava Mk.4 can carry a “Droid” active protection system. Unlike the “Trophy” protection system that performs hard kills of the incoming threats, the “Droid” system doesn’t directly destroy the rounds, but the system can fire laser beams to interrupt or disturb the guidance of threats so as to protect the tank from being hit.
The kit:
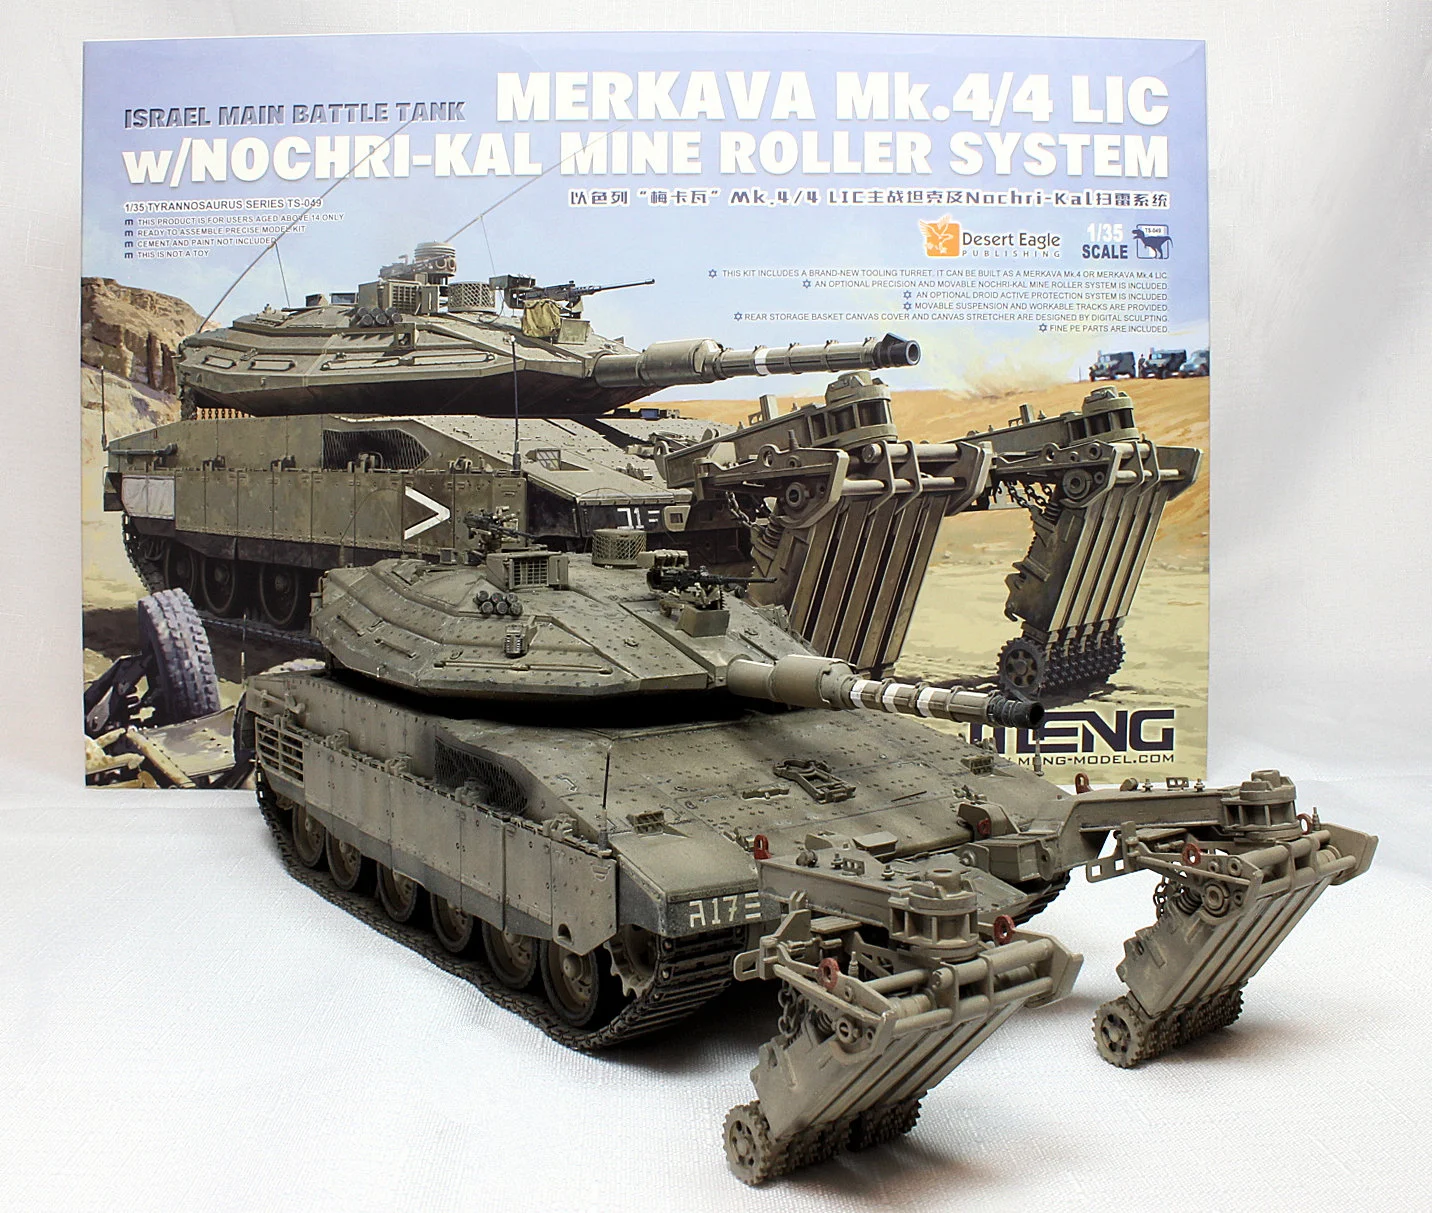
This latest model kit features a brand-new tooling turret, a precision “Droid” active protection system and a movable Nochri-Kal mine roller system. This kit also includes a movable suspension system, workable assembly tracks, precision PE parts and parts designed by digital sculpting. The finished model will be 264mm long and 113.6mm wide, and it can be built as a Merkava Mk.4 or Merkava Mk.4 LIC.The build - the Merkava IV:
Meng continues with their Merkava models, with this being their second release of the Merkava Mk 4, now with the LIC configuration with mine roller. I do think the Merkava is probably the most visually appealing of all the modern tanks, although unfortunately, it has lost some of its charms with the addition of all the extra armour on the turret.
The kit can be built as a Merkava 4 or 4 LIC, however, the instructions do not mention what the LIC modifications are, so off to Wikipedia for some answers. LIC stands for Low-Intensity Conflict which is fairly self-explanatory on what it is used for and involves the addition of mesh to help protect sensitive areas such as optics and the exhaust, a rear vision camera to help with visibility, and the addition of a co-axial .5cal machine gun for extra firepower to compensate for the reduced use of the main gun in urban areas.
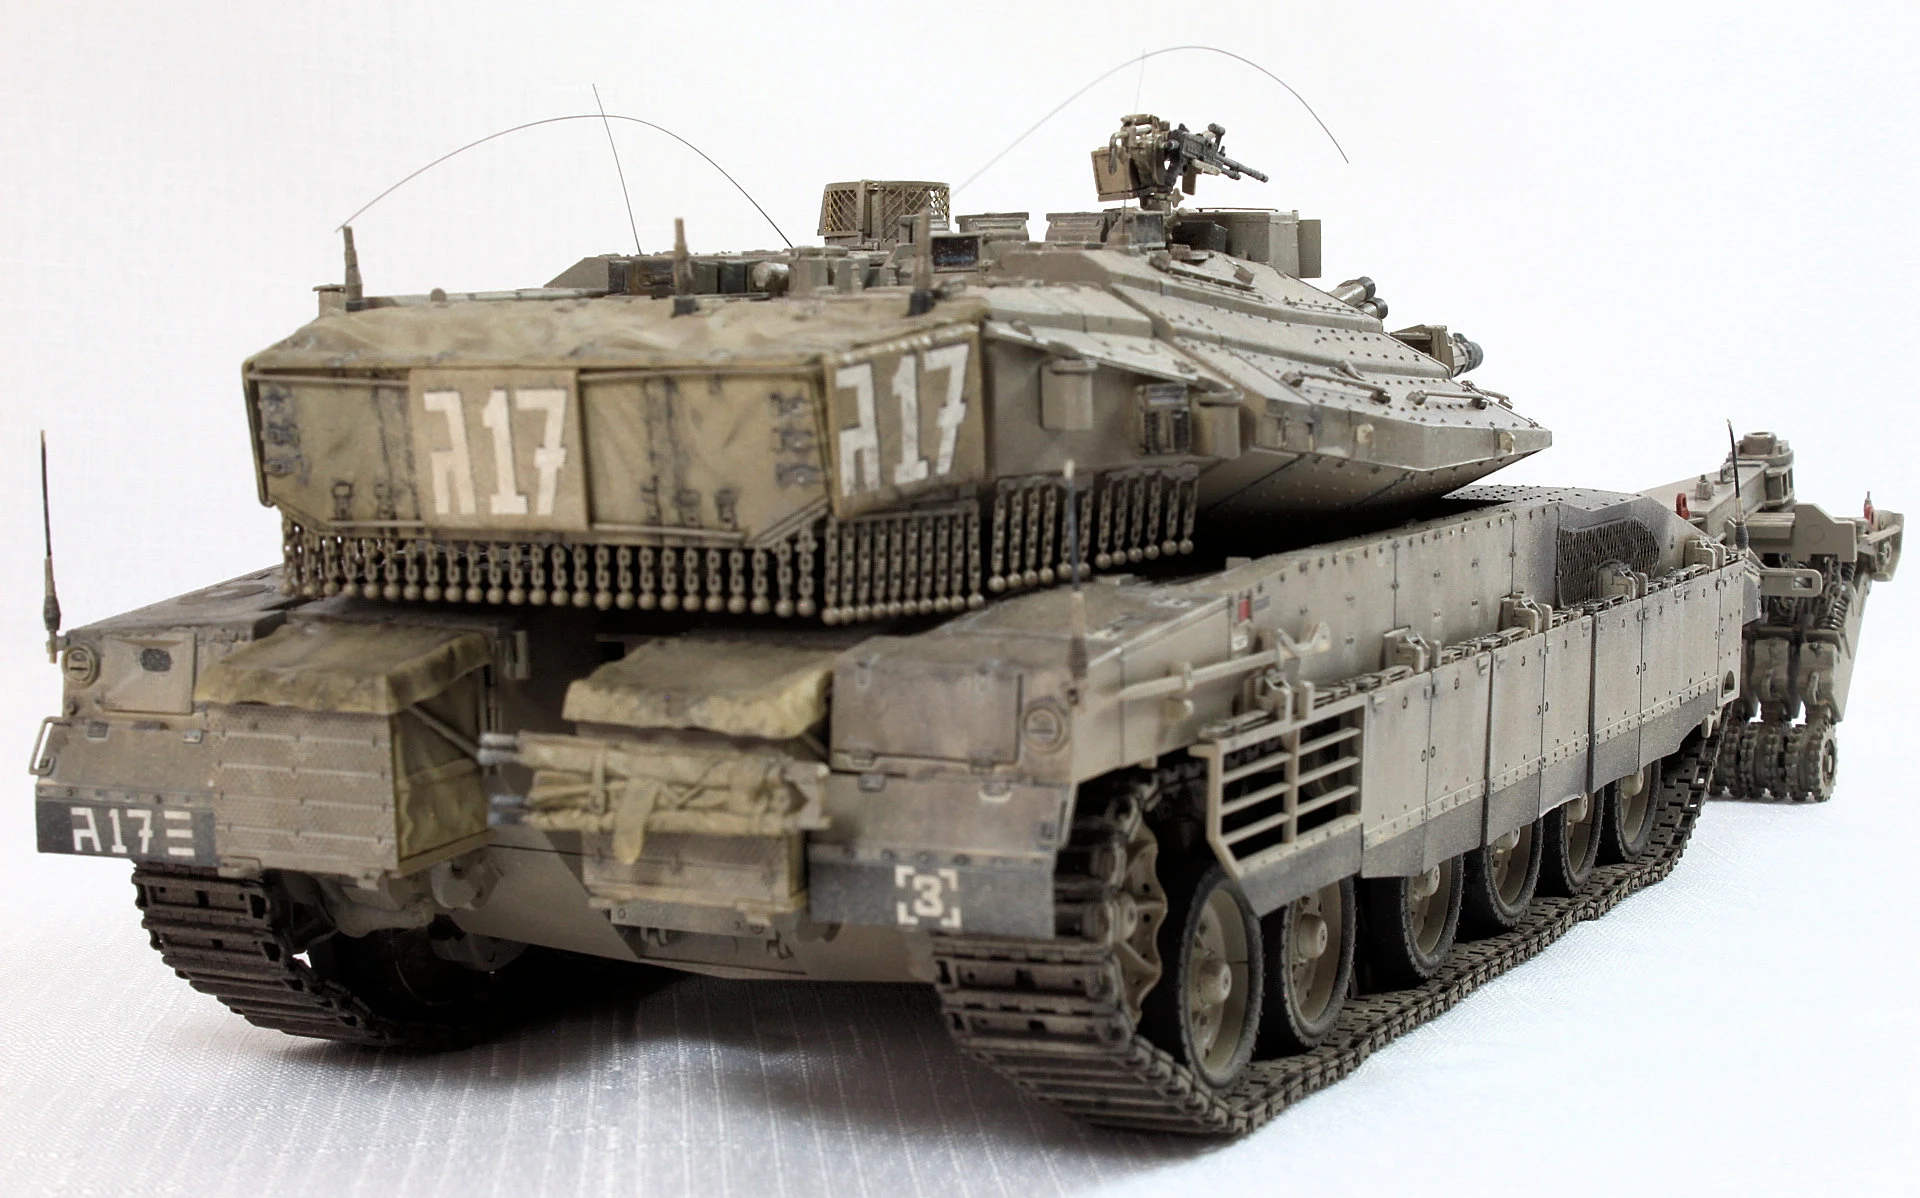
Construction starts with the wheels and the lower hull. The tyres are moulded separately from the wheels which makes painting easier and saves the effort to mask them later. The suspension is workable by gluing the inside end of the torsion bar inside the hull and the natural flexibility of the plastic giving the ability for the suspension to be workable. The instructions tell you to glue the suspension arm to the torsion bar before inserting them inside the hull, but this makes becomes a tricky affair because the springs are also attached to the suspension arms which you have to slide over the faux shock absorbers, as well as inserting the torsion bar, tricky because they are perpendicular to each other. The answer is simply to insert the torsion bar first, and then glue the suspension arm to it after sliding the springs over the shock absorber. The rear stowage bins are also very nicely with some very nice moulded in fabric texture.
With the workable suspension, the track also has to be, so each track link comes in an upper and lower half which sandwiches the moulded in track pin, so all you need to do is apply glue carefully. A jig of sorts would have been handy, but it wasn’t hard to make one by pulling apart a clothes peg and sandwiching the guide horn between the two halves.
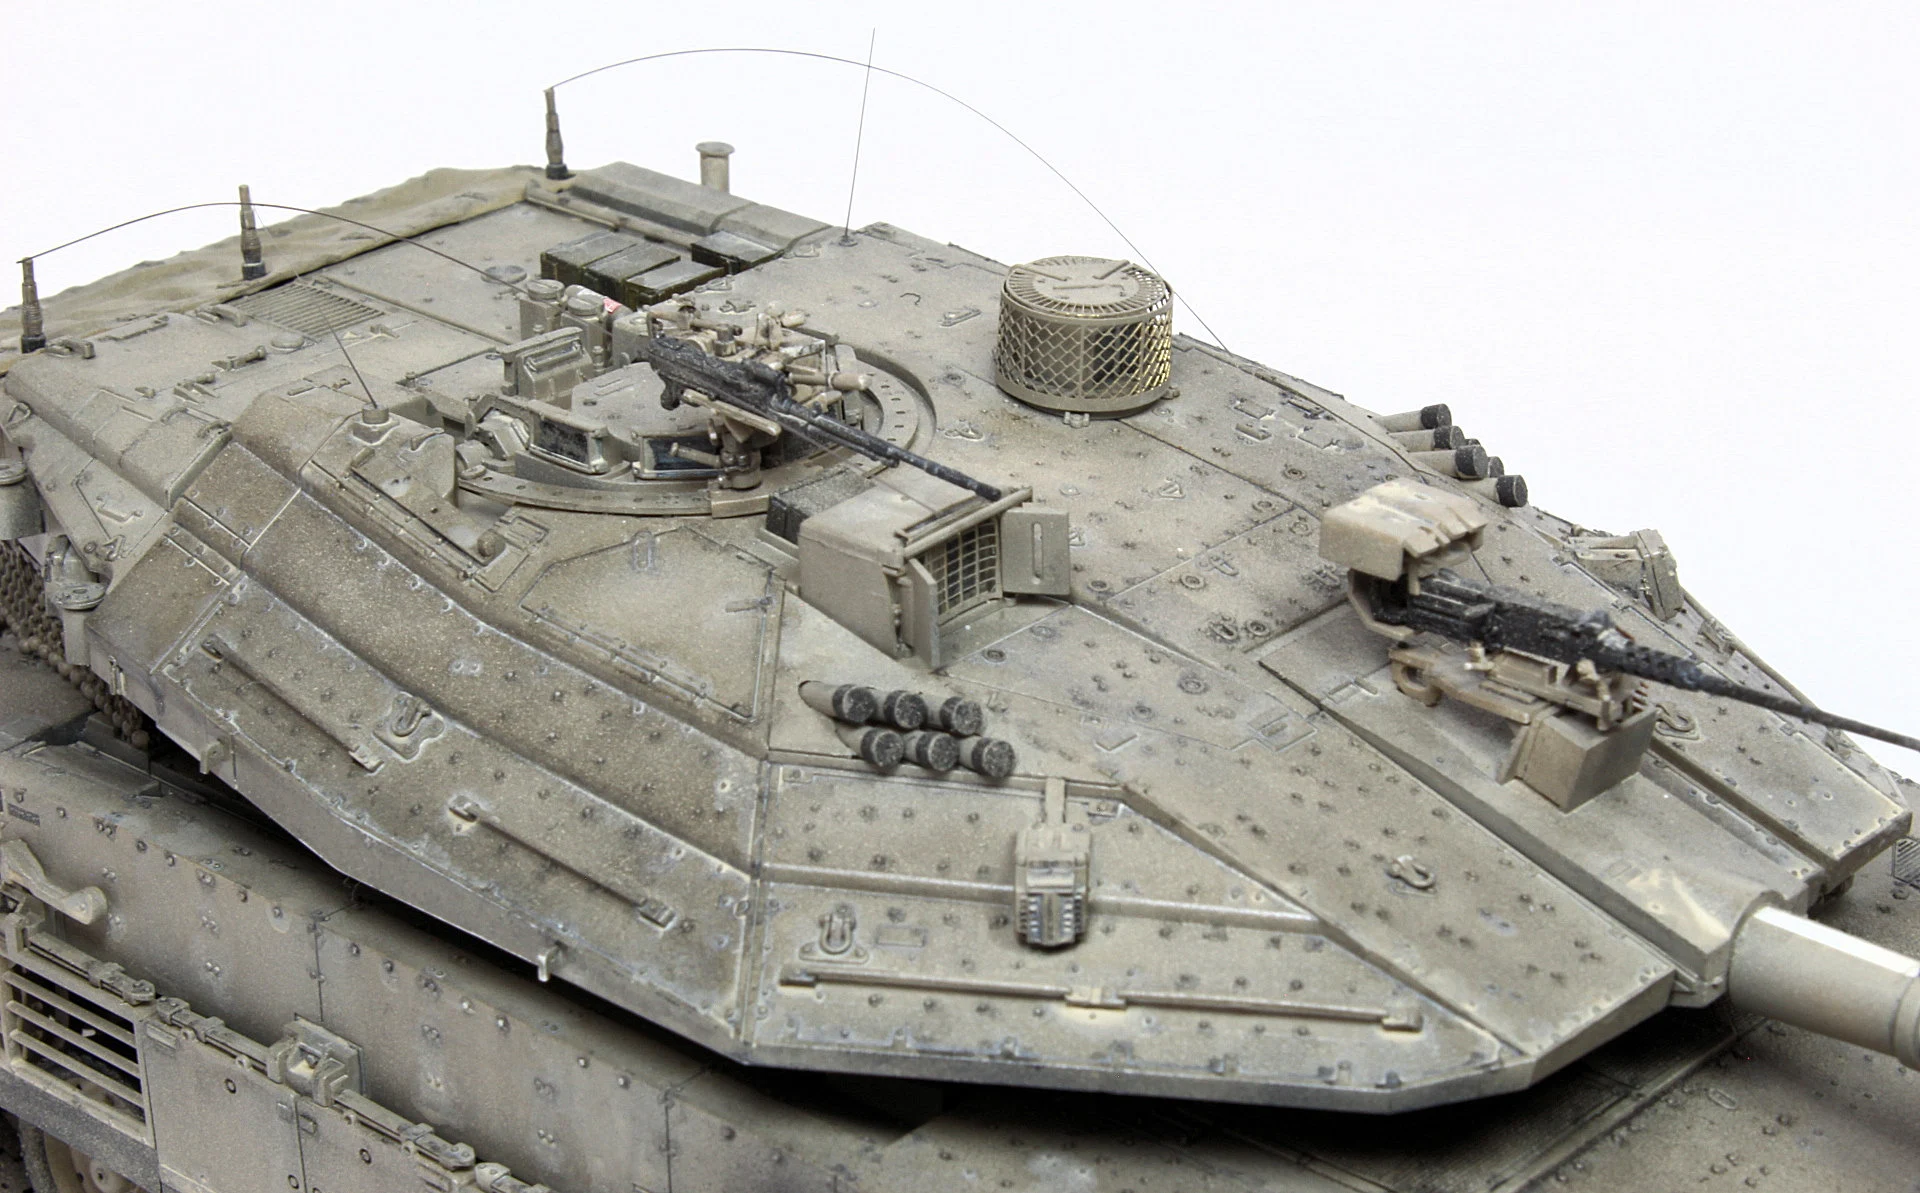
The upper hull comes next and is a fairly straight forward affair with some very subtle non-slip moulded on the upper surfaces, although I find pictures of Israeli non-slip to be a bit coarser so you may still wish to create your own. Take note of the PE mesh for the headlights and exhaust which are for the B set of markings and very easily missed in the instructions because they are only denoted by a B. I know this because I missed it myself... Similarly, for the last panel of the sideskirts, where the instructions will tell you there is an option of covered or uncovered slats, but the illustrated schemes show the uncovered slats are for the first marking option, and the covered ones are for the second. A length of wire and chain are also provided, and there is more than enough chain provided for the tank itself and the mine roller later on.
The huge turret is also a straight forward affair, and once again PE mesh is provided for the commander’s range finder and panoramic sight for the B set of markings which I once again missed. Also, like the rear hull stowage bins, the rear turret stowage basket has fabric texture moulded in just as well. The Droid Active Protection System is also provided in the kit as an option although it isn’t shown in either schemes. Having used the mesh screens on my tank, I thought it looked a bit vulnerable compared to the other optical devices on the turret so I decided to leave it off.
The Nochri-Kal Mine Roller
The mine roller comes next and all the various arms can be movable with some careful gluing although the instructions don’t mention this. The biggest challenge is trying to attach the lengths of chain for each arm to the rod which goes across. The rod is in plastic with a little frame moulded in for you to click the chain in place, and while I somehow managed to click in the first chain, I snapped the rod trying to do the second. All this is pretty much covered up later on, so I decided to bend a little length of wire and superglue it in place so I could simply hook on the last chain link with just a bit of super glue to hold it in place.
I haven’t really commented on this so far, but the overall fit of the kit is very good, although I was surprised by the amount of flash on a lot of the parts. The amounts of flash are not massive, and any fit issues I came across were fixed by a few swipes with a sanding stick. My biggest complaint about this kit is bits and pieces scattered randomly throughout the sprues resulting in constantly needing to ferret through the kit box looking for the sprue I was after.
Being Israeli armour, there are really no options when it comes to paint schemes and it is just Israeli grey all over so I used Mig’s Sinai Grey 82 and lightened with a few drops of white for the top services. The two decal schemes are basically the same with different Hebrew numerals, but the first scheme features some markings on the gun barrel, and the second scheme has a chevron on the sideskirts. The instructions don’t mention anything about the two variants, but as my experience shows, the first option should be the standard Merkava 4, and the second scheme is for the LIC variant, so in hindsight, I would say the first option is suitable for use with the Droid, and the second option uses the PE mesh, although I wouldn’t say it would be too much of a stretch for either of the marking options to appear with/without the LIC modifications.
I started weathering with a heavily diluted raw umber and black wash all over the model. Adding a bit more black and raw umber into the wash, I then used that mixture as a pin wash to bring out the various details all over the model. I sprayed a light dust colour, focussing mainly on the lower areas of the tank, and the mine roller, and finished off with a dust coloured wash applied to areas where dust might accumulate.
The completed kit in close-up detail...
While the Merkava has lost some of its charm for me, and the box-art doesn’t help with the dainty look of the mine rollers, the Merkava really is one brutal looking tank and the mine roller loses that tiptoed look when the arms are pushed back. This is a great model by Meng, it is not without a bit of work and requires a good amount of clean-up but nothing major. The instructions could do with a bit more information on the markings and specific parts for them, and the parts scattered amongst the sprues are my biggest gripes of the kit, but it builds into a great looking model in the end.
A walk around of the kit from further out...
Highly recommended
Paul Lee
Thanks to Meng for sending this kit to build and review. You can see more info on this kit and others from Meng on the Meng Models Website...


