Build Review Pt. III -Dassault Mirage 2000C
Kitty Hawk
Kit No #KH32020
1/32nd scale
Available from Hobbylink Japan for at this link
Kittyhawk's Facebook Page
Previous parts of this story:
- Build Review Pt. I - Kitty Hawk's 32nd scale Dassault Mirage 2000C
- Build Review Pt. II - Kitty Hawk's 32nd scale Dassault Mirage 2000C - Sealing the fuselage
Today:
Build Review Pt. III - Kitty Hawk's 32nd scale Dassault Mirage 2000C - Wheels, Wings & whatever else can fit in there...
When we last left this build a few weeks ago Gary had sealed the fuselage and was about to add everything else to this deadly delta. Today he finishes construction before the last painting article to come next week.
The first task for the wings is to decide whether you want to show the leading edges slats extended (as designed by KH) or retracted (as commonly seen on parked Mirages). The extended option is the easiest because that's the way that KH has engineered the parts on both the wing and separate slats themselves. I wanted to have the slats retracted into the wing and so a little surgery was needed. The first step was to thin the slat so that a clean fit could be achieved when mated with the wing. Once this was glued in place, I needed to fabricate replacement parts for the activation struts shown in the closed position. To ensure all the plastic inserts were exactly the same size I used my RP Toolz cutter.
I've only recently purchased this cutter as for a long time I had the Northwest Line "Chopper". The RP Toolz cutter is a precision tool with all-metal construction and can accurately cut through quite a thick styrene with ease.
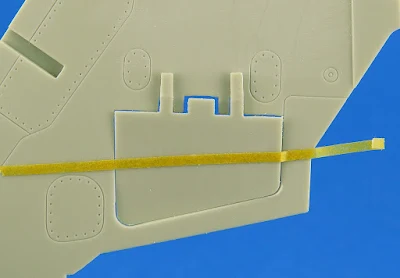
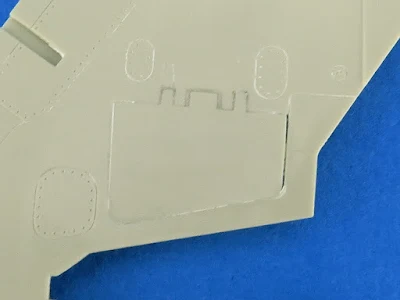
Much like with the slats you need to decide how you want the airbrakes (wing top and bottom) to be displayed. Once again, the default for the KH kit is to have them open, which is not normal for a parked aircraft. I did a quick test fit of the kit parts and found quite large gaps which would need to handled once they were glued shut. For filler, I used Super Glue + Talc powder as I originally planned to re-scribe the shape of the airbrake using a custom template.
After doing some testing with making a custom scribing template I realised that I could instead cut a new airbrake using my Silhouette Portrait from 0.125mm (5thou) sheet. Plastic this thin is about the thickness of paper and you need to be very light handed with any glue or it will deform or pit. Once the glue was dry, I further thinned the brake by sanding lightly as I did not want it to be obviously sitting on top of the wing.
The fit of the wings to the fuselage was quite good. About the only gap I had to deal with was along the upper join, where the fillet stood a little proud of the fuselage. An easy fix for this type of gap is to use Milliput which can be pushed into the gap with a toothpick and then smoothed off with a damp cotton bud until smooth.
Once dry you can go back and lightly scribe the Milliput to re-create a sharp panel line.
The main gear doors (and in fact the nose gear door) are normally closed on a powered down Mirage 2000. They are only opened when the gear is cycled after takeoff or for landing. The fit of the main gear clamshell doors was a bit rough, needing some plasticard strips along the outer edges to close up the gaps.
The main gear on the Mirage 2000 is very sturdy but not overly complicated in design. Several hydraulic cables can be found running the full length of the gear to operate the anti-skid braking system on the wheel hub.
Whilst the kit plastic wheels are quite passable, I happened to have access to a set of the ResKit replacement wheels designed for the KittyHawk Mirage kits. These are a substantial upgrade in terms of detailing especially around the wheel hub, sidewall detailing and the inclusion of tread pattern.
I expected the ResKit parts to be a drop fit onto the kit axles but alas this was not the case. Because of the corrected (thicker) inner hub detail provided by ResKit the wheel sat further out from the strut than the kit parts. To remedy this, I needed to fashion a new axle from Evergreen round rod which would allow the ResKit wheel to sit closer to the gear strut.
With the new wheels fitted I was now able to cable up the main strut using some "elastic string". This is a new material I had not used before and it's typically used for crafting and is readily available on eBay in assorted sizes. I used 0.5mm string here and I really liked that it bent very realistically and could be firmly attached with normal superglue.
The main gear on the Mirage 2000 sits at a noticeable angle when the wheel is perfectly vertical. The outer main door is attached to the main strut and closes with the gear itself. Notice how the door also sits vertically in line with the wheel rather than the angled leg. The main retraction strut is quite large and is hinged where it attaches to the leg and the fuselage inside the gear bay.
Kitty Hawk has done a respectable job of replicating the main gear angles and placement of the retraction strut. The locating hole for the main leg is not what I would call a positive fit and allows the leg to move around a bit too much for my liking. Make sure you give yourself enough time to align the main gear properly when committing to glue. For this, I like to use 5-minute two-part epoxy glue as it has a long curing time and is one of the strongest glues you can use on a model.
Primary armaments of the Mirage 2000C in the CAP (Combat Air Patrol) role were the Matra Super 530 medium-range semi-active radar-guided air to air missile (AAM) on the inboard wing pylons and the Matra Magic short-range infrared-seeking AAM on the outboard wing pylons. The Mirage 2000C could also carry air-to-ground stores, such as iron bombs, cluster bombs, or Matra 68-millimetre rocket pods, in its secondary strike role. It had no smart munitions capability, though it could carry laser-guided bombs (LGBs) if another aircraft or ground forces provide designation.
Kitty Hawk provides a comprehensive set of pylons and weapons in the kit. As I wanted to replicate the loadout used for CAP missions during Operation Daguet in 1991 I selected the appropriate pylons for the Magic-2, Super 530D's and the centreline fuel tank. As a general observation, I found the shape of both the weapons and pylons to be pretty good (based only on photos I could find to compare with). A couple of easy tweaks I carried out involved corrections to the pylons for the Super 530's and the centreline tank as follows:
I have learnt over the years that most model manufacturers fail to provide adequate mounting points for the pylons to the wings and weapons to the pylons. These days I routinely add my own pins, from either brass or in this case plastic rod. This makes it easier when I come to the end of the build (and my supply of patience has long run out) to have the stores line up properly and attach securely.
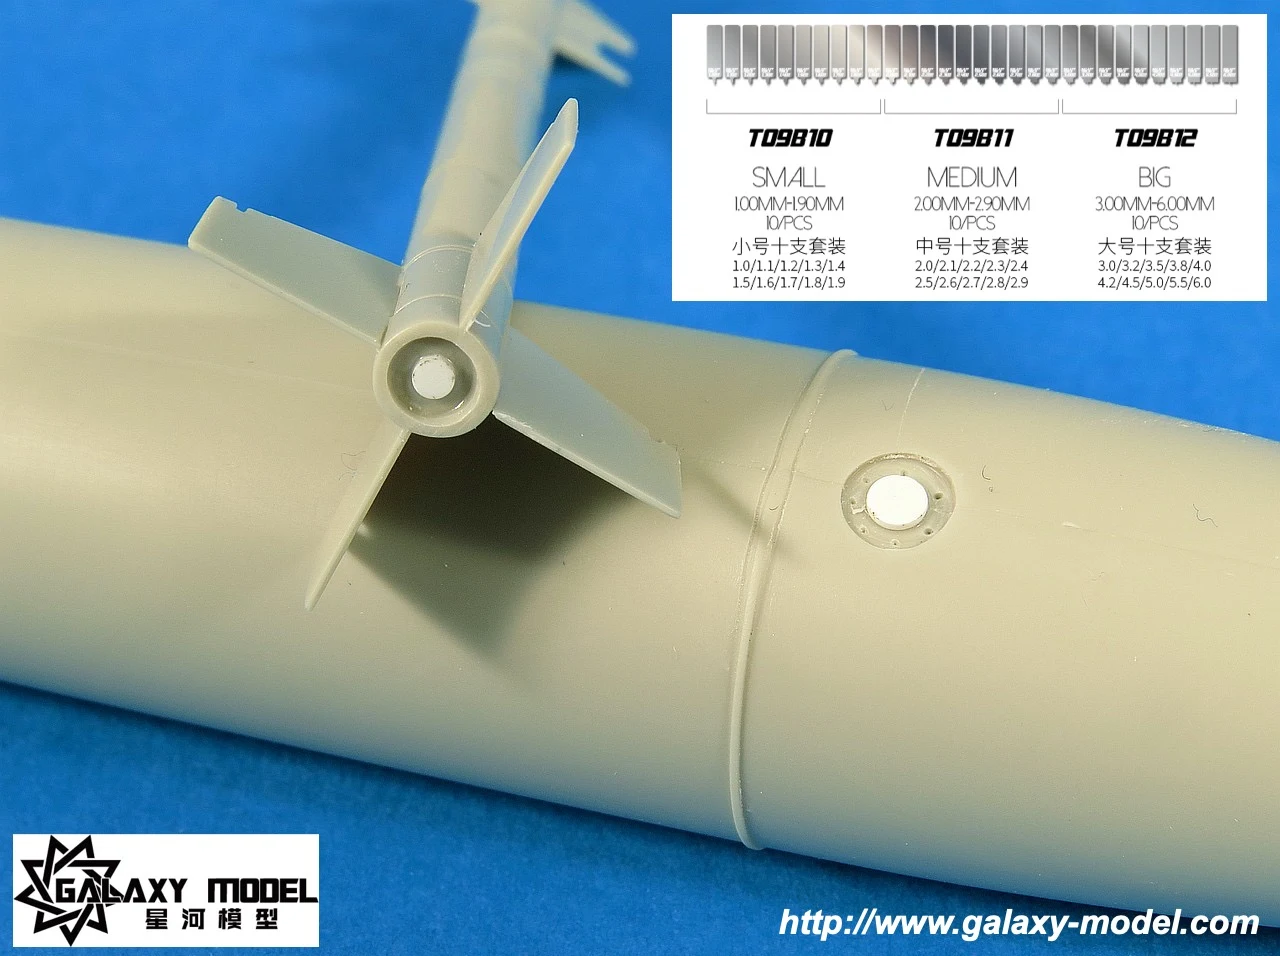
One area that most kit weapons fail to cater for is the engine exhaust at the rear. For both the Magic and Super 530 missiles Kitty Hawk has just left the back end of the body flat. A useful tool for helping to hollow out (not drill though) such 'flat bottomed holes' is available from Galaxy Model. I was able to use a couple of the available sizes (ranging from 1.0mm to 6.0mm in 0.5mm increments) to help me add a simple recessed filler cap to the tank and a similar cut-out for the rear of the Magic-2.
Using the Galaxy tools is very simple as they behave much like a drill. I did a couple of test cuts on a scrap part to get a feel for the right amount of pressure needed to get the flat blade to cut. The main trick is to keep the blade and part aligned so you get a straight cut.
Happy with the result on the drop tank I used the tool again (this time with a 3mm blade) to hollow out the rear of the Magic-2 body. For this, I drilled a small pilot hole as I wanted to make sure the blade was dead centre before applying pressure.
The result is quite convincing and adds a little more realism to the kit parts.
With construction mostly complete it was time to begin masking in preparation for paint. A quick tip for masking openings like wheel wells is to use some soft packing foam (the kind that Eduard puts in their Brassin sets works well). I find cutting the foam a little larger than the opening is best as you can then squeeze it into place and it holds without any tape.
We are on the home run now - the finished aircraft is finished already in a super desert scheme that suits this kit so much.A hint of what is coming...
Here is the link to the fourth and final part of this article...
Gary Wickham
Thanks to Kittyhawk for sending this kit to Gary for him to build and to review. You can see more about Kittyhawk's models on their Facebook page and right here on the news...
If you like Gary's work then please do go to his website www.Scalespot.com for a whole lot more of that...


