


Andy Moore has already reviewed both of MiniArt's 35th scale new Austin Armoured cars, the 3rd Series & 1918 Pattern kits in 35th scale. Today he shows us his build process as he makes them both in a twin-build review showing the differences between them in his excellent "how-too".


Twin build review: Austin Armoured Car 3rd Series & 1918 Pattern
Manufacturer – MiniArt
Kit Numbers – #39005 & #39009
Scale - 1/35th
Price - £36 – US$48 - €41 from Hobbylink Japan
Product Link on the MiniArt Website

Previous parts of this story:
Today:
Twin-build review: Miniart's 35th scale Austin Armoured Car 3rd Series & 1918 Pattern kits
I'll be building these two Austin armoured cars side-by-side for this review but, as the bulk of the construction is the same for each kit, I'll be concentrating on the 3rd Series build, while pointing out any construction differences for the 1918 pattern along the way. The first thing to consider with either kit is how much of the interior you want to be on show, as that affects how you approach the build. For the 3rd Series, I'll be posing all the hatches and doors open, and that means a lot of pre-painting of sub-assemblies, starting with the engine.

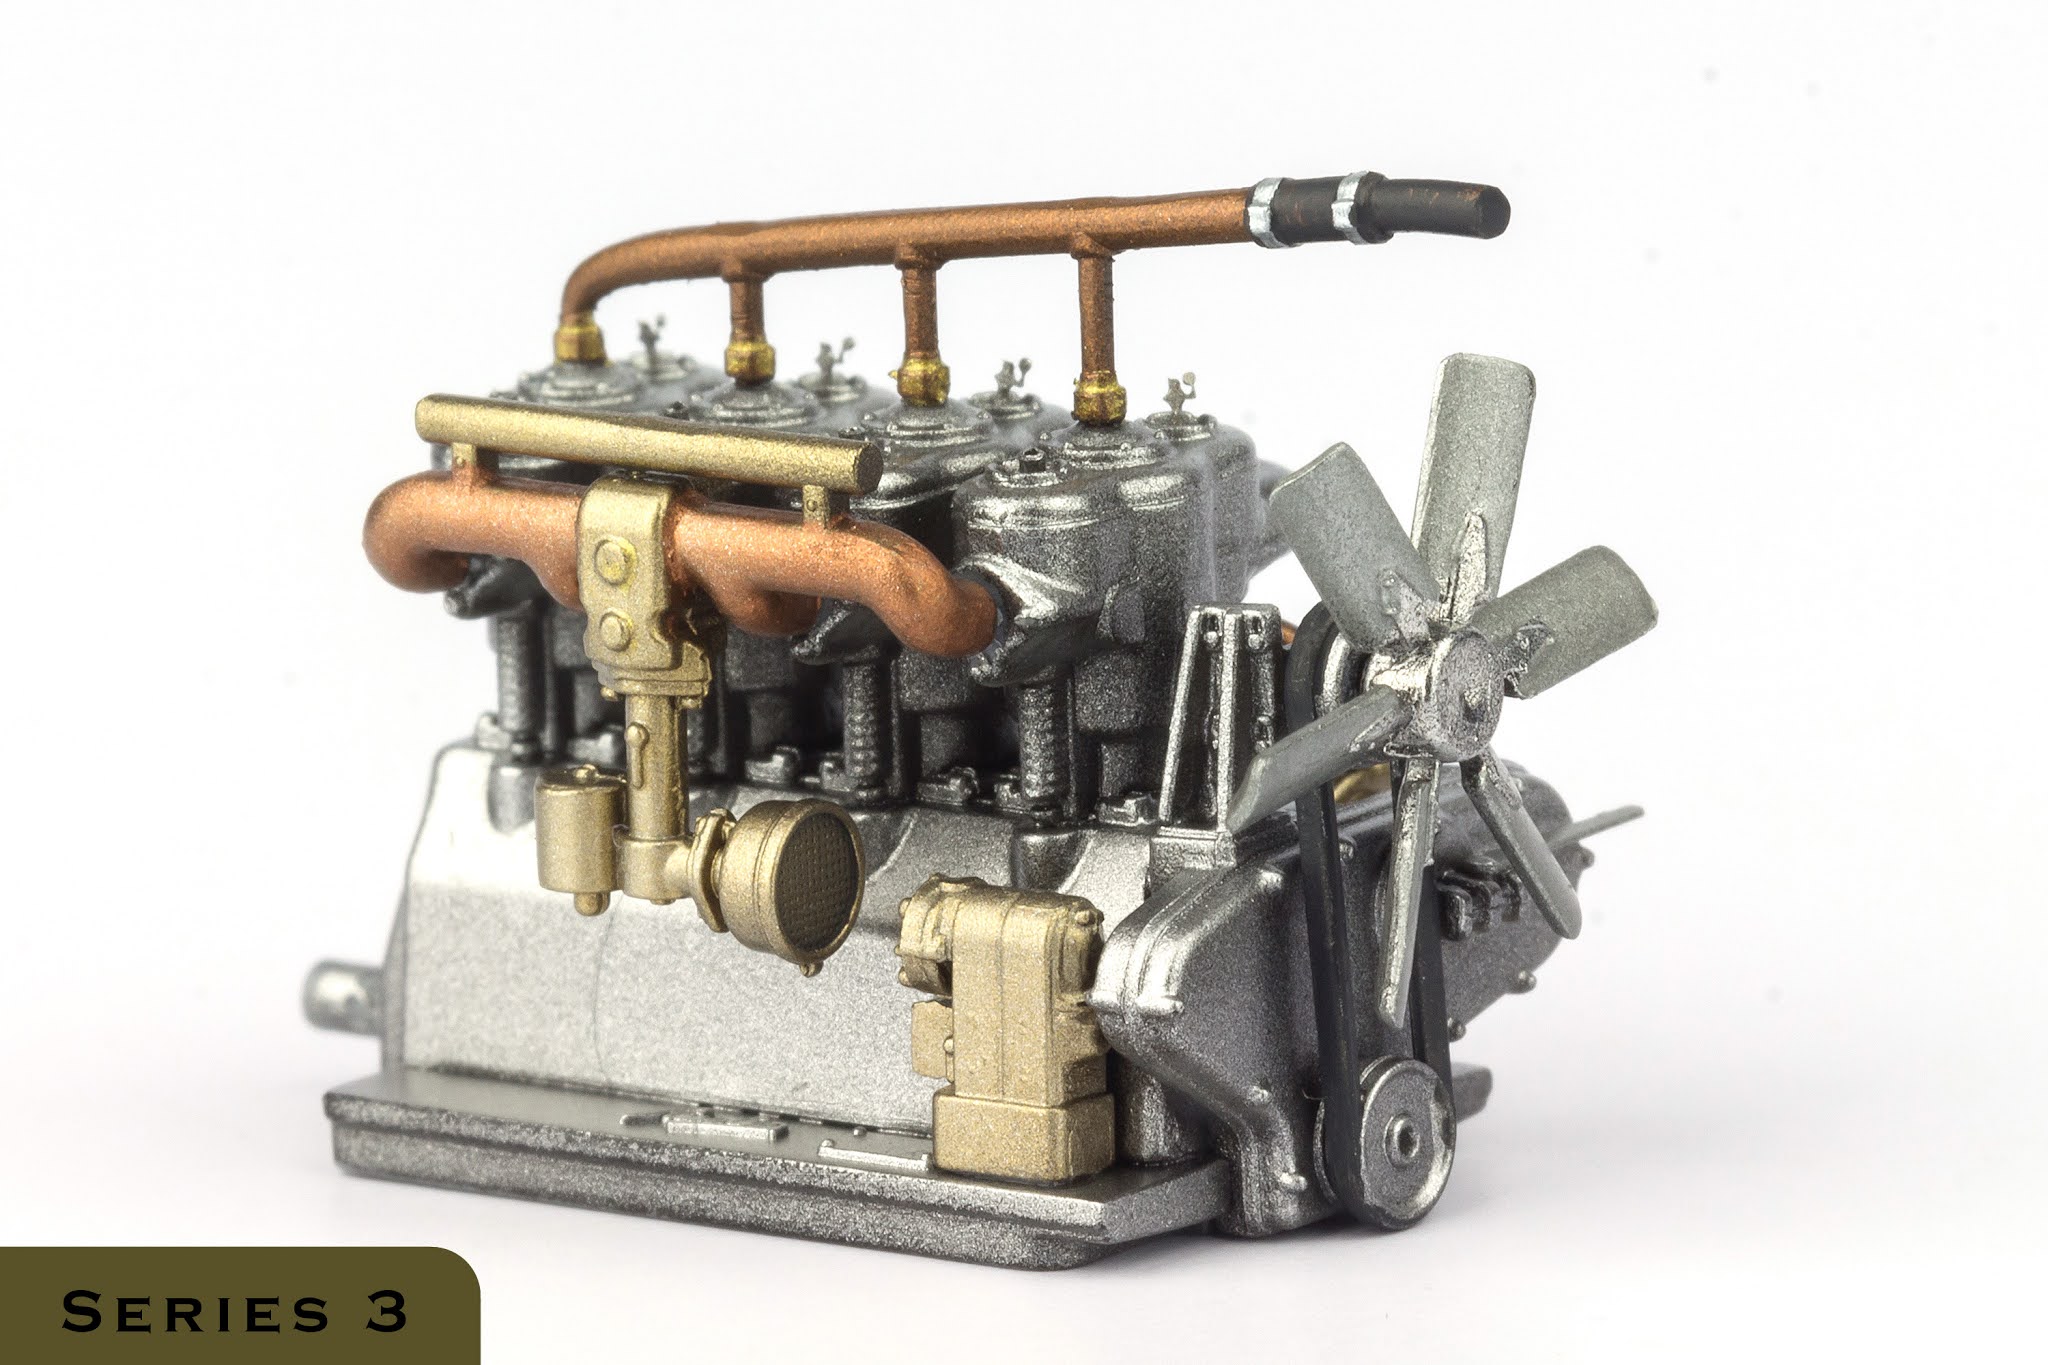
The engine is a very detailed build, possibly too detailed for what will be visible. There are some minuscule PE parts to add which make the assembly very delicate and, to be honest, you could easily leave them off as they're almost impossible to see at the end. The instructions tell you to add the engine block to the sump and support frame. I chose to leave them separate, as the sump and frame will be better attached to the chassis for painting, with the engine dropped into place afterwards.

The colour call-outs for the engine are aluminium for the block and copper for the smaller components. In fact, most of those components should be brass, with just the pipework in copper. I used Alclad Aluminium for the main block, Pale Gold (the closest thing to brass I had available) for the smaller parts, and AK Copper from their Xtreme Metal line for the pipework.

All pieced together, the engine looks very nice but, as mentioned above, is quite delicate. If you want to take the detail further, the instructions provide a wiring diagram (although you'll need to supply your own wire), but I didn't bother here as most of the wiring would be obscured behind the pipework, and also looked very fiddly to get in place. The paintwork looks a little too shiny and new here, but it'll get toned down later with a few washes and filters.
The chassis is next, and this is quite an involved build, spread over 13 steps and using quite a few tiny parts. MiniArt has supplied the control linkages in styrene and these are very delicate and hard to clean up due to the numerous sprue gates. The instructions do, however, offer an alternative solution by way of replacing the styrene rods with 0.3mm wire. You'll need to supply the wire yourself, although MiniArt has provided photo-etched brackets to complete the linkages. There is, in fact, a third option though, which is to leave the parts off altogether, which is the approach I took with both builds. For the most part, the linkage rods are tucked inside the chassis rails, and are all but invisible on the finished build.


There are a couple of linkages that do need adding though, as these connect to the rear brakes, and are visible below the chassis. For some reason, MiniArt didn't include these as styrene parts, and the instructions simply tell you to make them from wire. I chose to use a thin styrene rod instead, as I could get a stronger glue to join the kit parts.

The last parts to add to the chassis before painting were the front fenders. These are very nicely done mouldings but, again, fragility is the fly in the ointment here. The fenders are held in place by two tiny attachment points – one is a small tab moulded to the front edge of the fender, which I accidentally cut off thinking it was a sprue gate which, to be fair, it is. That's to say, there's a sprue gate that is attached to the tab with no clear distinction were the gate ends and the part begins. My fault for not checking the illustration in the instructions more thoroughly, but the way it's moulded certainly didn't help. The second attachment point is a small bracket which is glued to the fender, and has a very thin (i.e. very breakable) rod on one end which connects to the side of the chassis. Needless to say, I did break that rod (only on the left fender, fortunately) and had to replace it with some copper wire. Once you finally get them in place though, the fenders are surprisingly robust, despite the delicacy of the connections.

By this point, I was itching to take a break from the fiddly build and get some paint on. Most of the chassis needs finishing in black, with just a few smaller components that need painting in steel. I used a lightened black as the main base coat, with the steel parts touched in by brush afterwards. The fenders and armoured side panels were then sprayed with a 50/50 mix of Gunze C-121 Brown Violet and C-524 Hay. This is a fairly generic green that I'll use as the main base colour for the Series 3.

With the chassis taken care of, I could start on the interior. Despite the kit including a full interior, MiniArt has managed to keep the build complexity to a minimum here, helped by the relatively spartan nature of these armoured cars. The main floor is made up of three pieces which need finishing in the main exterior colour. Before painting, I added some light wood grain texture to the planks by scraping a razor saw blade across the surface. The parts were then sprayed with a light wood colour, followed by a coat of hairspray and finally the green Gunze mix used before. Once the top coat was touch dry, the paint was chipped to leave a worn finish to the wooden planks.

After gluing the engine in position, I set about attaching the floor panels to the chassis, and this turned out to be something of a struggle. The rear floor went down easily enough, but when I added the driving compartment floor and engine firewall, the parts didn't want to line up correctly. In the end, I had to use masking tape to forcibly hold the parts down until the cement had dried.

Even with the tape holding everything in place, I couldn't get the front of the floor to lock into the channel on the firewall, though fortunately non of this shows once the body is in place. I also had to remove the tops of the foot pedals before the floor would slot into place, even though the instructions show the floor sliding under these without any issues. Not a huge problem though, and I simply glued the pedal tops back in place afterwards.

Once the floors are in place, there isn't a whole lot more to add – just the seats, the steering wheels, and a stowage locker in the back. The locker and seat frames were sprayed white, and the seat pads brush painted in a leather brown tone. With those details added, a few oil washes were applied along with some earth coloured pigments and some graphite powder rubbed over the metal areas to add some wear and tear. Unfortunately, the decal sheet doesn't provide any dials for the dashboard, so I sourced some from the spares box. While they may not be entirely accurate to the original vehicle, they do liven up the driving compartment which is important if you're going to have the doors open.


Moving over to the 1918 Pattern build, I took a slightly different approach to the chassis construction. My original plan for this build was to keep all the hatches closed and, as such, I decided to take a few short cuts with the chassis, the principal one being to leave the engine out. Since this build wouldn't be as visually interesting as the fully exposed Series 3, I decided to make one small modification to add a little more character to the finished model. From the box, the front wheels are designed to be mounted in the straight position, but it's actually very easy to convert them to be mounted with some turn. The wheel hubs are separate from the axle, so they simply need to be glued at the desired turn angle. The only part that needs to be modified is the track rod which needs its ends cutting off and attaching to the respective hubs. The rod can then be reattached to connect the two hubs.

For the rest of the chassis, I built it up as with the Series 3, but omitted any details that wouldn't be seen with the closed doors. The floor panels here fitted perfectly unlike the Series 3, probably because I wasn't trying to work with pre-painted parts. In hindsight, I wish I'd taken this approach with both builds, as the subsequent painting stages were no harder with the floor already in place. In fact, as the build went on, temptation got the better of me and I decided to add some of the internal details like the steering columns and foot pedals and have a couple of the rear hatches open, and these proved no harder to install with the floors fitted than if they'd been added beforehand, as per the instructions.

For painting, I again went with a lightened black for the chassis, but for the bodywork areas, I switched to a Service Drab colour, mixed from Tamiya Flat Earth and Khaki, as this would have been the colour applied to the British Army operated 1918 Patten cars. Again, a little bit of chipping was applied to the interior planks, although this time done simply by brush. I kept the weathering fairly minimal, as not much would be seen through the open rear hatch.

With the two chassis completed, we'll wrap up part one of this dual build here. Next time we'll get the bodywork build up and continue with the painting.
Check out the next part of the story at this link.


Andy Moore
Thanks to MiniArt for sending Andy these two kits to review - and to build for you. YOu can find out more about these and their other excellent kits on the MiniArt Website
