


Build review Pt. II: Bronco OV-1A
From ICM Models
Kit Number: #48300
1:48th scale
Price:$45 USD from Hobbylink Japan

Previous part of this story:
Today: PT II: On to the paint & Weathering...
With the kit built, it was time to start the painting and weathering process and to kick it off the undercarriage and gear bays were sprayed white then masked off before spraying the model overall with a black automotive primer from a rattle can
Marking Choice used in this kit:
OV-10A 155416. Marine Observation Squadron 2 (VMO-2), Da Nang, 1969.

Aircraft history:
- New at the factory on May 22, 1968
- HML 267 - Marine Corps Base Camp Pendleton, California - May 24, 1968
- VMO-6 - Quang Tri, Vietnam - January 1, 1969
- Assigned to VMO-2 at Danang Air Base, Vietnam - May 20, 1970 thru June 12, 1971
Let's colour this pony...
Using Mr Hobby Aqueous paints entirely, the undersides were sprayed first, using a base coat of H332 Light Aircraft Grey. Instead of a solid coat of paint, it was done in a patchy finish with a follow up coat of H311 FS36622 Grey sprayed in the same way to give some tonal difference. The lighter grey was then lightened again with H11 White and this mixture was applied in between the panel lines.

The darker grey H332 applied. Ignore the fuel tank as this was sprayed with Tamiya TS-12 later. H331 Grey F36622 was sprayed next, then lightened further with H11 White. I said - ignore the fuel tank!

H405 Olive Green was sprayed first.

H340 was next and further lightened with H10 for the final coat.


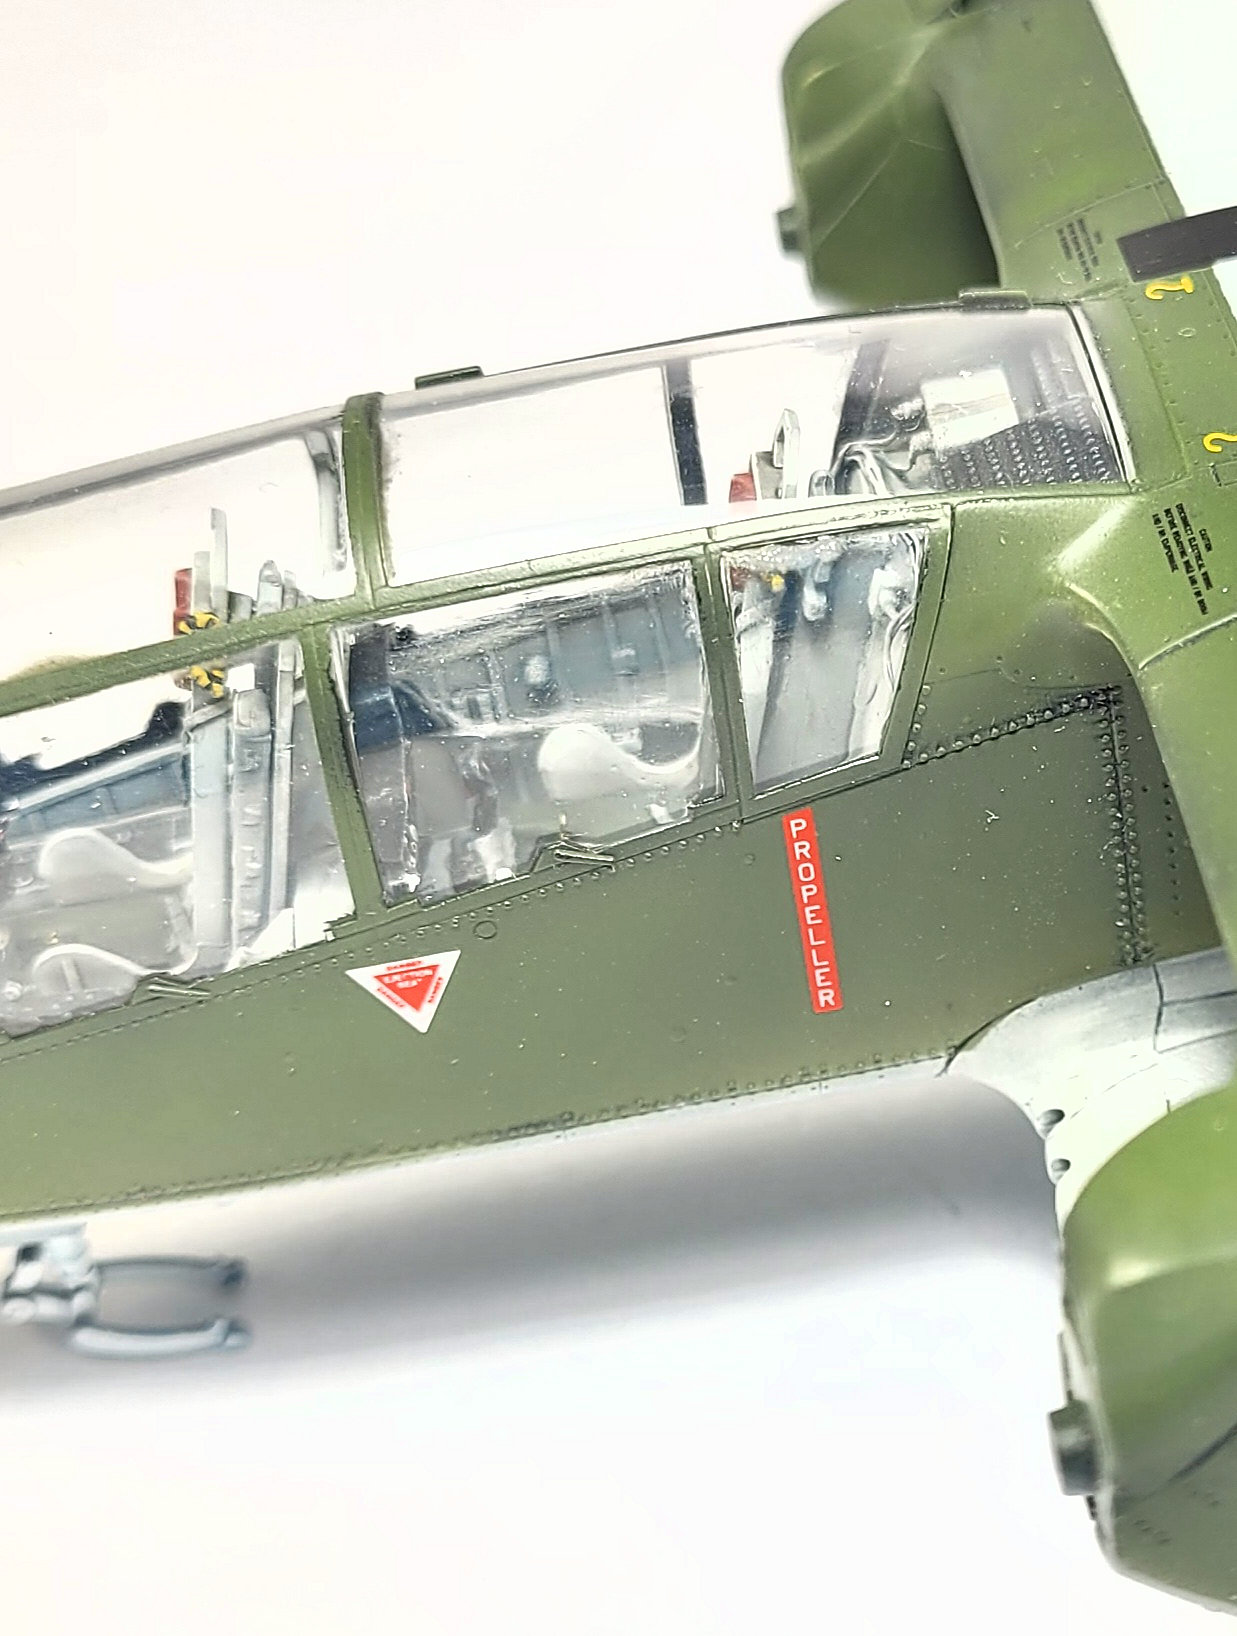
This particular colour scheme also had a red nose, so this was masked and sprayed at this point. With the final colours on, the model was given an overall coat of Tamiya X-22 Clear and by working in sections and misting on Mr Hobby Self Levelling Thinners straight after spraying the Tamiya Clear, a good shiny finish was achieved.


Keeping the decal on the backing sheet, especially a large one like this helped a lot with locating them in place.
The decals bedded down very well especially with the help of a decal setting solution;

Any air bubbles were popped with a pin and decal solution re-applied until they disappeared. After letting the decals settle down for a day or so, the model was sprayed with X-22 Clear to seal them in, then the weathering could start.

Any excess was wiped away with a flat brush dipped in white spirit (enamel thinners). The panel lines got a similar treatment but with Paynes Grey oil paint brushed into them, the excess being wiped away using kitchen towel.

Various other stains were added using different shades of oil paint then the model was set aside for a couple days before it received a final coat of Tamiya LP-24 Semi Gloss Clear. While it was drying, I painted and gloss varnished the propellers as I was curious to see how the red and white propeller tip warning decals would work so I applied a set to one of the blades.

Not bad, but as I suspected some touching up would be required on the propeller edges so the decals were removed. Instead, I masked off the propellers and sprayed the tips white then masked them off using thin strips of tape (possibly 2mm wide), after which the red was applied.
Much better!


To say the air turned blue was an understatement as to all intents and purposes the model was completely ruined. One solution was to ask ICM for a new canopy but that would have taken a couple of weeks to arrive, so I masked off the canopy framing around the affected areas and began a clean up/rescue operation.


The finished article...
That was an enjoyable project and great to finally have a decent 1/48 OV-10 after all this time. Things I would do differently on the next one (and yes there will be another) would be to glue the canopy together first THEN mask it off. I would have flattened the tyres a bit but due to the soft plastic I would have ended up destroying the undercarriage so the next one will see the kit supplied gear legs replaced with metal after-market items.
.JPG)
.JPG)
.JPG)
.jpg)
.JPG)

.jpg)
Andy King.
Previous part of this story:
If you want to know more about this kit, check out the ICM Models Website for their distributors worldwide.
We found this kit for $45 USD from Hobbylink Japan

You can see more of Andy's work at his web page: Andy King's Model Blog