
.JPG)
.jpg)
In-Boxed: le.SPW Sd.Kfz.250/1 Ausf.B (neu)
From Das Werk
Kit No: DW35029
1/35th scale
Photo-etch parts included
Decals for four variants provided inside the box
.JPG)
The Subject: le.SPW Sd.Kfz.250/1 Ausf.B (neu)
The Sd.Kfz. 250 (Sonderkraftfahrzeug 250; 'special motor vehicle') was a light armoured half-track, very similar in appearance to the larger Hanomag-designed Sd.Kfz. 251, and built by the DEMAG firm, for use by Nazi Germany in World War II. Most variants were open-topped and had a single access door in the rear.
Leichter Schutzenpanzer Sd.Kfz.250/1 number 102
Eastern Front, 1944.

The Sd.Kfz 250 was adopted in 1939 to supplement the standard half-track. Production delays meant that the first vehicle did not appear until mid-1941.
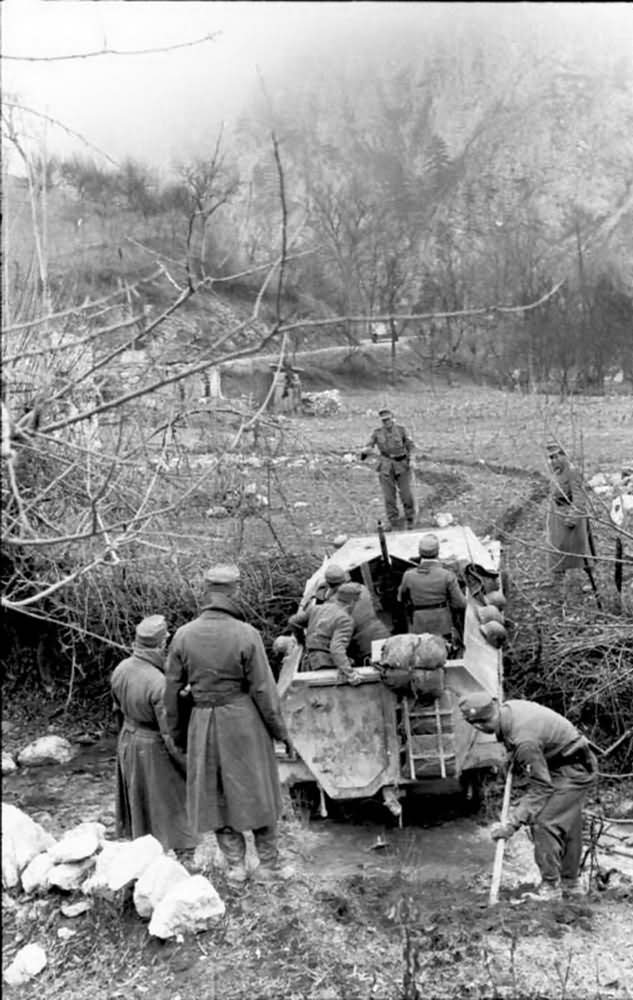
Sd.Kfz 250 (neu) light armoured halftracks in the Balkans in 1943

The le.SPW Sd.Kfz.250/1 Ausf.B (neu) weighed in at just over 5 tons, and it was manufactured by Demag from the end of June 1943 for the German Wehrmacht of World War Two. The "Neu" had room for six soldiers and was equipped with two MG 34s with 2010 rounds, was later produced by a total of four different companies.
The SdKfz 250 ausf B neu Balkans 1943
The Kit: le.SPW Sd.Kfz.250/1 Ausf.B (neu) in 35th scale from Das Werk...
A large, lovely box art covers Das Werk's latest kit of the le.SPW Sd.Kfz.250/1 Ausf.B (neu) in 35th scale. Illustrated by the talented Felipe Rodna, one can see straight away that they want this kit to stand out from the Dragon plastic that it is based on.
.JPG)
Das Werk say that they have produced this kit in conjunction with a "well-known model manufacturer" - which means in this case the Dragon kit. Originally tooled in 1998, Dragon's Sd.Kfz. 250/1 (neu) kit in 1/35th scale was updated with new parts in 2007. This "neu" kit from Das Werk comes at a good time, as these models original kits from Dragon are getting harder to find and more expensive nowadays.
CAD drawings of the kit were featured before launch...
.jpg)
Although you could write this kit off as just a re-box. We have been looking, and it is a little more than that to us. We thought we'd show you the sprues, metal, instructions, colours and decals, so we could work out the merits of the kit.
Inside the box:
Inside this big box, I was a little surprised to find some space! Many models nowadays cramming everything, including the kitchen sink in to get more units on shelves and more units shipped. Inside I found a full coloured instruction booklet, a small sheet of photo etch, decals for four half tracks, and ten sprues of light grey plastic with one sprue of clear plastic for transparencies. The lower hull is one part of plastic, while the tracks are supplied as separate links in two parts.
.JPG)
Come on, let's read the instructions for a change:
Printed in twelve A4 pages in colour and weathered as if it was a period document from WWII. Das Werk has gone to great lengths to start the differentiation of their kit by devising this booklet. I can see when I look at the original from the Dragon models what has been changed and what's been retained in the layout and twenty-two construction steps here. A few steps have been moved around and changed (and logically so as I will explain). That excellent box art and colour call outs in AMMO by Mig Jimenez shades make sense as they provided the profiles. The instructions were pretty devoid of individual painting instructions for internal parts, but where they are, they are provided in a square box with letters in them, so be on the lookout! Four languages explain the hazards & action key of the kit to come. The drawings and the action symbols have remained the same in these instructions.
.JPG)
A sprue map showing the parts we don't need, not too many, which is nice. Step one and two of the lower hull construction and suspension arms. The multi-part wheels and drive sprockets go together in steps three and four. Step five sees thirty-eight tracks go together on either side. Each track made of two parts.
.JPG)
Step six has you putting the front suspension/ steering rack together in a fashion that you can't turn the wheels, unfortunately. Step seven has those excellent new version of the multi-part sandwich-like tyres. These are great. Step nine on the Dragon kit has you making the engine now, which has been sensibly moved to the end of the instructions here i this case for those who will omit it completely, and logically for many builders. Step eight and step nine on the Das Werk kit have you assembling the seat, and then the controls for the driver together. Step ten also has more seats and a rear compartment to be made up pretty simply of plastic. Step Eleven has the modeller making more internal parts, including the steering column, along with the very intricate photo-etch box that has its own bracket around it. Most of the photo-etch of the kit is in this boxes' construction. The many parts of the internal stowage of extra weapons and equipment are secured to the side of the interior of the halftrack in step thirteen.
.JPG)
The two halves of the upper hull secure to the hull in step fourteen, with step fifteen being the three sub-assemblies of tools and driving light that attach to the front fenders. Thos fenders, the side tool box/ stowage bins and rear door are secured next in step sixteen. You are given the option to open or close these bins and doors here. Several small steps decorate the underside of the hull roof in steps seventeen through eighteen, while the option to open or close the front engine compartment, and whether you want to build the engine is shown to the modeller in steps nineteen and twenty. Lastly, the top deck of the hull , MG 34 and mount and last details are assembled before you are finished in step twenty two.
.JPG)
All in all, I like the way these instructions are laid out. They are more logical than the donor kit's instructions, even if they are very similar. The lack of alternative colour codes and some internal colour tips may frustrate some modellers.
Personally, I think the way this whole booklet looks adds to the different (can I say cool?) feel of the kit that started with the artwork.
We will look at the four colour choices at the end of the review - desert if you will...
A word on the plastic:
A word on the moulding of this kit that is common to all of the plastic parts. Marked clearly with the "dragon" logo on the tabs, the sprues show several signs of reworking of the sprues, probably done in 2007 when the kit was retooled. One might think after a while a mould might suffer, and maybe mould seams might creep into the kit. I investigated many of the parts that I know are always problematic - things like leaf springs. Although not perfect, there is only the slightest of seams on this. The kit was also devoid of great big ejector pin, sink marks or excess flash. A great start so far.
.JPG)
Sprue A:
Containing the bottom of the hull, drive sprockets and lower side parts of the hull that will not be used in this kit, the rest of the parts include the textured cab floor, leaf suspension and steering components for the front wheels, steering column and some tools and tow hooks.
.JPG)
.JPG)
Sprue C: Contains the roof of the lightly armoured hull, the seats, the internal driver's controls and dashboard. The guard for the MG-42 (or MG-34 if you choose) is also here on this sprue.
.JPG)
.JPG)
In a sweep of some of the other parts in close up, of note and catching my eye straight away is the nicely textured sagging leather look of the bench seat. The clasps on the container is also easy to pick out.
.JPG)
.JPG)
.JPG)
Most of these parts are used, with the two large lower parts of the flared hull dominating. the two tool/ stowage bins are here minus the doors that go on separately, opened or closed, while the rear cargo wall of the hull is in the same vein.
.JPG)
.JPG)
.JPG) Sprue G (X2):
Sprue G (X2):
.JPG)
You can see the lower flared parts here on their internal faces. The lugs for the hanging equipment lef to assist the modeller in placement and hold.
.JPG)
Piano hinges enable this kits stowage bins to be posed opened or closed.
.JPG)
Everything that goes around comes around (boom boom) on this sprue which features all of the track wheels and front wheels. Those stowage bin doors are also here.
.JPG) Sharp and flash free the rolling wheels of the track assembly are here, Thy are assembled int he suspension interleaved, so the single part but detailed moulds here are very welcome.
Sharp and flash free the rolling wheels of the track assembly are here, Thy are assembled int he suspension interleaved, so the single part but detailed moulds here are very welcome.
.JPG)
.JPG) In five parts, simply put together dried and clamped, then capillary action with extra thin glue secure these sandwich-style tyres together. The wheel centres are also on this sprue. Those of you will note that again , the "CONTINENTAU" will need some shaving into "CONTINENTAL" if they want to avoid copyright!
In five parts, simply put together dried and clamped, then capillary action with extra thin glue secure these sandwich-style tyres together. The wheel centres are also on this sprue. Those of you will note that again , the "CONTINENTAU" will need some shaving into "CONTINENTAL" if they want to avoid copyright!
.JPG)
.JPG)
These lovely wheels won't be needed if you use the layered tyres and wheels supplied. They look very good though!
.JPG)
Imagine someone from Continental tyres being paid to visit model shows checking for unauthorised use of their name on model tyres, huh?
.JPG)
The correct drive sprockets for this type are included ion the small sprue H, while the hull that was re-worked in 2007 is also here. Moulded as one large part with slide moulding, pretty much the standard nowadays, but everyone likes to mention it. The bolt detail is excellent. However, so I can see why they all mention it.
.JPG)
.JPG)
.JPG)
.JPG) Sprue TG:
Sprue TG:
.JPG)
Sprue X:
Containing all the parts you will need for the Maybach HL42 TRKM 6-cylinder, water-cooled petrol engine apart from wiring and ignition harnesses. Smartly, this is its own sprue, easy to put together, and available to be left out of construction completely if you aren't going to pose the engine compartment open. (Only you will know guys....).
.JPG)
The tracks and pads make up each individual track link. Thirty-eight parts either side. These are TINY, and I should have taken a shot for something you can compare them with for size. It belies the small size of this halftrack compared with some monster kits coming on to the market of recent. The tracks can be posed sagging a little if you like.
.JPG)
Sprue W:
The last real sprue of the real vehicle is sprue H, with the clear vision ports of the kit. These can be posed open to reveal the clear pats a litlle better. The parts themselves are small but very clear..JPG)
A stock sprue of extra tools, bolt cutters, shovels, an engine crank a pick, axe and two fire extinguishers is included. Most of them are spares as they are marked not to be used in this kit. 😌
.JPG)
Four entrenching tools are included on each of the two snipped of part sprues. One of several seems to be thrown in there to populate the inside of the vehicle. We all love spares, right?
.JPG) The other side of this already cut sprue (I don't know why?) features all the weapons a good German soldier could carry. Nice replicas of Mp40's MG-34's, MG-42's, Kar.98 rifles, STG-44 and ammunition clips. A bit more flash on these though...
The other side of this already cut sprue (I don't know why?) features all the weapons a good German soldier could carry. Nice replicas of Mp40's MG-34's, MG-42's, Kar.98 rifles, STG-44 and ammunition clips. A bit more flash on these though...
.JPG) The centre of GA sprue holds much of the soldier's personal gear. Luger & Walther pistols, holsters, Stick grenades, binoculars, map packs, M-40 steel helmets, rolled zeltbahn, bread bags, ammunition pouches and bayonets, water flasks and gas mask cannisters. Sorry, I did not shoot this from the side to see all the detail. Ill show you a but better each one in the build, I promise.
The centre of GA sprue holds much of the soldier's personal gear. Luger & Walther pistols, holsters, Stick grenades, binoculars, map packs, M-40 steel helmets, rolled zeltbahn, bread bags, ammunition pouches and bayonets, water flasks and gas mask cannisters. Sorry, I did not shoot this from the side to see all the detail. Ill show you a but better each one in the build, I promise.
.JPG)
.JPG)
.JPG)
.JPG)
.JPG)
.JPG)
Sprue GA:
GA includes three mini-sprues cut up from one larger sprue that holds tools, weapons and soldier's equipment.
.JPG)
.JPG)
.JPG)
Photo-etch part MA:
Th single sheet of photo-etch is mostly taken up with the single stowage box, its brackets and the leather straps that attach to the box. This all sits inside the crew cab and can be posed as an empty bracket with the box inside loose or the box in the bracket, your choice.Some straps and grilles are also present.
.JPG)
Well, that si all the plastic parts and Photo Etch, now let's look at the new colour schemes included int he kit.
Colours & markings.
There are four colour profiles, each provided in five views on a single A4 size page each so you can replicate the schemes perfectly from the illustrations provided by AMMO. The colours are provided in circled numbers for the camouflage. They relate to the AMMO paint codes on the front page. I noticed the the Nazi symbols were taken off the drawings, which is typical and completely fine considering this is released by a German company (get over it people). The decals are provided however.
The four schemes are:
- Staff vehicle SS group leader Carl Friedrich Graf von Pückler-Burghauss, Bohemia 1945
- Unknown unit, Russia, 1944
.JPG)
- 2nd Panzer Division, France 1944
- 1st SS Panzer Division "LAH"
.JPG)
Decals:
The single decal sheet for this kit includes stencilling and instrument gauge dials. The sheet itself has thin carrier film and the whites look thick enough. Many of you may want to replace the Balkenkreuz with stencils that can be weathered to your heart's content. The "SS" runes are supplied in two parts to comply with German laws. The dials and stencils of the halftrack are provided here, which will please many modellers, myself very much indeed.
.JPG)
And that, my friends, is all there is!
Well, having not actually seen the Dragon kit before, I was impressed. From my research in looking up the previous instructions and the colour and marking choices previously on offer, I was impressed in what this kit added. The box art and theme of the instructions is immersive and puts the modeller in that enthused mode to start the kit.
In fact, I might just do that-stand by for more punishment next week when I build this kit to see how it goes together!
A great kit with lots of potential!
Adam Norenberg
This kit is available from the MBK Website for 42.95 € at this link
You can find out more information on this kit, or where to pre-order it from the Das Werk Website
