Construction / Video review: 1/35th scale ARTPLA Küster from Kaiyodo
Today Clayton takes on the new 1/35th scale Küster in this, his latest dual photo/video construction review. He looks at what comes in the box & builds the kit to see how it really goes together. See what he thought about it in his review...
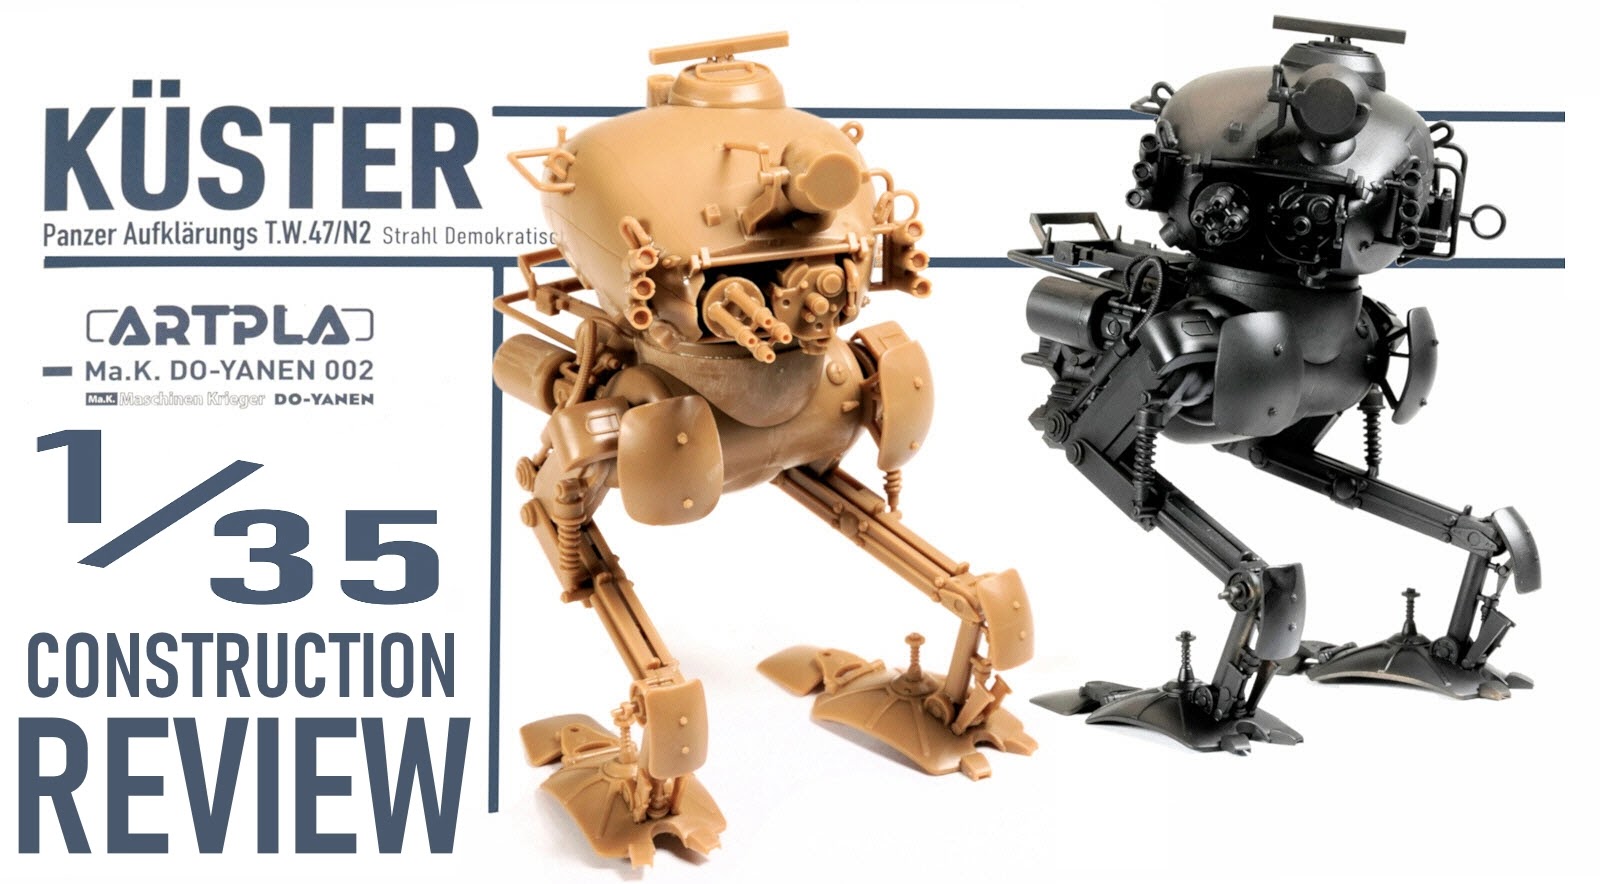
Construction review: ARTPLA Küster (set of 2) by Kaiyodo 1/35th scale (10.5cm high)
I can’t image there’d be too many modellers out there who weren’t aware of the Machinen Kreiger or Ma.K universe. Originally known as SF3D and the brainchild of Japanese Artist and sculptor Kow Yokoyama, the franchise started as a series of illustrated stories based around a 2807, post-apocalyptic landscape and the battles between the warring factions. Soon after the magazine series was released, a series of model kits followed and the legend of the Ma.K universe grew.
What started as an underground, left of centre sci-fi modelling genre in the early 80’s, has now found its way into the vernacular of even the most mainstream modeller. Whether you have built one or not, chances are you’ve considered at one time or another or at least crossed paths with modellers who have. I make no excuse for it; I love the range of kits and I am a sucker for pretty much anything that gets released from this universe.
A peek inside the box...
Whilst 1/35th isn’t a new scale for this range, the favoured scale for the Ma.K purists is generally speaking 1/20th, with the bulk of the armoured suits and machinery coming in that scale. From my observation the 35th scale range was once reserved for vending machines on the streets of Japan and aimed at the junior modeller with simplified construction of these iconic fighting suits for all but a handful of spare change. But as the popularity of the range grew, so did the opportunity to grow the scale and market it to a broader audience. The 35th scale range of kits evolved and ended up getting packaged in a box and offered to the mainstream.
The Küster is a bipedal, autonomous combat vehicle, fighting on the side of the Strahl Democratic Republic (SDR) – essentially the baddies from my basic understanding of the backstory.
I have here with me the latest release kit in the Ma.K universe, the 1/35th scale Küster. The Ma.K universe has a number of different manufactures working with the Machinen Kreiger universe however his release is from Kaiyodo, and is part of their Do-Yanen series of releases.
The kit comes in the usual kraft style packaging that makes the range instantly identifiable to those familiar with the genre.
In this release we not only do we get the one Küster to model, but we get two. Double the fun, right?
The boxing I have includes one of the models in a green styrene and the other in a tan coloured offering.
After looking through the instructions I noticed there was an alternate boxing available using different colour plastic. A Dark Grey and a Sky colour. Identical kit with the only difference being the colour. Clearly aiming the release at the collector needing the tick all the boxes and have all options in their stash. The collecting of these kits has become as big a part of the hobby as the actual building itself.
The instruction booklet caries the theme from the box and is slightly smaller than A4 and is an 8 page fold out style of print.
At first glance the steps look easy enough to follow and are broken into 22 steps for each unit.
The suggested schemes really don’t offer much in the way of colour call outs and are more about the decal positions rather than the schemes. In saying that, the beauty about modelling in this universe is we don’t need to worry about matching reference pictures or following any rules. I am sure there is a group of die-hard Ma.K fans out there choking one their Cheezels, but for most of us the freedom to do whatever we want is a major drawcard with the Machinen Kreiger range of kits.
The parts for each subject are provided across 4 sprues – so 8 sprues in total. 4 I the tan and 4 in the green. And of course, the decal sheet with multiple options to customise your Küster.
The Plastic:
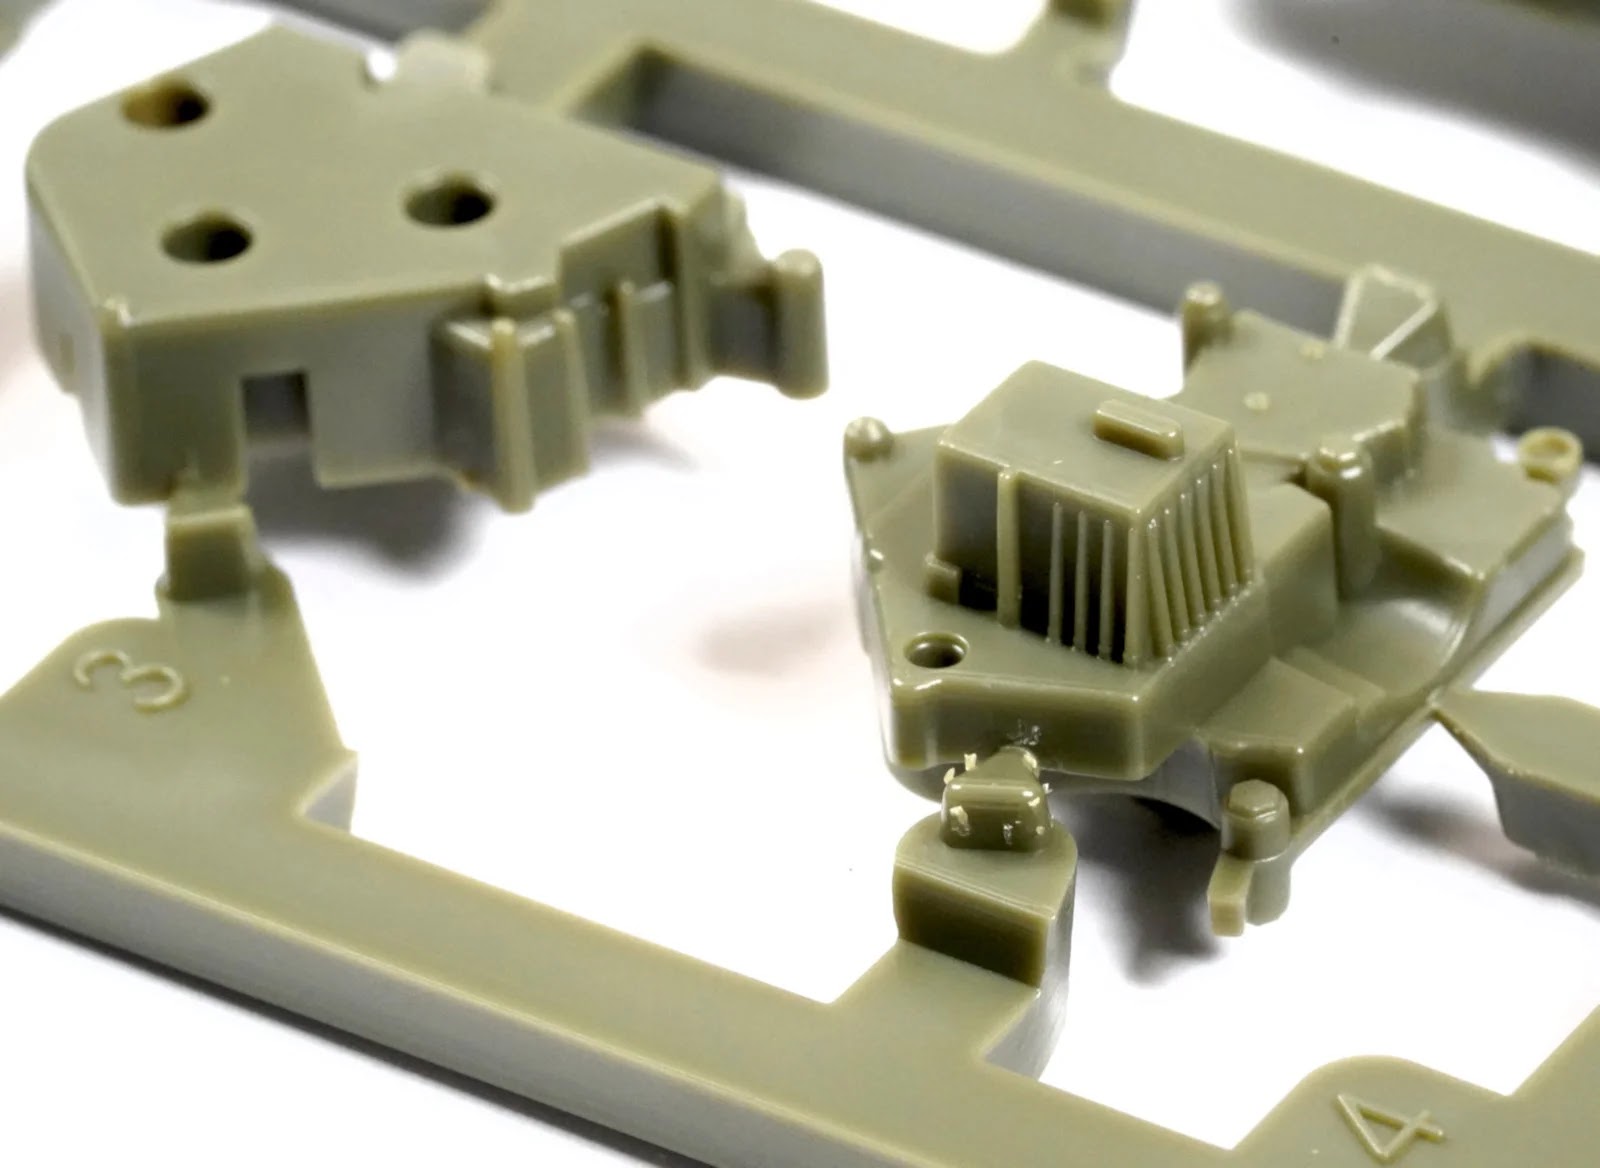
So how do the parts look under the macro lens? At first glance I got the feeling I was looking at overly simplified kit. The first thing I noticed was the spring / shock absorber for one of the legs. This moulded section meant there’d be limited movement in the legs.
Looking at some of the other parts and I still am getting the impression that this is going to throw together in 30 minutes and be more like a toy than a serious model.
The engine block and associated parts under the lens.
The hydraulic hoses were something we have become used to as being supplied as springs or at least silicone parts in other Ma.K kits, but here we get them as a moulded styrene section with a seam line that is going to be extremely difficult to remove. The moulded piece again suggests there will be more or less no movement in the legs.
A couple of other parts under the lens highlights bulky connection points and everything just looks to be toylike.
The bulk of the Küster is its head assembly. This is supplied in two halves.
The top half and bottom half will join with some of the biggest connection points I’ve ever seen. I’d suspected this was a snap kit when I saw those moulds however that isn’t the case.
The moulded pieces for the feet.
And finally, the two colours of the plastic that come in the kit. Identical other than the colour. Feels a big gimmicky to me.
I was going to leave this review at this point and do it as a simple in box / first look but given the perceived simplified construction I thought I’d build one of the walkers up and see how everything fit. It’s safe to say, at this point I was underwhelmed with what I was looking at in the box.
And so, the construction began…
The build: Construction began with several detail parts being fitted around the two halves of the head section. Irregular shapes on the mating surfaces ensure the position of the parts is perfect.
The mini-gun and various sensors that all protrude from the front of the head are prepared. Very simply assembly. Just some time required in cleaning up moulding seam lines.
The weapons, smoke launchers and various grab handles are attached, and the two halves of the head are connected. There is a significant seam where the two halves meet as well as at the rear of the structure. I haven’t filled mine because I’m wanting to move through the build phase as swiftly as I can, however this is something I’ll address when it comes time to paint.
Sub-assemblies of the computer and engine sections are next in line. I glued the parts I had to and left elements like the guard rails dry fit for easy removal at the painting stage.
The joins in the pieces seem to be thoughtfully positioned making a lot of them quite difficult to detect.
The body and the mounting point for the head are removed from the sprues and tidied up for assembly.
The body halves are joined together, and the engine parts are now all connected as well as the leg stabilisers.
I was amazed at just how busy the assemblies looked given their relatively basic look when they were on display by themselves. Adding paint to the equation will also aid the modeller to further creating contrast and interest.
The leg assemblies are next on the agenda. It is a little unfortunate that there is no movement in any of these joints. I was hoping to be able to position the model in a dynamic pose but the lack of movement in these joints is going to make that a difficult proposition.
The legs and head assembly are now attached and ready for primer.
It always amazes me how a coat of primer elevates the look of a model. I’ve primed mine in Mr Surfacer 1500 Black. As mentioned, some of these pieces have been dry fit only for the sake of the review, so I will have to go back and address some seams and gaps, but for now the model was done.
Conclusion Thank goodness I took the time to build one of these kits. The construction (for one of the units) took me around two and a half hours – 3 hours from start to finish which is significantly longer than I was suspecting.
The fit was excellent and extremely user friendly. The mating points on the parts are moulded in irregular shapes meaning that when two parts come together the position is all but guaranteed to be correct. Where things like the engine block are moulded in two pieces, the seams are placed along sections that make them hard to detect. The whole model was a joy to build and the detail and shapes in the parts presented far better than I was expecting.
The model itself was a lot bigger than I was expecting too, which will give the modeller a decent palette to work on and stretch the weathering boundaries with.
The kit is primed for painting & weathering which is to come...
This Ma.K range has become so popular due to the familiarity the shapes and designs. They seem to have got the mix of sci-fi and plausibility just right. The kits offer the modeller a change of scenery and a change of pace and can often be the perfect solution to help us find our mojo. We get the opportunity to test out new techniques or refine old ones without fear of going outside the proverbial lines. We get freedom to modify, freedom to paint and freedom to weather them however we want. Sounds just about perfect, doesn’t it?
As I mentioned earlier, I am so happy I chose to build this and not judge it from the parts in the box. I think sometimes something as silly as the colour of the plastic can have an impact on the impression of the kit.
This isn’t a kit for children, although a child could tackle it with a little help. It is a legitimate part of the Ma.K range and really builds up into a lovely little model. I can’t wait to get some paint on it…its just a matter of finding some time!
Please whitelist our site or turn off the ad blocker when visiting us. Ad revinue helps us continue to bring you the news. Refresh your page after you have done this to continue to the news. Thank you!!

 Construction review: ARTPLA Küster (set of 2)
.webp)
.webp)


.webp)


 The mini-gun and various sensors that all protrude from the front of the head are prepared. Very simply assembly. Just some time required in cleaning up moulding seam lines.
 The weapons, smoke launchers and various grab handles are attached, and the two halves of the head are connected. There is a significant seam where the two halves meet as well as at the rear of the structure. I haven’t filled mine because I’m wanting to move through the build phase as swiftly as I can, however this is something I’ll address when it comes time to paint.
 Sub-assemblies of the computer and engine sections are next in line. I glued the parts I had to and left elements like the guard rails dry fit for easy removal at the painting stage.
  The joins in the pieces seem to be thoughtfully positioned making a lot of them quite difficult to detect.
 The body halves are joined together, and the engine parts are now all connected as well as the leg stabilisers.
  I was amazed at just how busy the assemblies looked given their relatively basic look when they were on display by themselves. Adding paint to the equation will also aid the modeller to further creating contrast and interest.
.webp) The leg assemblies are next on the agenda. It is a little unfortunate that there is no movement in any of these joints. I was hoping to be able to position the model in a dynamic pose but the lack of movement in these joints is going to make that a difficult proposition.
The leg assemblies are next on the agenda. It is a little unfortunate that there is no movement in any of these joints. I was hoping to be able to position the model in a dynamic pose but the lack of movement in these joints is going to make that a difficult proposition.
 It always amazes me how a coat of primer elevates the look of a model. I’ve primed mine in Mr Surfacer 1500 Black. As mentioned, some of these pieces have been dry fit only for the sake of the review, so I will have to go back and address some seams and gaps, but for now the model was done.
 Conclusion


.webp)


