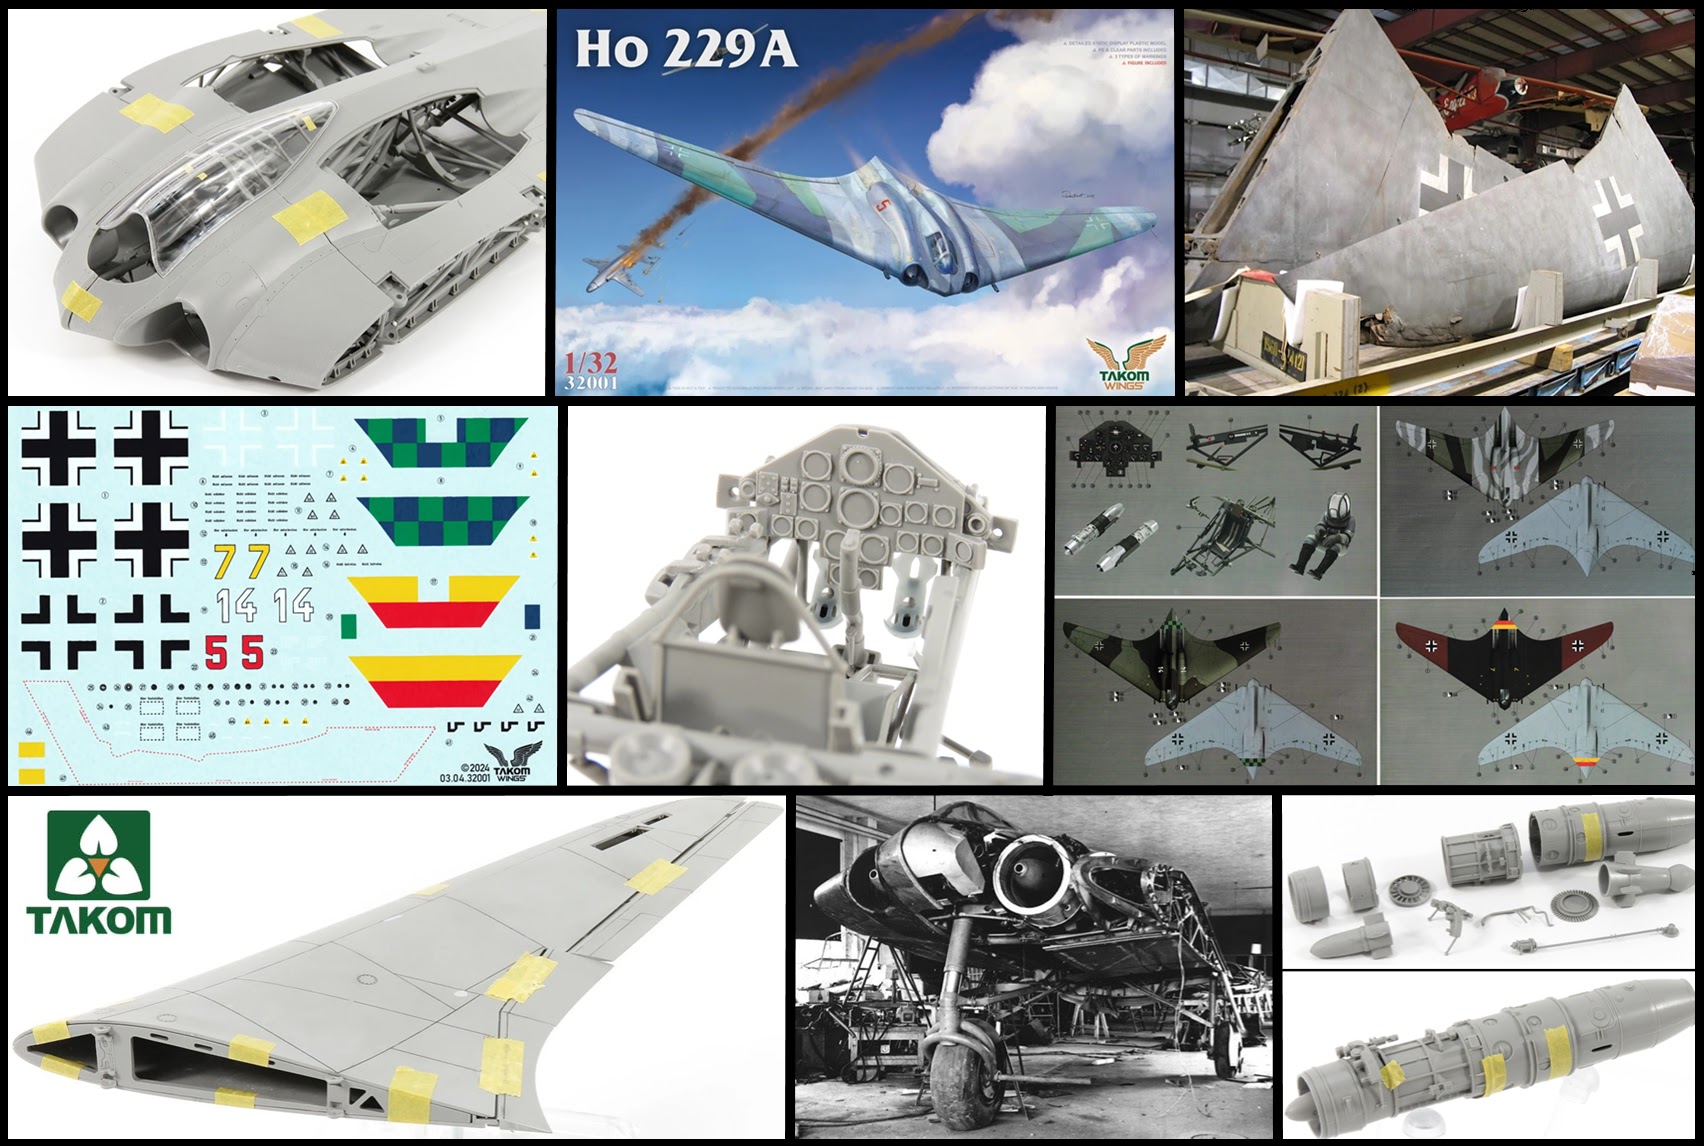
.webp)
Hand's-on review: Ho 229A
From Takom
Kit No. 32001
1/32nd scale
Three marking choices included
Grey injection-moulded plastic + photo-etch parts...
Price: $71USD from Hobbylink Japan


The Horten Ho 229A Flying Wing
The Horten H.IX, RLM designation Ho 229 (or Gotha Go 229 for extensive re-design work done by Gotha to prepare the aircraft for mass production) was a German prototype fighter/bomber initially designed by Reimar and Walter Horten to be built by Gothaer Waggonfabrik late in World War II. It was the first flying wing to be powered by jet engines.


The Takom Ho 229A kit consists of nine neutral grey sprues and one clear sprue, offering a comprehensive set of parts for detailed assembly. The sprue layouts are thoughtfully organized, with critical attachment points engineered in a way that makes part separation and cleanup relatively straightforward and hassle-free. This careful design minimizes the risk of damaging delicate components during removal. I find the Takom plastic itself to be quite pleasant to work with—it strikes a good balance, being neither too brittle nor overly soft, which helps with precise cuts, sanding, and fitting. Overall, the material and layout choices contribute to a smooth and enjoyable building experience.


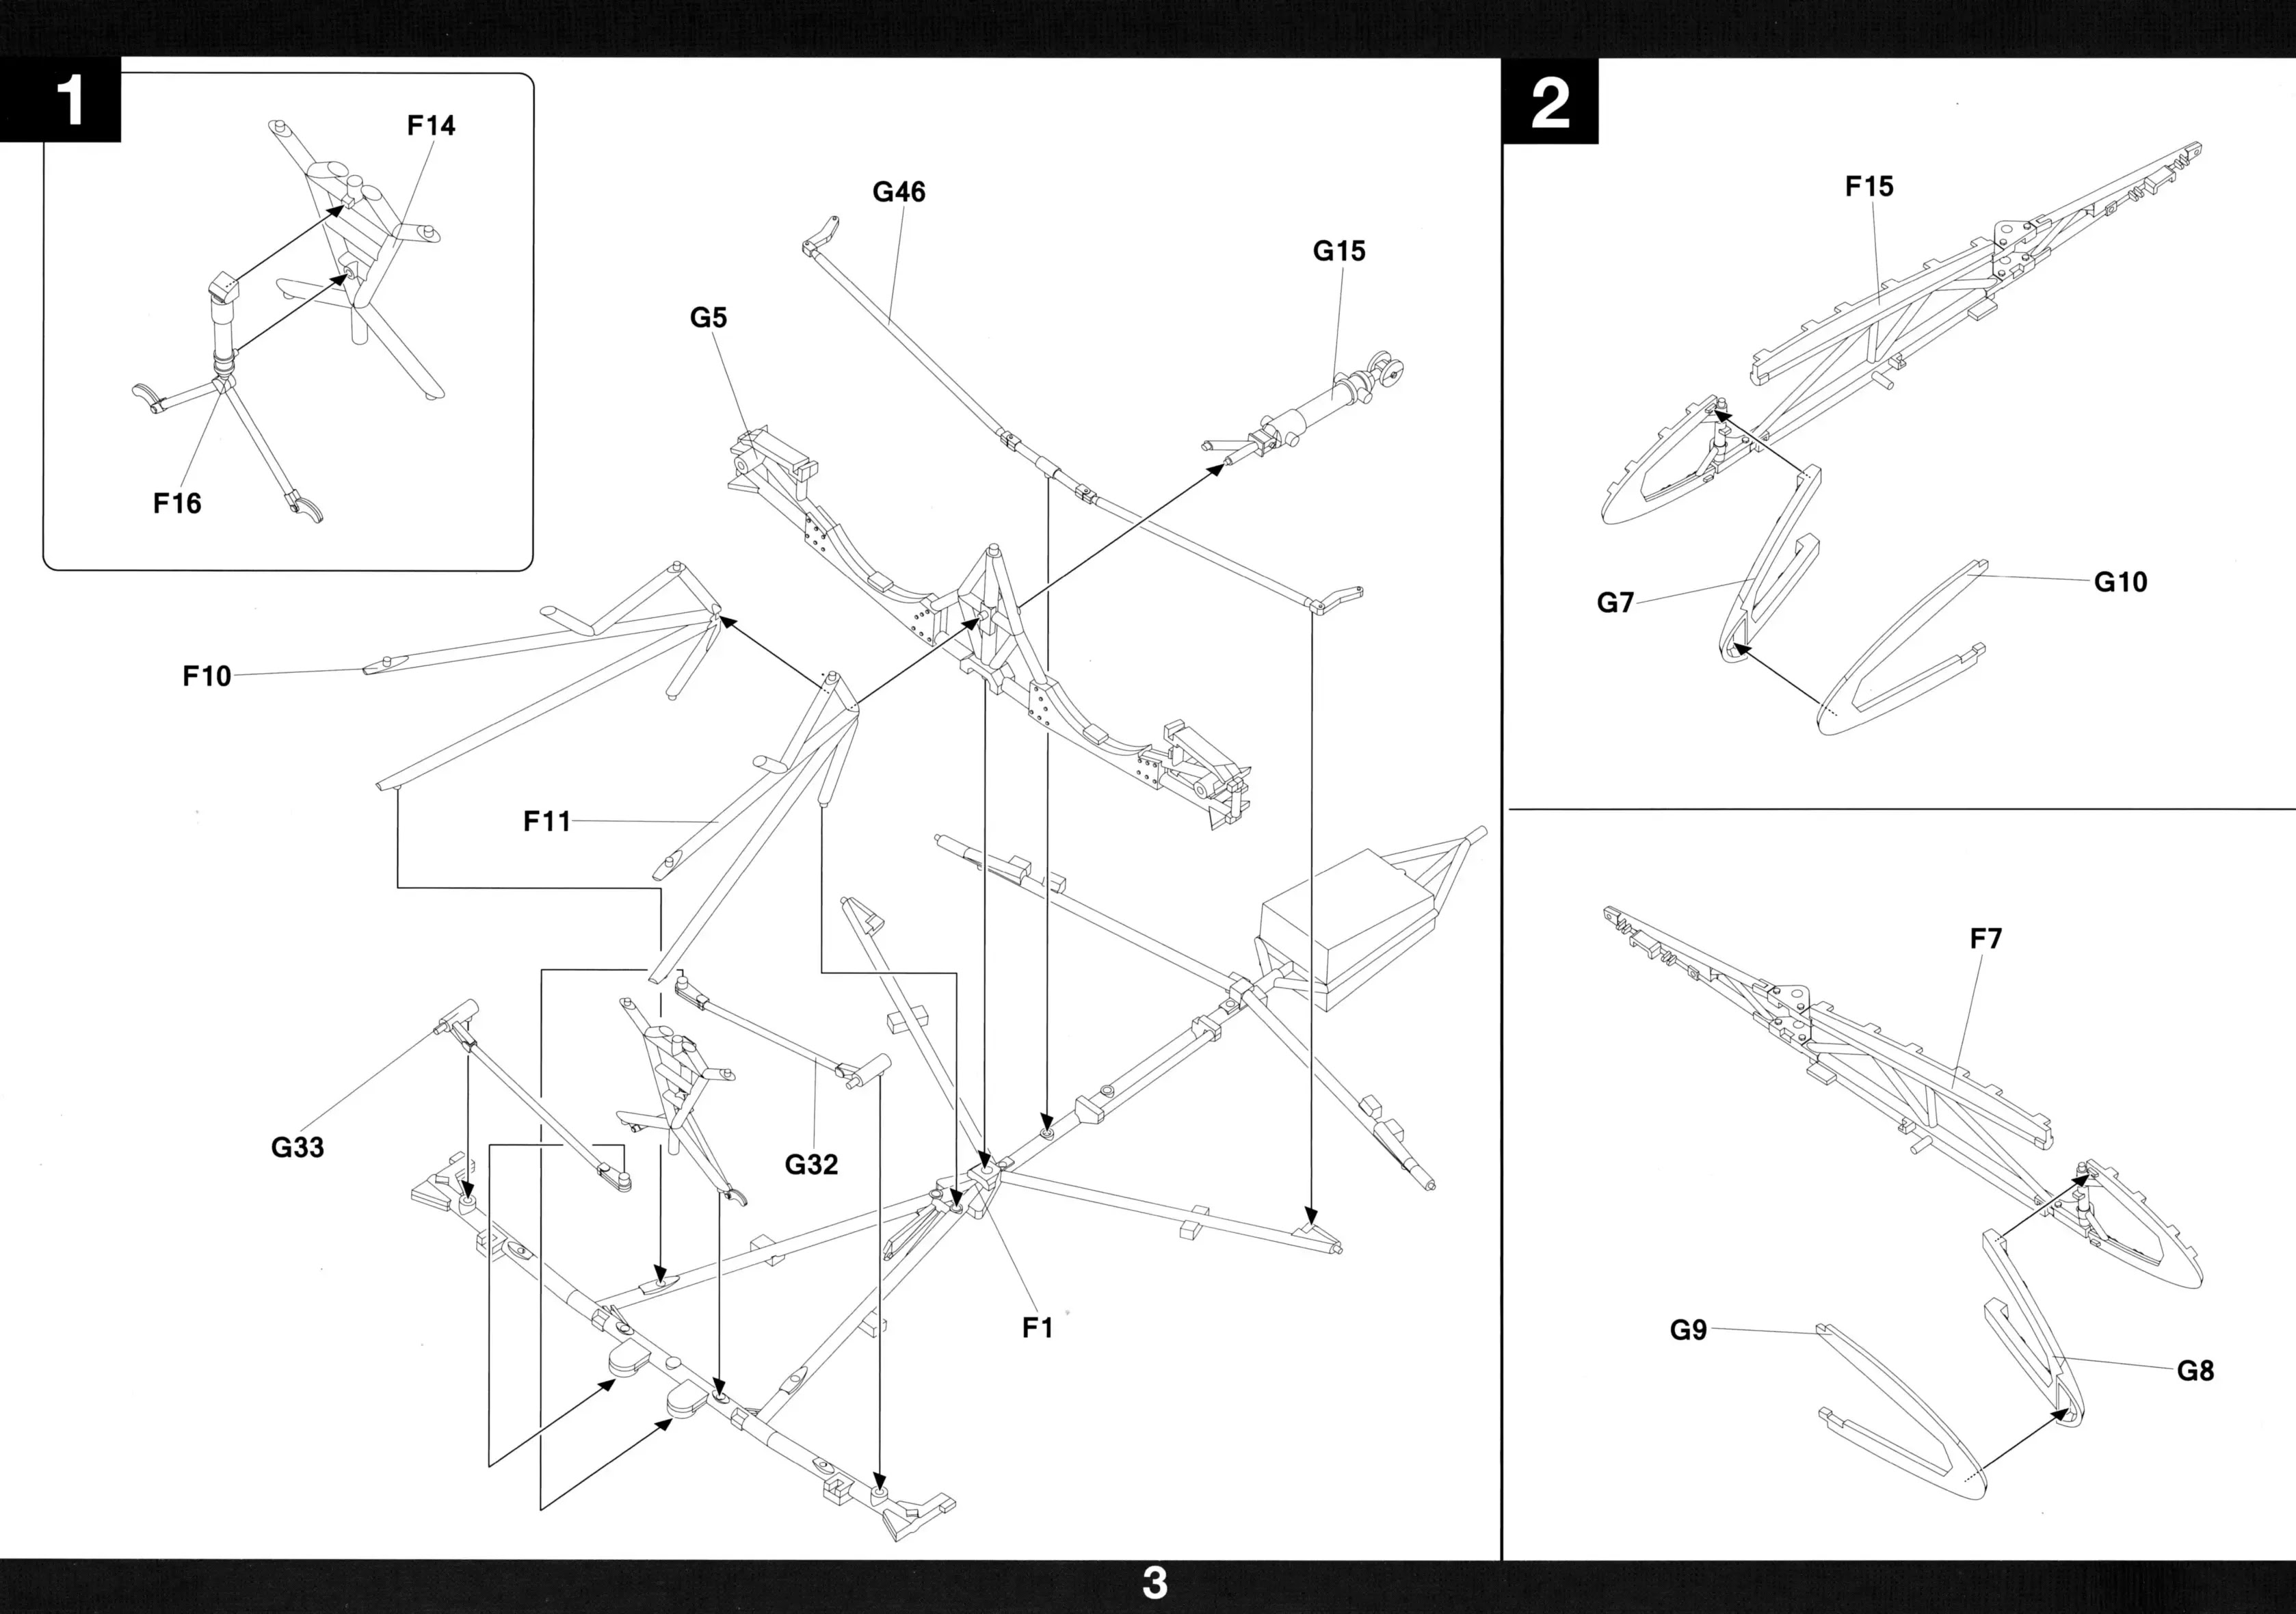
The majority of the assembly work focuses on the intricate tubular framework that forms the central section of the fuselage. These parts are quite delicate, and I strongly recommend taking your time to carefully clean each one before committing to glue. Most of the tubing has mold seams that should be sanded smooth, as they can become quite distracting once painted if left untreated.

Fortunately, Takom has thoughtfully designed the sprues to minimize the number of visible ejector pin marks, so only a few areas require filler and sanding. This central sub-assembly involves a complex arrangement of interlocking and overlapping parts, which adds to the build's structural realism but also introduces some challenges. I found the Takom instructions to be inconsistent—at times unclear, and occasionally even misleading. Directional arrows were often vague, and I had to skip ahead several steps to understand the proper placement of certain components. This interrupted the flow of the build and added unnecessary frustration to what is already a meticulous stage of construction. In my experience, the most valuable reference material for any build is the real thing—ideally original period photographs. These images provide not only accurate details but also context, wear patterns, and construction nuances that are often missed in modern diagrams or museum restorations. Fortunately, in the case of the Horten Ho 229, we’re in luck: a substantial number of Allied reconnaissance and ground-level photographs were taken during the invasion of Germany and the subsequent capture of strategic Luftwaffe production facilities. Among these are several rare and informative images from the Horten assembly plants, offering invaluable glimpses into how these revolutionary aircraft were actually constructed. One such photo clearly reveals the lattice-like structure of the Ho 229’s internal framework—a defining feature of its design. This intricate pipework not only formed the backbone of the center fuselage but also supported the innovative flying wing configuration. These historical photos provide an excellent reference point for modelers aiming to replicate the airframe with accuracy and realism, especially when building exposed or partially skinned versions of the aircraft.
 The Horten Ho 229 was planned to use the Junkers Jumo 004B turbojet engines, the same engines used in the Messerschmitt Me 262, the world’s first operational jet fighter. The BMW 003 jet engine was also considered early in development due to its slightly smaller size and lighter weight. However, the Jumo 004 was more readily available and ultimately became the engine of choice. The engines were suspended within the main framework either side of the cockpit with the fuel tanks located in the wings.
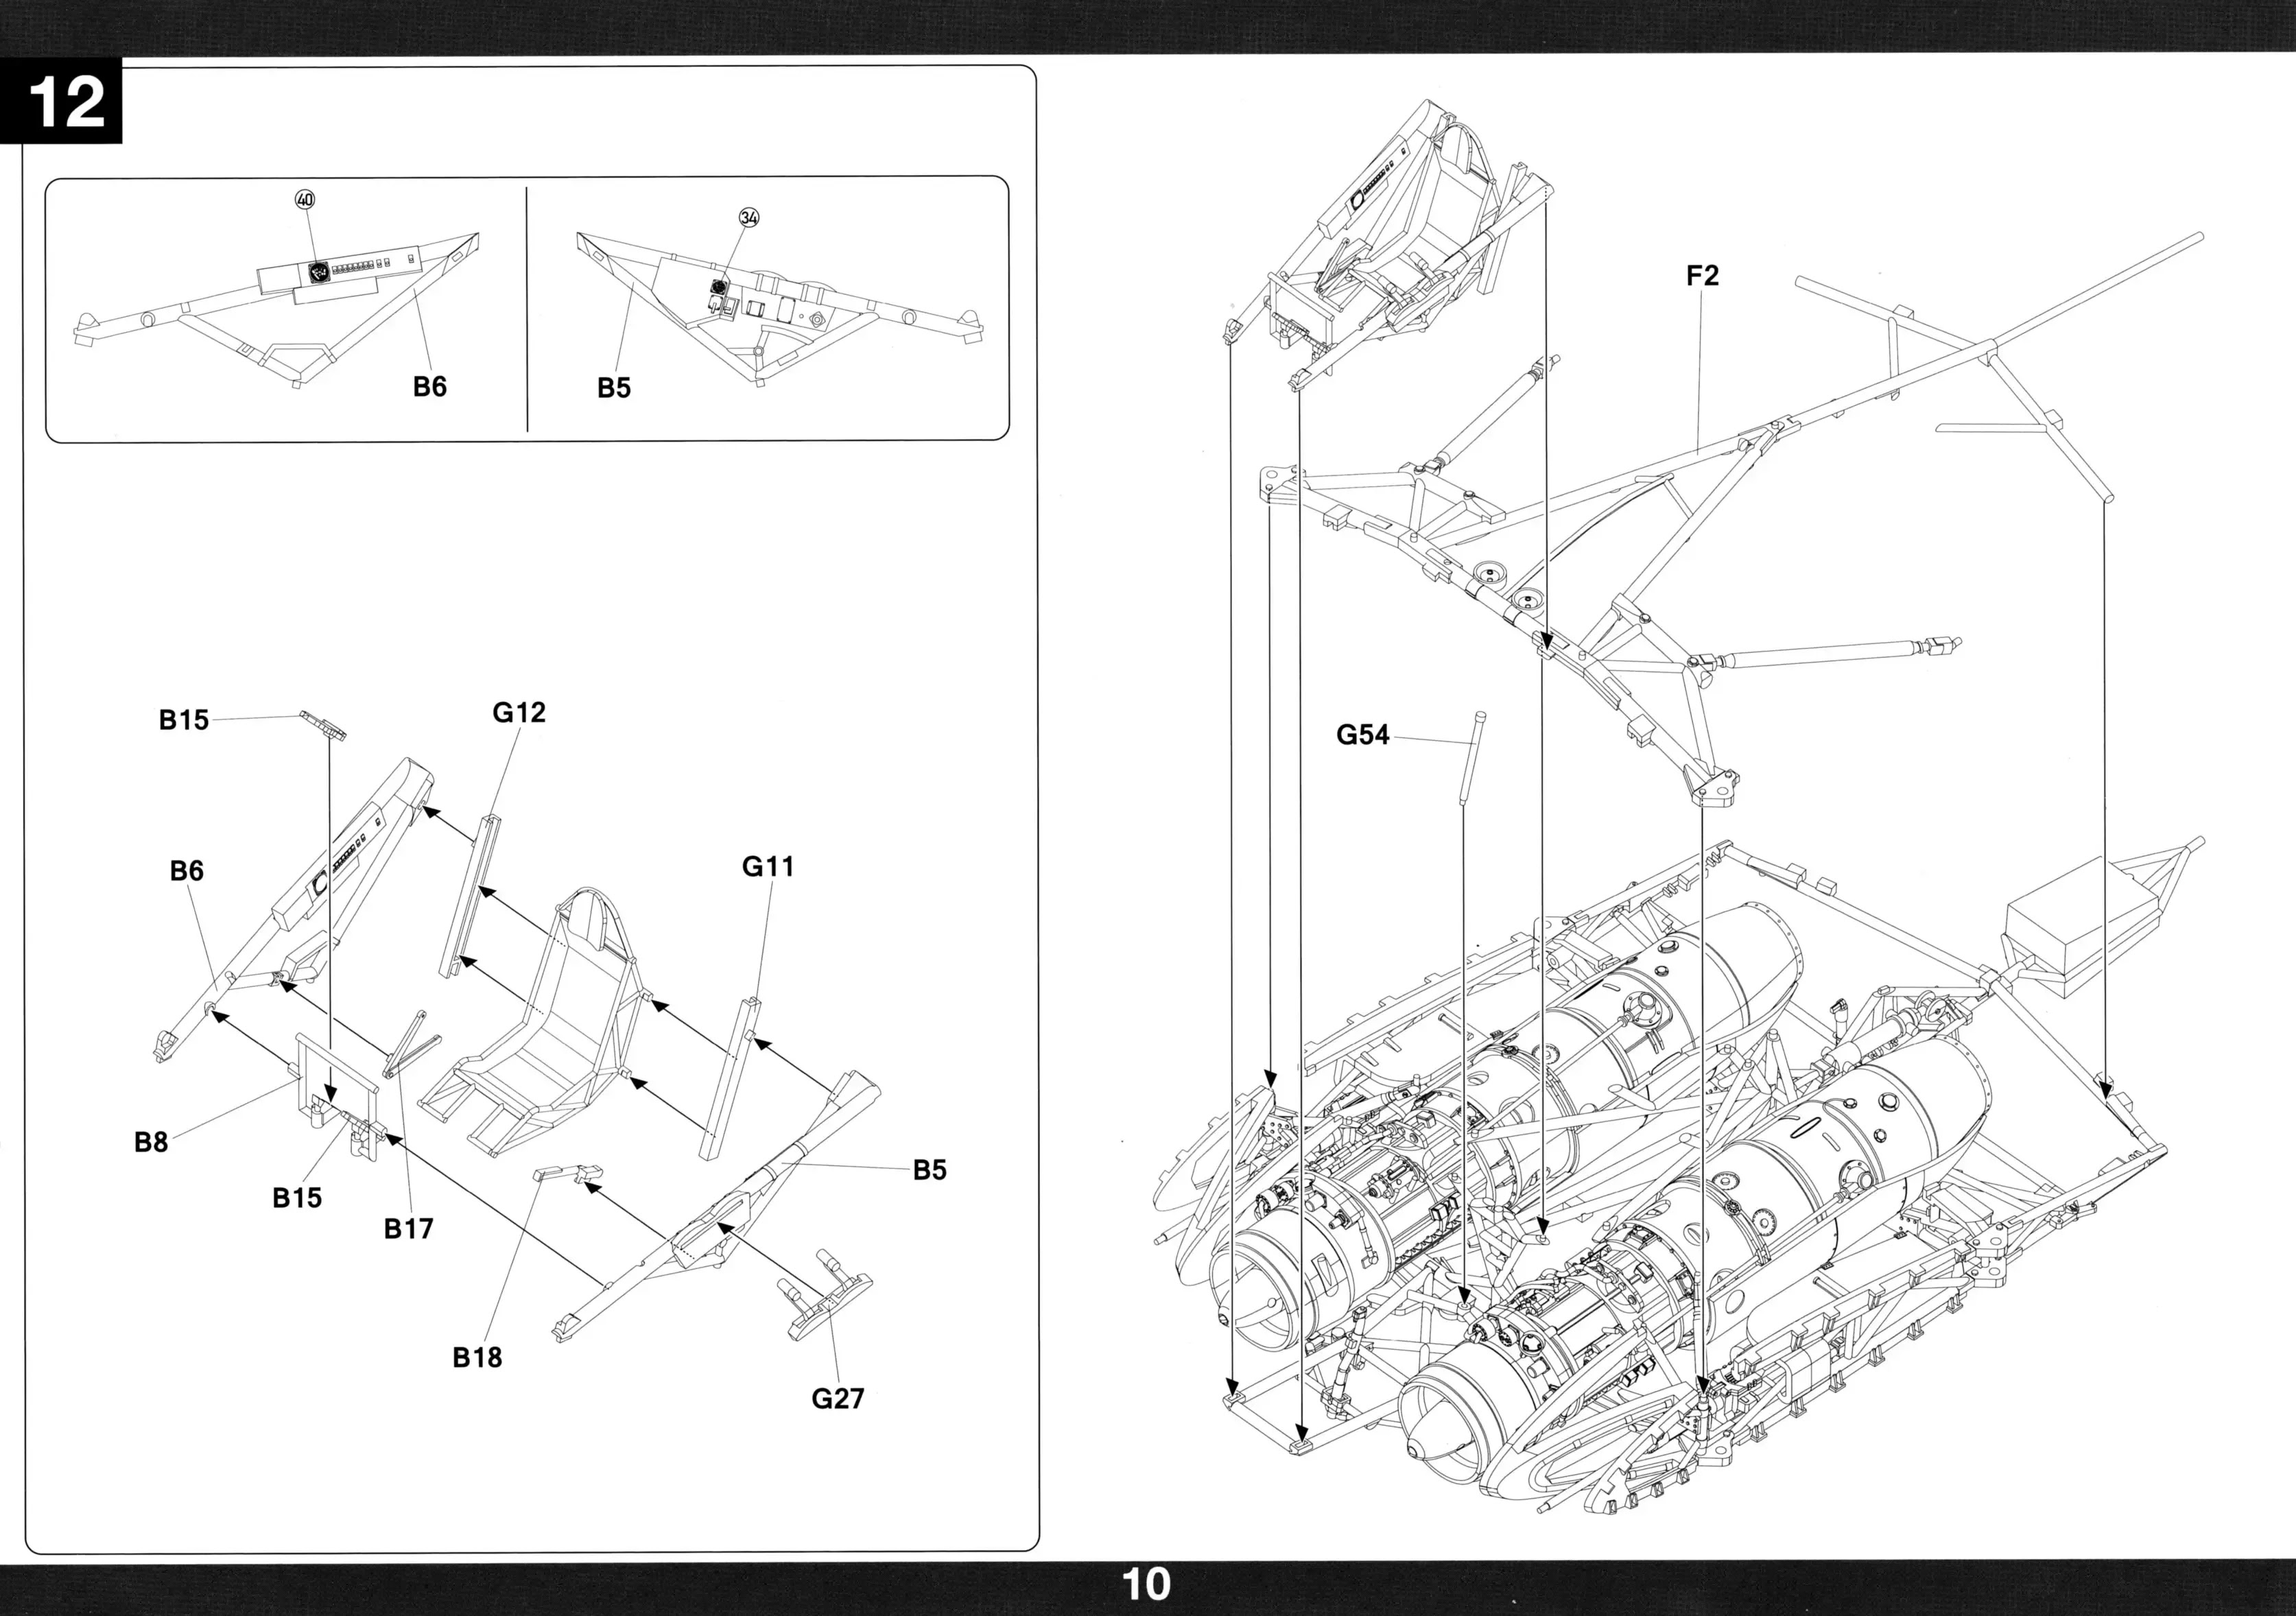
 Takom has provided a solid and reasonably accurate basic representation of the Jumo 004 engines in the kit. The core components—compressor stages, turbine details, and exhaust sections—are all present and provide a good foundation for further enhancement.


That said, there's definitely ample opportunity for super-detailing. In 1:32 scale, the size and visibility of the engines mean that any additional plumbing, wiring, and surface refinements you add will make a noticeable difference. This is particularly true if, like me, you intend to display the model with the engine covers removed or posed open.
The Horten Ho 229 (also known as the Ho IX) was planned to be armed with two 30mm MK 108 cannons. These were the same powerful short-barreled autocannons used in aircraft like the Me 262 and Bf 109K, and were effective against Allied bombers due to their heavy firepower. However, it’s important to note:
No Ho229 was completed with operational armament. The only flying prototype (V2) was unarmed and crashed during its maiden flight.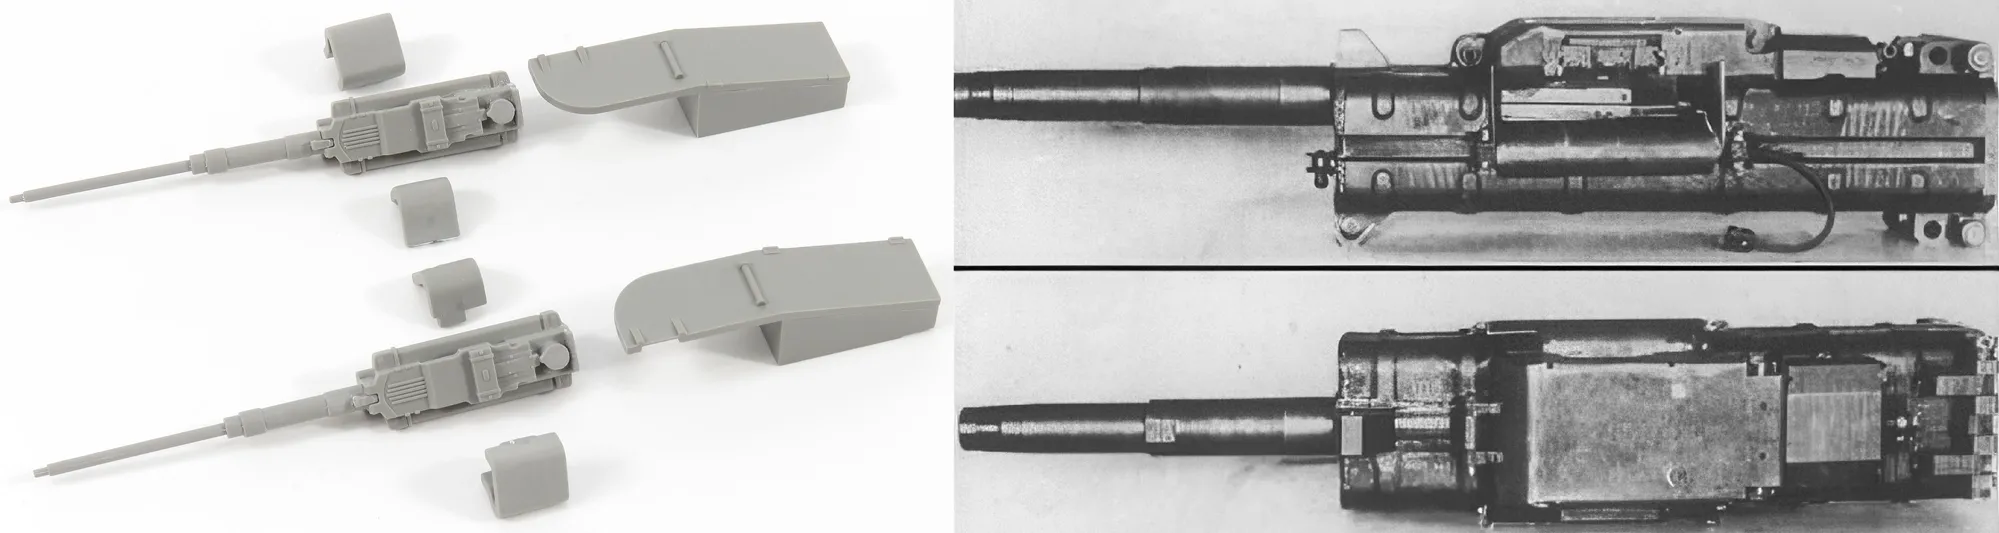 Even by World War II standards, the cockpit of the Ho 229 was extremely minimalistic. In the prototypes, there were no traditional sidewalls or flooring—instead, the seat, control stick, and rudder pedals were mounted directly to the internal tubular framework of the airframe. Flight instrumentation was kept to the bare essentials, with only the most critical gauges installed. Engine controls were located on the port side, using early versions of throttle levers that resemble the layout we now consider standard. The canopy was a single-piece design that slid to the rear for entry and exit, differing notably from aircraft like the Me 262, which featured a side-opening canopy. This stripped-down configuration reflected both the experimental nature of the aircraft and the urgent wartime production constraints under which it was developed.
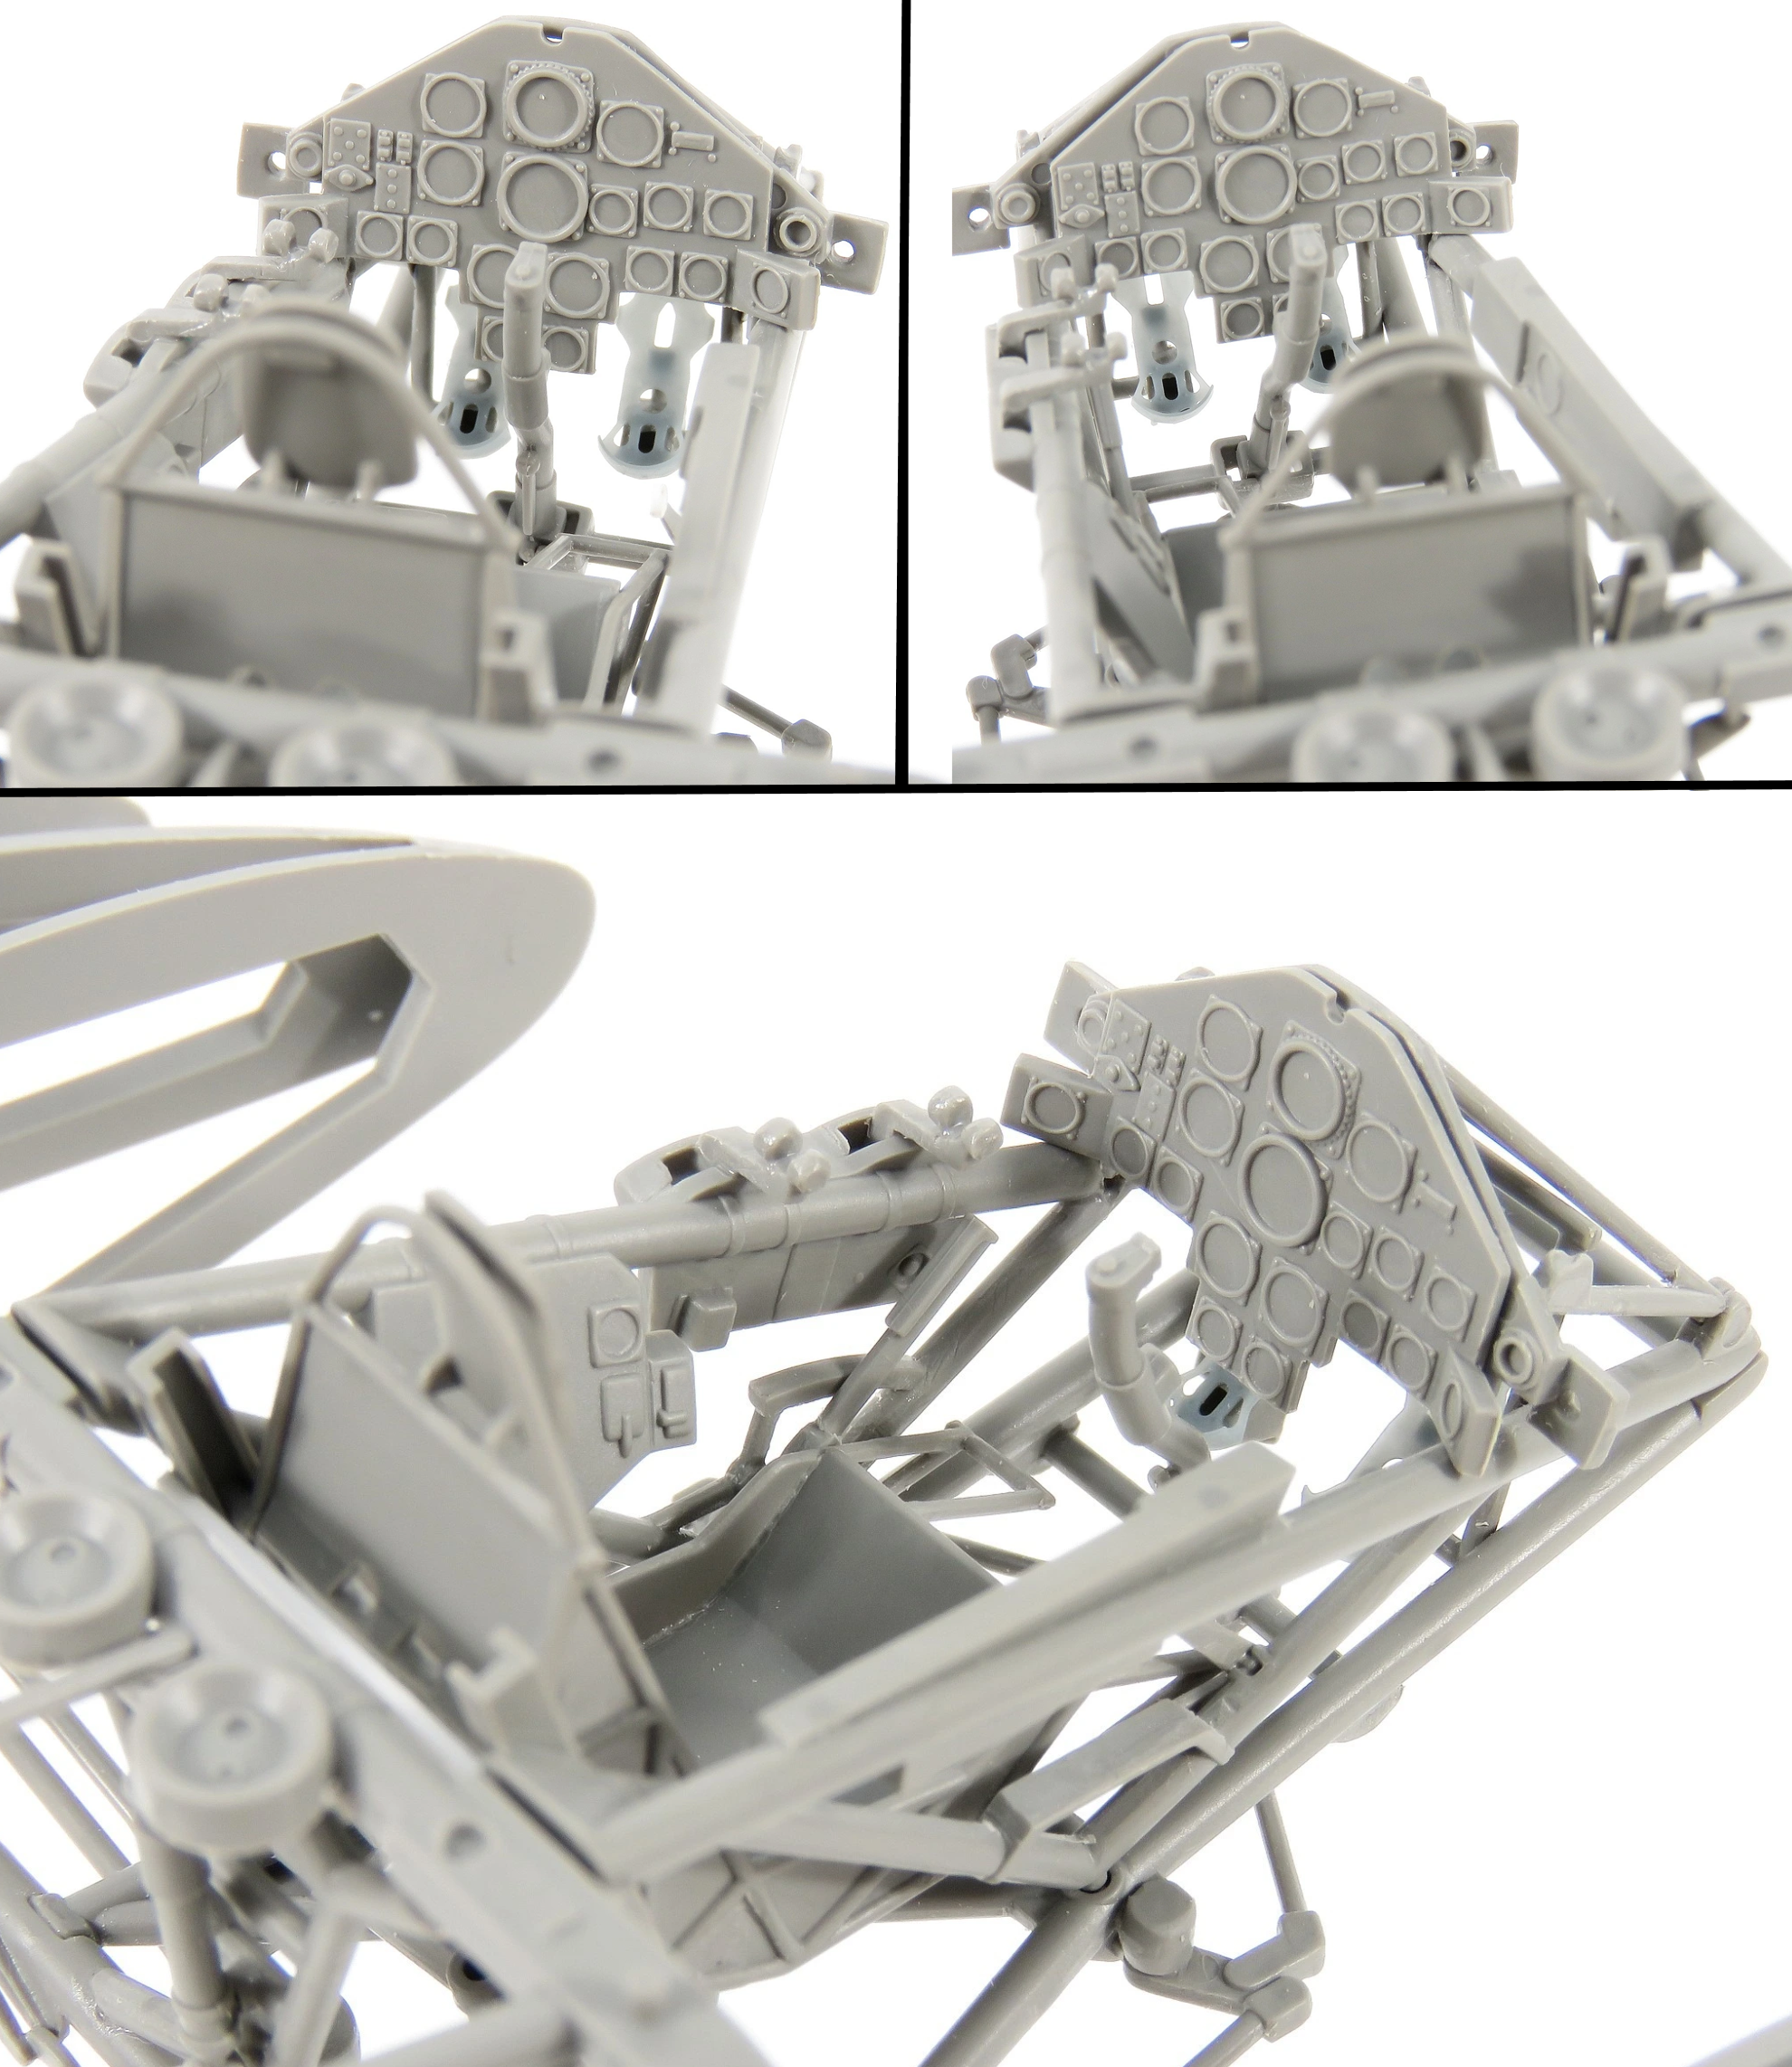
 One area where this kit truly shines is the cockpit interior. Upon close comparison with period photographs and images of the surviving airframe, it's clear that Takom has done an admirable job replicating the major components. Most of the essential elements—such as instrument panels, control levers, and structural details—are present and generally accurate to the original layout. However, the kit-supplied rudder pedals are quite simplistic. As shown in the accompanying photos, I chose to replace them with more refined 3D-printed parts for added realism. For those looking to elevate the cockpit detail even further with minimal effort, Quinta Studio offers an excellent aftermarket solution: QD32253 Horten Ho 229A 3D-Printed & Coloured Interior (Takom). Printed on water slide decal paper, it provides a fast and effective way to upgrade the instrument panel, side consoles, and other cockpit features—resulting in a far more visually impressive and realistic interior.
 Like most early jet aircraft developed by the Luftwaffe, the Ho 229 was designed with a tricycle undercarriage layout, a configuration better suited to the higher landing speeds and nose-down attitude typical of jet-powered aircraft. One particularly distinctive feature was its unusually large nose wheel, which is believed to have been repurposed from the tailwheel assembly of a Heinkel He 177 Greif heavy bomber. This oversized wheel gave the aircraft a distinctive ground stance and may have helped support the additional weight concentrated at the nose due to the cockpit and forward systems.
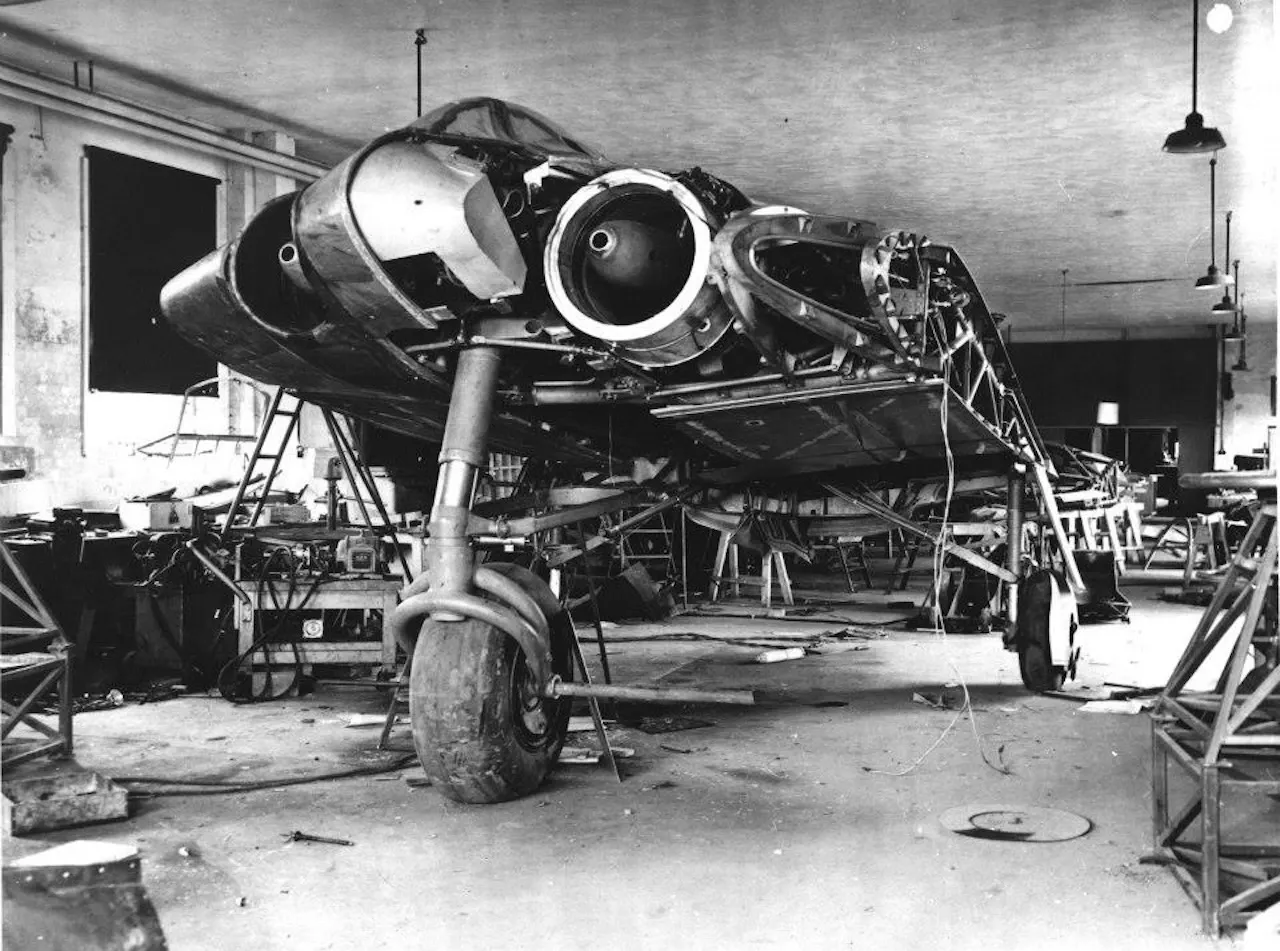 At around the halfway mark of the build, the main central fuselage section is largely complete. To simplify the process, I chose to leave the engines out at this stage, allowing me to focus on ensuring that the numerous attachment points for the internal framework were properly aligned before committing to the next steps. This approach also provides a clearer view of the kit’s ejection seat, which is mounted on basic guide rails as seen in the original prototypes. Additionally, the throttle quadrant is now visible on the port side of the cockpit, giving a better sense of the layout and detailing provided by the kit. For my build I intend to add cabling and wiring in and arond the cockpit area as seen on period photos and museum airframes.
 To more accurately replicate the hollow axle design used on the Ho 229’s nosewheel, I decided to replace the fragile plastic mounting lugs provided in the kit with a length of 1.6mm brass tubing. Not only does this better capture the look of the original structural detail, but it also adds significantly more strength and durability—especially important given the size and weight of the nosewheel. An added benefit of this modification is the flexibility it gives during the final assembly stages: I can now leave the wheel off entirely until the end of the build, making it much easier to paint, weather, and handle without risk of damage. Once all finishing work is complete, I can simply slide the wheel onto the brass axle for a clean, secure fit. This small adjustment improves both accuracy and practicality, and it's a great example of how simple scratch-building techniques can enhance a build in multiple ways.
 A dry test fit of the nosewheel strut and its associated retraction arms showed no issues with fit or alignment—everything slotted into place cleanly and maintained proper geometry. Takom includes a mudguard for the nosewheel in the kit, but I’ve chosen not to use it, as I was unable to find any period photographs showing it installed on the actual aircraft.
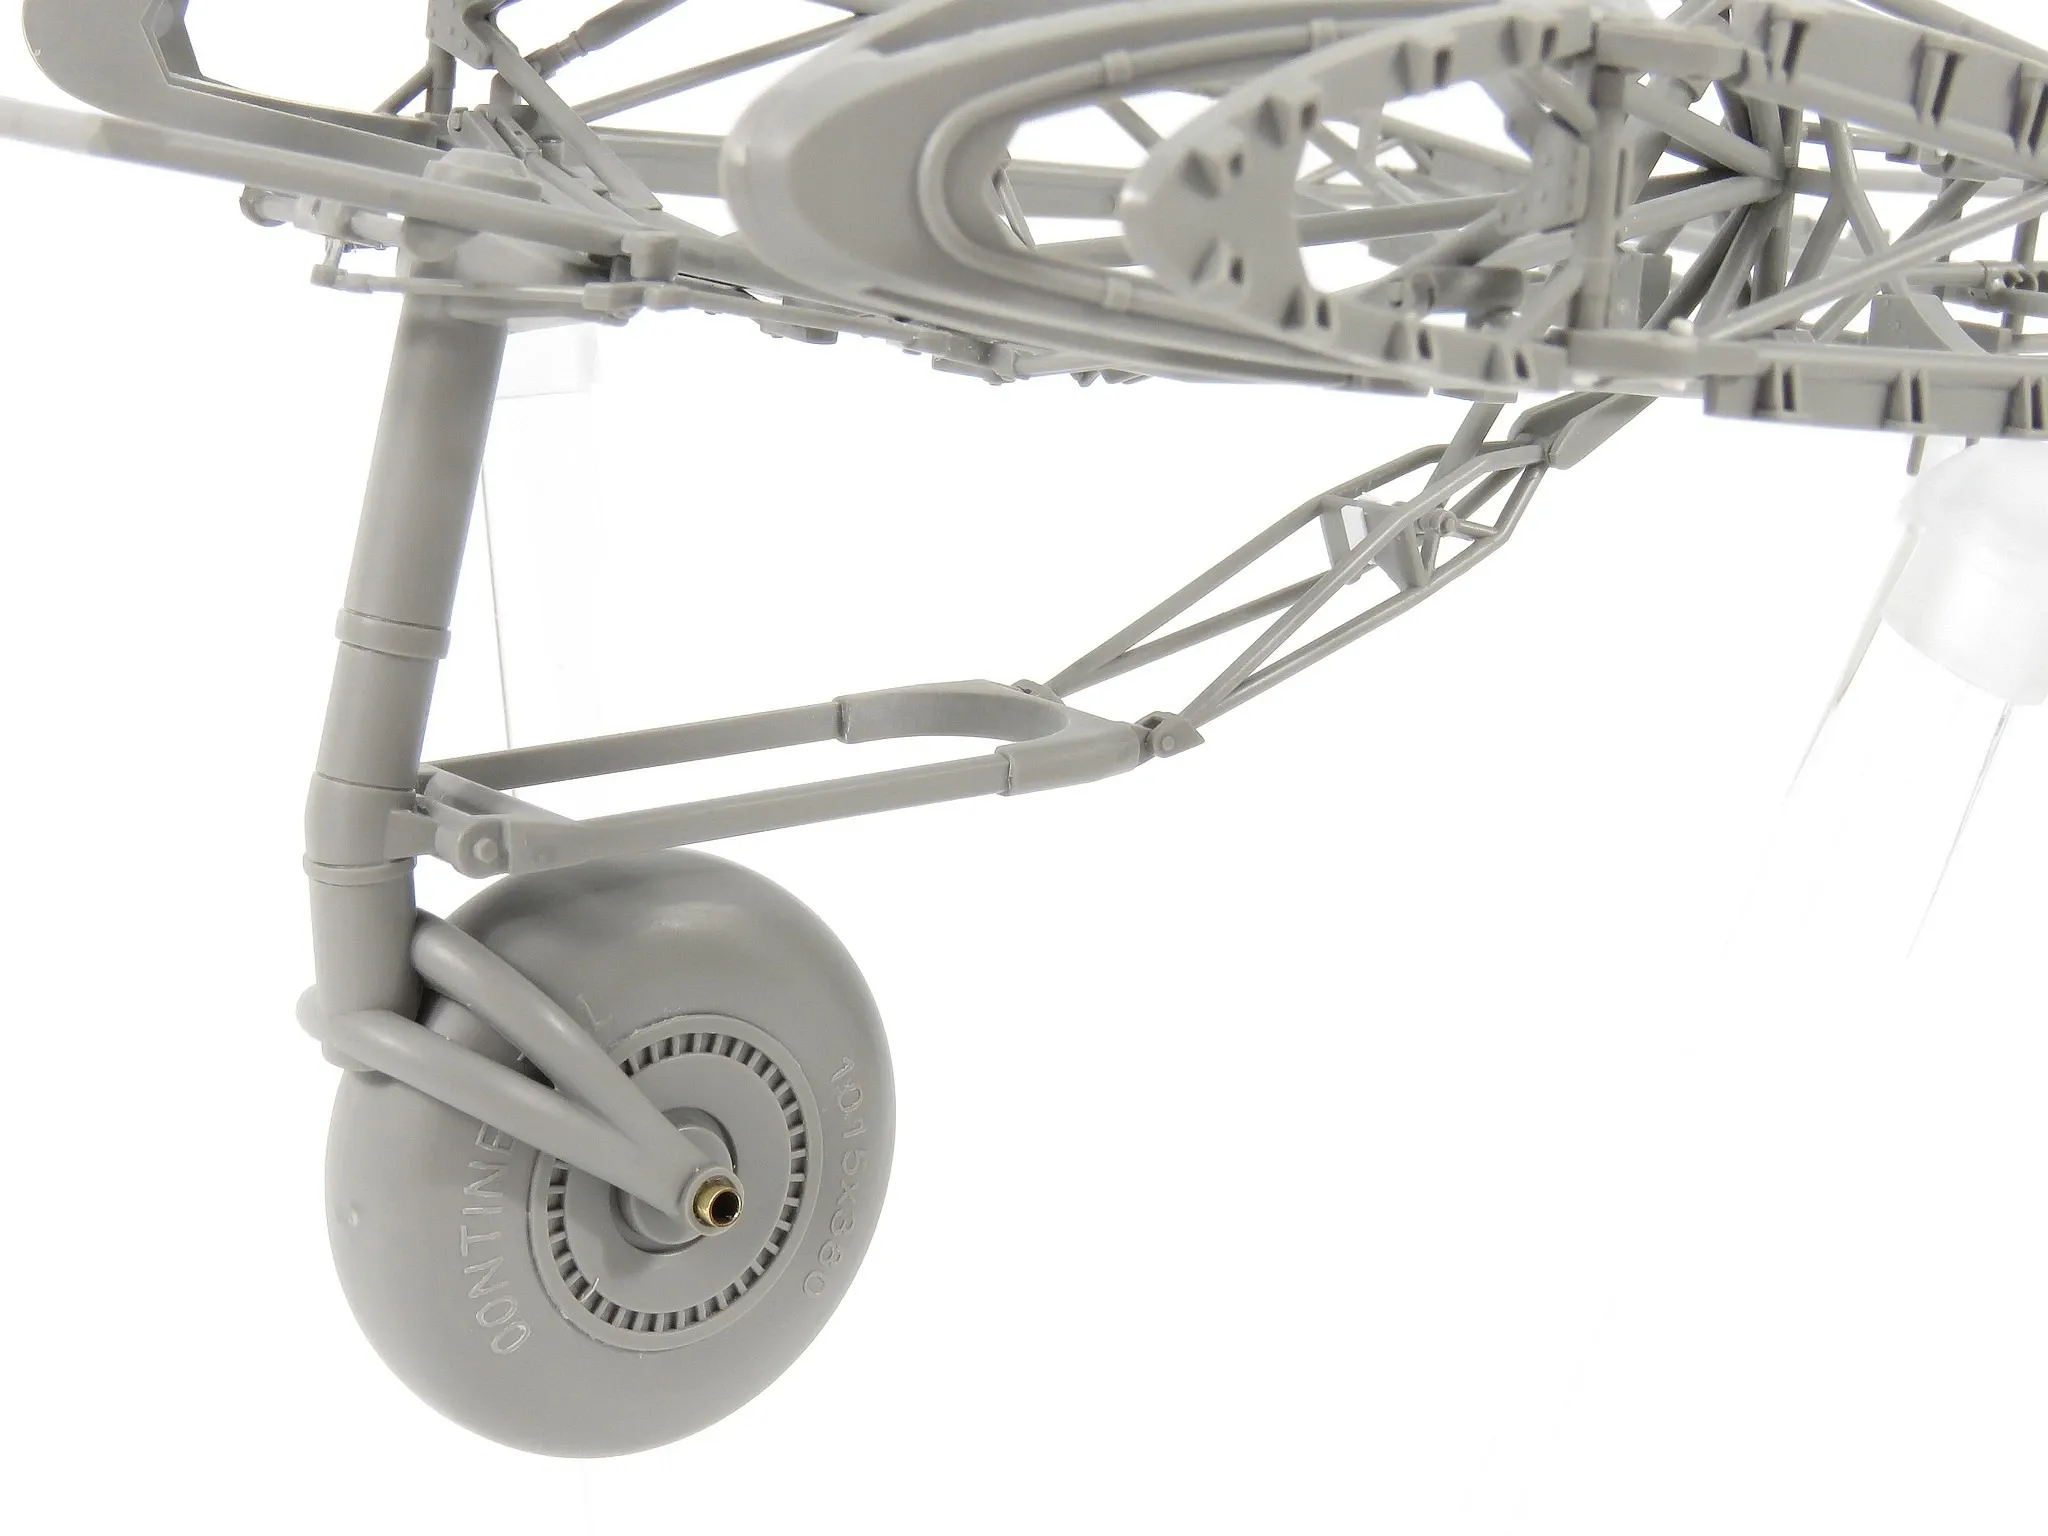
- The planned armament was included in the design for production models, but the war ended before any could be completed
- Takom include a full set of two MK 108 cannons with ammuntion boxes and feed chutes in the kit.


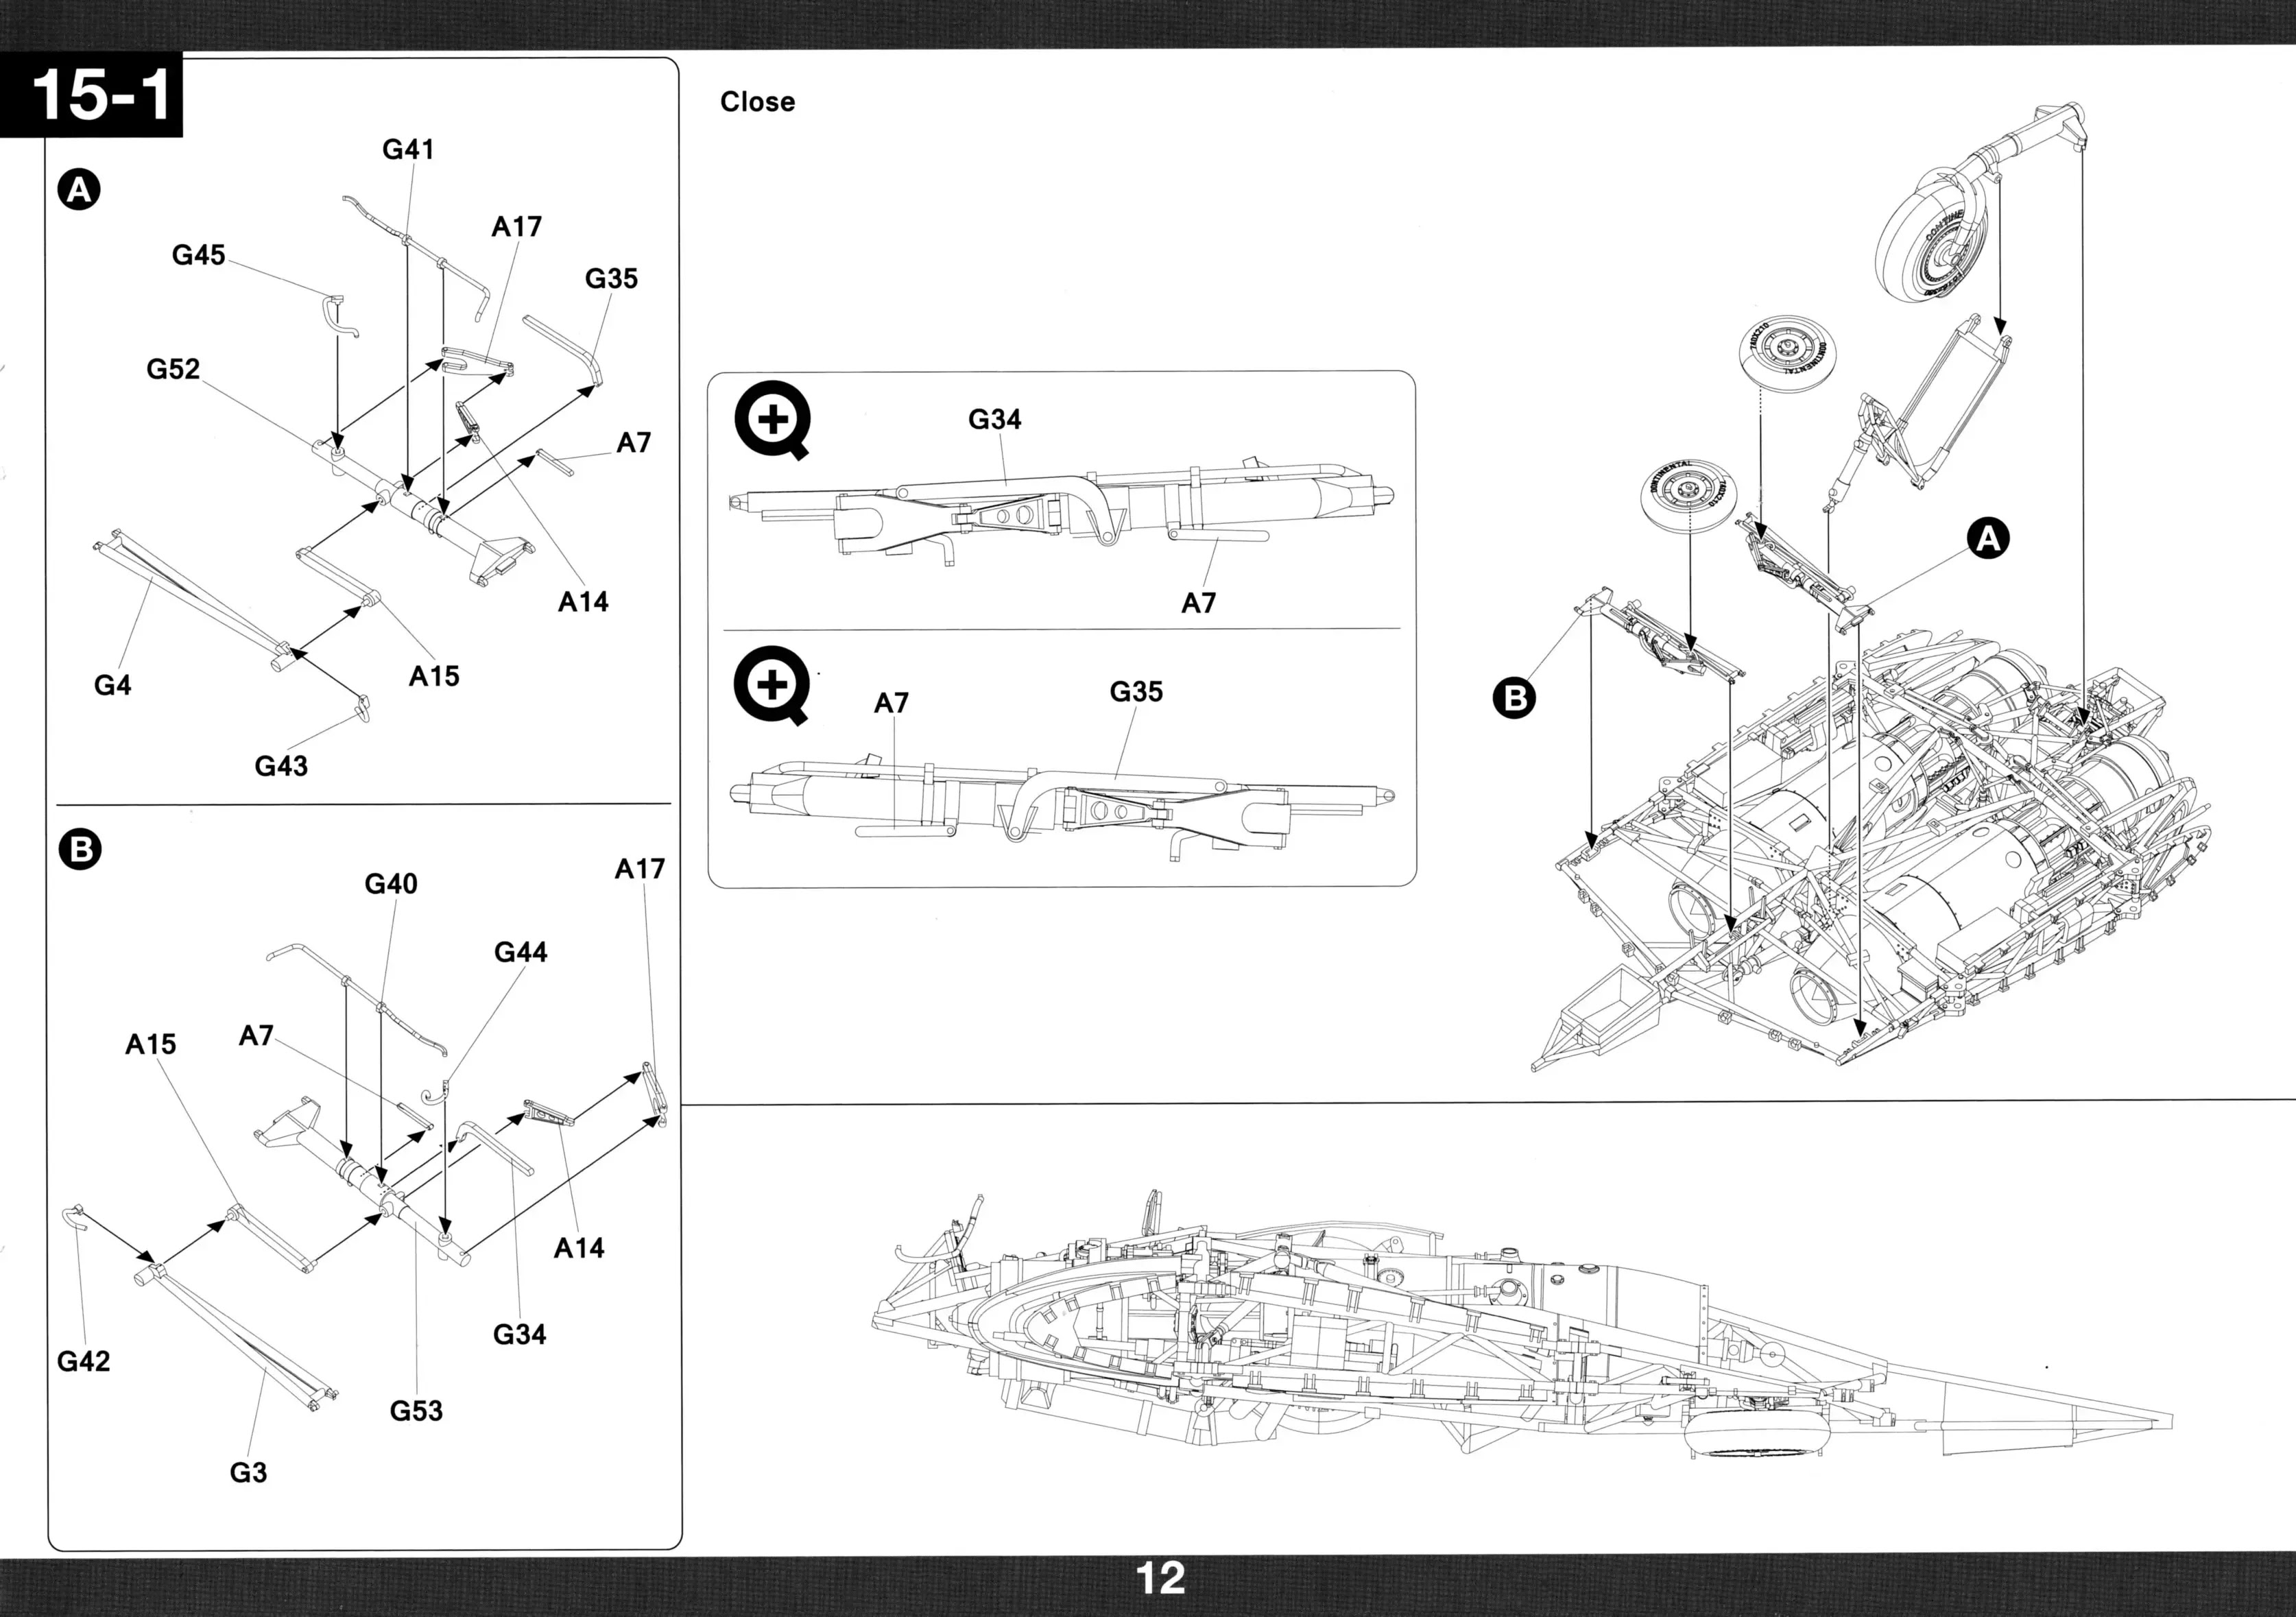
It’s also worth noting that Takom provides all the necessary parts to model the landing gear in either the extended (ground) or retracted (in-flight) position. This flexibility is a welcome feature, especially for those who wish to display their Ho 229 in flight, mounted on a stand or in a diorama setting, without the need for scratch-building or aftermarket conversions. The Ho 229 main landing gear units were mounted in the wing roots and, like the nose gear, were fully retractable—contributing to the aircraft’s sleek aerodynamic profile. All three gear legs featured relatively simple hydraulic retraction mechanisms, consistent with late-war German design philosophy that aimed for functionality with minimal complexity. When retracted, the gear sat flush within their bays, preserving the aircraft’s low-drag, flying wing configuration. For modelers, the exposed gear—particularly the nose wheel—offers an interesting detailing opportunity that can highlight the aircraft’s experimental and somewhat improvised nature.
 The Takom main landing gear parts appear to be quite accurate when compared to reference photos. However, assembly is once again made more difficult by the unclear instructions, which feature overlapping arrows and awkward drawing angles. The connection between the main wheels and the struts is particularly weak, relying on very small contact points. I’m considering adding a brass rod to reinforce this area for added strength on my build.
 This digital rendering of the Horten Ho 229 is historically consistent with German late-war aircraft construction trends and shows the use of Mixed Construction Materials such as wood composites and metal. This mixed-material construction is consistent with late-war German practices, especially under resource constraints and Allied bombing of industrial centers. The looming end of the war also pushed the Luftwaffe to employ simplified construction as Germany shifted toward emergency fighter programs (like the He 162 and Me 262), often prioritizing ease of assembly over long-term durability.
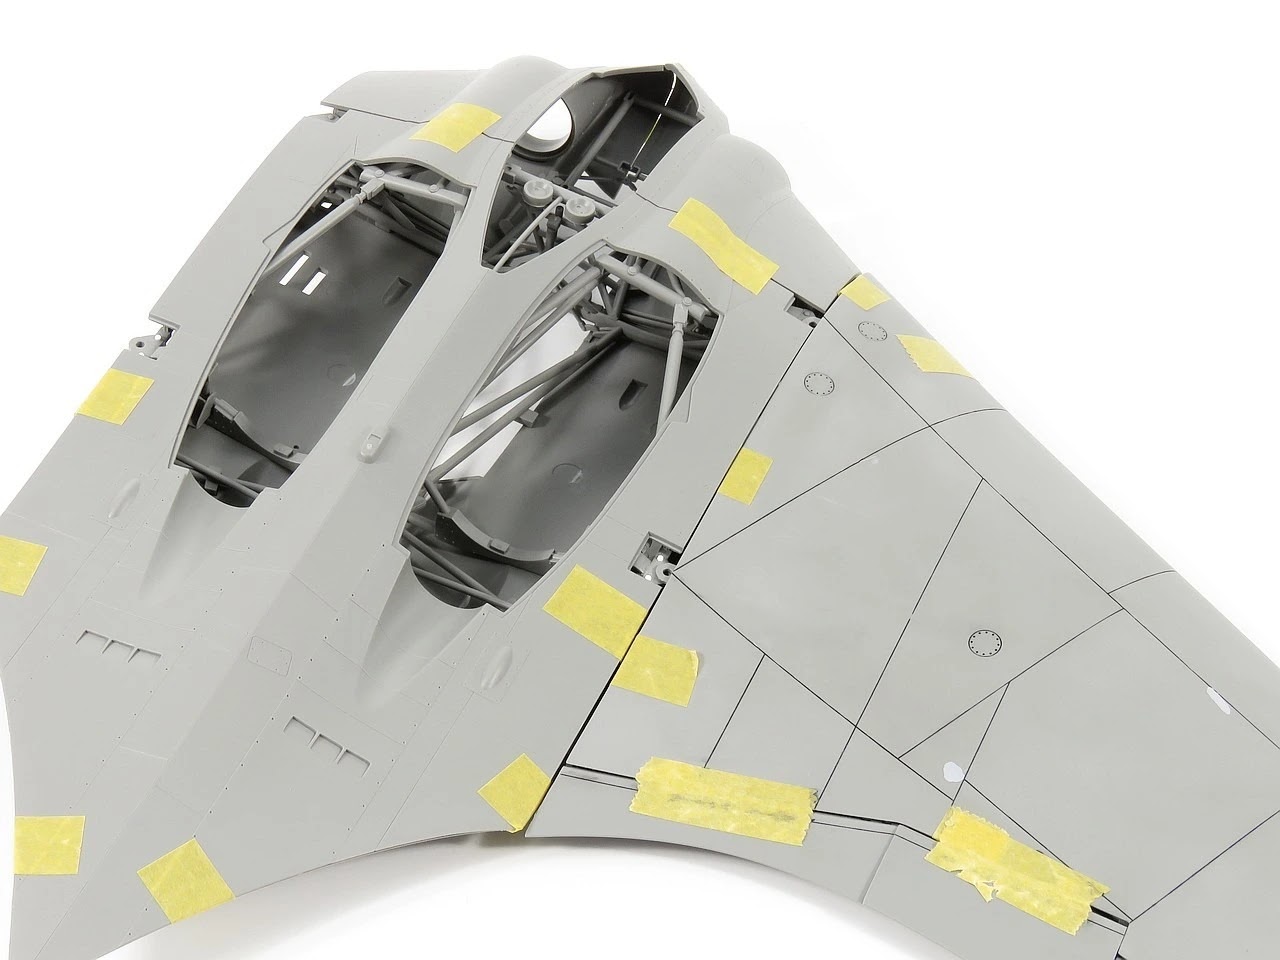
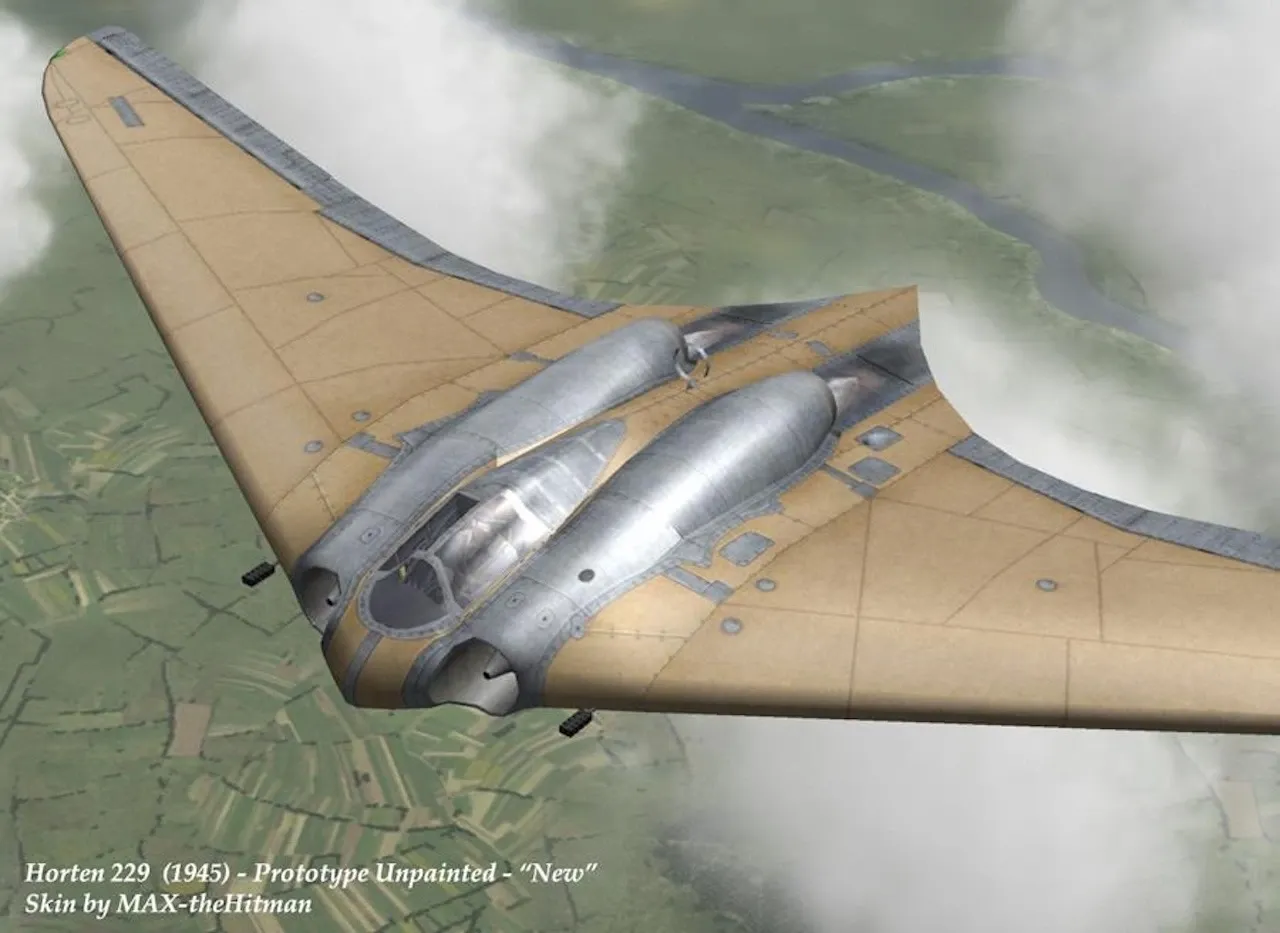 The outer skin of the central fuselage section is composed of four main parts: a single top panel, two lower panels (split by the main landing gear bays), and the forward nose section. This modular breakdown allows for easier access to internal components during assembly and offers greater flexibility for those wishing to display the model with panels removed or opened. In my test fitting, all the outer skin sections aligned very well with the internal tubular framework. Takom has designed this area thoughtfully, incorporating small locating pins and holes throughout to assist with alignment and ensure a clean, flush fit.


This engineering makes it much easier to attach the outer panels without gaps or stress on the delicate inner structure. For a kit of this complexity, it’s impressive how well the parts come together at this stage, and it gives the builder confidence moving into the final assembly and finishing stages. Additionally, this design approach supports both full-closure builds and more ambitious "cutaway" displays, depending on the modeler’s preference.
 This historical photo of the Horten Ho 229, likely the V3 prototype, reveals several key construction features that highlight both the innovative and improvised aspects of this groundbreaking aircraft.
-Plywood Skin Over Tubular Framework - The most striking feature visible is the plywood skin, which is applied in flat panels over the aircraft’s distinctive flying wing structure. The panel joints and fastening points are quite evident, suggesting a semi-monocoque construction approach. This method kept weight low while allowing rapid assembly using non-strategic materials—critical given wartime shortages in late-war Germany.
-Exposed Jet Engines - The Jumo 004 turbojet engines are mounted in nacelles that protrude above the upper surface of the wing. The exposed upper portions and incomplete cowling hint that this is a partially assembled airframe, likely under inspection by Allied forces post-capture. The engine placement, while aerodynamically challenging, shows the pragmatic adaptation of available propulsion systems into a novel airframe.
-Flush-Mounted Control Surfaces and Panel Lines - Panel lines are visible running diagonally across the surface, corresponding to the aircraft’s internal framework and covering strategy. These flush-mounted surfaces helped reduce radar cross-section—a feature that would gain significance decades later in stealth aircraft design.
-Minimal Riveting and Weld Lines - Unlike traditional metal-skinned fighters of the era, this Ho 229's surface shows minimal riveting or welding marks. This is consistent with the use of wood and bonded composite materials, a forward-thinking approach driven by both stealth experimentation and material shortages. The Takom sliding canopy is thoughtfully engineered, combining a grey plastic internal frame with a single-piece, crystal-clear transparency that forms the outer glazing. This setup captures the look of the original canopy well, balancing structural detail with clarity for viewing the cockpit interior. One of the nice touches in the kit is that the canopy can be posed either open or closed, thanks to the inclusion of the side rails that the canopy would have slid along in the real aircraft. These rails are molded as separate parts, allowing for a realistic and mechanically accurate display. This flexibility is ideal for modelers who want to showcase the detailed cockpit interior or simply vary the appearance of the aircraft on a shelf or in a diorama. Careful masking will be needed to highlight the internal framing without obscuring the clarity of the canopy, but the sharp molding makes this process manageable. With a bit of finesse, the finished canopy can become a real focal point of the model.
 This image shows the preserved wings of the Horten Ho 229 V3 prototype, currently housed by the Smithsonian’s National Air and Space Museum in their storage and restoration facility. These are some of the most iconic surviving components of the Horten flying wing project and offer valuable insights into the aircraft’s design and wartime construction techniques. The most immediately visible feature is the smooth plywood outer surface, which was bonded and doped over an internal framework. This technique not only reduced radar reflection (unintentionally foreshadowing stealth characteristics), but also helped mitigate Germany's shortage of strategic metals late in the war. The absence of external rivets or metal fasteners enhances the aircraft’s sleek profile and would have contributed to aerodynamic efficiency.
 While not immediately visible in this view, the Horten wings were designed with elevons—combined elevators and ailerons—on the trailing edge. These were vital for pitch and roll control, as the flying wing lacked a traditional tail. The control surface hinges and actuator mounts would be just out of sight, but they form a critical part of the aircraft’s flight control strategy.
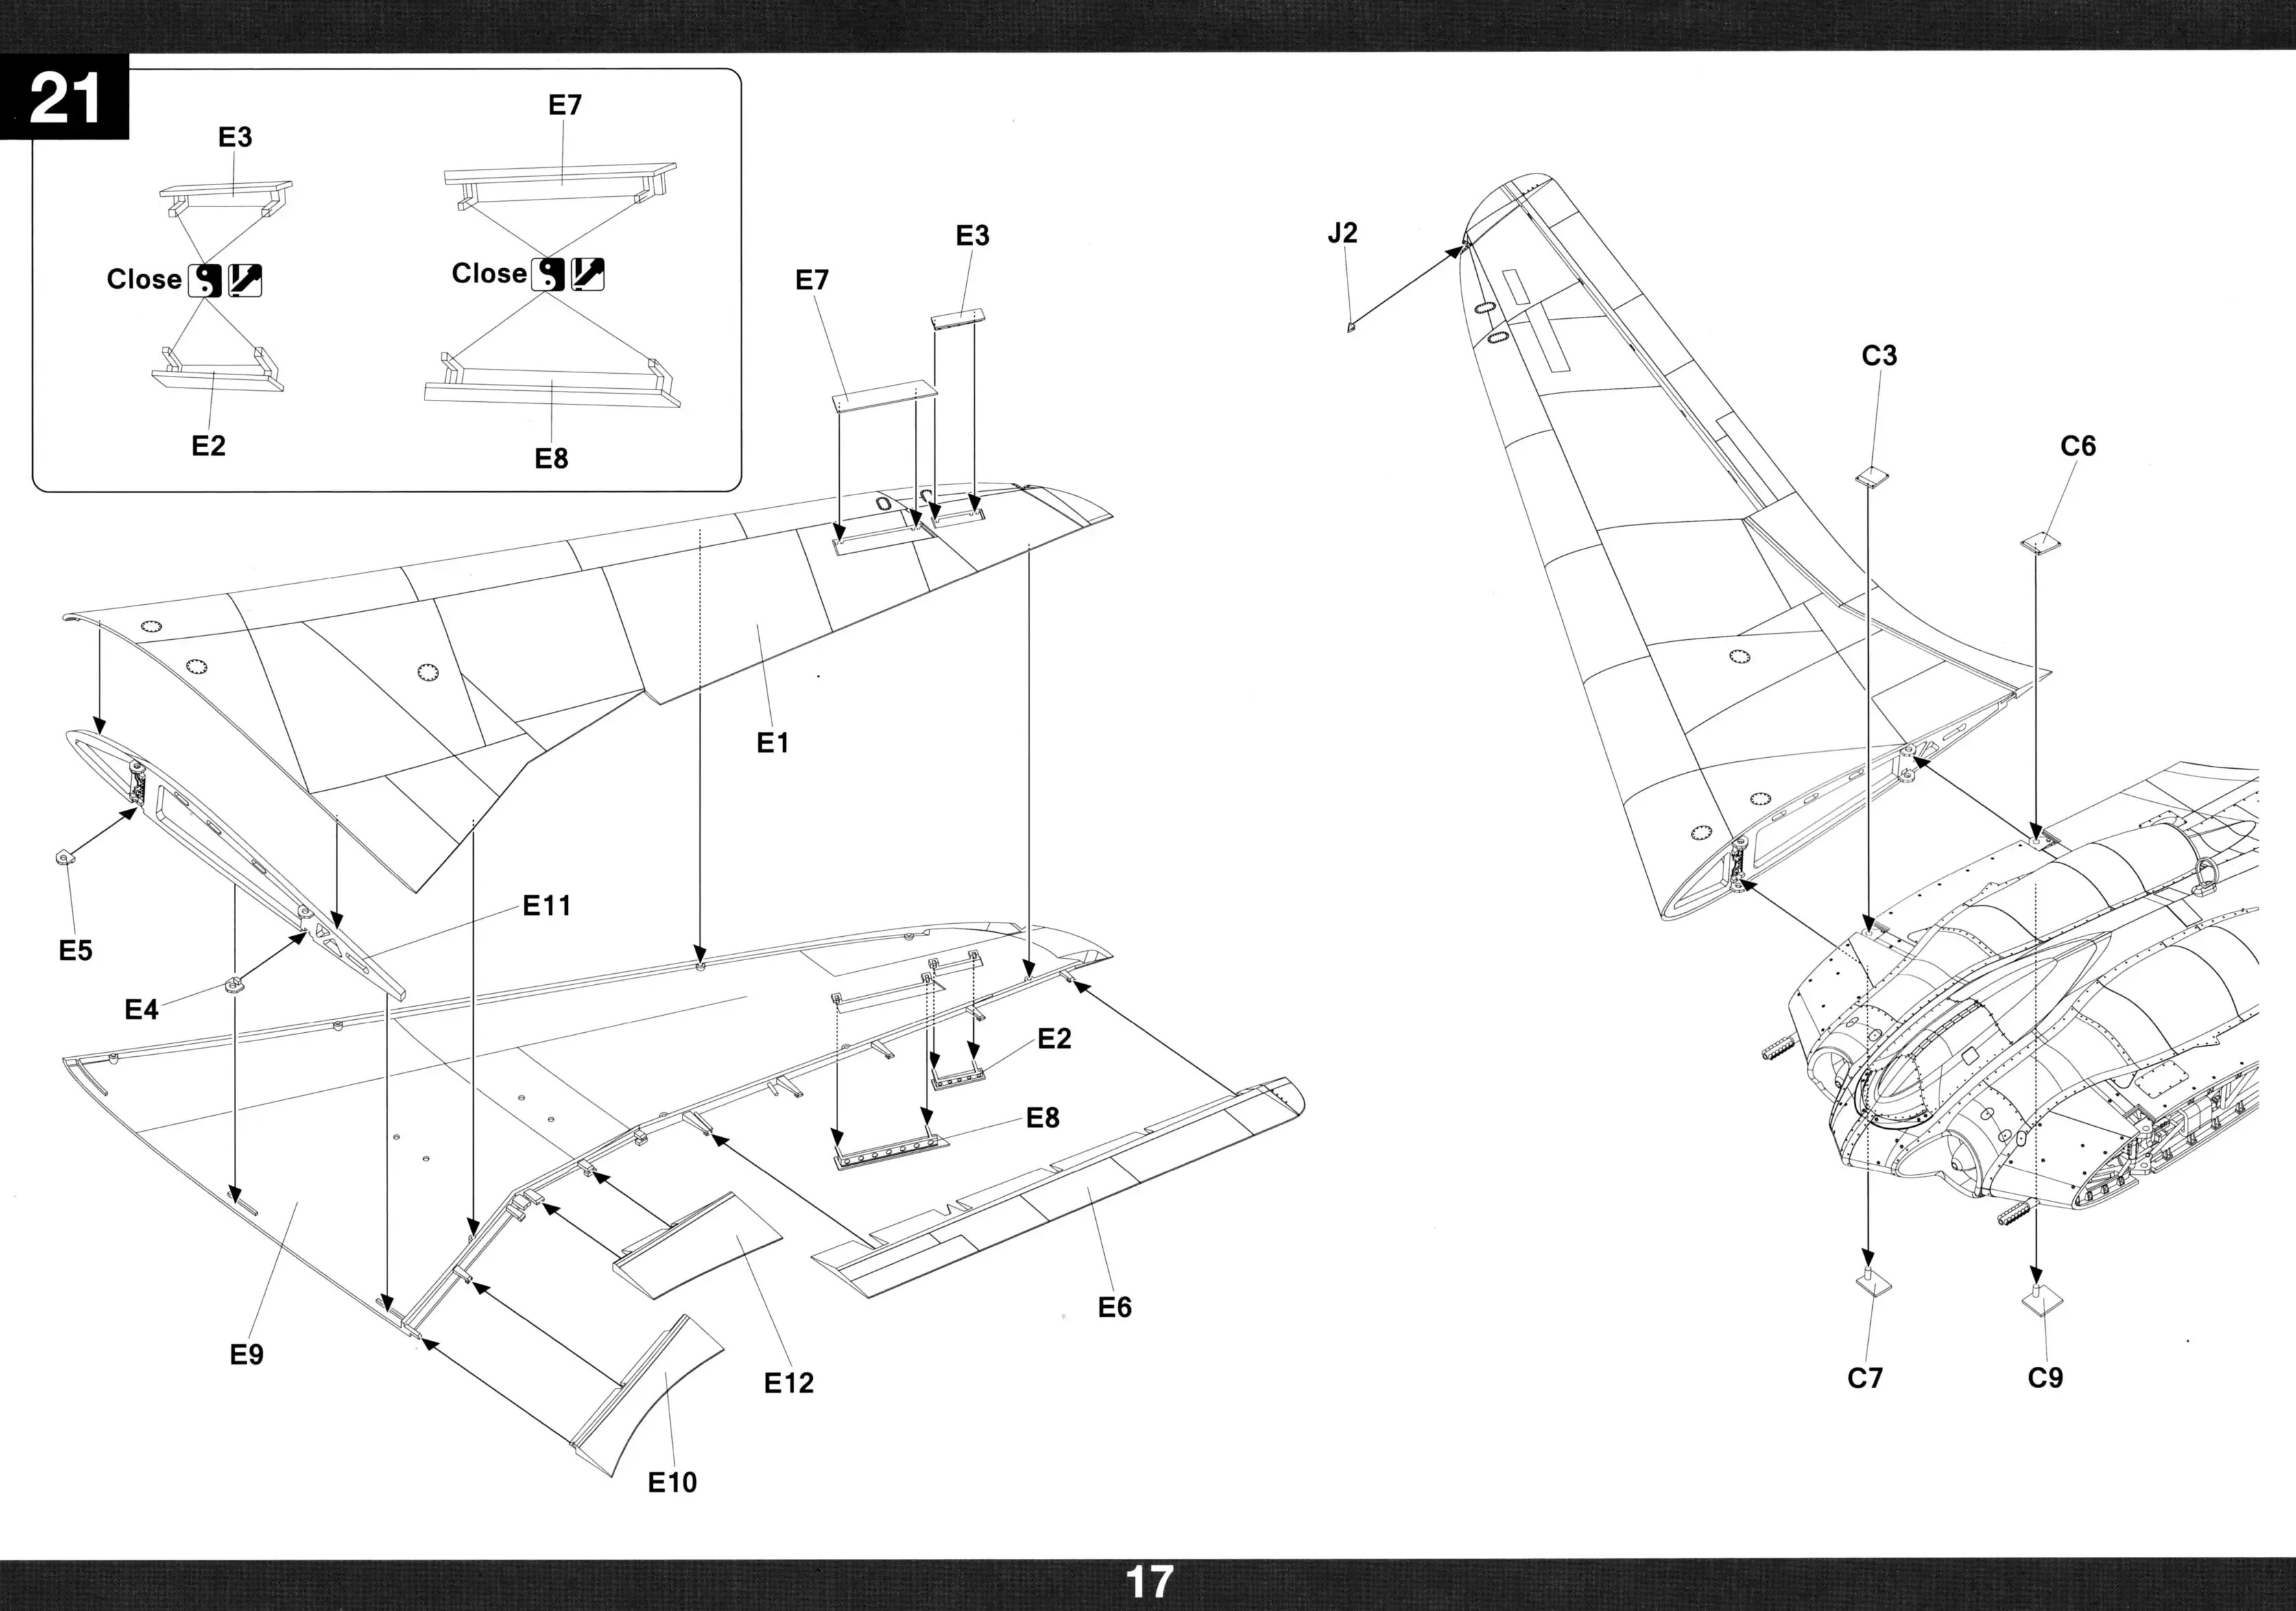
 The kit wings are impressively large in 1:32 scale and will be quite a handful to manage once attached to the center section. I'm strongly leaning toward presenting my build in a manufacturing or post-war inspection vignette, complete with figures and the wings displayed vertically on racks—much like the reference photo above. One drawback of the Takom wings is the lack of internal detail, such as the fuel tanks, which are clearly visible on the real aircraft.
 A rather forlorn-looking Ho 229A, most likely photographed during Allied analysis in the immediate aftermath of the war. The aircraft appears weathered and worn, with scuff marks and discoloration on its outer skin—likely the result of both wartime handling and post-capture transport. Of particular interest is the canopy, which is clearly tilted to one side, possibly indicating damage during disassembly or inspection. A moment frozen in time—one of the most advanced designs of the era, grounded and under foreign scrutiny, its future sealed not by combat but by surrender.
 The final stage of assembly involves attaching the wings to the central fuselage section, and it's clear that Takom has thoughtfully engineered this part of the kit. Just like the real Ho 229, the model incorporates four locking pins per wing—two on the upper side and two on the lower—that slot securely into the main body. This not only provides a strong and stable join but also cleverly allows the wings to be removed again with minimal effort. This feature is especially useful for transport, storage, or modular display options such as a factory diorama or a maintenance scene. The fit is surprisingly precise, requiring little to no adjustment, which is impressive considering the size of the parts involved. It’s a smart design choice that reflects the modular nature of the original aircraft while offering added flexibility to the builder. For those planning to detail the internal structure or leave panels open, this removable wing design makes the whole process much easier to manage.
CONCLUSION - Takom 1:32 Ho 229A (32001)
Takom has steadily built a reputation for tackling a diverse range of modeling subjects, and their recent expansion into 1:35 scale helicopters—particularly the AH-64 Apache series—was generally well received, based on the feedback I've seen. It's encouraging to see them continuing to invest in aircraft kits, especially in the larger scales where detail really shines. Overall, this is a very well-executed kit. The engineering is smart, the assembly process is surprisingly straightforward given the inherent complexity of the subject, and the fit and alignment of major components is excellent. Where the kit stumbles, however, is in the instruction manual. The assembly guide is poorly laid out in places and can be difficult to follow. On several occasions, I found myself frustrated by vague diagrams and unclear part placements, even when cross-referencing with period photos. In the end, I had to rely on some educated guesswork, which detracted from what was otherwise an enjoyable build.
It's inevitable that comparisons will be made with the Zoukei-Mura version of the Ho 229. While that kit is arguably more detailed, it also demands more effort and comes at more than twice the cost. If you're looking for a well-priced, accurate, and visually striking model of this iconic aircraft, the Takom 1:32 Ho 229 is a solid choice that delivers great value and display presence.


The surface detail is otherwise good; the plastic is smooth, and while the panel lines were a bit shallow out of the box, a light rescribing helped define them better, especially once enhanced with a black wash.


Takom has steadily built a reputation for tackling a diverse range of modeling subjects, and their recent expansion into 1:35 scale helicopters—particularly the AH-64 Apache series—was generally well received, based on the feedback I've seen. It's encouraging to see them continuing to invest in aircraft kits, especially in the larger scales where detail really shines.
Check out Takom's Facebook page for more on their kits...

You can see more of Gary's model making on his website Scalespot.com

Instructions: