
Revell of Germany
1/32 He 111P-1 Review and mini-construction

Kit no: 04696
Subject: Heinkel He 111P-I
Scale: 1/32nd
No. of parts: 433
Length: 511 mm
Wingspan: 709 mm
Sprues: 17 grey + 3 clear Styrene
Decal choices: 3 from the Battle of Britain
Where I got mine: Revell of Germany for £59.99

When you think of a German bomber from the Second World War you would either think of the Junkers Ju 88 or the Heinkel He 111 bomber. The Junkers model was made into a new tool kit by Revell of Germany in 1/32 scale over a year ago – and now it is finally time for its just as popular (and larger) stalemate to see the light of day in the same scale.

Revell of Germany have not at all been left behind their far eastern rivals in the 1/32 aircraft market, and right now are the flag bearers for the Europeans in 1/32 scale. This year they have released the excellent kits of the Arado Ar-196 and the BAE Hawk trainer. It is good to have a counterbalance to the generally expensive and super detailed Asian market that dominates the modelling scene right now. A different way of looking at things like this suits many modellers who like to either add their own bespoke or aftermarket extras or just leave the kit out of box. As long as the company is not slugging you for the extras it should have added itself I like this philosophy. Revell of Germany has stuck true to that ethos here.

The choice of a He111P is obvious as already in this scale in the past the whole Battle of Britain (BoB) combatants seem to have been kitted by revel - the Spitfire, Hurricane, Ju-88, Bf 109 and Bf 110 have all had the 32nd treatment, and now it is Heinkel’s turn with the He 111P-1.
Very Very Big wings

This aircraft’s model was chosen I would think by the fact that the other aircraft it matched were early war prominent BoB aircraft and the P-1 was THE He 111 model of that era. It was the first with the slender bulged dome nose and was powered by a pair of Daimler-Benz DB 601A-1 water cooled engines. It was protected by three machine guns and served pretty much until the main production variant the “H” model took over at the time of operation “Barbarossa” in 1941.

The box is the first surprise. Revell of Germany have released both of their large scale kits now with a regular top opening box, as opposed to the nasty side opening counterpart which tends to spit kit parts out for the “carpet monster” to devour – this I have to say is a box full of kit. The kit itself is in several plastic bags but as an unfortunate outcome here there are sometimes three sprues in one bag. The problem with this is that some of the parts scratch each other. That is bad with the fuselage but really poor with the clear surfaces of which some of mine had been scratched. This is an easy problem to fix and I hope it is addressed in the future.
A little scratch here and there should polish out hopefully..

The light grey plastic is a hard plastic type and not shiny and a little matt in texture. There are a lot of sprues here - seventeen plastic and three clear, and a few sprues like the wing pieces are just a slab of plastic! I was really amazed at the size of this kit when I revealed the box; it reminds me of the Airfix Mosquito in the sheer amount of plastic. Although this kit comes in for around half the price. Some shortcuts have been taken to achieve this in the moulding technique, but the end result here is a kit that fits together well and one that would be an aftermarket modellers dream.
Eight pages of A4 instructions in the almost comic book style Revell is known for are really crammed together on these black and white pages. They certainly are a busy couple of sheets but you do need to follow many steps here to the letter otherwise you will maybe come undone later. I noticed you must glaze the interior windows and include the tail wheel before buttoning this beast up. Things like this make me want to follow the instructions in this kit and not deviate. There are one hundred and ten steps in this kit’s creation; and I know I could make more steps than I need to if I didn’t follow them!!


This kit’s features run off the brochure and sound like a pretty good set of options:
Firstly the detailed surfaces with engraved panel joints - all of the surfaces feature some nice surface detail; nothing is over done here – although some of the panel lines could be deep for some I am happy with their look at this scale. There are riveted areas especially in the tail and control surfaces but none really except for some Hasegawa style major rivets and holes. Good luck riveting the whole thing! I am sure some people will do this, but the Germans were very good at making their rivets as flush as possible, so I think Revell have it right here
Some close-ups of the fuselage


The cockpit is a blessing and a curse in such an open - nosed aircraft. In my experience (currently building the Fw 189) you have to really get the cockpit parts looking as accurate as possible before buttoning it all up. The pilot’s seat features the lift mechanism that helped him to be raised in the cockpit to see above the glass “tunnel” that was around him and could impair or distort his vision. The option of a little open windscreen shielding him is given here and opening up the “bullet” glazing here is nice.
The cockpit instrument panel is well moulded (bulged instruments) and comes with decals as well if you choose to use them instead. The controls are all there and look good but could definitely do with some extra wire work, especially going into the control column. The gunner’s rest/floor section can be moulded open or down and the seat next to the pilot is basic but will look great with some weathering. Remember RLM66 in the cockpit and RLM 02 in the internal structures...
The cockpit instrument panel is well moulded (bulged instruments) and comes with decals as well if you choose to use them instead. The controls are all there and look good but could definitely do with some extra wire work, especially going into the control column. The gunner’s rest/floor section can be moulded open or down and the seat next to the pilot is basic but will look great with some weathering. Remember RLM66 in the cockpit and RLM 02 in the internal structures...
Both sides of the seat


The wings are excellent in texture and shape and the flaps and ailerons are moulded separately so you can pose them if you would like. You have little tabs in the wing so you can rotate the control surfaces pretty easily to make your kit more dynamic and less “static.” The wings themselves are riveted lightly and snap fit together like no one’s business – they are gapless in their join I was very impressed to say! Balance horns are of course included. One thing I must mention, these would be best attached overnight as the joint is small in its notch and leaving to sit overnight would not do you any harm – and maybe it will save you some room.
The wings in closer detail


Here they are together…a great fit on all major joints - this is just sitting together not even glued or taped

Reinforcement and strong glue are a help here - a lot of surface area but a small seam make this an overnight “set” i would think.

Flaps are positionable and well detailed

The tail section is just like the wings in that they have positionable control surface and balance horn and actuators are again included. This is one step ahead of some competitors who do not include such simple things. Here are some pictures of the horizontal stabilizers and the elevator assembly plus the straight and bent positions for them.
Elevators are easilly consrtucted and they dont seize up when you add a little glue


And together

The tail section


The structured side walls - Well this is the real problem I have with the kit. To come in at a price point the moulding has been done in a less expensive method and you have really large ejection marks on the interior of the cockpit wall and the rear cabin. It does remind me of the main problem I had with the Airfix Mosquito last year which had the same issues.
This to me is the main blemish on this kit but to half of the modellers out there it probably will not matter. To those who like to work on interiors and maybe wish to show them off (with such a large glazed area a distinct possibility) this is a real “staller” on getting the first parts of the construction done. You have to sand inside the internal ribbing without damaging it which is a pain in the donkeys behind. I still have not come up with a good solution to full these except maybe for blanking the panels off...?
This to me is the main blemish on this kit but to half of the modellers out there it probably will not matter. To those who like to work on interiors and maybe wish to show them off (with such a large glazed area a distinct possibility) this is a real “staller” on getting the first parts of the construction done. You have to sand inside the internal ribbing without damaging it which is a pain in the donkeys behind. I still have not come up with a good solution to full these except maybe for blanking the panels off...?


There are a few sink marks in the kit on the ¾ fuselage spine which aren’t that big of a deal but are there none the less. I also found some very small sink marks middle of wing ant at the extremities where the internal structure is there to brace things. This though is so very hard to see you need a really strong light to pick it up and I don’t think it would even be noticed unless you looked very hard. There is some flash on wings and fuselage seams, as well as rudders but nothing that won’t take a few seconds to knock off.
Tiny sink marks in the spine – it is nothing to write home to mum about though - most will not notice them, i had to look pretty hard to see these!

With a kit the size of this the constructors really did do a good job of trying to eliminate the problems associated with injection moulding. Apart from the injection marks in the cockpit which many would not bother even filling the compromise here was met and made, and Revell should be happy with the result achieved.

Internal bulkheads are good as they are or detailed up - your choice here


The bulkheads are fairly sparse and again you could go both ways with this aircraft, super detail them and hope someone can see inside or just the minimum and get it all sewn up. The ribbed insides look “ok” and the Separate Radiators and Inlets are a basic model of the real thing, as is the navigators station with equipment table.


There is front, gondola and upper Machine-Gun Positions (3) which have machine guns with them but these are a little toy- like – a quick fix for these would be some of the excellent barrels from Master from Poland who makes excellent brass replicas of the same thing. With just three guns to purchase it makes good sense for an area that would attract a lot of attention, not to mention that the top turret is an open position and the front MG you will look at always – I will be making that change to the barrel part at the least. Again it is a matter of personal taste. I always look at the MG’s and I expect others do too so I make sure that area is looking as good as I can make it.
The gun sprue provided with the kit with ammo cartridges


My replacements will look more like this

The top gunner’s hatch is depicted with the “P” style rotating mount and with a hood that can slide forward or rearward. This looks like Revell have made sure they can later do the “H” model with a rotating turret as the middle square insert can be easily swapped or added. I will keep my eyes on the fit of this part.
The upper “turret” sprue

The sliding hood for the aft top gunner

The detailed Bomb-aimers compartment, plus the control Column and Bomb-aiming Unit are quite adequate and will look the part with some weathering and close detail, they are pretty basic but again it is the effort you put into these that pays off at the end. As long as the basic detail is there the sky is the limit.
The construction of the eight SC 250 Bombs and the bomb-bay with vertical magazines takes up seven steps – but many of these are repeat steps (eight bombs with four tails etc.) the Bombs look pretty nice and the tails are not too thick. They are loaded in straight up into the magazine tail down. And you could maybe install half of them and leave some out to show the detail inside – otherwise it is full of bomb and you cannot see your handywork. This is the last step of the inside before you button up the fuselage as well in the instructions. The bomb bays of course can be displayed open or closed but not guessing that many people will show such an impressive load open.
The bomb magazine


The bombs look very nice and detailed - better leave some out to show them off !


Surface detail is nice and subtle

Wheels and the main undercarriage is very nicely represented here and should not take much work to make look very realistic. You must as I mentioned earlier install the tail-wheel and linkage before you seal up the fuselage. The main gear goes into the underside of the fuselage/ wing spar in the instructions and this is several steps. One could not be blamed for searching out for metal landing gear in the case of this build as even though the gear is sturdy enough there are going to be a lot of people picking this up to have a look at it after you have built it! The main wheels are the earlier narrow type and while not bulged look pretty good to me.


While on the undercarriage the bays are really fantastic and could do only with some extra lines in there. They are a four walled construction and look pretty nice even out of the box unpainted.
The gear doors from outside

From inside..


The Wing-spar of course fits to the fuselage with two infills on the top that surround the cowlings of the (not present) DB 601A engines. These are omitted as a cost implication no doubt. To include aftermarket engines you would have to add ribbing to the internal cowling to display them open.


The top infills between the fuselage and engines

Simplicity here though is the key – and these build up very quickly without the engines and all of the work included herein. The exhausts are very nice two part examples which are open at the tips of course.


Only a small divot in the root of the props to fill

The plane’s “glasshouse” is nearly the last part of construction for obvious reasons. I found this clear styrene very transparent and not too thick – I did have one or two surface scratches though from not having each part in its own bag – this really needs to be addressed because it isn’t the first time and won’t be the last that not just Revell do it. Such an visible area needs better treatment.
Here are some of the unconstructed pieces before assembly from many angles – it’s a complicated shape…


The canopy for the glasshouse goes together really easily and there is actually a locating notch for the front asymmetric Ikaria nose mounting for an MG 15 machine gun. You will have to have to remove notch to revolve front Perspex which isn’t a big deal. The fuselage glass has little notches to keep it INSIDE the fuselage when you glue it in there – both on the clear and the grey styrene. I would say invest in some G-S Hypo cement for gluing these transparencies together before you scar the plastic with “hot” glue. Some more of the transparencies here.


– here is the glasshouse together at many different angles...


Decals are printed in Italy by Cartograph which would suggest top quality (we will see when we build it) the colours are strong and the decals are in register – there are no misprints or misses that I have seen. Three variants from the BoB are included all in splinter camouflage RLM70 Schwarzgrun and RLM71 Dunkelgrun with RLM65 Hellblau undersides.
The colour schemes are..
The colour schemes are..
- 5./KG 54 Totenkopf (Death’s head) Geschwader, Coulommiers, France 1940
- III./KG 27 Geschwader Boelcke, Delmenhorst, Germany 1940
- II./KG 5 General Wever, preserved at the Norwegian Aviation Museum, Gardmoen, Norway

One thing I think is a bummer but I completely understand is that there are no swastikas on the kit. It is however Revel of Germany and it is illegal for that symbol to be displayed there. Fair enough – but you will still have to source your own. There are several data sheets, warning signs and stencils to include to the kit as well. These add detail inside and out.

This brand new tool kit is a boon for large scale modellers - but where to put it? Seriously this kit will go together pretty quickly once you decide to button it all up and once the inside is sorted out to your tastes.
Revel have made all of the great detail on the outside – which is fair enough as that is what most people look at for most of the time. Aftermarket and paint suppliers must be rubbing their hands together with glee at this kit – and with good reason, you could add a lot to it. Or you could just build it out of the box and still come up with a lovely model for under £60 for a bomber with a wingspan of 70cm that is quitte an achievement. Revell should be very happy with this kit which I am sure many people will transform into a masterpiece!
I thought I would do some more minor assembly to show you all some more of the shape of what is to come when building the kit


I will be building this up over the next few weeks -stay tuned I'll pop up the updates on the front page -
Till then have fun with your modelling!
Adam Norenberg
Till then have fun with your modelling!
Adam Norenberg
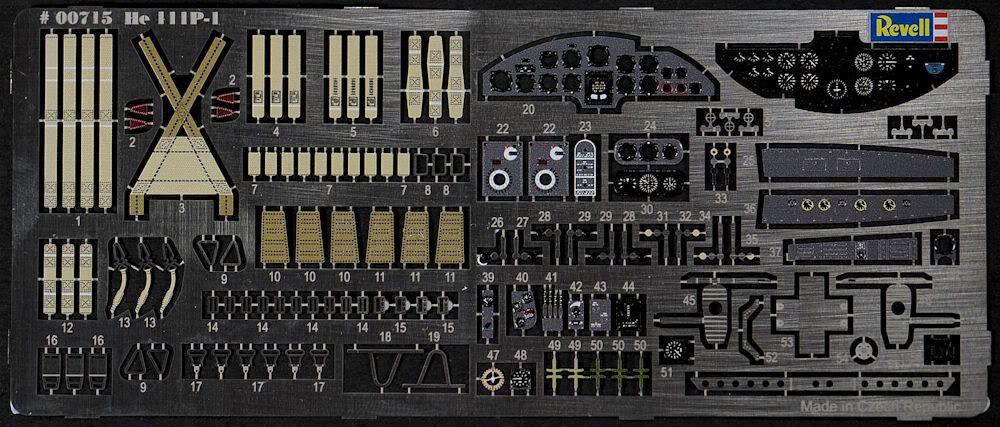
If you would like to see the new Revel Interior PE set applied to some of the kit parts just follow this link to our review...

For further information on this kit visit www.revell.eu
