

First look &Test
Shot review
Panda-Hobby 1/35
Oshkosh MRAP M-ATV
Kit No: 35001
Kit type: 392 Styrene parts, 84 photo on three sheets & 5
Rubber Tyres
Scale: 1/35
Available now from: Pacific
Coast Models in
the U.S. and you can also get it in Europe from AVAX models the Czech Republic for USD$ 45.95

The kit has only been made once before in 1/35 – the Varja Resin kit (USD $195 + postage) –which
costs a great deal more than this one which ships Via Pacific Coast Models for
– (or if you want to wait the Kinetic kit will be out sometime early next year.) 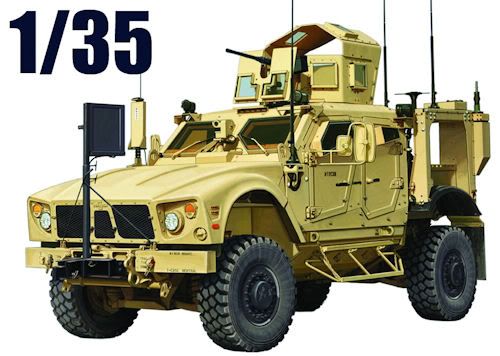
Now I am not going to go into the history of this vehicle
here – that is what the
internet is for - but I will
mention that this vehicle is the all in one new solution for the US and other
armies around the world to the successfully improvised tactics used by
insurgents that have pinpointed the Humvee ( and other military lightly
armoured vehicles) weak points. The MRAP which is made by the Oshkosh firm in
the U.S. has a V-shaped Plasan armoured hull to absorb and deflect bomb (IED)
blasts, run-flat tyres, armoured topsides, a four wheel steer system with an
advanced suspension with sixteen inches of travel – The top turret can be fitted
with all sorts of weapons and remotely operated from the cabin if need be. Here
is the promo video for this vehicle – pretty impressive as a run-around!
Now I must stress the kit we have is a test shot – and not
the final production kit just yet, there is yet to be added parts like decals
and clear windows for a start that we do not have in this case just yet – But to tell you the truth though not much
needs to be added! I thought we would have a look at the sprues and a close up
of some of the parts – I will talk you through them each as I go through. I
will do a quick build of this vehicle over the next few days as well to share
with you the fit of the parts and any possible pros cons of this kit.
The sales brochure picture from the Oshkosh lobby...

We have also worked from the as yet to be finalized instructions (22 pages without colour scheme choices) so I will mention them
but not show them yet. At first glance the kit looks impressive, there are ten
sprues moulded in tan plus the cab section and the bonnet, plus two sprues of
transparencies, six rubber tyres and three sheets of photo etch. At first
glance it looks detailed but not painfully so – let’s have a closer look sprue
by sprue. First the contents…
The cab of the
M-ATV is well replicated in shape here and all of the angles look right
according to reference picture I have to hand. The detail is there but what
there is is quite subtle. The thing with a vehicle like this is that it’s
probably better to release a good and inexpensive base vehicle that people can
add to to make their version of interest.


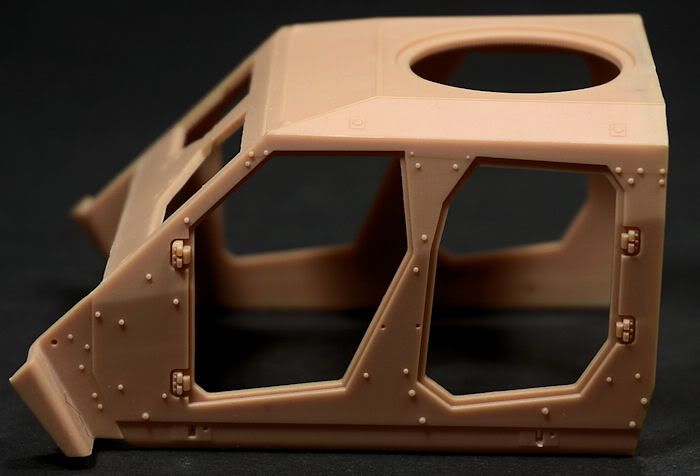
The turret ring is
finely detailed

There is no 7.2 litre inline-6 Caterpillar C7 turbo diesel
engine here, so the bonnet will be closed – there is Photoetch to replicate the
impressive grilles of the M-ATV as well – more on those later. The shapes look
right and that is the main thing here.

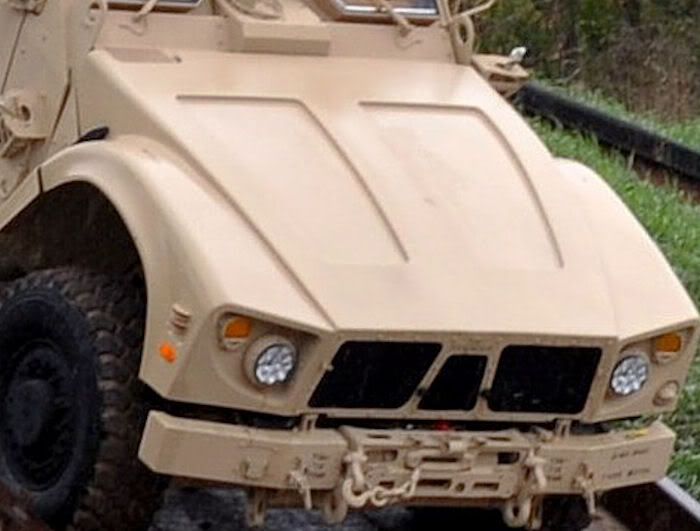


The real hood badge

The kit - just a bit of paint and it will come out nicely - the included P/E grilles will help also

The Tyres - are
of the rubber family – like rubber tyres or loath them is your choice but these
ones look pretty good to me – Chunky tread and no extra rubber to clean away
and you can read all of the tyre details. There is also the detail of the little
undulations of the tyre which actually make it easier to weather with fine sand
as it drops out of the treads on when the dirt falls from the top of the tyre –
I like these tyres a lot.

The rear spare tyre


The real thing again

Sprue A - contains
mostly the armoured hull and the floor – with the engine floor section and
transmission and other details like the mudguards and the dashboard. Sprue A is
taken up with the interior floor and leg-wells for the front section of the cab
as well.

The dash board is clear and apart from decals which are to
come looks ready to paint and weather

The real thing

it looks like Panda
have the three central Dials and the toggles in the right place. You can easily
pick out details like air vents and switches as well

The Transmission and
engine are both only shown from the bottom down, not a problem as you won’t be
seeing it anyway - or it will be covered with mud or sand by most modellers
anyway.

Large rear mudguards
include top and bottom corrugated detail on them


The underside Plasan
armoured hull – there aren’t many pictures of this knocking around funnily
enough – but the holes for the attachments of the foot plates to gain access are
there in the right position.


Sprue B

Sprue B has mostly
two sections of the chassis and the structure of the chassis and Alison six
speed transmission, as well as the driver’s seat (minus the frame which is on C
and D sprues)

There are two identical Sprue
C’s

The four main wheels
– two on each sprue

The real wheel


Steps of safe ingress
and egress to attach to the armoured sloped hull.

The biggest mud flaps
you have ever seen!

All of the shackles
you could probably need to complete the vehicle – there is some excess styrene
there but nothing to worry about – especially on a test shot.

Part C19 is the four
separate linkages for the TAK 4 Independent Suspension – this suspension takes
up a large amount of these two sprues.

The diff housing that
attaches to the drive shaft which is on sprue E

The springs come in
half and have to be glued together but look quite good and beefy

Sprue D continues
the trip further up the vehicle - doors and their included armoured window
frames, the door inserts and wheel brakes along with the stowage bins for the
rear compartment

The steering wheel is
a good match for the original – it only needs a horn decal!


The armoured window
frames are an easy match in this scale – they are suitably chunky like the real
ones


The doors front and
back are next – the real doors are in the middle pic for you to see


Sprue E is by far
the largest and contains some more of the structure of the vehicle – including
other part like more internal door detail, the drive shaft, the internal
wheel-wells and the rear cabin door as well as the exhaust pipe. This sprue contains
as well the four bladed satcom antenna parts.

The rear exit section
is next – there is a frame that holds everything together at the rear end –
this is pretty much the back end’s main structure if you are building this and
no the “Pick up” style rear


The exhaust pipe
trails well under the armoured hull – this could look good detailed up. Funnily
enough this fell of the sprue just like my exhaust fell off my old Datsun 180B
– but I digress..

The internal door
handles are quite accurate as you can see from the real ones in the picture
below it


Sprue F – is not
yet with me – as soon as it arrives ill include it in this first look review. This
sprue contains all of the top armoured compartment and the .50 Cal gun. More
when I see it!
Sprue G - is
missing as well at his time – as is the smaller - these will come, and as soon as they do I will
include them in this review
GP1 - is the
first of the transparencies – this is frosted here as it is a test shot but it
will not be of course in the proper kit. These parts are the regular cab and
door armoured windows.


GP2 Sprue - is
the top fighting compartment armoured glass – the top of this kit resembles a
WWII turret and makes it one of the more interesting versions.


Sprues H - There
are three of these sprues – and each
of them has a passenger seat with the patented shock absorption system, coupled
with the Photo etch these make quite convincing seats.

Sprue J – houses
the external aerials and sensors of the vehicle - the flag passive RHINO device
for the front bumper, as well as the Anti-IED device for the front passenger
door and the two DUKE Anti IED devices are there of the rear mounting on the
M-ATV as well.


The RHINO - should really be called the flag..Along with all the other antennas
The Photo Etch sheets (3 of them - PE A, PE B and PE C) are
for all of the incidentals which cannot be replicated as easily in styrene –
they make parts like all of the internal storage shelves for all of the radios
and computer equipment and monitors and radios which unfortunately you will
have to raid from your spares box or look to other sources for.


Just some of the P/E
used here as shown by the CAD images


So there you have it!
The test shot is here and it looks pretty good – we will see over the next week
how well it goes together as well. At least it looks pretty good compared to
the photos we have of in-service M-ATV’s.
I am sure aftermarket companies will go NUTS adding detail
to this kit – if you want to show it buttoned up you have everything you need
here already. I am sure most modellers will add their own customizations to
this vehicle, and while the kit only costs USD $45.95 from Pacific Coast Models in the
U.S. and you can also get it in Europe from AVAX models the Czech Republic. For that
price I think this kit is a bargain and I will explain why.
The Varja kit
looks great but it is resin for one thing and it’s USD$ 195.00. No thanks - not
for me. There is also news of a M-ATV from Kinetic
on the horizon (all of a sudden) but his kit from Panda I think has the jump on
it as well - the Photo etch is included here in the Panda-Hobby kit is much finer than the Styrene parts on that
Kinetic kit so unless that changes this looks to be the winner on the detail
Vs. price front.
Keep tuned in here - well see how it goes together over the
next week...
Here is an amazing
walk around I found very helpful in reviewing this kit - below I have posted the info on the Box-art
and below that is the built up kit shots we have been sent by Panda-Hobby – we
will see of course with our own kit how it all goes together.
Thanks to the People at Panda-Hobby for sending us this, their
first kit. Hopefully on the quality of this kit the first of many for them.
Below is what we believe the box-art and the markings will look like...


The Test shots built up from Panda-Hobby themselves are below - as are the CAD images


Panda-Hobby Co. will be making model armour, planes, ships &
cars. I have heard that their newest airplane kit in 1/32 will “blow our
minds” and that it is not a rehash of something someone else has made –
which is good news in a hobby intent on not taking risks. The US
distributor has been named as Pacific Coast Models so there is
definitely “movement at the station” as the old folks would say. Pre
orders (from Pacific Coast Models in the US and in Europe from AVAX models the Czech Republic


Below are the rest of the CAD images from the MRAP M-ATV for you to enjoy. We will keep you abreast of news from Panda-Hobby in the future.


