


We had been waiting for this special release for a while – and now with dragon’s new smart kit of the Tiger I "131" s.Pz.Abt.504 Tunisia in 35th scale we can finally build the tank that is so well known as the last tiger I still in running order today and one that many of you might have seen or touched in the flesh. Let’s have a look at the real Tiger I31, the kit and how the two compare when we build it all up (with a little bit of history thrown into the build as well…)

Build Review: Tiger I "131" s.Pz.Abt.504 Tunisia (Smart Kit)
1/35th scale
from Dragon Models
Kit number# 6820
759 parts (699 in grey styrene, 29 etched brass, 21 clear styrene, 6 DS Plastic)
Box Size: 9.6" x 15" x 3.5"
Available from Hobbylink Japan, Price: ¥6,240/ USD $50.82/ €47.97
1/35th scale
from Dragon Models
Kit number# 6820
759 parts (699 in grey styrene, 29 etched brass, 21 clear styrene, 6 DS Plastic)
Box Size: 9.6" x 15" x 3.5"
Available from Hobbylink Japan, Price: ¥6,240/ USD $50.82/ €47.97

Thought to be a bit of a banner release for Dragon, the linking of one of, if not the most famous Tigers in history that had an interesting back story. This added with the fact that you can still see this tank in running order and yes, the fact it’s a Tiger I in 35th scale. Well it’s a hole in one, isn’t it?

Well yes and no. Picking such a well-known subject you had better get it RIGHT! Dragon had enlisted the technical services of the current owners of this vehicle, the Bovington Tank Museum in the UK along with supervisor of the project is none other than David Byrden. who had hands-on experience with this vehicle. The chance to examine tiger 131 bolt-by-bolt and have all of the data accrued upon its capture was afforded to the team is a great start.

Now a little about the real Tiger 131…
The Panzerkampfwagen VI Tiger (Sonderkraftfahrzeug 181) with chassis number # 250122 was shipped from its factory in Germany to North Africa in March 1943. It served with the 3rd Platoon, 1st Company of the 504th Schwere Heeres Panzer Abteilung (s.Pz.Abt.504) and there are a few pictures of this vehicle on the roads in Northern Tunisia around that time.


On 21 April 1943 Tiger 131 saw action in the Battle of Longstop Hill (Djebel Djaffa hill) when it was attacked by Churchill tanks of No. 4 Troop, A Squadron, 48th Royal Tank Regiment near Medjez-el-Bab. Tiger 131 was hit three times by the 6-pounder guns of Churchill tanks from the 48th Royal Tank Regiment.


One of those hits immobilized the turret by hitting the Tiger's gun barrel and ricocheted into its turret ring, jamming its traverse, wounding the driver and front gunner and destroying the radio. A second shot hit the turret lifting lug, disabling the gun's elevation device while a third shot hit the loader's hatch, deflecting fragments into the turret. Another clipped the lifting device on the turret side, while shellfire also damaged the stowage bin and Feifels on the rear of the tank so there must have been some lead flying at the time. The German crew bailed out taking their wounded crew with them. No one knows to this day if all the crew survived or what for but the German war diary says guardedly that the crew deserted the tank in panic. “Crew members of Tiger 131 panic and abandon the tank after two harmless hits from a Churchill.”

The Tiger “131” was the first intact Tiger tank captured by Allied forces.

Lt. Peter Gudgin, who commanded one of two troops of Churchill tanks leading the attack on the hill was soon to experience the destructive force of the Tiger. After walking into this ambush by the tiger perched on the top of the hill Gudgin and his crew bailed out under heavy machine gun fire and were fortunate to escape with minor injuries. From his diary, he says “The next day we took the opportunity to examine our burnt out tank. It had been cleanly penetrated by an 88mm shell which had been fired by a Tiger tank that had been found abandoned on our objective.”


The captured Tiger was recovered by the 104 Army Tank Workshops, Royal Electrical & Mechanical Engineers and it was displayed in Tunis on 24th May 1943 where it was also inspected by Winston Churchill and Anthony Eden on 2nd June 1943 and by His Majesty, King George VI on the 18th.


After being taken back to England for evaluation purposes it was transferred to the Tank Museum in 1951 and subsequently left in disrepair for many years, repainted – once by a Sergeant who was so proud that he left his name on it!


Restoration commenced in 1990 and by 2012 the work was complete. Now any visitor who attends the open days at Bovington tank museum can see this tank, often in a running condition. I had the pleasure of seeing this tank run a few times myself, and like many others, I have a special place in my heart for it, so when I saw a dragon kit with the boxart of this particular chassis number like many others I dived in.
Pre-restoration colours

After restoration - wow! and she's the only running tiger in the world

It was this tank that is the subject of this model and it is this vehicle in running condition just before and after capture that this model kit is based on. Several of the decals of this smart kit is the same as the ones added by the captors. More on colours in part II of the build but for this part, we will concentrate on building the kit and comparing it to the real thing which has been mostly restored to original condition with a few additions and alterations.
The Kit:
The kit comes with the normal standard of very good artwork from Dragon. They have, and still do make some of the better box arts around and this one shows Tiger “131” on the road with some African Fallschirmjäger in support while the commander scouts out the road ahead. The artwork is evocative and maybe a keeper for your shelf even when your kit is finished.
The kit comes with the normal standard of very good artwork from Dragon. They have, and still do make some of the better box arts around and this one shows Tiger “131” on the road with some African Fallschirmjäger in support while the commander scouts out the road ahead. The artwork is evocative and maybe a keeper for your shelf even when your kit is finished.

The rear has all of the special features of this boxing. The CAD images show how this kit was replicated to make not the tiger of now but the same vehicle that was captured in 1943. This Tiger on the box top or the other two versions in the profiles on the side of this boxing are all on the menu with this one kit. For those who wanted to know it is very much like the recently released “Wittman” tiger released at the start of the year to much fanfare.

When looking at the supplied instructions you can see just how much of previous kits have been used in this boxing. I was going to go through the kit sprues but that would almost be a folly. There are so many spare parts from other sprues that are included here we would spend half our time looking at non-applicable parts for this boxing. We will stick to what we need to make this particular model then.

When making this kit from Dragon I was very interested in the two other schemes on the box. One was a Winter white scheme of an early tiger in Russia of Panzer Abteilung 202 (no #1 whitewash over grey) in 1943.

It looks to have been lost in action at the second battle of Lake Ladoga in March of that year. The jury is out but SOME people think that it is this tank.
The other scheme was an attractive three coloured Tiger I of s.Pz.Abt.505 in the Ukraine in spring 1944. Interesting that such an early type survived that long into the war but you never know how this tank got there and how it was put together from how many different parts as shortages meant that every hull and turret available was used.

Having seen the other two tanks on offer here, knowing that all three were well researched and they could each be made with this kit, and even knowing that I liked the scheme of Tiger “131” the least of the three…well, I still had to make that Tiger. The fact I had seen it running added so much to the desire to do this particular tank. I think many people will feel the same way about this boxing. It was a smart move from Dragon to kit this particular variant.

The decal included are fairly simple as was the nature of these three tanks - well printed and in register, these will work well unless you prefer to use paint masks


The DS cactus is an amusing addition - being a tank in Tunisia this is a nice little addition to the kit

This build:
So off we go. I’ll go section by section. Most of my build photos disappeared (thanks, Windows 10 upgrade gone wrong) but no matter I’ll walk you through what you need to do to replicate “131” and how close this kit goes into getting it right. I have used many of my own walk around pictures I took at Bovington of Tiger 131, and although the tank now is not 100% the same as the captured version in 1943 that is the version I will be making.

The instructions of this kit are pretty vague in some areas of concern to the model builder. Not enough clear views at the right angles of certain not-so-obvious assemblies are afforded the modeller in some parts of this detailed and multipart 19 step process. Dragon could do with some more thought to get the angles of the most important things right so the modeller can see them and get their own build right and that would have saved a considerable amount of time ungluing for this model builder if they had made a mistake. However, I will tip you off to those tricky bits of the build and show you the right angles in this build. This kit was designed to build Tiger "131" as it was on 21 April 1943, the day of its capture and that is how I will make it as close as possible.
Step 1
Dragon Tigers start off at the exhaust assembly on the rear hull plate. There are several well-marked holes to make and notches to chop off and the assembly of these exhausts is the same as the tank might have been in 1943 and not as it is on the restored tiger.
Dragon Tigers start off at the exhaust assembly on the rear hull plate. There are several well-marked holes to make and notches to chop off and the assembly of these exhausts is the same as the tank might have been in 1943 and not as it is on the restored tiger.


Parts G15 are not very clear as to the angle they go into the holes provided until they are in place, but once everything is there it can sit open or closed.
Step 2
The torsion bars go in next in step 2. Along with a confusing (and hey it’s a Tiger I so it’s already complex) road wheel. Drive sprocket and idler wheel set up on either side.

The instructions correctly let you know about the lack of front road wheels on the left side but they mention nothing about the right-hand side of the vehicle. I left mine off on both sides.

There is a picture of this tank AFTER it was captured undergoing some trials work and it is missing none, or the second outside road wheel and not missing the front right road wheel. I don’t know anyone who knows for sure so I may change my mind and just leave off the front left on the final build we will see.

The dense pattern of the interleaved wheels are evident in these pictures


...is concerned with the position of the rear idler which can be moved to produce the desired tightness or slackness depending on how you like your tracks to sit. The position needs to be set AFTER you try your DS tracks on your wheels once it’s all on. DO NOT glue this into its final position unless you are sure of track tension. This important note is brought up in a blow-up diagram.

The rear plate for the hull also goes on at this point. The exhausts going on probably before this goes into place to have a flat surface to work on. Notice here that I have already installed all of the tools, pipes and exhaust on this flat plate before installing it for ease of working on a flat, simple surface first.

Step 4 sees the jack handle, the tow ring and the suitcase that was strapped onto the back of the rear hull. The pictures you see of this at the time of capture show it this case not on the rear hull but it is sitting on the front glacis. Obviously, the captors were having a rummage. Not sure on where it has gone because it is not on the tank as it stands now.

Step five see the simple seven-part jack go together and the two hooks that it sits perched on that secure into the rear hull.

The jack is simple to make but as it stands the notch that it had protruding to form the jack handle into the hole it is captured in the rear hull does not locate. I had to fill that hole and cut off the notch on the jack handle and just glue it to the rear hull there. What a pain in my… trying to get it to fit.


The two sides of the hull are a simple affair. That and the two visible parts of the radiator that sits inside the rear of the hull are the main concern in this part of the build.


You will either have to paint this before you seal everything up or do like I did and count on your ability to shoot thru the gaps in the radiator grills on the rear hull. Although most of the detail of these will be lost in the darkness and the extra protective grills that cover the thick steel grates on the hull completists might want to detail these more. You can also leave the rear grates open for inspection altogether.

This step involves mostly the top of the deck of the hull. The rear engine exhaust grills, + shaped fuel filler caps and the heavy door for the top of the engine are secured at this point. Also, the latter details which you might want to leave off, for now, are included like the shovel, sledge hammer and axe can be added now. These tools have the attachment points secured to them. Some might not like this and the holes for these attachments are already in the hull. If you don’t want tools then stick some stretched sprue through them and glue then cut them, lastly sand the surface flush.

The two hull hatches for the driver and radio operator/ gunner are a sub assembly in this step, you get clear periscopes and a full interior hatch with large hinges and handles all there. This is great if you want to display the hatches open (with a person inside as there is no real interior) or alternatively leave all of this off if you want to close them up.

The next step of the kit features a few options that you may want to (or not) take up. The bow machine gun option or the pointy sock dust cover (seen on a later picture of the captured Tiger 131) and the water proof cover for deep wading. The driver’s periscope is also here on the front glacis plate.

The bow MG is a total pain in the butt to make. The plastic part (J26) that Dragon wants you to bend, the whole busy end that everything gets glued together around the muzzle and the fact that there is not another view of the gun make this a time consuming and probably not necessary build process. The gun is not visible once the kit is together so you only need to put the part J28 into J20 and then put that into the mantlet and you are done. It’s just not needed so if I make another one of these I would omit it and save my time.

A bit of a different look at my gun assembly if this helps you out…

A lot of stuff going on here and I have broken it down for you so as to try to help as much as possible. The tow cables, the rear engine deck covers and grille mesh to go over them, the front glacis joining to the hull and lastly, the "Feifel" air filter tubes are all put together in one stop.

The pre moulded tow cables have only a minimum of a mould seam on them so they are pretty good - They have clasps on them in the designated places to attach to the hull simply. Recently the style of tow hook clasps has been brought into question, so check your references for your own tank. The ones here match "131" just fine for us

The "Feifel" air filter tubes had some seam line son them, I was disappointed at these because they are a right pain to remove and you can loose surface detail if you are not careful.

It is also difficult to twist these into just the right aspect as they curve in a unique direction that there not many references of - I used this to help

The rear engine fan doors must have been a heavy thing to lift, here they are moulded in separate parts so you can remove or replace them as you like.

Lastly, the glacis plate is added to the upper hull deck.

We have next more tools going on to the deck of the tank, as well as the Photo-Etch mesh for the grills

These tools I pretty much left off, because they will get knocked off or broken during the build so I left them to the later stages of the build. The photo etch is made up of one sheet, with four mesh grills to use over the engine covers.

These grills are typical of Dragon's Tigers, while the larger sheet provides some very small details, along with some larger sheets of what would be thin metal for the Feifel filters and the engine fan ducting.

As per Tiger 131, I left the rear mesh guards off this version

Steps 11, 12 & 13 are all kind of jammed together, I don't know why - maybe they thought they would run out of numbers, maybe just to spell the sequence out a little. But this part of the build involves the joining of the top of the hull to the bottom and the front deck and rear Feifel filters added.

Lots of tiny parts are added to the hull also, brackets and more tools, including the right type of shovel for Tiger 131. Other variants are helpfully pointed out in the instructions when you need to make the right choices.
At this point, you also add the fenders for your tank. A lot of peeps will want to use photo etch for this. I put a slit in the joints where each of the individual fenders meets to give it more depth - you can see in the example below it does add a little. Many might remove or damage theirs further. I was sticking to the example of 131 again on this step
Above: cut - below - standard, your choice...

LOTS of clamps to help it all seal together!

Here it is from above, a little filler went into the gap where the rear deck plate meets the vertical rear wall of the tank

A comparison to the real thing just after capture.


Next up, we have three steps, broken down in a fairly simple way, that enable you to replicate the mighty 88m gun that the Allies feared so much on these Tigers.


The Breach is a fairly simple construction, and it all stays together once you are handling it as well.


And here it all is inside the turret.

The turret is next - and Step 17takes a whole page, where smaller steps on previous pages would have seen this in several steps. Again, with the nature of the chopping and changing of several kits together to make this particular boxing from Dragon we see this reflected in the instructions.

A notable thing about this boxing is that it includes a largely one-piece turret - often tiger I kits are supplied with two halves which take some effort to cleanly join. This kit has a circular base of the turret in one part.


Seats, harch actuators and all of the other stuff that can be seen in a basic (but not complete) turret ring are supplied, it is enough for most people who will not, of course, open up the turret past the hatches. I left the hatches off until the final completion of the kit so they didn't impede the rest of the main part of the build.

We are getting close now, as several parts of step 18 are simple turret hatch, cupola and stowage bin options.


With them in place, the turret is looking familiar now isn't it?

However, we do need a stowage bin on the rear of the turret, and this one is provided very much like the original.

However, if you are going to copy this particular tank, you need to make both this bin, and the Feifels pierced by shrapnel...


Step 19
Oww the end of the line is here - with the DS tracks - like e or love em - simply joined together, these are really easy to put together. However, if they are bent out of shape in storage you might have a bad time fixing up the teeth between the drive wheels


The rack for the spare tracks is added to the front hull, these tracks are simple track and tooth construction - however, use good glue to seed them in place as they can be fragile

...and slipped inside the rack


Et Fini!
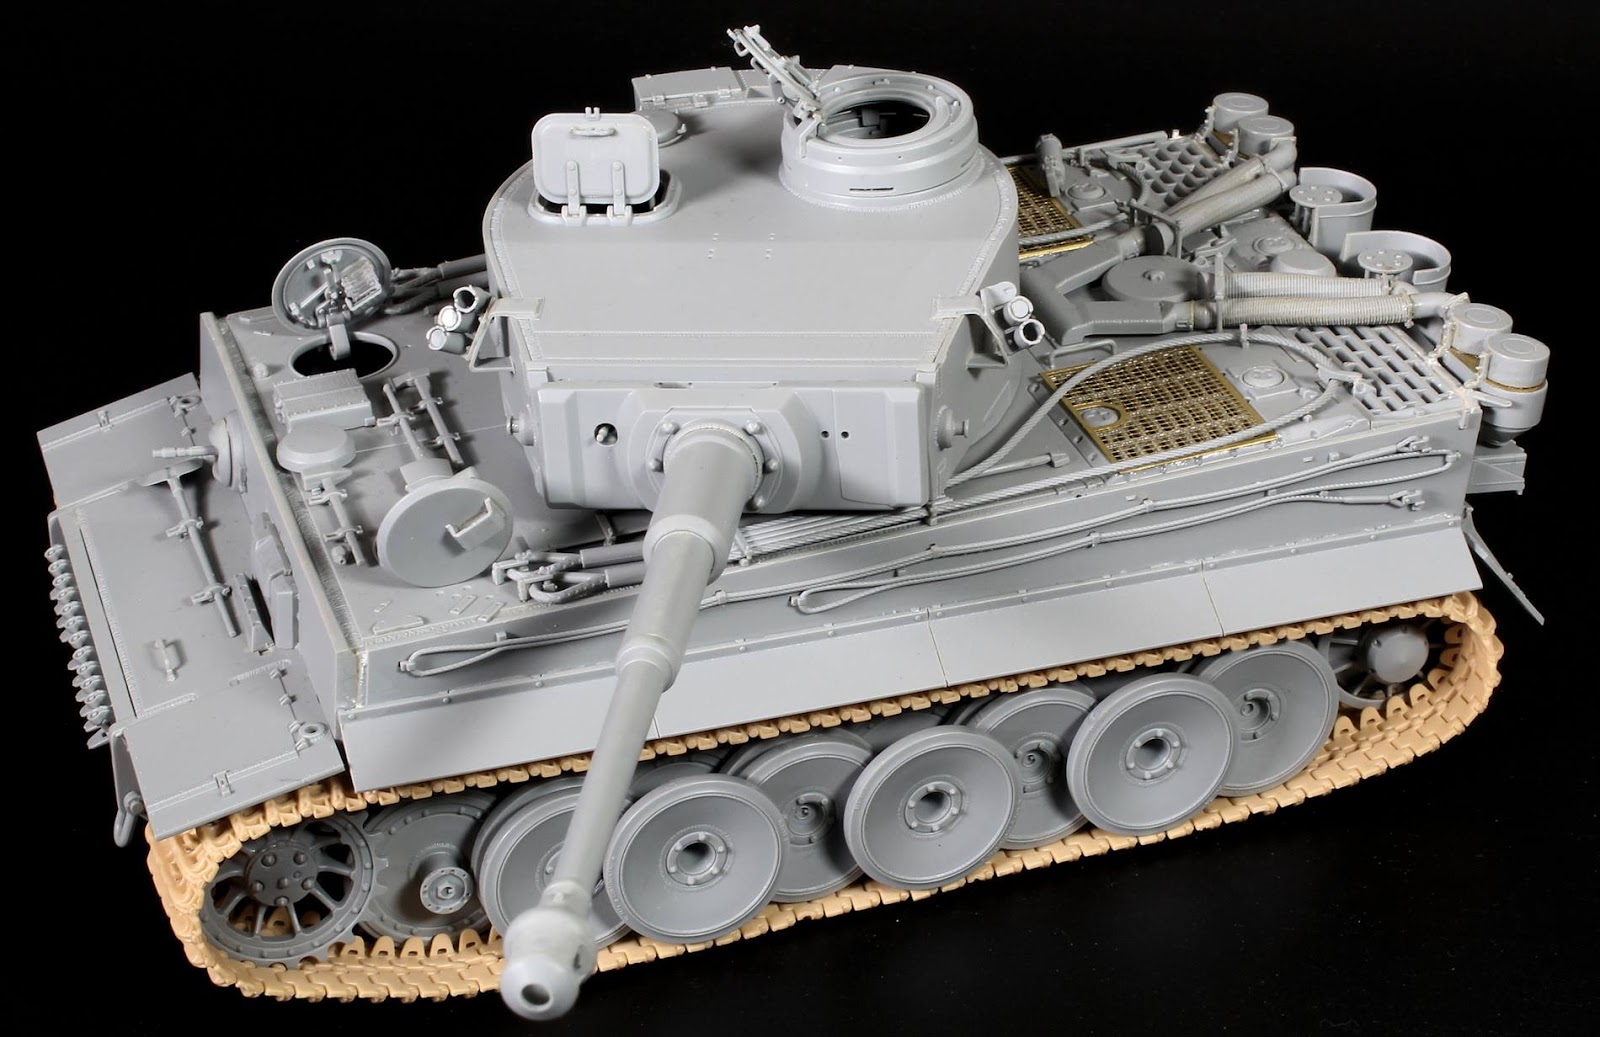
We think that lots of people will like this kit - a lot of people - compare the pictures of the real thing to some at similar angles of the kit we have for you here.
Compare the real thing to the kit in these pictures


A final walk around of the kit...


Thanks to Hobby Link Japan for sending us the kit it is available from their website now...

Our very good friend Tojima Hiromitsu who we met at the Shizuoka Model show has finished the kit - unfortunately he did not write a painting log for the kit - but this is what he came up with in the final wash. He wanted us to share his pictures of the kit here with you.


