

We take an in-depth look at Italeri's newest edition of their F-104 Starfighter G/S in 32nd scale today. With its new decals, new parts & a new recon pod - the upgraded edition photo reconnaissance version seems to be a worthy addition to the family - but is it? Let's see in the review...

In-Boxed: F-104 G/S (UPGRADED EDITION RF VERSION)
From: Italeri
1/32nd Scale
Kit No# 2514
Model Dim.: 52,0 cm
Box Dim.: 560 x 280 x 115 mm
Price: € 98.00 from Italeri directly

The Photo Recon Starfighter in history:
The Lockheed F-104 Starfighter is one of the most famous fighters in the history of aviation and also one with the longest operational life. Its history began at the end of the 50's and ended in the mid-2000's. The Starfighter's unique airframe, with a slender fuselage and very little wing surface, made this aircraft ideal as an interceptor, and thanks to the thrust of its General Electric J79-GE-11A afterburning turbojet engine, it could exceed Mach 2.2 in flight. The lightweight fighter had an excellent rate of climb with a great power to weight ratio, it was a difficult aircraft to fly, and for a fighter, it was not as manoeuvrable as was hoped, so it was best served as a high-speed interceptor.

The F-104G Starfighter was produced under license by several European aviation industries from 1959 onwards. In the mid-60s, this fighter became the standard interceptor for many NATO countries including Italy, Germany, Holland, Greece, and Turkey.
Some of the NATO countries' fighter line-ups of the 60's

The armament on these NATO Starfighters was basically the same as was found on previous versions, with a 20mm Vulcan cannon and the option to fit air-to-air missiles, bombs, or importantly additional fuel tanks to increase the aeroplane's range.
One of the best photos of the Starfighter (ever we think)

Being a major customer of US aircraft, the West German Airforce procured the F-104 early on. The Luftwaffe variant was designated the "F-104G", ("G" for "Germany"). Later other NATO air-forces bought or built their own F-104G's under licence.
The F-104G was essentially an enhanced F-104C, featuring:
- A reinforced airframe to help cope with the fighter-bomber role.
- A North American Autonetics F15A "North American Search & Ranging Radar (NASARR)" FCS replacing the AN/ASG-14T-2 FCS.
- Generally improved avionics, including a Litton LN-3 inertial navigation system.
- The latest J79-GE-11A turbojet engine with 70.28 kN (7,165 kgp / 15,800 lbf) thrust.
- A Lockheed C2 rocket-boosted upward-firing ejection seat. Some production would feature various flavours of the better British Martin-Baker Mark 7 ejection seat with true "zero-zero" ejection capability.
- The larger tail fin of the F-104B/D twin seater Starfighter.
- Improved brakes with an anti-skid system & a larger drag parachute for increased weight.
Modification of the flight control system to permit the use of the leading-edge flaps in combat maneuvers, reducing the Starfighter's turn radius considerably.
- Provision for an F-104C-style bolt-on refuelling probe.
- F-104Gs could be fitted with two stores pylons under the forward fuselage to carry Sidewinder AAMs.

Recon Starfighters of the NATO countries:
Early versions of the NATO RF-104G/S had a modified fuselage to permit the 20mm cannon and its magazine of 725 rounds that were to be removed in the field with a camera pallet and bulged sensor window fairing. This installation is a hinged panel behind the nose which housed three Old Delft T46M or three KS-67A, 70mm cameras in the vertical and side oblique positions in the fairing or bump immediately behind the nose wheel gear doors.
This earlier style camera position under the nose can be seen in this picture

A close up of the bay open and closed


Orpheus reconnaissance pod:
Later models of the NATO Recce F-104's deleted the internal camera configuration in favour of the centreline position Orpheus reconnaissance pod. This 700KG, a 3.5-metre long container was designed by the Dutch and they contained five cameras (usually TA-8M's). One in the forward oblique position, two in the side-borne positions and two in the high-side-oblique positions. These high-speed cameras used film speeds matching the aircraft, resulting in very sharp images. The Orpheus pod also carries an "Old Delft" IRLS-5 Infra-red scanner and a coupling unit.
A technical diagram of the Orpheus pod used in many of these aircraft in this kit.

Some Italian F-104Gs were modified to carry the low altitude Orpheus pod for the reconnaissance mission. These had the Fairchild 70mm panoramic camera and three TA-8M cameras and one Oude Delft IRLS-5 sensor. These machines actually served in the Gulf War in 1991, flying out of Turkish bases to keep an eye on northern Iraq.

Dutch and German RF-104Gs did not have the Trimetrogon camera system, instead, it was fitted with the NVOI Orpheus centerline reconnaissance pod, with five TA-8M film cameras and an infrared linescan unit.

Canadian Air Force F-104's went from a Nuclear strike role into a photo recon role at first with the large Vinten Vicom low-altitude pod, and the four that were used in Europe did not from my knowledge, use the Orpheus pod.

A gaggle of Canadair Cf-104's carrying the Vinten Vicom low-altitude pod. It is a shame it is not included in this kit.

This kit from Italeri:
You can now get your own 1/32 scale model kit dedicated to the F-104 G/S Starfighter (upgraded edition) from Italeri. Their updated F-104 kit includes the Orpheus Recon Pod to build up the “RF” version along with several other refinements. The two huge decal sheets include 8 possible versions from the nations that operated the photo recon version of the Starfighter.

The new kit includes photo-etched details for better realism level in scale thickness. The F-104G/S - Upgraded Edition (Kit #2514) has several unique features in this boxing:
This from Italeri Kit Includes:
- The Addition Of The Italian Air Force's Orpheus Recon Pod
- Bulged Cover for the early style Photo Recon System
- 2 Ale 40 Chaff Dispensers
- Finely Engraved Recessed Panel Lines And Rivet detail
- Fully Detailed Engine, Cockpit & Avionics Bay
- Fully Detailed Gun Bay With Complete M-61 Vulcan Assembly
- Open Or Closed Air Brakes
- Photo-etched Fret
- 325 Parts in plastic
- 2 Large Decal Sheets
- Instruction Sheet With Colour Profiles

If you are familiar with the original or US Airforce boxing the size/ length of the box will not surprise you at 56cm x 28cm x 12cm. The very nice artwork shows both the Italian and German variants, one with the Orpheus pod and the other with the under-fuselage camera bay.

Inside the box, you find a pretty full package of individually wrapped sprues and photo-etch on cardboard backing. The decals have the moisture absorbing paper and the instructions are also sealed in nice and safely.
The Sprues:
The plastic inside the kit is in good condition, with only a minimal of excess seam removal, not any ejector marks where they shouldn't be or short shots. In all the plastic is in good shape in the kit I have.
I will take you through the details of the kit that stood out to me in the sprues before we look at the markings and instructions.
Sprue A:
The largest sprue of the kit is this one, taken up mainly with the two main fuselage halves and the exterior of the aircraft. The intake splitters, the intake covers (in two types) internal bulkheads, the nose cone, two types of gear doors and the cockpit tub are all present on this sprue which is common with the original "G" variant.

The detail on the surface of the kit's fuselage needs to be seen in a review, and I have a few pictures here of the rivet detail of the kit. Kind of to be expected nowadays, we have recessed rivets on the panels, and although I have not seen any manufacturer replicate the flush, polished head rivets (that look more like stamped bolts) of these fast jets, the surface detail on offer here does not match it. Some people (a great friend of mine included) says he just can't accept the rivet detail, but I am of the belief that you can take this detail and improve on it.
 No, it isn't up to the more modern Tamiya, HK Models, AMK, GWH standard of precise detail, but it is definitely more finely detailed than the earlier Hasegawa or Revell offerings in the same scale.


Rivet detail on the real thing - the detail is almost too small to notice unless you want to model a natural metal finish Starfighter...

The underside of the nose of the aircraft.

The real thing showing the starboard side of the nose...You may have to do some extra riveting work here.

Some would say one of the most important parts of a kit is the instrument panel and cockpit, and the Italeri cockpit of this kit starts off well with a nice instrument panel in raised plastic details. ( this panel is actually on Sprue B, but here it is to compare with the side consoles).

A picture of the F-104G instrument panel, the kit is pretty close!

The technical drawing of the F-104G instrument panel giving you a notated description of the parts you see above.

The sidewalls and consoles of the cockpit are here, with raised panel and switches and knobs on the surface.

The technical drawing of the F-104G instrument panel and side consoles.


For the heavier weight of the F-104G larger main wheels were used. With the Italian Air force Starfighters, only the first 28 units were fitted with the regular gear doors with standard wheels. The aircraft were later retrofitted with the larger wheels and convex doors. Hence the flush and the bulged gear doors supplied by Italeri on this kit (bulged on the left below with the earlier version on the bottom right).


The airbrakes can be positioned opened or closed, the insides of the tail where the airbrakes are positioned are thankfully blemish-free (often model making companies choose this spot for ejector pins etc).


There are two types of intake cover included in this kit. The duty inspection access doors on the regular "G" model are rectangular in shape (top lower pair) while the ItaliaAirforcece doors are trapezoidal (the pair below).

A picture below with the Italian style doors bellow left, while the regular G model doors below right.


In the picture below we see two important parts of the kit, the intake shock cone on the left and the insides of the main gear doors on the lower right. The intake cone, designed to improve the airflow into the engines, is close enough to the original for me, with screw detail in the right places. Also in this picture below is the pitot tube, which may need a little thinning out if you want it to look realistic.

The intake below right with the gear bay on the left below. The gear bay as we see in comparison will need some more wiring detail (as do all modern jet kits - every one of them.)


Sprue B:
This is another large sprue with the major flying surfaces included, The horizontal and vertical tails, the wings and control surfaces, the gear and the large wingtip drop-tanks are included here.

I quite like the shape and the surface detail of the wings and the posable forward and rear control surfaces from both above....


...and a look from below at the underside of the wings.

A stripped pair of wings in NMF (where you will always see more detail as the wing is not painted) showing rivet/screw details from above and below

The vertical tail is good, some will want to replicate the riveted horizontal lines that create almost a wrinkled look just before the afterburner.

 The horizontal tail of the kit is again covered with fastener detail (you may want to add some rivets to the top if you are making a weathered example), but again the tail looks to me to be in the right shape.


 The part in this picture at the extreme below left are the so-called "Jeep Cans" where all of the Starfighter's vital electronic equipment is housed in a bay behind the cockpit. These were opened up to change the components with an easy twist of the "T" shaped handle. The pressurized compartment is also opened when the aircraft is being refuelled to eliminate gas fuel fumes building up in the compartment. The dotted part on the right-hand side of the part is the circuit breaker box. You will need some wiring to make this a little more realistic, the base is there though to improve on.

You can see the slight "wrinkle" effect between the two "hoist" stencils in this picture below.


The main landing gear struts are quite beefy for such a light aircraft, and well represented here in this kit.

The plumbing and wiring for the gear are also supplied, some may want to add more but what is offered is passable for a straight OOB build...

The wingtip tanks (called "tiptanks") were important additions to the aircraft that lengthened the Starfighter's missions to more than twenty or so minutes that you got without them attached, so you probably will be using these kit tanks which are again good in shape and detail with the tails of the tanks looking correct also. The right filler cap points are there also, these are slotted so they sit on the wings correctly and firmly. The smarter modellers out there might want to use two small magnets to plant into the thin wing to make these easily removable...


Sprue C:
This sprue is common with the earlier releases also, this one features a lot more of the internal details of the F-104G as well as some cover panels to these internal spaces.


The Lockheed C-2 ejection (downward firing) ejection seat was replaced in the "G" model by the Martin-Baker Mk.Q7 which is included here. Again those who want a simple build will be happy, but this isn't up to the resin aftermarket standard and heaps of those seats are on the market so it is your choice...


Sprue D (X2)
From internals to things hanging FROM the kit now, the under-slung drop-tanks, two variants of sidewinder and a single pair of (almost identical exteriors) US Sparrow/ Italian Aspide Mk.1 missiles and the earlier C.7 ejection seat which isn't used in this kit.

Early and late sidewinders are here, and in pretty OK detail too. The earlier missiles with the straight front fins (Aim 9D) are marked not to be used in this kit while the other choice is the Aim 9L/M with the larger rear fin and cranked canards on the front (lower missile in the picture)

The Italian made Aspide Mk.1 is here. Similar to AIM-7E, with Selenia monopulse semi-active seeker and SNIA-Viscosa solid-propellant rocket motor. This version was popular with export customers, and sold to 17 countries and used (sparingly) on the F-104G/S, but not as much as the Sidewinders the older into the service of the Starfighter progressed and not much at all on recon Starfighters (payload vs mission).

Only the very earliest F-104G/S Starfighters did use the thinner wheels (as we talked about with the early Italian Starfighters) but these are greyed out on the sprue map. Nearly every model made of this kit and those in the kit's markings will use the fatter tire which was soon adopted as standard to compensate for the "G" variant's increased weight.


 The J79 engine, many people will not ever see this inside the fuselage so it is up to you to leave it how it is, and use some wiring to detail it up, or to not think a second more about it and seal it up.


 The two afterburner cans are here, with both the F-104G and the F-104S (option C, one of the Italian birds) all but this single one use the can on the left below. these are pretty good for the casual modeller but a lot of people will opt for resin or painful photo-etch here.


Clear Sprue F:
There is one small clear sprue included in the kit. The opened or closed canopy is, of course, an option here, but no mask is supplied for ease of painting this.


Sprue G:
Lastly, the Orpheus pod (which we spoke about at the start of the review) and two AN/ALE-40 flare/chaff dispensers.


At the top of this picture working down: The ventral fin (the wider/thicker part is to the rear), The F-104G/S has a slightly enlarged ventral fin and two extra fins left and right. The insides of the gear doors are below that, and I was impressed by how good the detail was and how little flash, ejector pins or any other moulding signs are seen here.

The real ventral fins on the Italian "S" model (option C in the kit) below

Sprue D (X2)

Early and late sidewinders are here, and in pretty OK detail too. The earlier missiles with the straight front fins (Aim 9D) are marked not to be used in this kit while the other choice is the Aim 9L/M with the larger rear fin and cranked canards on the front (lower missile in the picture)

The Italian made Aspide Mk.1 is here. Similar to AIM-7E, with Selenia monopulse semi-active seeker and SNIA-Viscosa solid-propellant rocket motor. This version was popular with export customers, and sold to 17 countries and used (sparingly) on the F-104G/S, but not as much as the Sidewinders the older into the service of the Starfighter progressed and not much at all on recon Starfighters (payload vs mission).

Only the very earliest F-104G/S Starfighters did use the thinner wheels (as we talked about with the early Italian Starfighters) but these are greyed out on the sprue map. Nearly every model made of this kit and those in the kit's markings will use the fatter tire which was soon adopted as standard to compensate for the "G" variant's increased weight.
The top two tyres are correct for this kit. They are all slightly weighted.


The underwing pylon tanks are of a decent enough shape to my eyes, a comparison with the real thing (below the kit part) always helps.


Sprue E:
The J79 engine is here in the kit on this sprue, with both the standard US supplied J79-GE-11A and German spec J79-MTU-J1K engines nozzles. The step ladder that affixes to the fuselage for the pilot to enter and exit the aircraft is here along with the harness for the full removable engine.
 The J79 engine, many people will not ever see this inside the fuselage so it is up to you to leave it how it is, and use some wiring to detail it up, or to not think a second more about it and seal it up.


On the left: J-79 GE-11A, on the right F-104 S / S-ASA / ASA-M - General Electric engine J-79 GE-19:


There is one small clear sprue included in the kit. The opened or closed canopy is, of course, an option here, but no mask is supplied for ease of painting this.

As you can see by this picture below they are plenty clear enough. The canopy frame itself will need some further embellishments from an aftermarket photo-etch or scratchbuilding from the modeller as there are quite a lot on the release handle and the hinged locks of the hood.
Sprue G:
Lastly, the Orpheus pod (which we spoke about at the start of the review) and two AN/ALE-40 flare/chaff dispensers.

The Orpheus pod here in plastic is as sharply detailed as the Videoaviation version in resin that are available on the market, and there is room to improve on the detail here. I guess you would not be interested in this kit if not for this pod. The camera ports are not moulded clear, with no clear parts that I would have liked to have seen. Then again the resin aftermarket pod doesn't have that option either so you are ahead in cost with this kit.


The AN/ALE-40 Counter Measure Dispenser System (CMDS) provides expendable countermeasures stores and dispensing for multiple aircraft platforms. The AN/ALE-40 system is a means by which the pilot can release chaff or flare, depending on the threat type, to counter any homing of a missile to the plane. The AN/ALE-40 Counter Measure Dispensers were mounted on the lower side of the rear edge on both sides of the fuselage. Two systems are carried on the right side a chaff payload and on the left a flare payload.


Photo-Etch Sheet
A simple photo-etch sheet garnishes the lily a little, with (I think unnecessary) instrument panel and side consoles (I think the plastic version adds more depth and realism, with some harnesses (again paper or coloured PE is better here) are added also. Some parts that are helpful are the engine bulkhead fascias.

Markings:


Another (better) shot of this bird in service for tour comparison.

Version B: RF-104G Italian Air Force 28° Gruppo, 3° Stormo "3-31" MM649 Villafranca, Italy 1983.
From the same base and time period as the first choice, this Rf-104G had again the Green/ Grey over aluminium coloured camouflage, this time with the witch on the broomstick emblem of the 28th Wing.


Version C: F-104S Italian Air Force 10° Gruppo, 9° Stormo "9-41", MM6932 from 1985
This aircraft from "Francesco Baracca" the 9th Wing "Francesco Baracca", wore the prancing horse and "Baracca" lettering over the marking colours of the Green/Grey/ Aluminium camouflage.


Version F:


Version G:


The lattice five times three box pattern on both of the chaff and the flare dispenser's open ends are good, but the tips of the open ends could be a little thinner.
Photo-Etch Sheet
A simple photo-etch sheet garnishes the lily a little, with (I think unnecessary) instrument panel and side consoles (I think the plastic version adds more depth and realism, with some harnesses (again paper or coloured PE is better here) are added also. Some parts that are helpful are the engine bulkhead fascias.

The markings included in this kit stretch over 8 versions of recon Starfighter from different countries in the sixties. A separate colour printed A4 booklet houses these

 The F-104G's weapons, their rails and the chaff/flare and Orpheus pod's colours and stencilling are here in this coloured guide.


The many stencil placements of the kit are given here. Aircraft from this generation had a LOT of warnings and stencilling on them and the F-104 is a fine example of lots and lots of these on a model. Handy to have this placement guide here.


Decals:
Two large decal sheets are here in this boxing housing eight (make that nine) choices from several NATO countries. Included are not only the national markings but unit markings and of course stencils. I could not find any printings or register errors and the colours are represented quite well on these sheets.


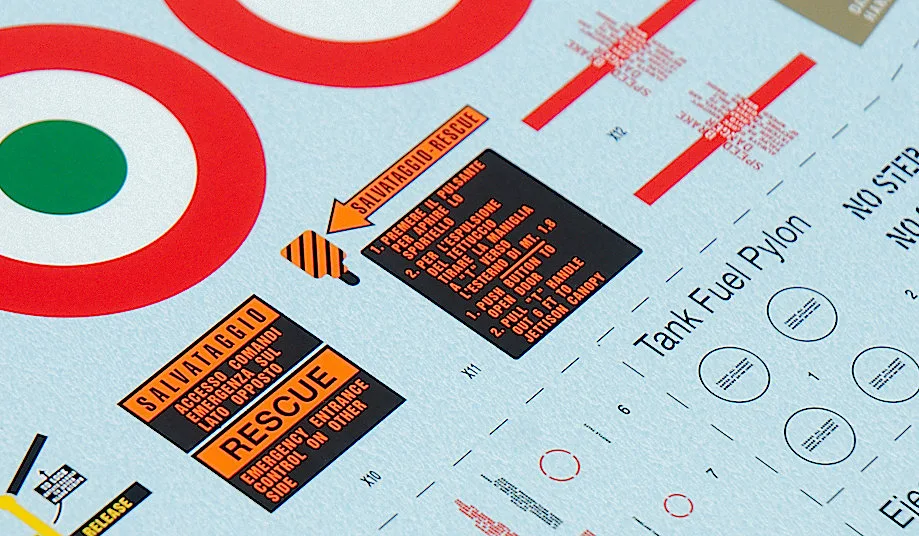


Two large decal sheets are here in this boxing housing eight (make that nine) choices from several NATO countries. Included are not only the national markings but unit markings and of course stencils. I could not find any printings or register errors and the colours are represented quite well on these sheets.

Not only these markings but stencils for the armament, the instrument panel are all here and clearly marked and sectioned off so you can easily find them on the large sheets.

Close up details of the decals in these shots show the very sharp printing rendered on these sheets (1/1 matchstick for scale)


The Marking choices:
Very attractive jets from many a country are included and I will take you through them.
Very attractive jets from many a country are included and I will take you through them.
Version A: F-104G - Italian Air Force 132° Gruppo 3° Stormo "3-01", MM6529 Villafranca, Italy 1983
Camo for this bird was the then standard Green/Grey over aluminium. This machine carried the Orpheus Pod in service.

The decals for this version (Aeronautica Militare roundels are also supplied elsewhere on the sheet.)

Mar 31, 1998, This Starfighter in Rome for 75° anniversary of Italian Air Force - don't ask us why, or how it got there!

Another (better) shot of this bird in service for tour comparison.

Version B: RF-104G Italian Air Force 28° Gruppo, 3° Stormo "3-31" MM649 Villafranca, Italy 1983.
From the same base and time period as the first choice, this Rf-104G had again the Green/ Grey over aluminium coloured camouflage, this time with the witch on the broomstick emblem of the 28th Wing.

For some reason, I left out the unit decals to show you silly me (you can see them on the larger picture of the decals) ...Italian Air Force roundels are here in this picture though.

Taken on May 31st in 1994 Grosseto Air Force Base in Italy - the aircraft by this time (almost ten years after) has the low visibility numbers on the sides instead of the larger white codes as it had in 1985. Both versions are included on the decal sheet, more value for money there.

A view of this very kite from the front on, note the stencils on the radar dome which are included in the decals.

Version C: F-104S Italian Air Force 10° Gruppo, 9° Stormo "9-41", MM6932 from 1985
This aircraft from "Francesco Baracca" the 9th Wing "Francesco Baracca", wore the prancing horse and "Baracca" lettering over the marking colours of the Green/Grey/ Aluminium camouflage.

The prancing horse emblem that was made famous by Italian ace pilot Francesco Baracca is here to be placed on the tail of this F-104S

Now, I could not find the high viz markings on any pictures of this aircraft, however, I did find "9-42" which carries all of the same embellishments.
 I found plenty of pictures of the alternate low-viz "9-41" F-104S ASA marking for 1989 which are supplied also in the kit.


Version D:
F-104G - Koninklijke Luchtmacth RF-104G, "D-8145" 306th Squadron, Volkel A.B. in 1978
This Starfighter from the Dutch Air Force features medium grey undersides with that dark green/ grey camouflage on the topsides again.
F-104G - Koninklijke Luchtmacth RF-104G, "D-8145" 306th Squadron, Volkel A.B. in 1978
This Starfighter from the Dutch Air Force features medium grey undersides with that dark green/ grey camouflage on the topsides again.

The KLU roundels and squadron markings are correct in colours and shapes on this part of the decal sheet.

I found three pictures of this aircraft, though none of them are with the underside onboard cameras, but with the Dutch AF version of the Orpheus pod attached, though the one in the kit is the Italian spec of the pod.

Fokker factory construction number 10595; accepted by Royal Netherlands Air Force December 5, 1963, as RF-104G for 306 squadron. Taken into service on January 10, 1964, coded D-8145, this aircraft's whole service life was with 306th squadron.

This picture shows the aircraft in an unusual configuration, with only the Orpheus pod without wingtip tanks attached. This would have reduced the sortee to about a total of twenty minutes on only the internal fuel load.

Version E:
F-104G - Luftwaffe "EB+103" AG 52, Leck Airbase in Germany 1967
The largest non-US user of the F-104, this German flown aircraft is seen again in the NATO standard camouflage for the starfighter of the light grey undersides with grey and dark green scheme on the topsides.
F-104G - Luftwaffe "EB+103" AG 52, Leck Airbase in Germany 1967
The largest non-US user of the F-104, this German flown aircraft is seen again in the NATO standard camouflage for the starfighter of the light grey undersides with grey and dark green scheme on the topsides.

The black panther of the Reconnaissance (Aufklärungsgeschwader) Squadron 52 was a reconnaissance squadron of the Bundeswehr for manned tactical aerial reconnaissance within the Bundeswehr. In 1964, the AG 52 was equipped with the RF-104G and based at Leck Airbase. It is here on the decal sheet

You can see a picture of "EB+103" here in the foreground in the picture below. This was carrying the internal camera array system.

Version F:
F-104G - Hellenic Air Force "FG-6893" 116 Pterix, Arakos A.B 1992

Greek characters for the stencilling are included don the decals sheet with some (very) dark blue and white roundels.

Here is this particular aircraft in a service with what looks to me to be the KRb 6/24 camera. Notice the larger fairing under the nose/ pilot's seat and what looks to be an oblique camera just in front of the air intake. You will have to add this yourself to the kit.

Version G:
CF-104G - Royal Canadian Air Force "754" from the 417th ST/R (OTU) Cold Lake, Canada in 1979
These Canadair build versions of the Starfighter were painted only with white wings while all of the rest of the aircraft was in a natural metal finish.
These Canadair build versions of the Starfighter were painted only with white wings while all of the rest of the aircraft was in a natural metal finish.

The decal sheet options for this bird, the "Cold Lake" version is very "fast" looking in these shades.

You can see this aircraft - CF-104, Canadair model CL-90, Lockheed model 683-04-12, Canadair construction number 683A-1054, first flight was on March 3rd, 1962, taken int service by the RCAF on May 17th, 1962. Unfortunately, this aircraft crashed with 417 ST/R (OTU) Squadron Cold Lake on February 21, 1979, during a "Red Flag" exercise in Nevada, USA when the aircraft struck the side of a mountain during a tactical egress, the pilot did not eject in time and was killed.
Notice on the picture below the thinner F-104C/D wheels and non-bulged gear doors? These are in the kit but beware when putting this together.

Version H: F-104G - "SILVERS Aerobatic Display Team", "FX68", 1 Wing Golden Falcon in 1971 of the Belgian Air Force.
This aircraft was in a Vietnam-era camouflage pattern with a green, tan and green camo with a light grey underside. Features of this marking choice include the "Silvers" writing of the exhibition team in white for the intakes as well as smaller white lettering to go on top of the red sidewinder/ droptank rails

The decal sheet has yet a ninth version included here with another aircraft from the group "FX90" which is not mentioned in the coloured profiles. I notice these stencils are in English, French and Flemish on this section of the decal sheet.

Starfighter "FX68" of the 350th Squadron of the Belgian Air Force on display at the 1972 Leuchars Airshow in the UK.

Brustem-St.Truiden Airshow (B), June 1971

As a bit of a bonus (like the one we found in the kit) here are two pictures of a recently snapped and very faded and weary-looking "FX90".


Instructions:
The black and white printed instructions with CAD line drawings to show you just what you are looking at are here. Forty pages with clear and easy to follow assemblies that break the kit's construction into different pages for different variants when needed, otherwise these forks int he road are clearly marked and easy to follow.

A simple sprue map showing what is included and what isn't is here over two pages.


First we start construction with the versions pointed out for the MArtin Baker Ejection Seat variant...

...And the Lockheed C2 seat and which aircraft that is featured on. Both of these include the Photo-etch for the harness if you are using it from the kit.

The cockpit tub and instrument panel is made around the ejection seat, the alternate instruments are notated here, but your particular bird will take some researching as certain cockpit elements are deleted or added too.


The undercarriage, fuselage bulkhead and intakes are formed as a base that the engine will attach to.

The next two pages detail engine construction and where the powerplant attaches to inside the fuselage and what you need to do in the way of making holes in the fuselage. I would add some wiring using references as these things are a little more than the plastic supplied. I would however, not bother if I was sealing it all up.

The cockpit, engine, electronic bay behind the cockpit and grear section bulkheads all go together in this step, lots going on here. Both alternatives are offered here.


Step 16 sees us making up the simple (but a little under-detailed for my liking) undercarriage and nose bay.

The nose underside and camera bay is here at step 17. Alternate options for the sensors and nose gear doors are pointed out in this step.

We switch to the insides of the cockpit and gunsight with the addition of photo-etch on this page.

The Vulcan cannon will not be used much in this kit (only two versions) while the open Avionics on the rear of the cockpit needs some detail to be of a show standard. It is nice that both of these panels can be opened up if warranted.

Steps 21 & 22: External panels of the air intakes and splitters, the cannon bay door, airbrakes and the radar dome now are applied to the model. I would leave the pilot tube until last though.


Flying surfaces are now applied, with notes for the airbrakes in a closed or the opened position, the holes needed for the joining of the wings.

The tail can be left separate from the rest of the aircraft as in real life, here both the versions of the tail can be applied.

If you would like to display an opened engine now is the time to do it.

The wheeled stand for the tail section is to be made here (or whenever you want really) and this option is shown in step 27

The J79 engine is made up here and placed on top of the cart that was used to transport it. The choice of afterburner cans and the addition of some witing if you want to display this outside the aircraft is important but easily added.

The fairly solid wheels are added at this point to a multi-point gear for the aircraft. with some simple addition of wires, this gear will look quite good.

Both opened and partly closed options for the wheel well were normal on the real thing and both options are notated here. Remember the Canadian version uses the regular C/D wheels and doors.


Note both types of afterburner can is present here in the instructions. Double check your own type if you are creating another recon bird and going "off-reservation"

A notation is made of which sidewinders your particular variant is used along with the Alenia/ Aspide missiles on the Italian version and the Orpheus pod. Note again that this is the Italian version of the Orpheus pod and the Dutch version is slightly different.

Those tip tanks, the pylon tanks and the ECM pods are an easy construction

This additional page gives you instructions for the RF version's internal camera set up.

Options for external fuel tanks and Orpheus pods or internal cameras and the rear chaff/ flare pods are shown here in two option choices but many configurations.


Weaponry is another option, with wingtip sidewinders and pylon mounted fuel tanks and the Aspide missile.

Armament load outs of each of the aircraft are explained here, a good guide for those who are not sure which aircraft can carry what and a handy catch of potential errors.

Lastly, the canopy and its garnishes, the pitot, and a choice of an open fairing are the last detailsisl added.

Oops one last thing, how do we get in without a ladder? The pilot's access ladder is also supplied in this kit.

...And that is all she wrote about this kit.
Could it be better? yes, the details could be sharpened, but this is not outside the normal modeller's skillset. Those with AMS or who want to build on the base of what is provided will find a glut of aftermarket for this kit including resin wheels, the open camel hump electronic bay, afterburner cans, cockpit and harness to the kit and that is their choice. There is enough for the regular modeller to make this into something nice with some elbow grease and a few bits of wire and persistence. Some better research on who used which recon pods and what pods for these choices and the lack of the Canadian Vinten Vicom low-altitude pod which is not supplied in the kit would be nice.
However, I like the kit, the decal choices, the options of weapons and what you can make straight from the box without aftermarket if that is your want. If I had the choice of this, or the Hasegawa or Revell kits, I would make this one every time.
Adam Norenberg
Thanks to Italeri for sending us this kit to review. This new version of the Starfighter is now available from Italeri's Website Directly
