


From Meng Models
1/35th scale
 The Subject: British FV510 Warrior TES(H) AIFV
Kit No #SS017
The kit includes:
- Injection moulded kit (599 parts in grey plastic + 1 clear sprue = 701 parts in total)
- The kit includes metal gun barrels & photo-etched parts
- Decals for one vehicle are included in this kit
- Colour instruction booklet

The FV510 Warrior is the British Army's principal infantry fighting vehicle. Since 1984, it has taken part in the military operations with the British Army in Iraq, the Balkan Peninsula and Afghanistan. Like the British Challenger series main battle tanks of the same period, the Warrior also has excellent protection. In response to the new combat environment and missions, the British Army has upgraded the Warrior to make it have better combat capability in the new environment. This brand-new variant is the FV510 Warrior TES(H) which is now in military service.

This MENG SS-017 British FV510 Warrior TES(H) AIFV model kit will present you the latest Warrior AIFV configuration. Meng has developed this product with the support of Mr. Carl Schulze, who is the author of the book Tankograd In Detail: Fast Track-WARRIOR FV510(H). He's also a defence specialized journalist.
A CAD mock-up of the vehicle on the Meng Website

This kit includes movable suspension, workable tracks, a track assembly jig, a metal barrel, find PE parts and a road wheel painting mask. All hatches are operable and all-optical parts are clear. The finished model is 218.6mm long and 117.7mm wide.

The build:
Looking at this kit on initial viewing I was very impressed with the parts layout and the level of detail. However, one might think that this would be a complicated build, with 701 parts in total, but it's actually not the case at all, as 338 of those are in the tracks. Sounds daunting, but that actually isn't the case here.


Looking at this kit on initial viewing I was very impressed with the parts layout and the level of detail. However, one might think that this would be a complicated build, with 701 parts in total, but it's actually not the case at all, as 338 of those are in the tracks. Sounds daunting, but that actually isn't the case here.
The kit contents inside the box

Before we start the build, a couple of shots of the standout parts that impressed me on the first inspection, being the bar armour and the tracks, which we will look at further later.


So let's have a look at the build as I have done it.
The build started with the lower tub and the workable suspension over the first two stages, which was fast and simple. The lower tub, ready for the suspension arms to be fitted. This was a very simple stage, with minimal parts to glue in place and without any issues.

The lower Tub now fitted with the suspension arms and ready to fit the wheels at a later stage. Note that there are two options for the suspension being either workable or fixed. Either is simple as it's just a matter of where you apply the glue. The level of detail is very nice, even at this stage. You just have to ensure that the glue sets and parts are all even. I sat mine on an even surface to ensure of this.

The level of detail in the wheels is excellent and all details of the nuts and bolts are sharp here.

The next five stages were on the upper hull, placing on the basic parts and gluing on the upper hull to the lower. Dry fitting the Upper and lower halves to ensure all goes together well.

This was followed by gluing on the additional belly armour and putting all the wheels and tracks together. I was quite impressed with the etch parts that do not need to be cut off the fret as they are held in place with a sticky film, meaning there's no need to sand parts down.

There are a few photo-etched parts, the engine screens, which require a tiny bit of bending, which I did in small stages until I had it right. I did like that there are locating lugs to put these on, making it a simple clean task when gluing.

Engine grilles in place. Note there are small lugs to place them over so they don't move once in place. Note that there is very little glue is required to hold these. I used a Loctite product to do this, which is available at any good hardware store. I progressed on to do more work on the front of the vehicle, the tool stowage and a front stowage box. Again, no fitment issues and the detail continues to impress throughout this build.

Front lower of the vehicle showing the frontal armour added on and also the underside belly armour, providing those inside more protection from mine blasts.

These are the components and the handy jig needed to assemble the excellent fully workable tracks.
The jig holds seven links in total.

On initial viewing, the tracks looked complicated to construct, but in actual fact were brilliant. One simply clicks the tracks together, seven at a time, place them in the jig provided, then push the pins into place. The beauty is, no glue is required at all for this process and you simply continue on until you have the length required. It was actually a fun part of the build. The process is a little time consuming with seventy-nine links per side but not a difficult task at all. Both runs of tracks completed and draped across my cutters to show how workable they are. Of note is the brilliant detail in these and how clean they are as well.

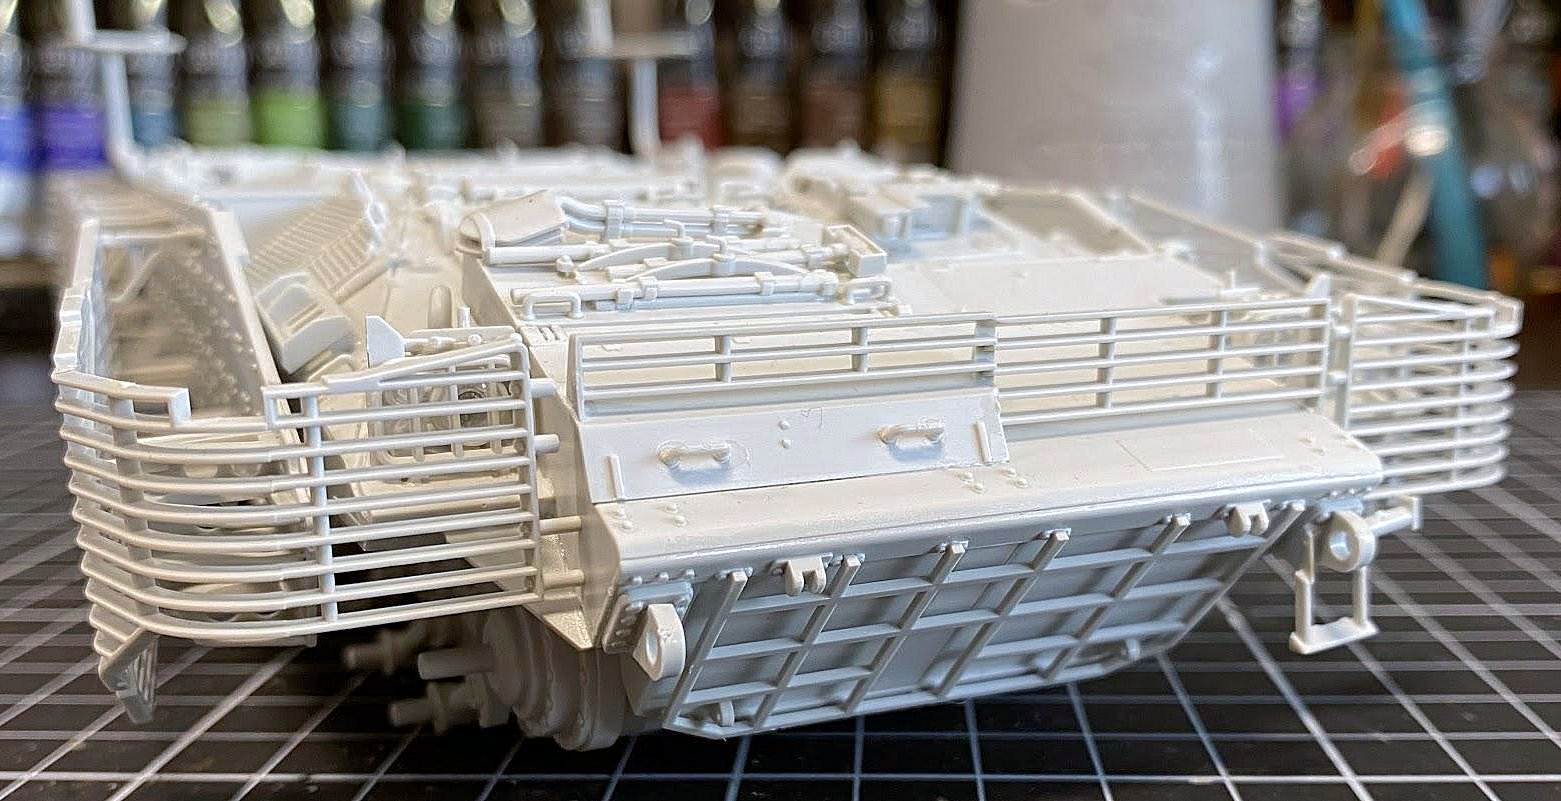
Next to be constructed were the bar armour over four stages, and this really impressed me on how Meng has engineered this to be done. You have the armoured side of the vehicle, which you place on all the mounting brackets, very simple, and then glue the one-piece bar armour section onto this.


The armour joins at all four sides - the left and right...
 ...the rear...
 ...and the front is all supplied with stand-off shields.


Once the shields are on you can see the space between the armoured hull and the frames

Lastly was the turret, which is the final eleven stages of the build, and as the rest was a very straight forward process, without any issues for such a detailed finished product.


The hatches can, of course, be posed open or closed, but no interior means you will have to fill it with crew.


The photo-etch is delicate and fiddly but once it is on the scale thickness is impressive

With the entire kit built into sub-assemblies, as per the last image, it is now ready to paint and then weather. This was a very smooth build.
The sub-assemblies before the next phase of the build, painting.

This British FV510 Warrior TES(H) AIFV from Meng Models is really was an impressive kit to construct, and hopefully, this is Meng taking it to the next level, especially for future kits.
The kit ready to paint and weather - this will be the next part of this series.

Thanks to Meng Models for sending Andrew this kit to build and review...
