


From: Tamiya
1/35th scale
Item No: #35377
Length: 139mm (with trailer), width: 29mm


 We were then pretty anxious to see what Tamiya could do nearly fifty years later! let's look at what's in the box...
Item No: #35377
Length: 139mm (with trailer), width: 29mm
Kit includes 1 Kettenkrad & trailer plus two figures
5 sprues in tan plastic, photo-etch & decal sheet
Price: HK$148 / $19USD from the Continental Models shop

Earlier this year Tamiya released details of a new "refresh" of their old Kettenkrad kit in a newly-tooled 1/35th scale German Sd.Kfz.2 Kettenkraftrad (Mid-production) for the "Military Miniature Series", kit no #35377. It was a completely newly designed Kettenkrad mid-war type with two new figures in traditional poses in addition to the driver.
The kit was on display put together and painted at the Hobby show at the Shizuoka in 2021 show.

The kit was interesting to modellers because it was not only a fresh take on a nostalgic classic, but because their recent "new" models and especially Tamiya's new figures have been great.
Old on the left, new on the right - the old tooled kit was from 1973 originally, which will age a few of us out there!

The parts in the box:
The box has the typical white box style that Tamiya is famous for, with one camouflaged scheme on the side and a much more 3D illustration than the older kit (see above).


The parts inside the box: The sprues...
The tan sprues feature the vehicle, the trailer and the two figures. You can see that there are two very small photo-etched parts and decals for the number plates of the vehicle. 

Curved tracks replicate the sag of the links over the rollers

Smaller sections of curve track pre-joined are marked out for the modeller to place in the instructions, it makes construction almost foolproof.

Although the trackpads being separate is great, there isn't any bolt detail though as in the real thing below.


Sprues B & R: A bit odd to name them B and R, but these sprues pretty much make all of the main body and chassis of the Kettenkrad. The straight and curved parts for the outside of the bike as well as the floor, the controls, seat, dash and every other garnish on top of that for the Kettenkrad comes on this sprue.


The rear of the sprocket is not seen anyway I suppose.

Several parts for the controls are here, dear and selector knobs, the front handlebars, the rear light and front instrument cluster is also here on this sprue

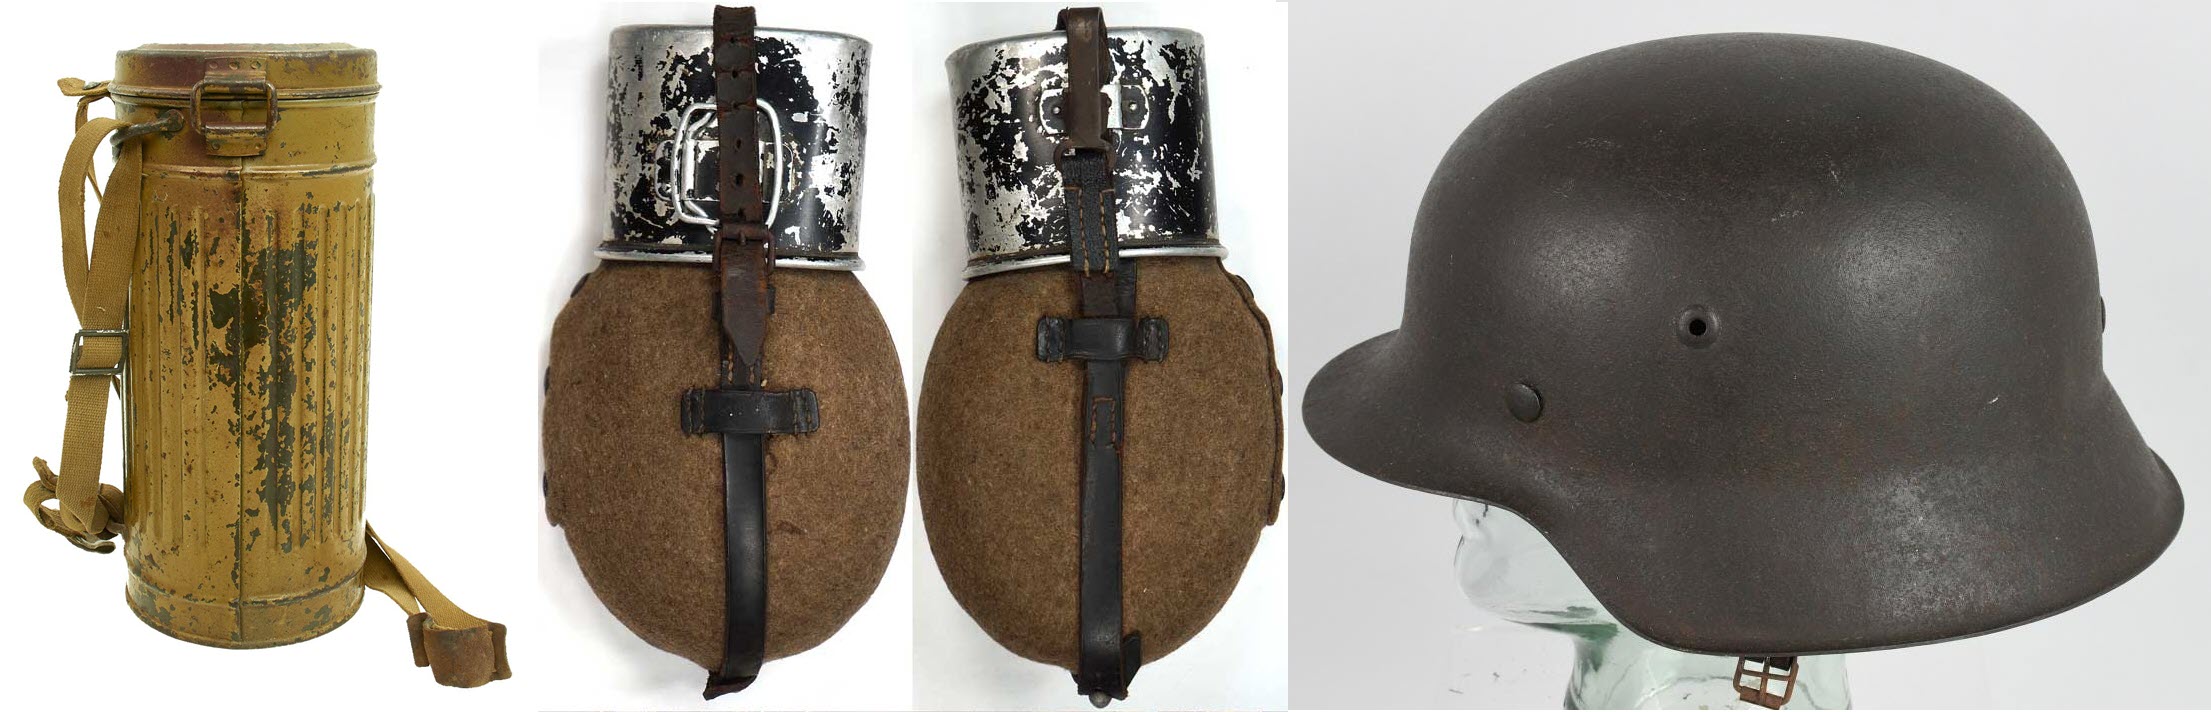
The front instrument cluster from an unrestored example...

The leather covered seat and the wooden footrests are replicated here also.

A look down into that area on the real thing...


The 1478CC Opel Olimpia 4-cylinder inline engine with water cooling system is replicated faithfully with most of the details here on this sprue except for the engine wiring harness which is typical of this scale.

The pinched tarp for the trailer is stretched at the edges as it would be in real life.

Photo-Etch & Decals
You can see that there are two very small photo-etched parts and decals for the dials on the dash - but no number plates of the vehicle/s? A comparison with a 1/1 (regular sized) match shows you how small these two are...


The look of the engine cooling cover on the real thing - more of a wire than a mesh grille but this is a start.

The Figures:
The figures for this kit were realistically shaped by the 3D scanning and sculpting process, with three in this box featuring lifelike faces and very nice details, some of which can be swapped around. The inclusion of a base for both of the walking soldiers will help some modellers, but not most.


The instructions & coloured painting guide...
Normally we see a nice little flourish by Tamiya in the addition of almost hand-drawn instructions, tips and tricks and some information sometimes about the subject.
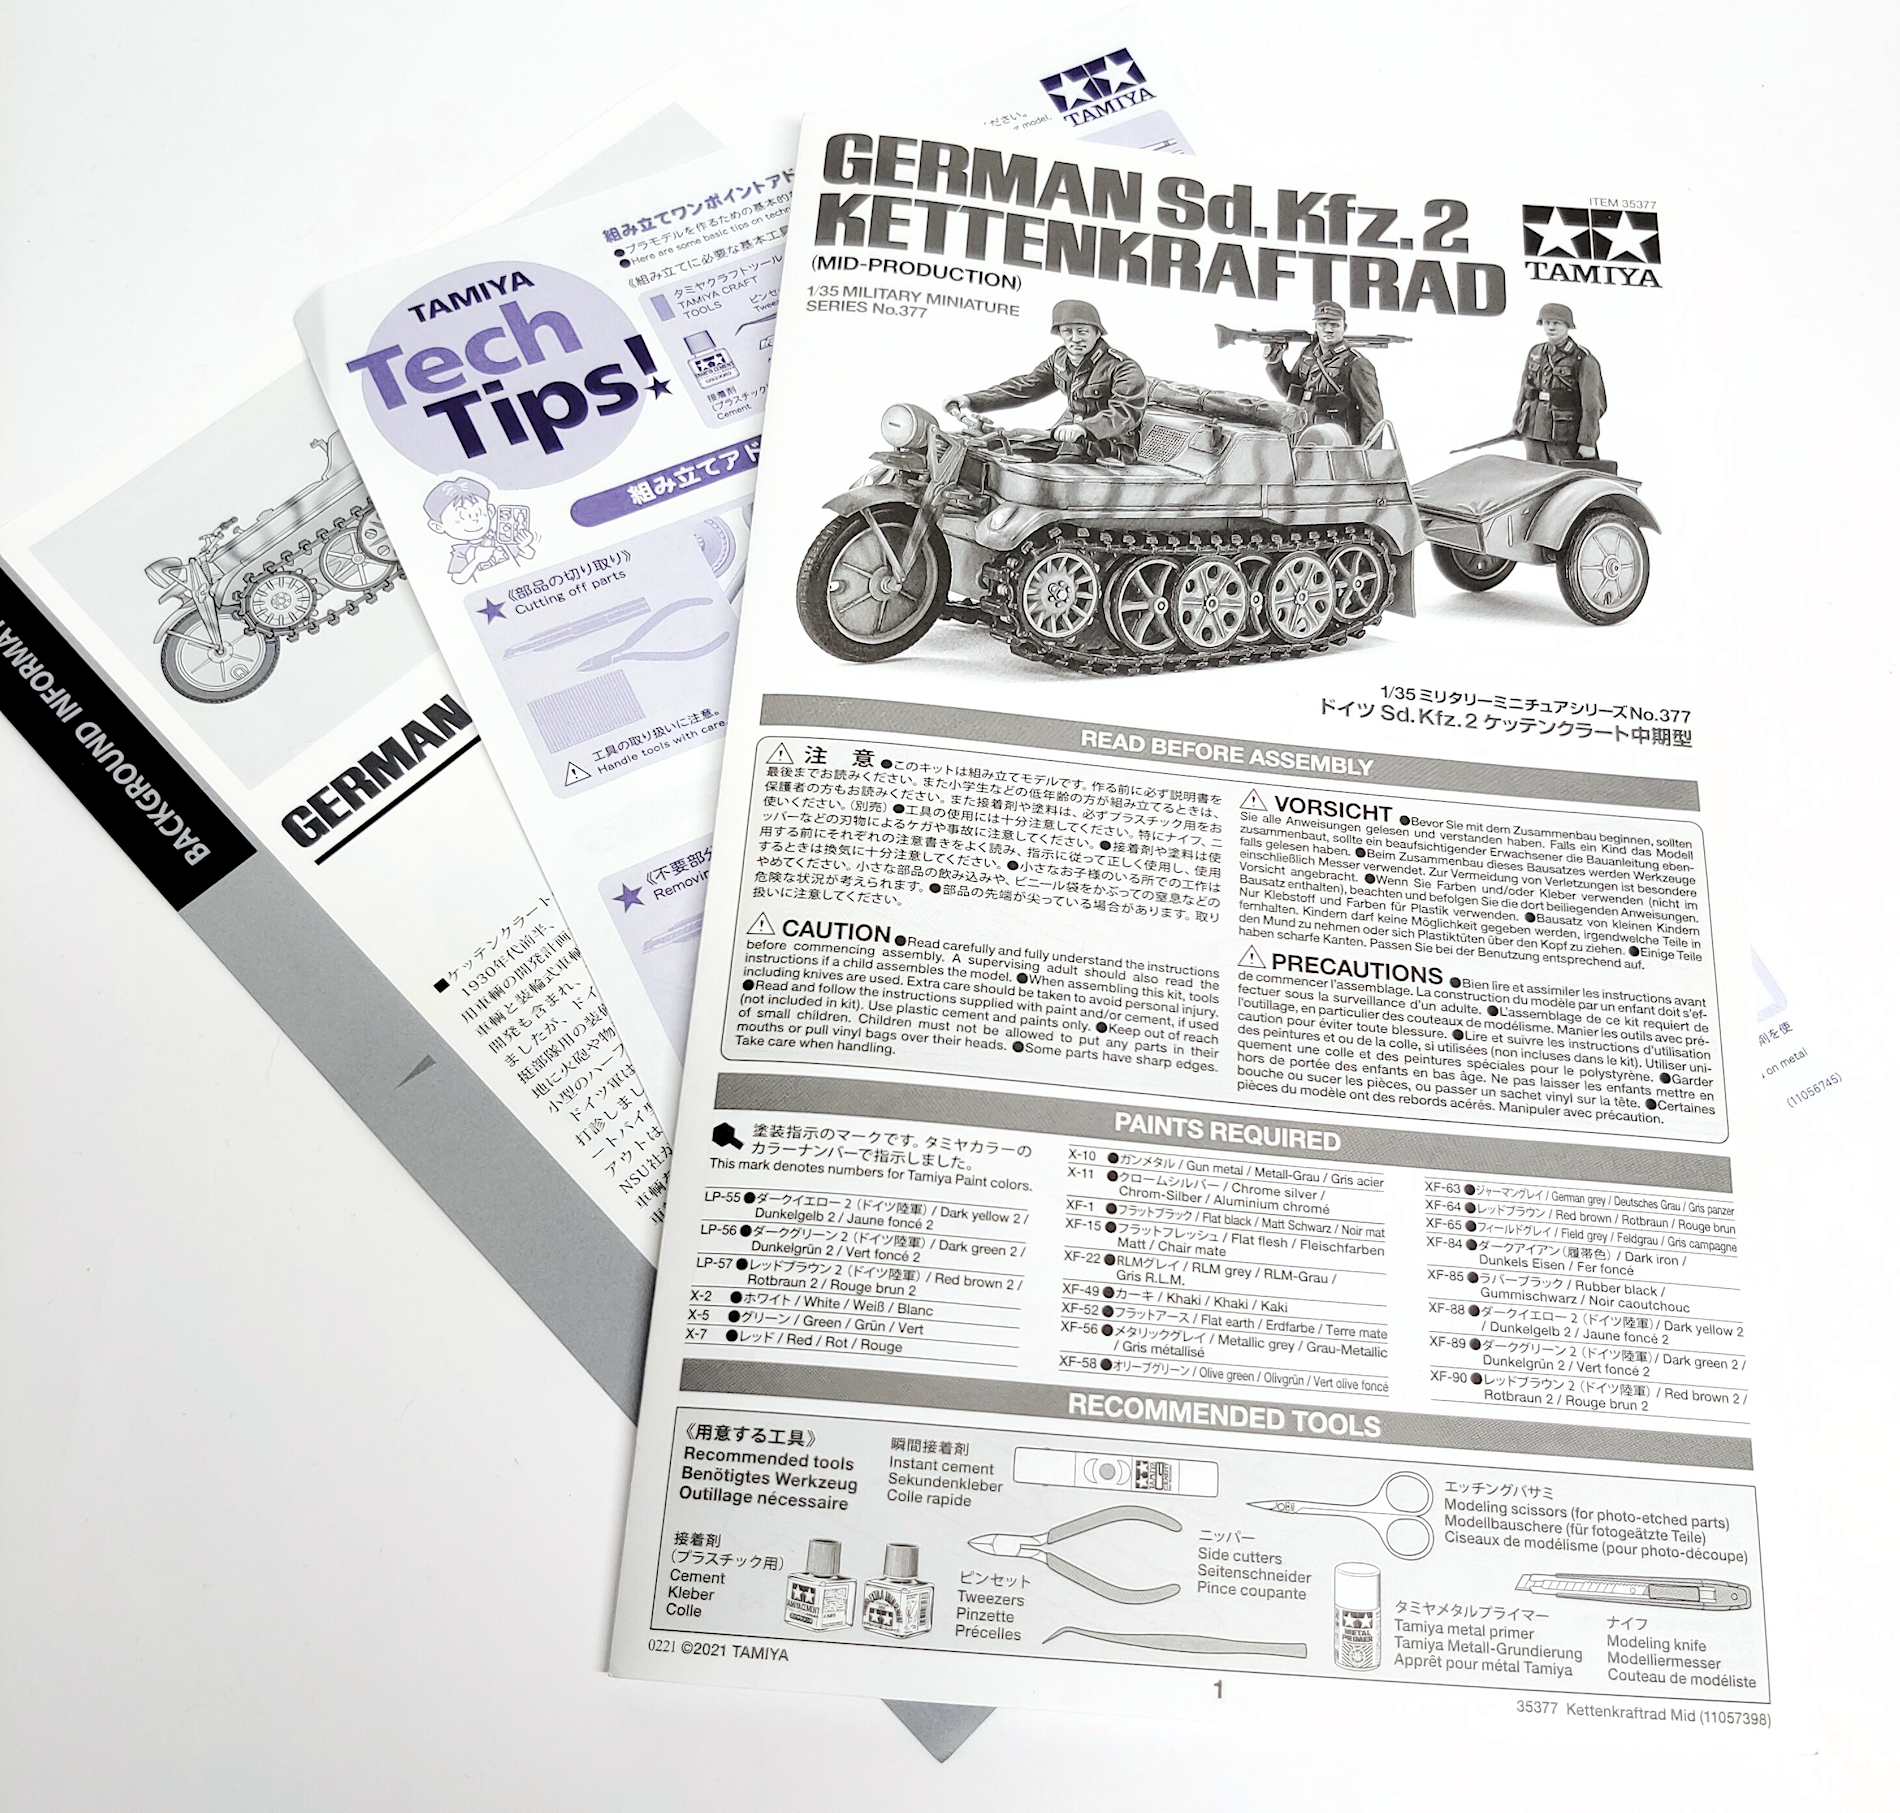
The instruction guide is typical Tamiya fayre, with text in Japanese, English, French and German. There are twenty steps in this black and white paper folding instruction booklet.
Below is an example of one of the steps, not too cluttered, pretty easy to follow.

Let's put it all together, we will start with the figures this time, as there is the biggest scope for a change as far as I am concerned. Below are the instructions and colours for the two walking soldiers...

I have already talked about the details of the soldiers, their faces, the details of their equipment and sculpting being superior to the older set (and most injection moulded figures for that matter) although some seams do still exist on the figures that need removal, nothing major or likely to disfigure your Schützen here.
Construction and painting notes for the driver /rider

One major change is how the soldiers fit together - the picture below shows that each part has a notch or socket that not only aids the construction but holds the piece a little bit stronger than a flat seam. These smart and thoughtful locators make the figures go together not only with the same body language but the correct angles and attitudes. Great work here by the designers.
 The three men go together without any problems at all, and sorry to say, without the need for me to explain it to you. In a big part, this is due to the lugs and notches that help with the assembly.
 You can see the very good detail of the soldiers, their weapons and equipment. All of this equipment can be used or not, but there are some recesses to be filled if you do not use them. The choice of either M42 helmets or soft peaked caps for two of the men is offered.
 The Build: The Kettenkrad...


Step 1 sees most of the body go together in a simple sequence, with the kit fitting well and guided by two lugs and sockets.


 Step five is skipped for now as its parts that can be added later, step six is in two parts and sees the 1478cc Opel Olimpia 4-cylinder inline engine is made. It is a fair replica of the original item, and as I said earlier only needs engine wiring to be added to make it more than passable. That is IF you want to display it under an open cover.
 The second part of step six has you adding the transmission, seat and gear shifter to be added to the powerplant, ready to go into the bike.


 Steps eight & ten are the same for each side with different part numbers: the overlapping roadwheels are layered together and they sit on a shim that attaches to the bike's hull.

Step 2 sees the modeller assembling the other side of the body of the Kettenrad. Take care when putting the side fenders on, as misalignment at this stage knocks the whole bike out of whack! (ask me how I know 😁)...

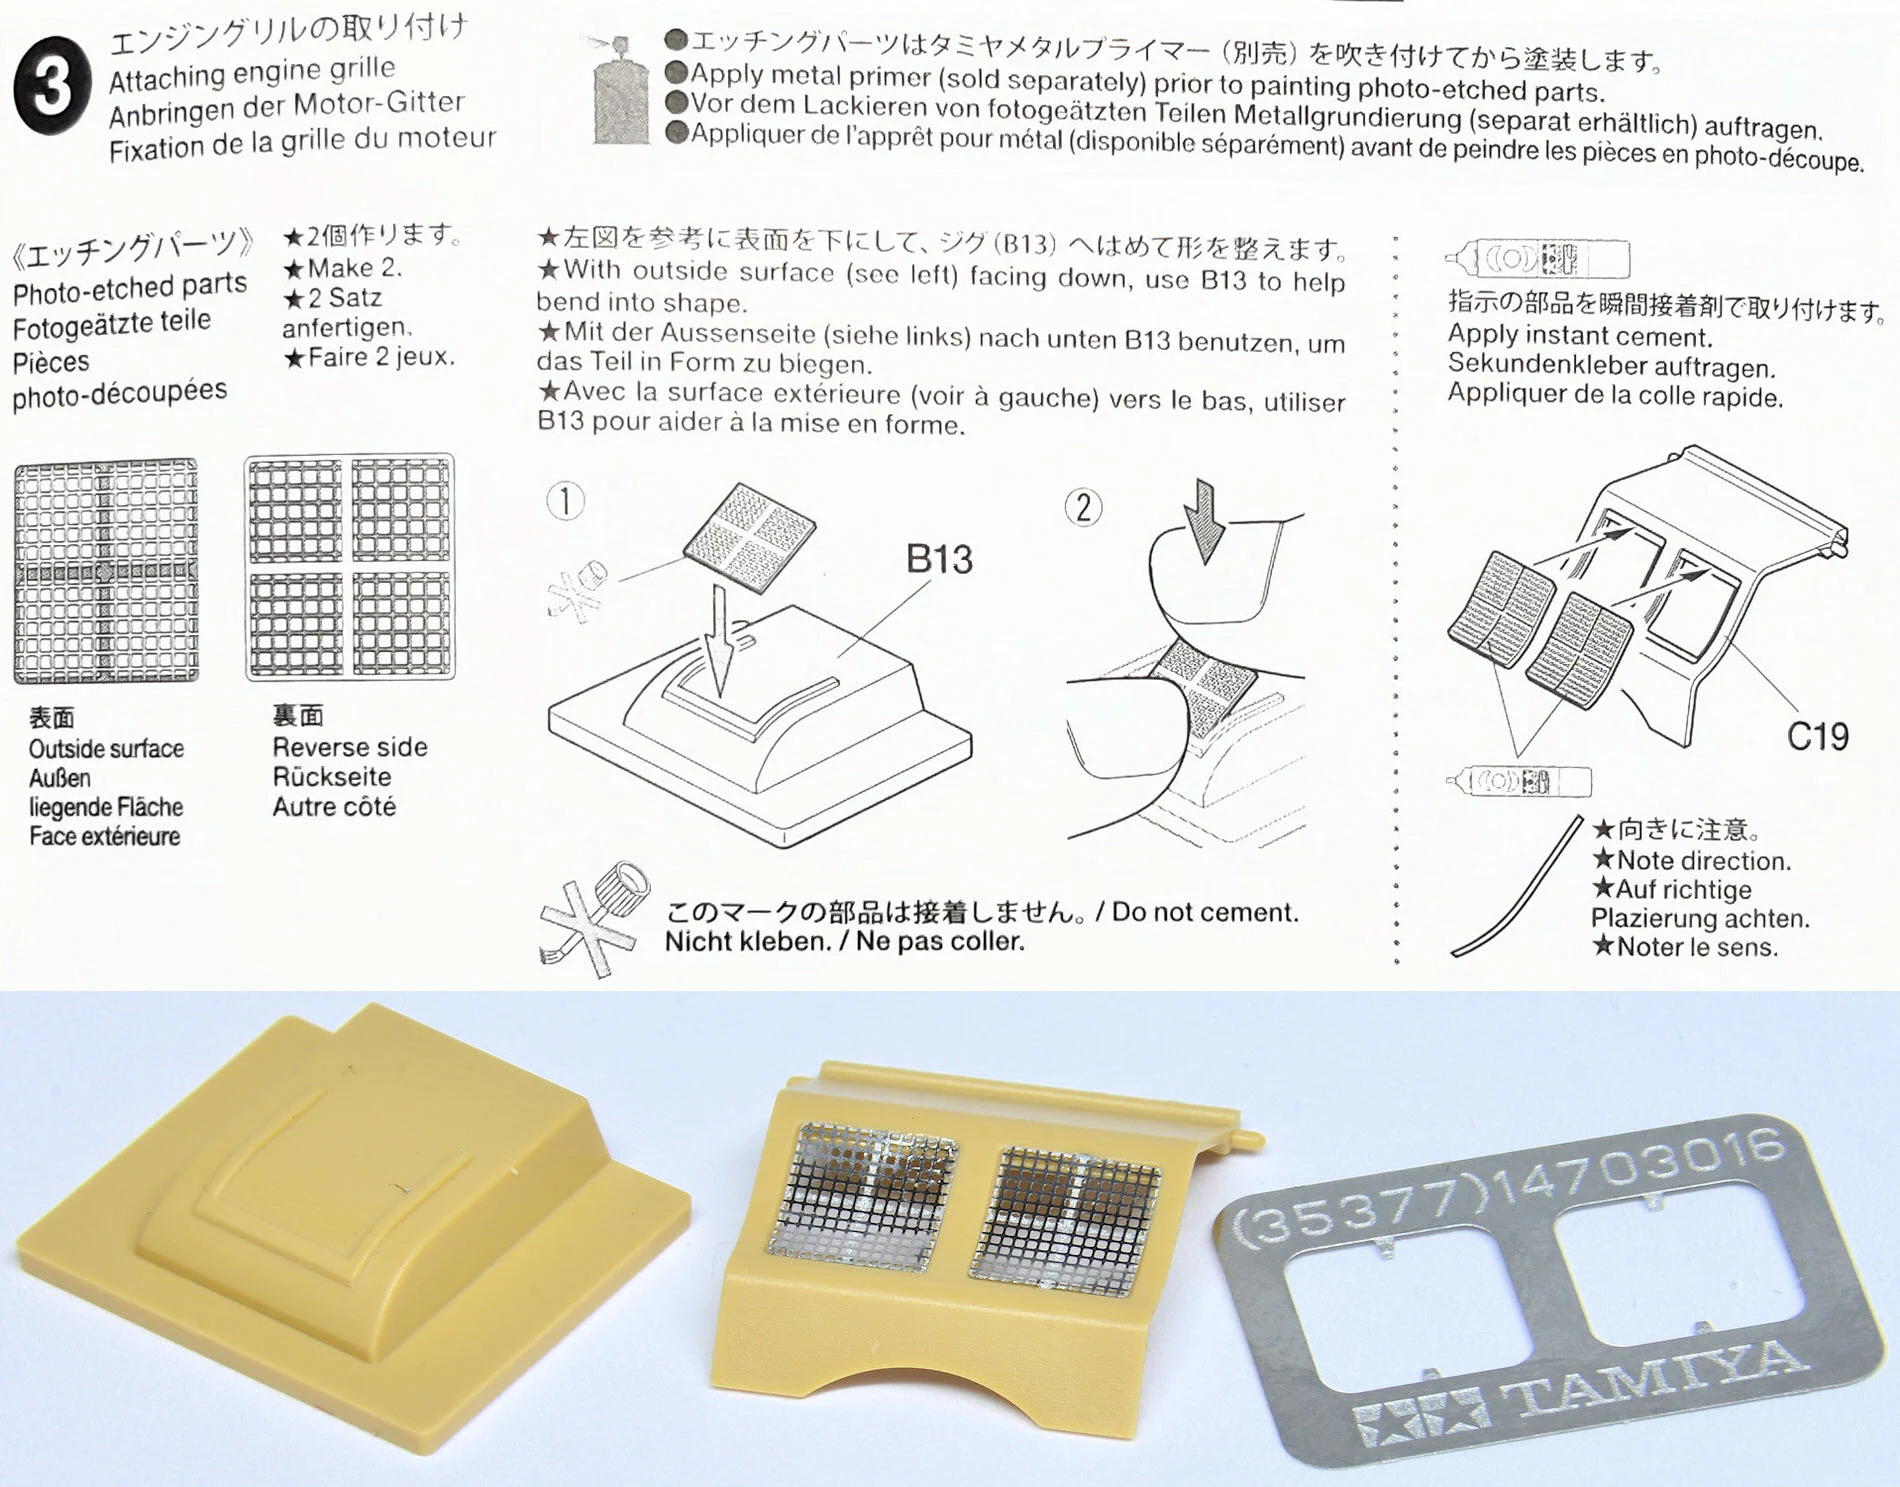
The one and only photo-etch is used in step three, with the curved tool provided by Tamiya to bend the two plates to the right angle for insertion using either wood glue or super glue depending on your confidence with either of them. If you notice the instructions show you which side up the Photo-etch goes which is handy.

Step four sees you aligning everything on the chassis with the help of the engine grille cover. With this in place and opening and closing, you can then make sure the rest of the body is in the correct place. The engine can be placed in later into position later. To me also you would need to thin down the engine grille cover plastic as it is too thick for this scale.


The engine then fits nicely inside the body of the Kettenkrad. If you are going to show the engine (it is invisible behind the engine grille) then of course it needs to be painted first, and it does take a little wiggle to go in there. There are two ejector pin marks on the underside of the engine cover that need to be sanded off if you are going to show it opened...

Step seven sees you installing the front instrument cluster, the brackets to hold the front handlebars in position and you fit the lever to the bracket inside the cockpit. You may notice two circular ejector marks on either side of the "cockpit" walls where the rider's knees go...


You are left with some very nice independent tracks at the end of this process, these went together easily, and without any gaps or malfunctions. Tamiya even gives you a few spare track links just in case you mess it up...

A smart way of attaching the trackpads is provided by Tamiya, the pads are supplied on sprues in just the right spacing to apply the straighter edges en-masse so you cut a lot of time in placing them one by one. You still do the corners individually,

...And here it is on the Kettenkrad...


For some reason, my hull and tracks didn't fit together so well so I used this vice to secure them properly.

Step fourteen, and we are putting together the front two forks, suspension and the front mudguard together. This mudguard has a slight seam line on it once it's together, not great, but sanded down it comes up OK.

The pin that goes through handlebars and the front pivoting frame of the bike to keep it in place but allow the bike's front wheel to pivot slips in without glue...

Here you see our rider with the hand on the handlebar and the other on his knee. There is an option for the rider to have both hands on the handlebars also...

We actually go back to step five now, which includes the rear seat cushions and the tarp for covering the Kettenkrad.

I was a little confused about how to place the canvas cover of the bike, It sort of sits right on the edge like you see this on the real one, it covers the top and vertical edges of the rear seat of the bike.

This is the assembled finished product before painting. The etched parts of the engine cover are a good addition to this kit and it is removable so you can see the engine underneath...
Here we are from similar angles showing unrestored vehicles...


The build: The trailer...
The Sonderanhänger 1 (Sd.Anh.1) or Special trailer no. 1 is the second major part of this kit. It was a single-axled trailer for the small tracked motorcycle - (Sd. Ah. 1) was a trailer for the NSU Kettenkrad Sd. Kfz. 2. It could carry a load of 215 kg and was floatable in empty condition.

Step sixteen and seventeen sees us in the home straight now, with an all-too simple build of the trailer (which needs no description or guide it really doesn't) and the simple nature of the kit continues with this build.

Although the trailer looks good here, some sanding and removal of moulding artifacts and interior trailer detail will need to happen if you want to show the tarp off the trailer and it full of some other gear. I would assume very quickly and aftermarket company making a full trailer load to pack this out...

The completed Kettenkrad & trailer...
Here we have both the Sd.Kfz.2 Kettenkrad and the Sonderanhänger 1 (Sd.Anh.1) together, they make a convincing couple when looking at them, especially as we do, at eye level.


Here the figures are added to the Kettenkrad to bring it to life, first the driver by himself...

...then the other two - these can be used or not according to your tastes...


The kit has a few things to watch out for and improve. The lack of detail in the trailer, the ejector marks on the inside of the engine cover and the interior sidewalls and a little lack of some of Kettenkrad's finer details, no number plates etc. However, the ease of construction, the sharpness of the figures and the nostalgic feel of this cute little kit make it a simple diorama filler for a lot of different armour and even aircraft-based scenarios.

This kit and figures took a lazy weekend to build, you could make them in a day if you liked and paint them the next. A simple set that almost falls together and a definite upgrade from the older kit we might be familiar with - a worthy upgrade!

Thanks to Continental Models who sent this combo for us to build and review - you can get the Kettenkrad pretty cheaply there for HK$148 / $19USD from the Continental Models shop
