Wednesday, February 9

Build review Pt I: M114 A1 CRV from Takom in 1/35th scale

Clayton Ockerby has gladly taken on the new M114 A1 CRV from Takom in 1/35th scale in a two part build review. Today shows us the contents in his build. See how the kit goes together & how he made it look even more like the original in pt.I of his story...


Build review Pt I: M114 A1 CRV
From: Takom
Kit Number: #2145
1/35th scale
Price: $43 from Hobbylink Japan
I’m sure, if you are anything like me this release from Takom caught you a little off guard. I am by no means an expert with all things armour, but I do like to think I know a little bit about the subject given I am looking at armour in one form or another just about every day…but this one stumped me a little. In all my time in the hobby I had never come across the M114 before.
I won’t cover old ground, because when the kit was first announced the details were published here with a brief history of the vehicle. In short though, the vehicle was developed in the 60’s by the Cadillac Division of General Motors and was designed to work alongside the M113 in a command and reconnaissance role. Underpowered and unreliable, the M114 never really proved itself in the Vietnam conflict and would soon be replaced by the M551 Sheridan.
After some research I found out Accurate Armour had also released a version of the M114 in the early 90’s, but this release from Takom is the first time we have seen this subject in a mainstream boxing.

I have always been fond of the M113, so it made perfect sense to add the M114 to my collection as an interesting comparison between the two similar vehicles.

Packaging comes in the smaller size box and presents in the typical Takom fashion.
The kit contains 6 light grey sprues and one section of clear pieces. It also contains a tow cable, decals and photo-etch fret. From the onset it is pretty clear the construction phase is going to be reasonably straightforward.
The kit comes with 4 schemes. I was hoping one of them may have been suitable for a Vietnam setting but that was not to be the case. Two of the markings were vehicles stationed in Germany during the mid 60’s and the others vehicles based in Kansas and Colorado.
The decal sheet.
Construction:
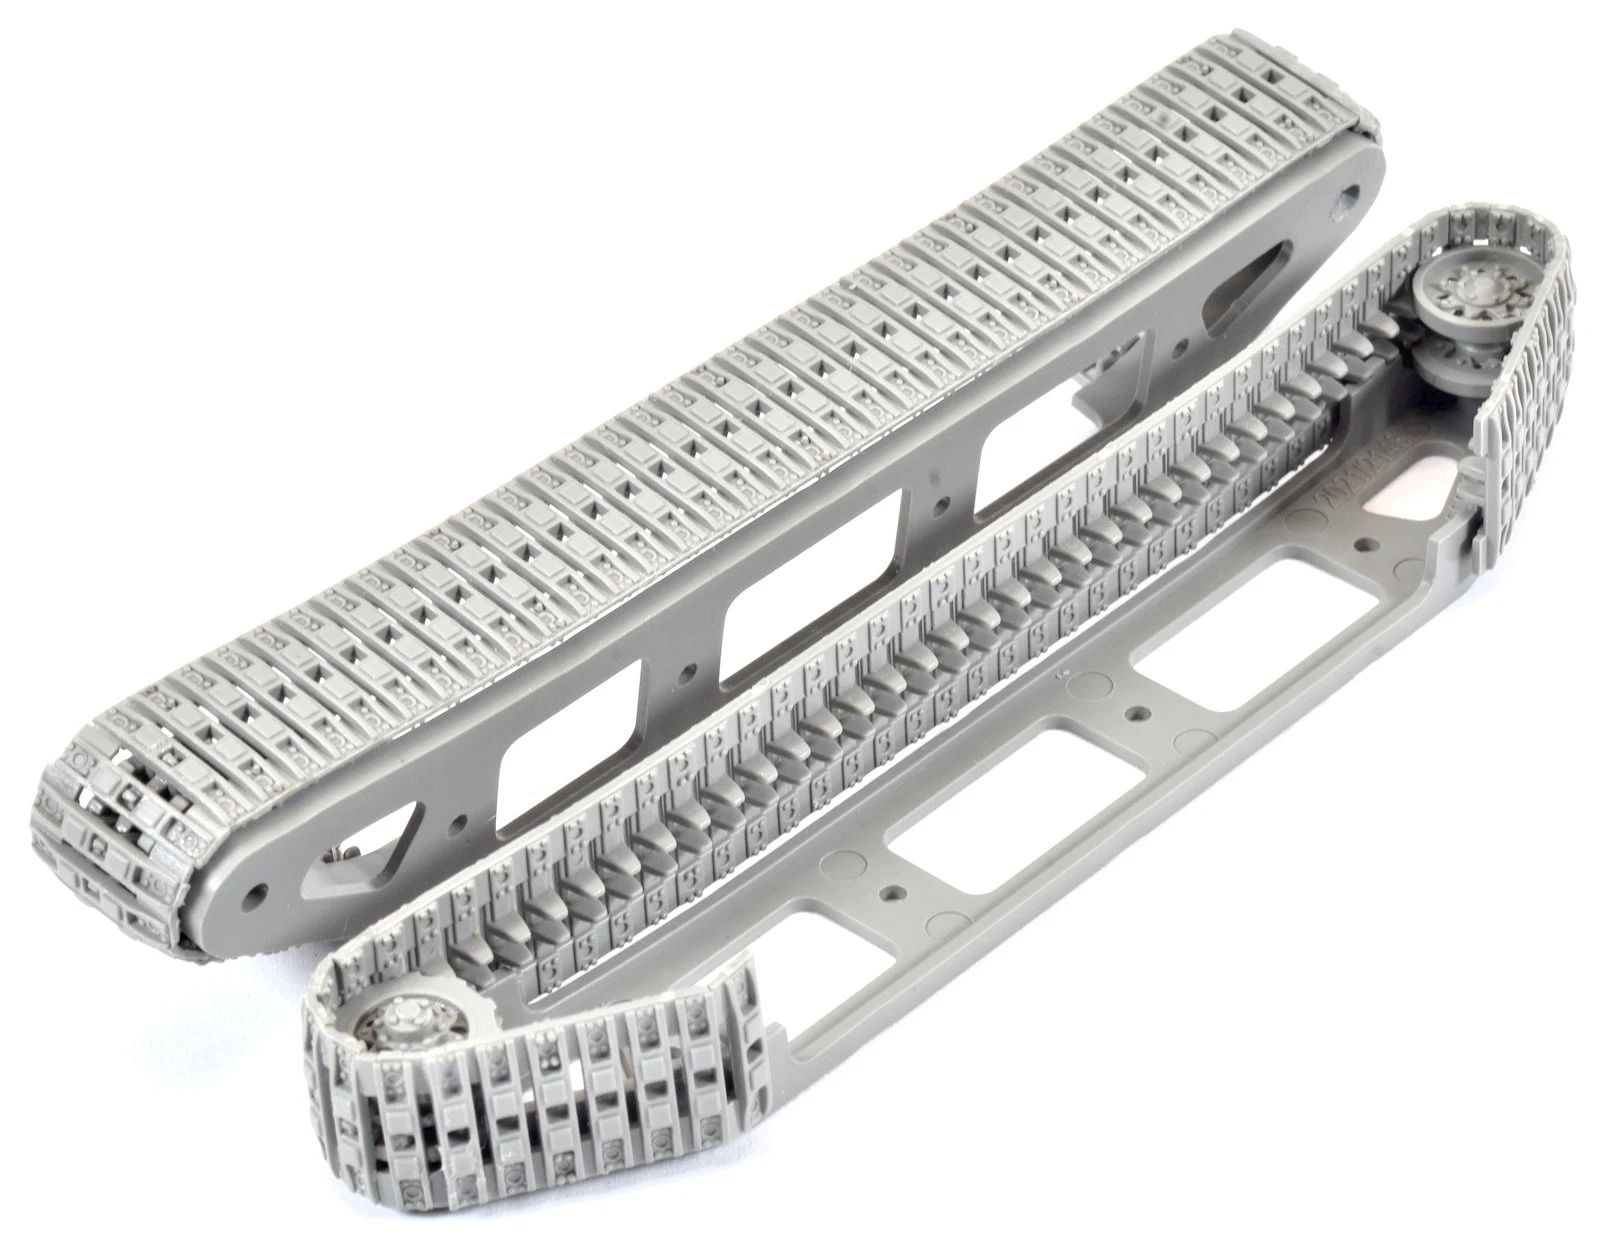
Construction begins with the floor section and the side walls being fixed together. The attachment points for the running gear are also glued into place. There is a locating pin that ensures the swing arms will sit parallel to the ground once attached.
There are some odd grab handle / tie down brackets on the sides of the vehicle. A style I had never encountered previously. The instructions were a little vague of how the bracket should look, so I encourage you do your research prior to assembly. But to save you some time this is what they should look like.
I had a lot of issues with the plastic parts getting knocked off the model when handling it, so I left them off the right hand side of the model and would look to fit them toward the end of the build.
I do tend to flip flop around the instruction sheet when building a model, but is usually for good reason. The instruction sheet calls for the hardware to be fitted to the rear plate prior to being fitted to the tub assembled in the initial step. A little bit of warping meant the rear wall had to be manipulated into place. Not having the small brackets and the like attached meant the part could be more easily handled without fear of damaging it. The kit also includes some of the very basic internal walls, but in terms of an interior that is all you are going to get…
Once the glue had time to bond the parts, the smaller details and pioneer tools could now be added to the rear section.
The instructions call out for a number of small 0.8mm holes to be drilled out of the top deck prior to fitting it to the tub. This was done using a small hand drill.
Gun and ariel mounts as well as the gunners hatch and drivers periscopes are now attached to the section.
The roof section is now attached to the tub. The fit wasn’t perfect and required some trimming of the internal walls to ensure it sat correctly. The side walls needed to be manipulated somewhat to ensure the fit was adequate. Once the glue had set the structure was sound and looked even and correct.
The engine grill and maintenance hatch sections are now attached. Again some manipulation and sanding of the parts was required to ensure the pieces sat flush. Generous amounts of Tamiya Extra Thin ensured the bond was strong.
The water vane and headlight sections are now attached.
There appears to be an error in the instructions. Parts G13 and 14 should be attached to G11…not G12 and vice versa. It’s pretty easy to work out something wasn’t right, but it is worth keeping an eye out for to save you any grief in the build.
The commanders hatch is now assembled. The clear sections are supplied as a single piece and nest together with the surrounding part. I was very careful when trying to remove the sprue gates from the part, but the damage to the part was obvious. It’s a shame those connecting trees weren’t placed on sections a little less obvious.
The hatch was dry fit in place and the photo-etch grills for the engine hatches were set in place using supa-glue. Some light wear was created by gently pressing the etch into the contours of the model
Back to the commanders hatch and the 50cal is assembled and fitted in place. The barrel was drilled out with a fine drill bit to add a little detail. The cooling sleeve is a touch underwhelming but I am sure once it has been painted it will look fine. The etch aiming site is also a nice touch.

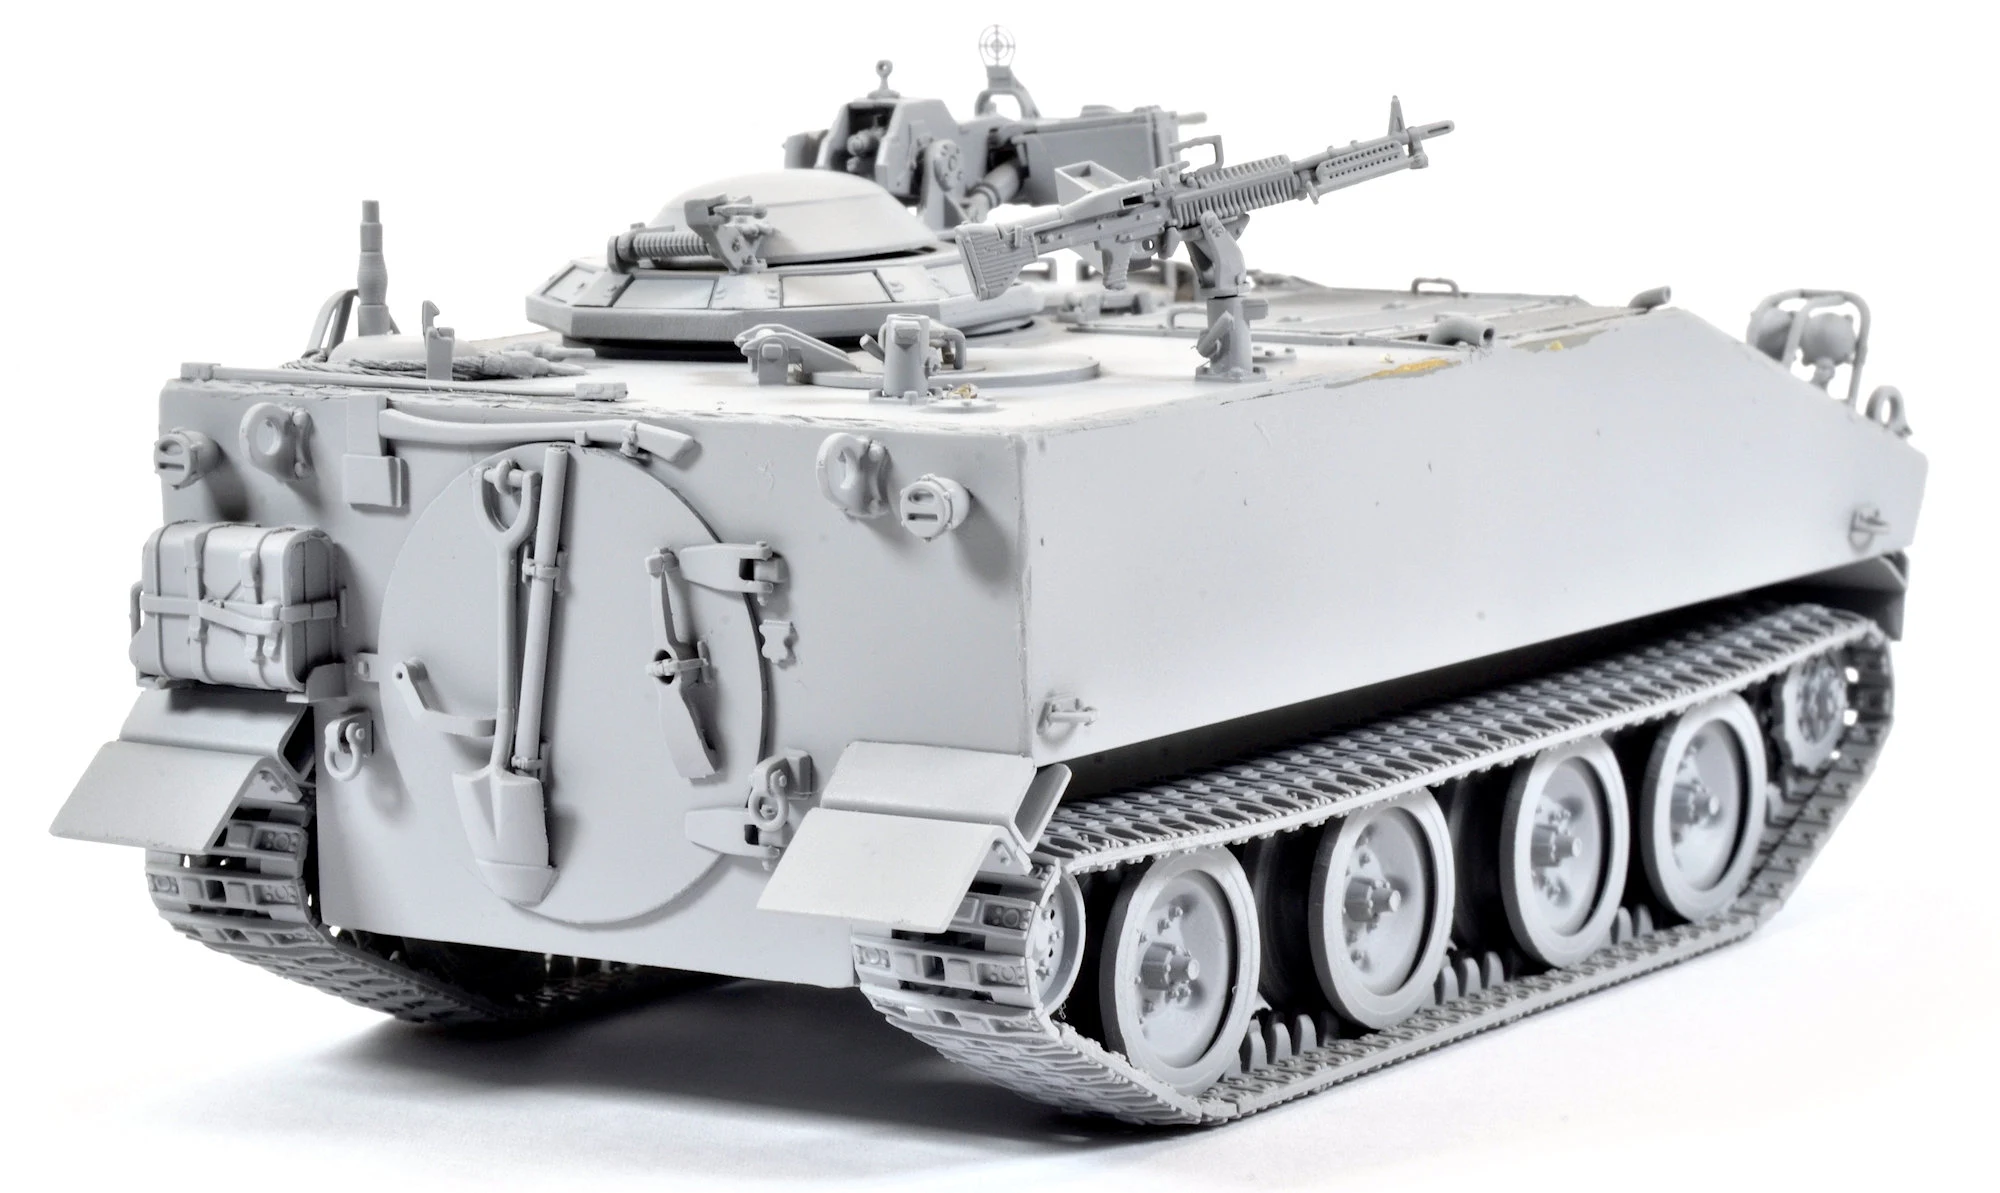
The secondary weapon (M60) is also assembled at this point. The detail on this weapon is of a very high standard.
With the bulk of the body assembly complete it was time to move onto the wheels and tracks. The wheel assembly consisted of three pieces per wheel and required only minor clean up.
The track sections are supplied as link and length and are assembled with the aid of a jig. I have found in the past this style of assembly can be a little hit and miss, so I was extra cautious assembling these sections.
Once the glue had time to bond the track assemblies and wheels are carefully removed from the jig. Thankfully everything seemed to remain in place.
After having a look at reference photos of the M114, it became obvious that the edges of the hull sections had a significant weld seam running along them. A two part Tamiya putty was rolled into small rolls and worked into the edges. A light lineal weld effect was added by pressing the tip of a spatula into the putty whilst it was still soft. The putty was later refined using a sharp blade and shaving off any excess.
With the putty now dry, the track and wheel sections were attached to the hull. The track section was finished off with the piece that runs along the ground. The fit was reasonably good and only required a small amount of coercion to sit correctly.
As the final step the mudguards and front brackets are attached and the model is now complete. The only plastic to be added is the lenses for the lights but they will be fitted after the painting stage.
It is a satisfying feeling to get a layer of primer on the plastic once the build has come to an end. The uniform coat ties everything together and prepares the model for painting. It also exposes any areas around the model that may need additional filling or sanding (which will be addressed prior to the next steps).

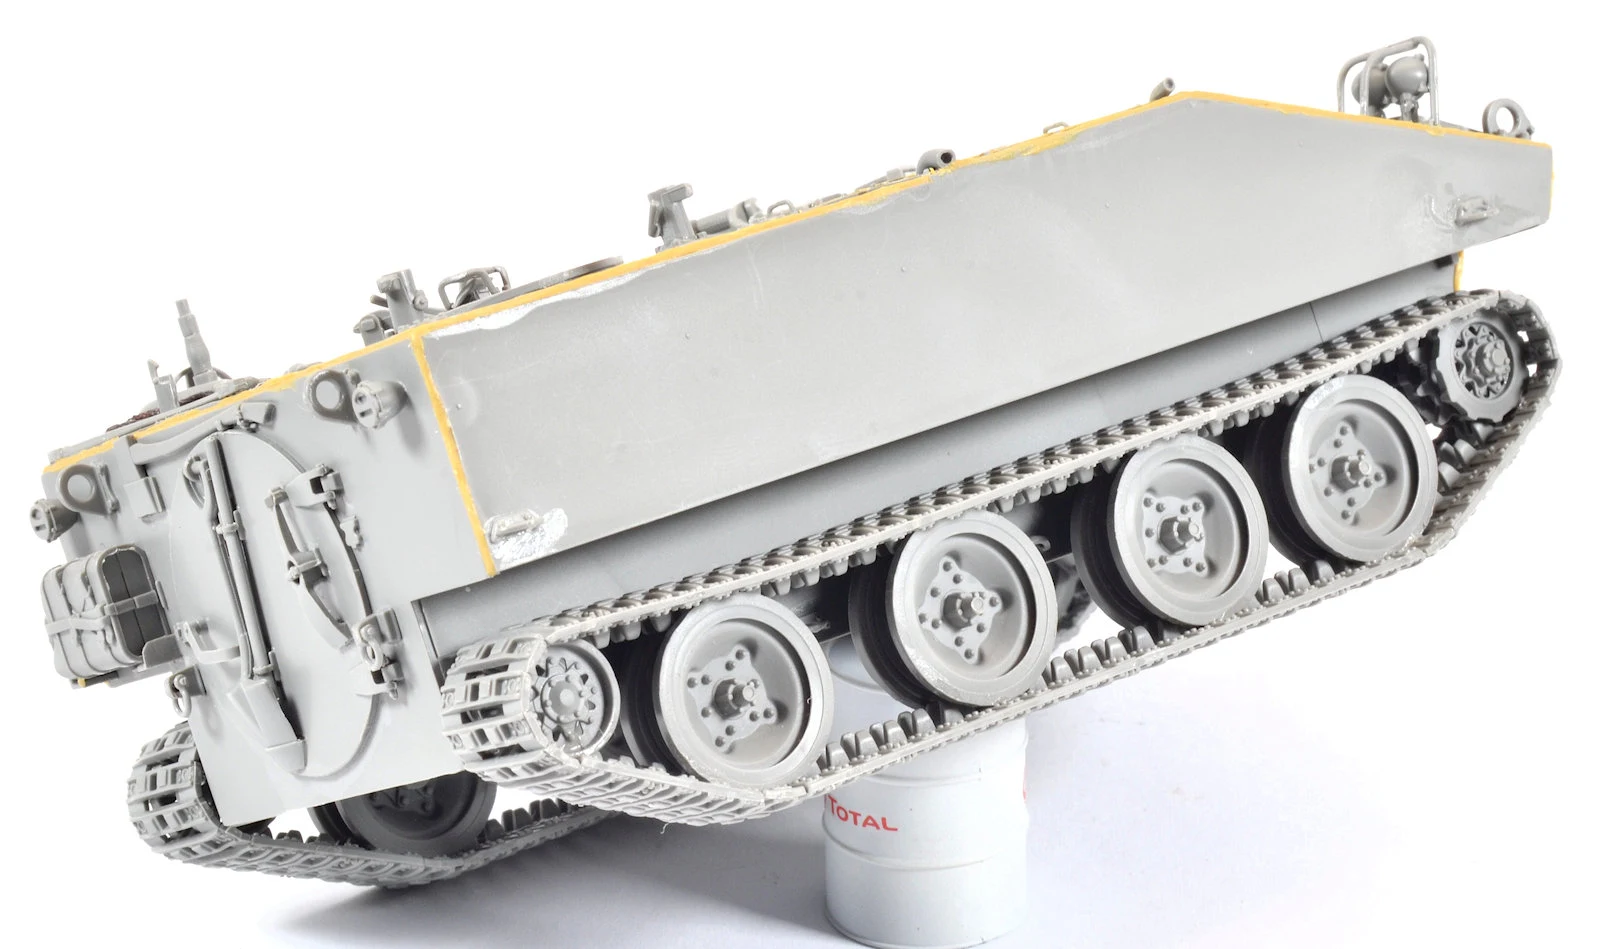
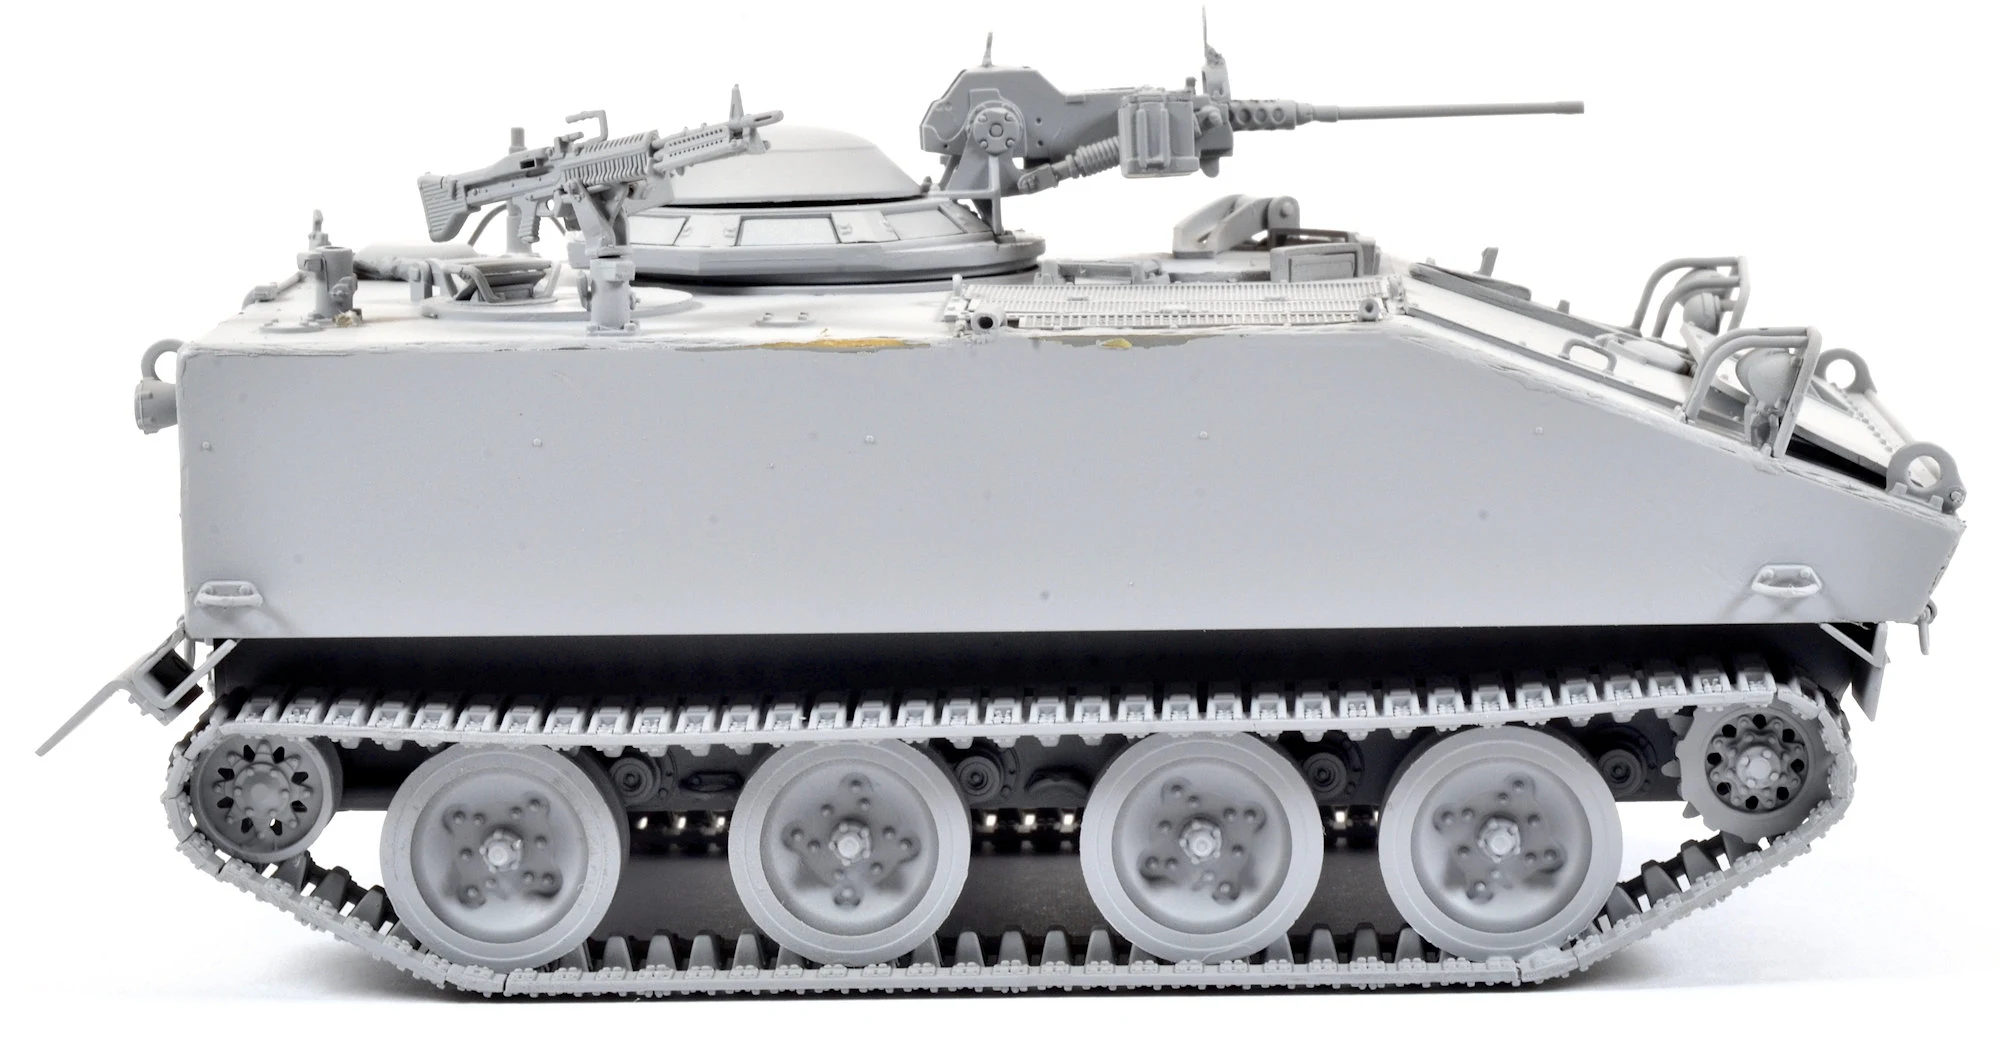
A walk around of the completed vehicle after undercoating...
Size comparison
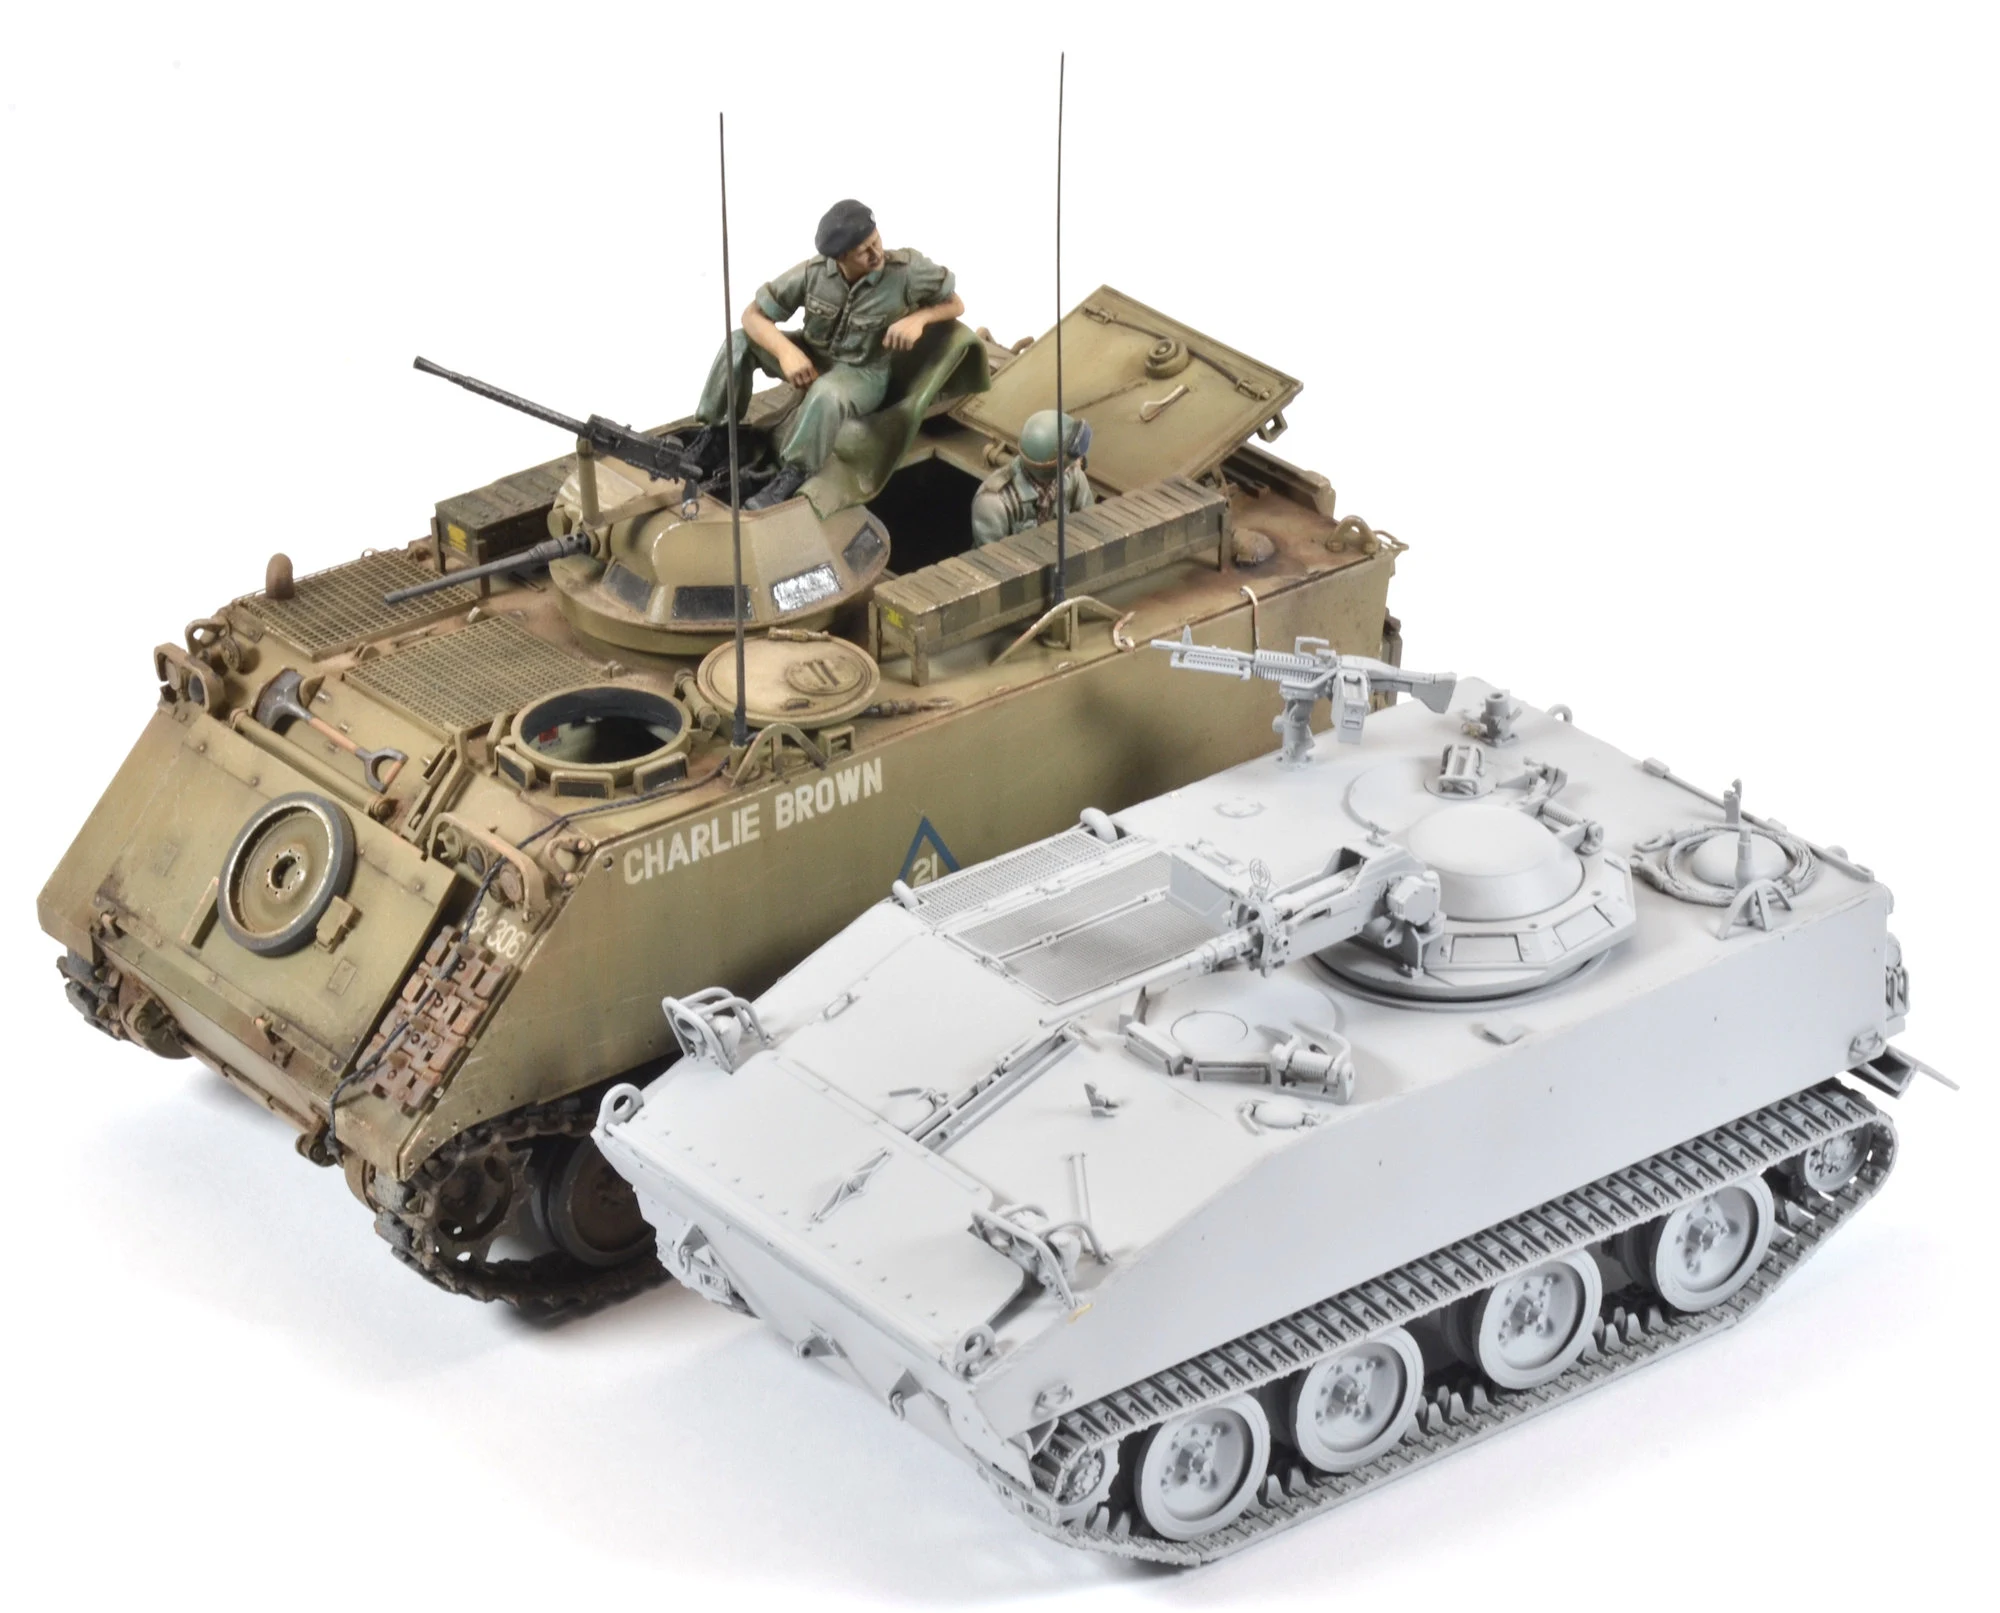
It is interesting to see the size difference between the M114 and the M113. Here you see the M114 posed next to the recent release AFV Club M113. The M114 is considerably smaller in every aspect.
Conclusion
A few months ago, if you had have asked me what an M114 looked like I wouldn’t have had a clue, and I am sure I wouldn’t be alone in my ignorance. This is a niche vehicle that would be a little foreign to most. In terms of its popularity as a model release, I guess time will tell…but for me it was actually a great opportunity to learn something about a little piece of history I had otherwise ignored.

In terms of a model the kit itself is quite simple and the fit is overall reasonable. The lack of in interior is a little bit of a downside on a subject like this. The ability to pose the hatches open would certainly add an extra dimension to a subject like this. so, who knows, maybe that is the long term plan for the kit because it looks like the ability to expand on the kit is present.

I enjoyed the build and an looking forward to getting some colour down and bringing this little fellow to life.

Clayton Ockerby

Thanks to Takom for sending this kit to Clayton to build and review for us. You can see more about Takom's kits on their website or on their Facebook page