Monday, October 17

Construction review Pt.I: Takom's Panzerjager IB mit 7.5cm StuK 40 L/48 in 1/16th scale

A large undertaking, making this little tank with a big gun - Paul has taken on Takom's new Panzerjager IB mit 7.5cm StuK 40 L/48 in 1/16th scale. In the first part of his build review, see how the hull goes together in a step by step process...
Construction review: Pt.II:Panzerjager IB mit 7.5cm StuK 40 L/48
Manufacturer: Takom
1/16th scale
Type: Polystyrene, photo-etch, and waterslide decals multimedia Kit
For many people, 1/35 is seen as the default scale for armour models and for the most part, I am one of those people, although admittedly, a lot of the smaller vehicles such as tankettes in particular, are more towards the smaller side of the spectrum, and don’t have the visual impact of their larger cousins when the finished model is placed onto the display table. Takom has been releasing a few tankettes in this larger 1/16 scale of late, which I think this is a great scale for these diminutive vehicles and this is one of Takom’s newest releases based on their earlier kit of the Pz IB.

A BIG box for a little tank...
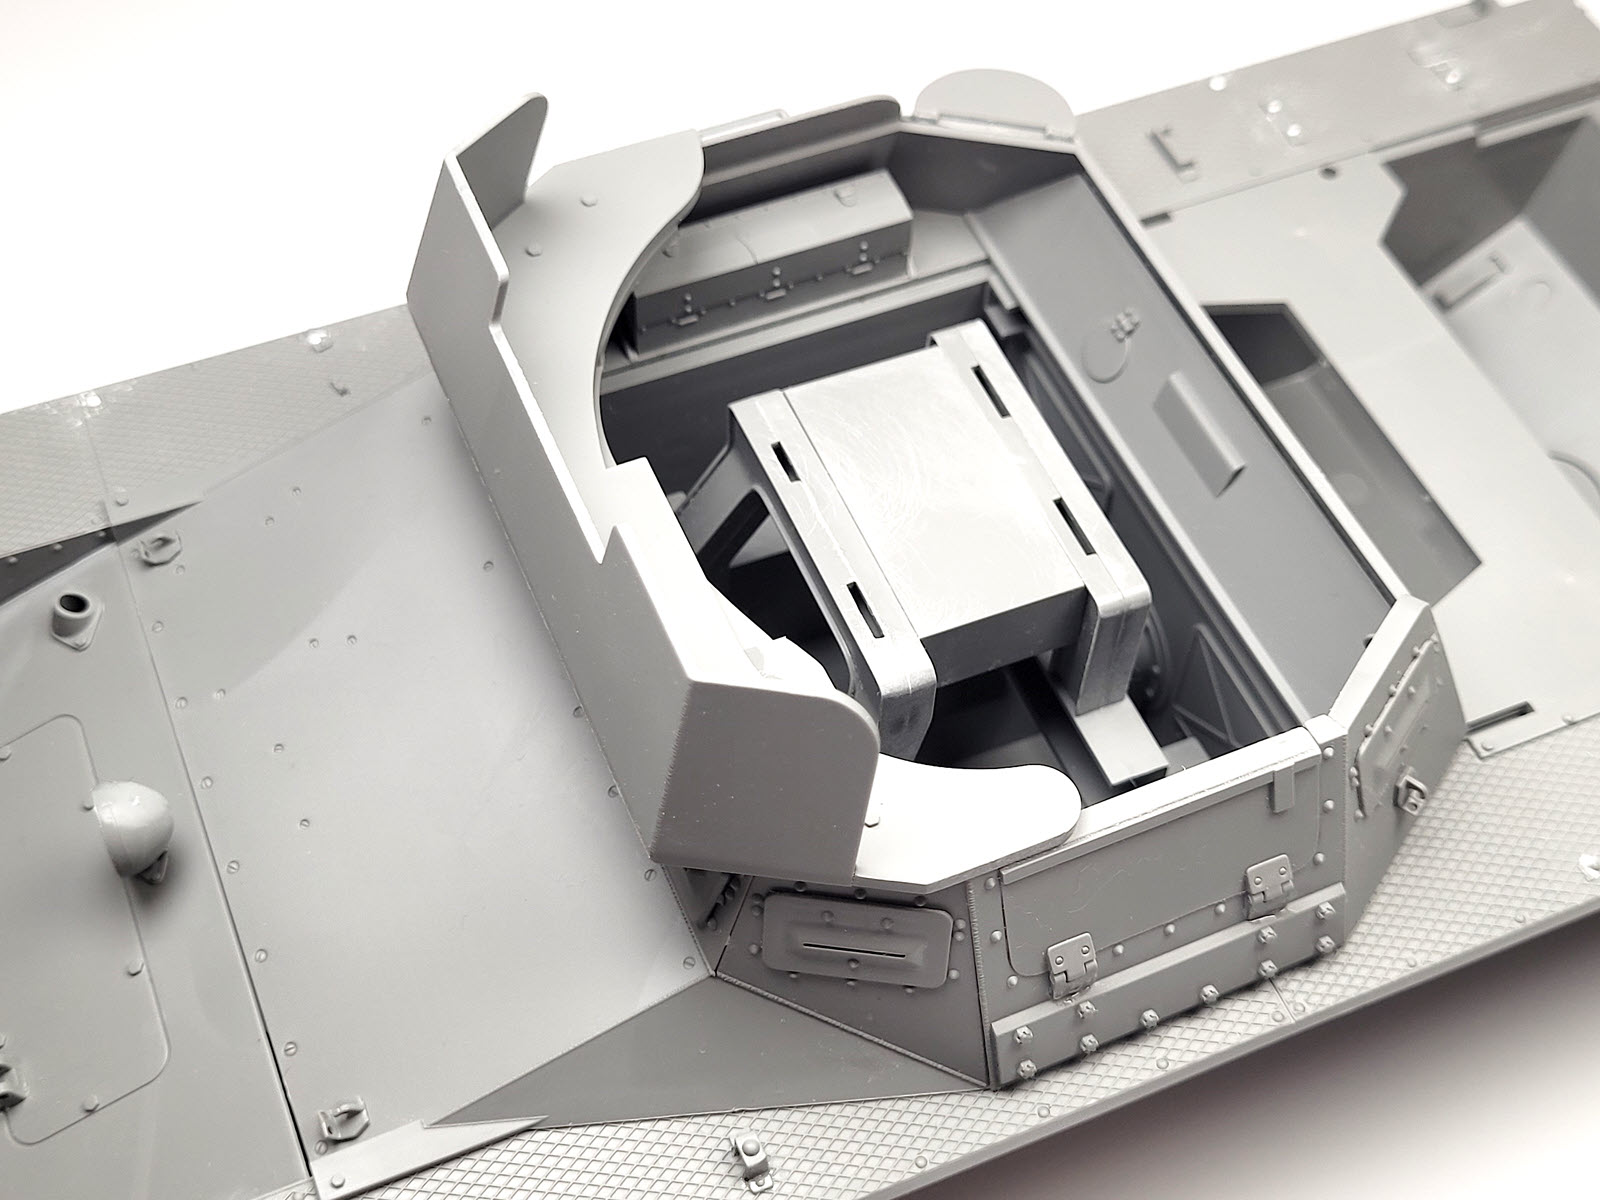
The Germans were desperate by 1945, and pretty much anything that could be put into battle was put into battle, especially anything that had anti-tank capability. This new release by Takom is a very obscure vehicle, believed to be a one off, and with only one known picture of it, features what appears to be a 75mm gun taken from a Stug, and mounted on top of a Pz I hull. While this vehicle is often portrayed as a self-propelled gun, as well as in this kit, if you look at the picture, the lack of tracks poses a very valid question about whether this was actually a SPG, or if the gun was just mounted onto the chassis and then towed into place for use as a static gun. As far as I am concerned, without any definitive information, that choice is up to you.
Construction starts with the wheels and bogies, but since the wheels needed to be sandwiched between the inner and outer halves of the bogies, I decided to put them aside and paint them later before putting them together. The hull comes in a single tub and is substantially larger than any I have dealt with before, but this is 1/16 scale. The fit of the lower glacis, and front nose plate wasn’t quite perfect, and needed a bit of filler and blending, but this shouldn’t take more than a few minutes. Details at the rear of the hull gave no problems at all.
There is a partial interior provided, and while this is all purely conjectural, I think it is a fair representation of what would have appeared on the real thing. I believe this kit uses Das Werk sprues for the 75mm gun from their Stug kit, and the fact that there are two “E” sprues in this kit supports that, so also take note when you come across parts labelled “E” such and such. With the much larger hull in an unfamiliar scale, you really don’t get an understanding of how small that hull is, although the mount for the 75mm really does bring it all back by how much space it takes up in the interior.
The fenders come in a single piece with bracing between the two to help with alignment, although it is not necessarily accurate, and the forward section will be slightly visible on the completed model. There is also a forest of ejector pins on the undersides of the fenders which need to be removed and will leave a mark that will leave a mark afterwards which you may choose to fill but they are hard to spot when the vehicle is sitting on its wheels. The sides of the hull were slightly warped/bowed inwards, so that bracing really does help with getting the alignment right. In going with my decision that this is a towed gun rather than a SPG, I filled all the locating holes for the tools on the fenders.
Once you put on the forward section of the upper hull, it really shows you how much the mount for the 75mm gun really dominates the space inside, and there really isn’t even any room for ammunition storage, let alone be considered as a fighting compartment. There are some outside plates to be attached to the upper hull, and the fit was pretty good except for the two rear pieces, which didn’t reach all the way down to the finder, so they will need some filler later on. The front of the upper hull also has a cut-out to help with alignment of the plates, which is great, although that cutout is partially visible from the back, so I created a blanking plate from one of the unused pieces.
The rear deck comes in one piece with various bits to be added, including the small PE fret including the grill, and some arguably optional covers. The rear deck initially sat perfectly with the upper hull in a dry fit, however the additional plates that were added interfered with the fit, so I had to sand them back a bit.
The tracks provided in the kit are individual links with pins and are meant to be fully workable. Being in 1/16 scale, these aren’t the usual tiny individual links and are a nice easy size to work with. The styrene pins were the biggest question mark to me as styrene isn’t the strongest of materials and snapping them is a real possibility. Putting the tracks together turned out to be a fairly easy process, and the secret to putting them together was getting rid of the bits of flash that appeared in the joins of the track links. I still managed to snap a few pins early on, but replacements were readily available in the shape of drawing pins, which are almost an exact match in size except for the length, and are invincible compared to styrene.
At this point, I’m probably leaning against using these tracks, as the more I put together, the more I am convinced that this unique combination was used as a towed static gun rather than as a SPG as advertised, but there is still time to re-consider.
It has been a fun journey so far though and while I was initially a little wary about the potential size of this model, I must confess that it has been quite refreshing working in this larger scale compared to its 1/35 cousins that I have previously built.

Pt.I of this build guide

Paul Lee

Thanks to Takom for sending this kit to paul to build and review. You can see more about Takom's kits on their website or on their Facebook page