

Build Guide Pt II: Panzer Kampf Anzug Ausf M Melusine
by Wave
1/20th scale
Kit No #WAVMK-027
Injection moulded kit
$31.52 USD from Hobbylink Japan

Today: Part II - painting, weathering & finishing the kit...
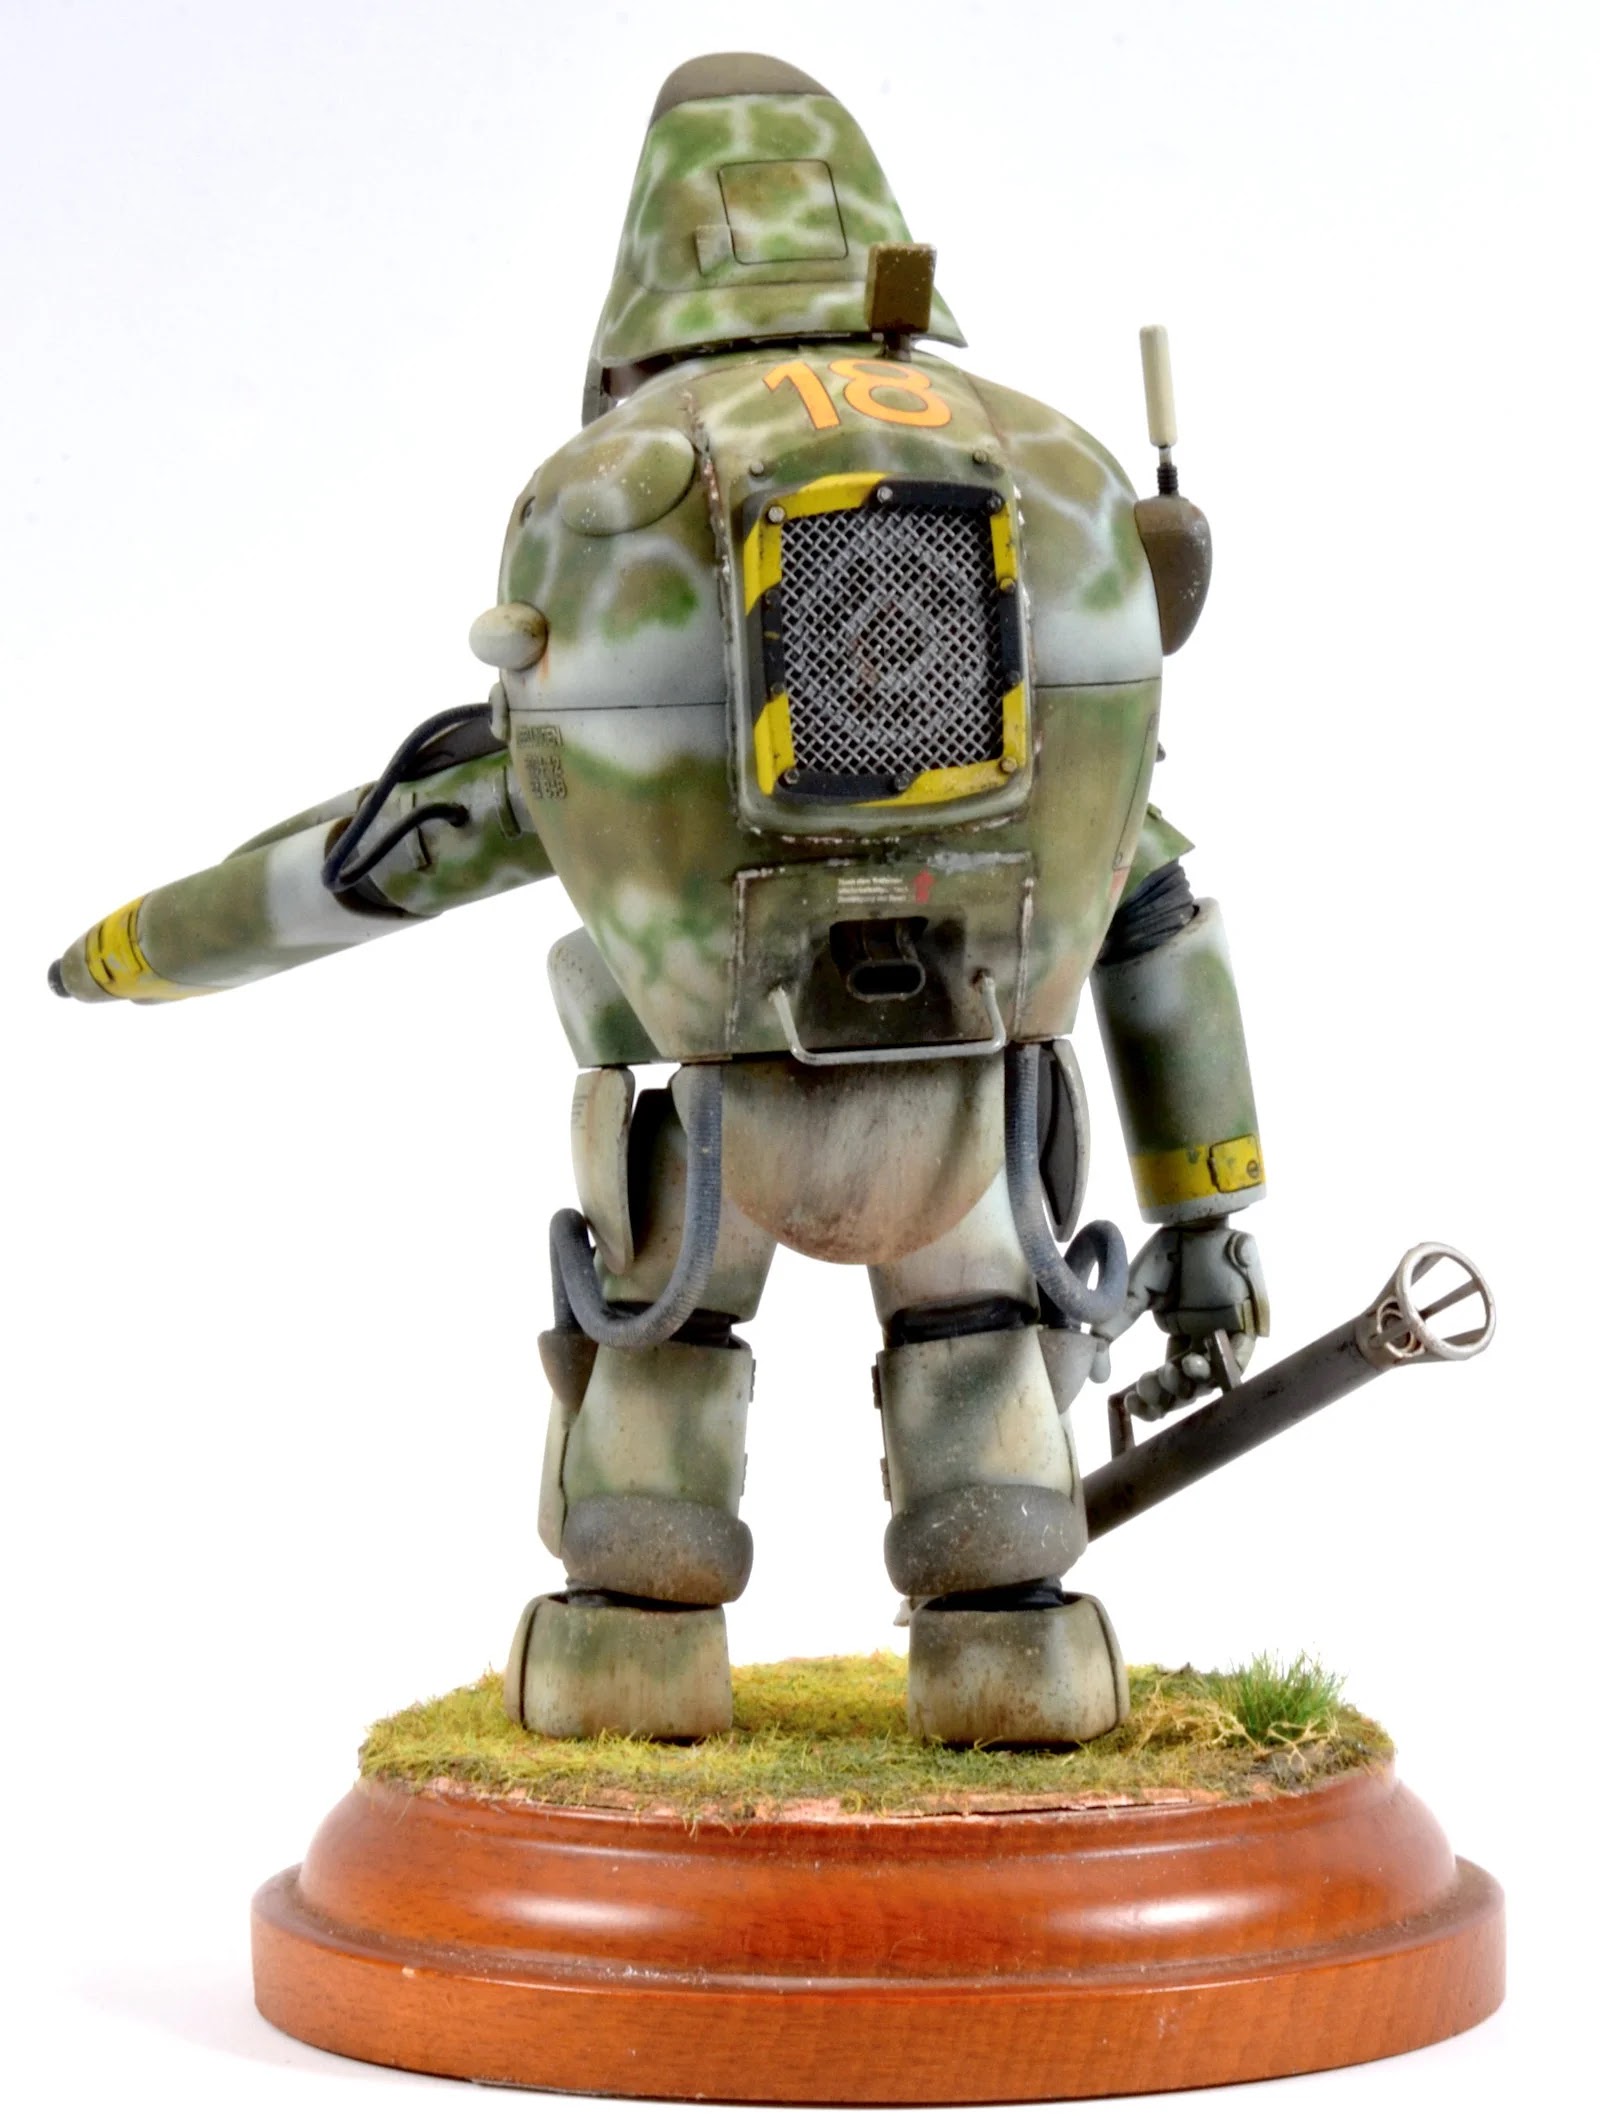
Still with no clear plan I kept painting. Wavey stripes using Camo Green from SMS were applied horizontally. I purposely allowed the finish to remain somewhat mottled just as it would be if it were field applied. The paint was kept thin to help hold tight lines and reduce overspray.

It was around about here my inspiration kicked in. Melusine (the name of this suit) is a figure of European folklore, a female spirit of fresh water in a holy well or river. She is usually depicted as a woman who is a serpent or fish from the waist down. She is also sometimes illustrated with wings, two tails, or both.
It seemed fitting that some type of scale or organic web would be perfect for Melusine.
Back to the thinned mix RLM 76 and white and some patience with the airbrush, and the webbed, scale like pattern started to take shape. Rather than take the blanket approach and cover the whole shape with the pattern I focused on the topside and just had a bit of fun with the rest of the parts.
The Green was used to ‘correct’ some shortcomings in the paintwork, but overall the result was pleasing.

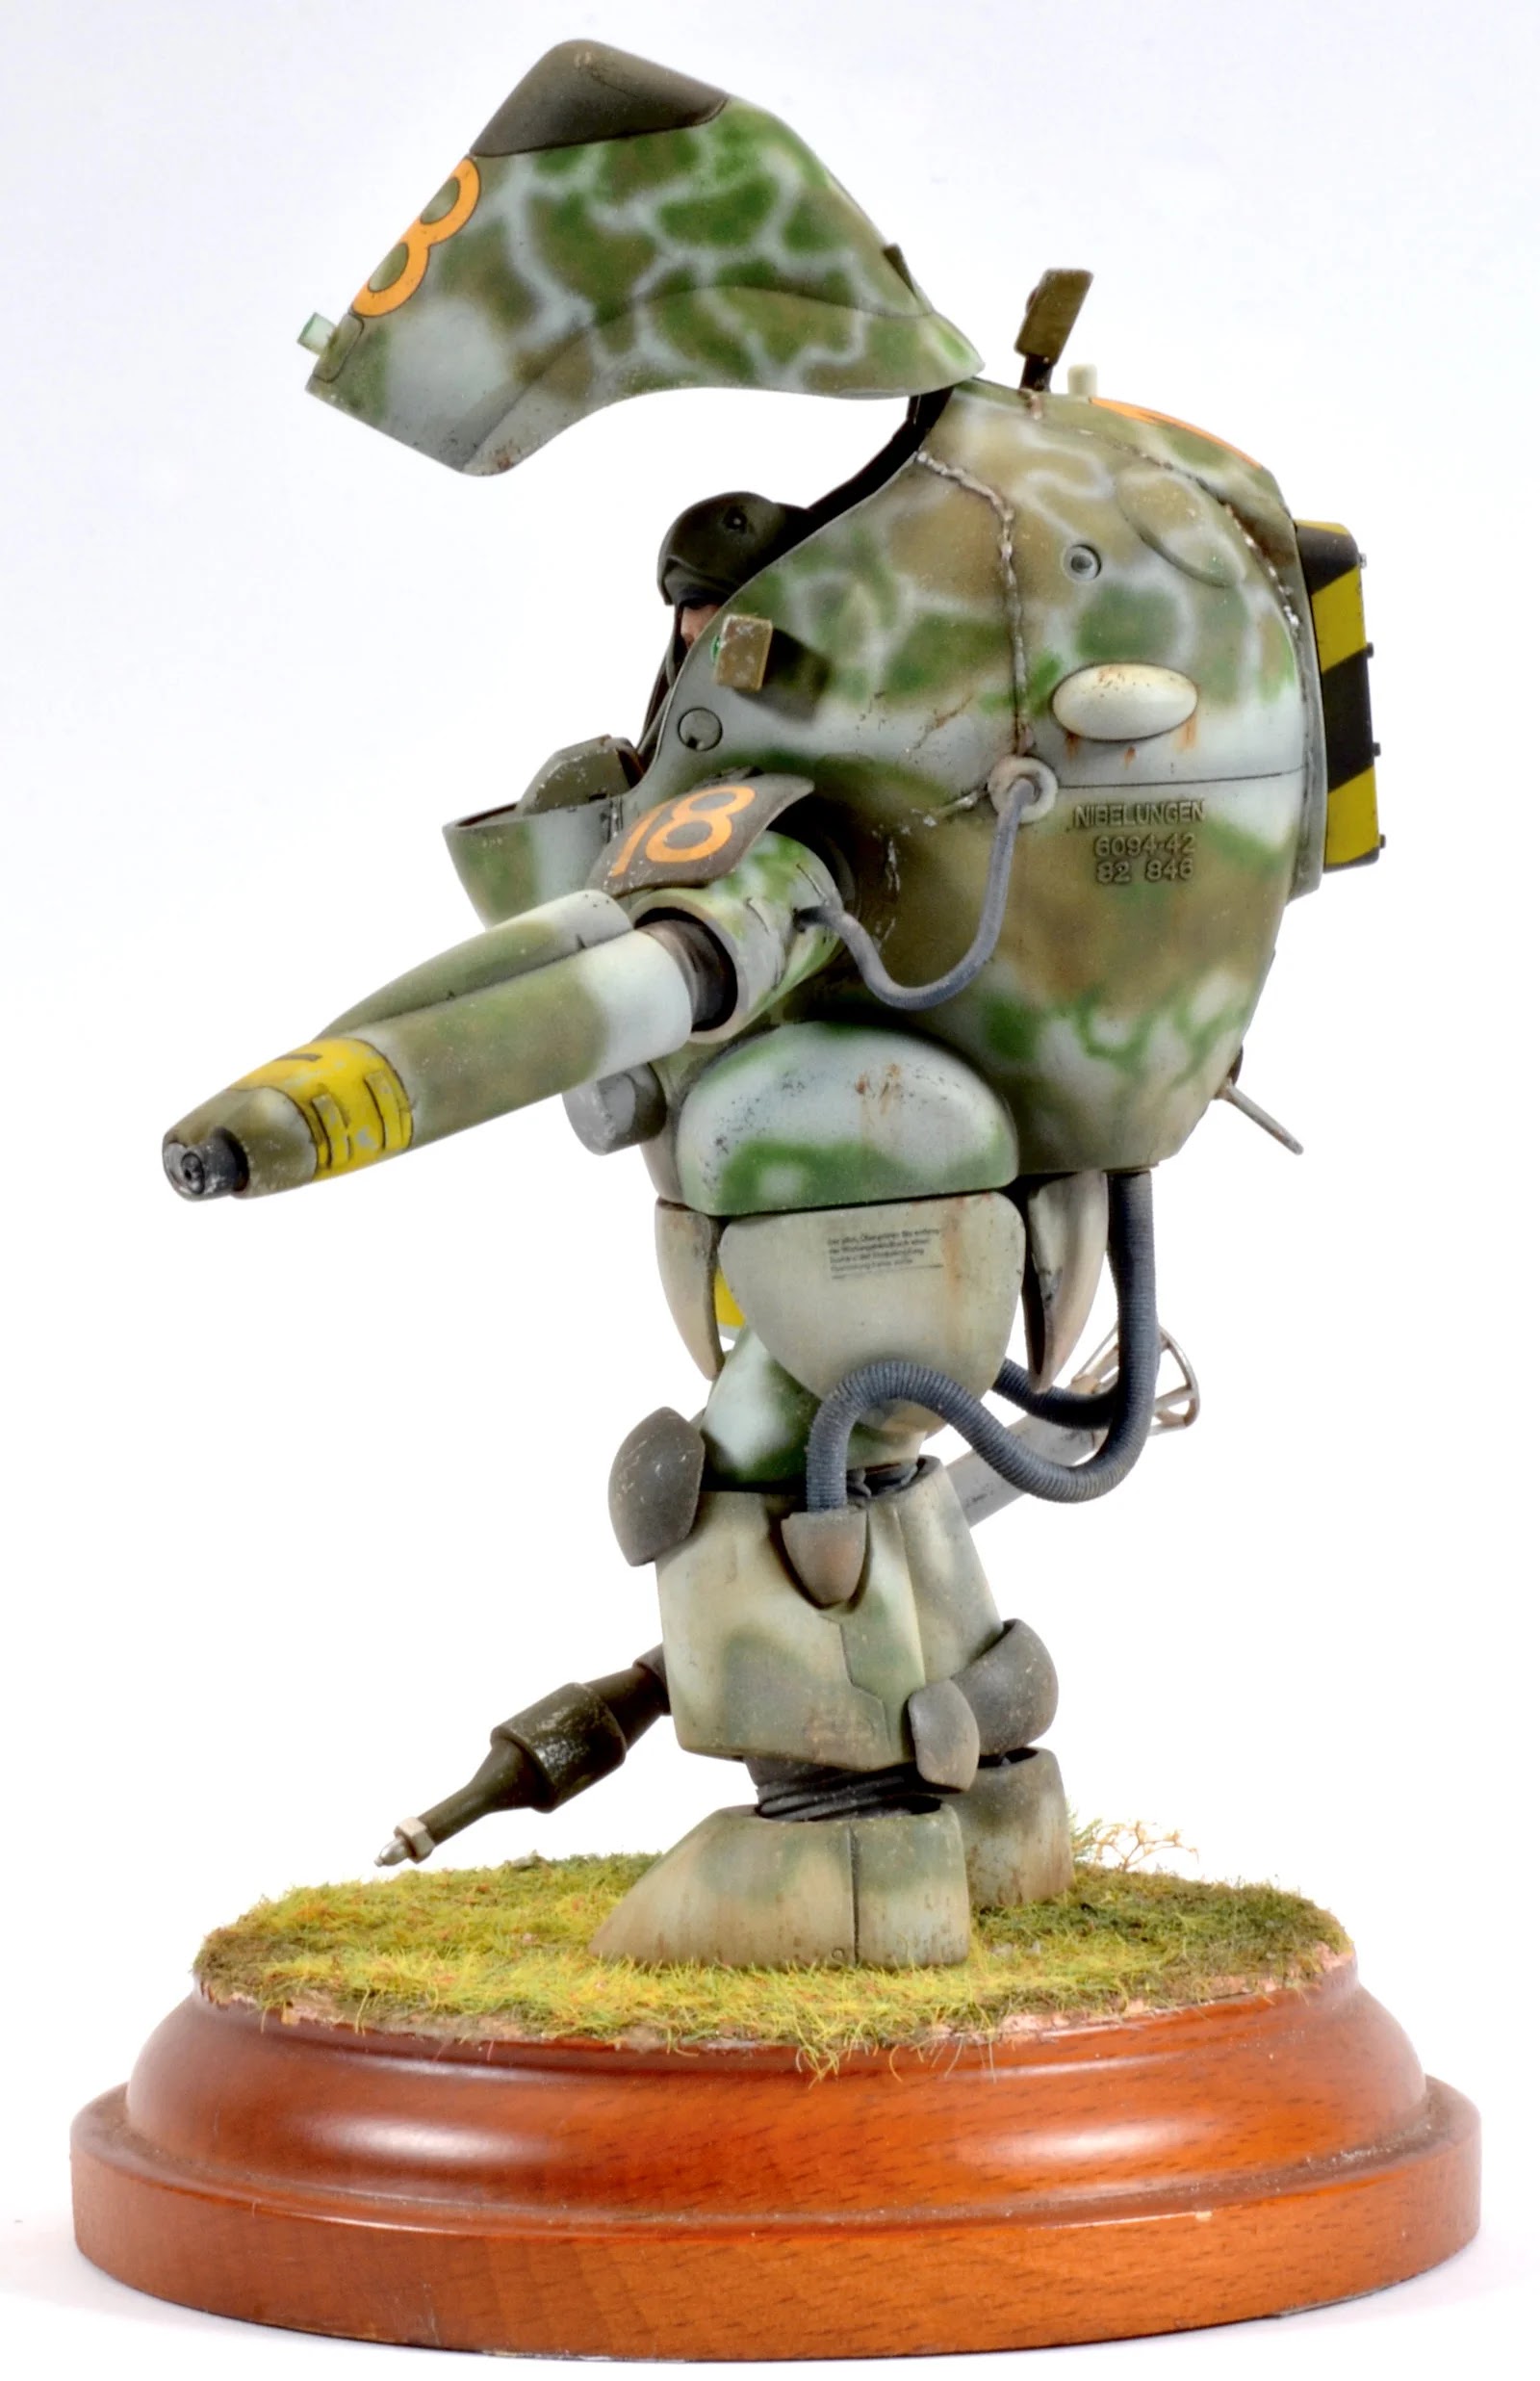
With the basic scheme complete, various sections were masked and painted. The front part of the hatch was painted in Stainless Steel from SMS. The arms were masked, treated with chipping fluid and painted yellow.

The Stainless Steel section was then painted with Dark Green and highlighted with a mix lightened with Light Stone. I was intending to chip this part but liked the look of the colour so much I decided to leave it (for the most part)…

The guard section for the air intake was masked and sprayed using black and yellow. Clichéd I know, but the black and yellow adds another element to the paintwork

Armour plates over the arms as well as cameras and antenna mounts were pre-painted and snapped in place. I had left these off because I was initially going to use a mask for the pattern however I could have applied them earlier because I ended up free handing the camouflage.

The legs are assembles and the knee guards are applied. They were painted using aluminium lacquer and the dark green over the top. The aluminium base allows you to remove the paints quite easily without the need for chipping fluid. I used the tip of a tooth pick in this instance.

Everything is then snapped together and Melusine reveals herself. There was a fair amount of pressure required to fit the leg section to the body which made me a uncomfortable that the whole thing was going to explode in me hand…But the modelling Gods were with me for a change.

I was a little lazy and applied the decals straight over the paintwork rather than stall to varnish. I chose the big, bright yellow number because they worked with the colours and I liked the absurd nature of how visible they would have been in battle. All of that beautiful camouflage and some thumping yellow numbers to give your position away! What could possibly go wrong ?

Once the decals had settled the model was sealed with a coat of satin varnish and treated with a pin wash using AK2071 (essentially a dark brown enamel paint).

The figure was painted using acrylics and oil washes. On reviewing these pics it has become clear to me I need to invest in an Opti-visor. Magnified this guy looks very sloppy…but not so bad to the naked eye. I hear you…another armour builder making excuses for his figure painting.

Superficial chipping was applied using an old sponge and Vallejo acrylics.


Dust and dirt effects were created around the lower edges of the model by speckling North Africa Dust and Dark mud enamels. A brush is loaded with the paint and ‘flicked’ at the model by dragging it across a tooth pick. Errors are easily corrected with a fine brush moistened with enamel thinner.

Conclusion
With the weathering over the line, the Melusine was now complete. It’s a funny thing when you are given free rein to paint whatever you like. You would think it was liberating and refreshing, but I found it strangely restrictive…like I was almost crippled by my own indecision. In the end though, once I had some concept in my head that I was happy with the rest of the process became a joy.
Some close-in details of this completed kit...


The kit is what you would expect from a Ma.K kit. Quirky suit, articulated joints, interesting lines and accessible to just about every modeller. I would have preferred this to be the traditional style of kit rather than the snap style. I understand why it was done, but as an experienced modeller the ‘close enough is good enough’ fit that snap kits can give you at times doesn’t cut it. In saying that, would it stop my buying the kit ? Of course not, it’s very cool and a worthy inclusion to any collection. Filling gaps is a basic skill every modeller should have, so the complaint is minor.
The kit shown here without a base


The Maschinen Krieger franchise has always had somewhat of a cult following throughout the decades however it seems to have found a next level of popularity in the modelling community. It’s easy to see why… The genre allows for all types of modellers to unleash their creativity and use a mix of techniques without fear of being bound to reality.
A simple base can add a lot to this presentation...


Beautiful subject. Beautiful genre, Beautiful kit.
Clayton Ockerby
You can get this kit from Hobbylink Japan for $31 USD

You can see more of Clayton's work on his Facebook page - Workbench Hobbies Also, his YouTube page which has heaps of videos on this and other subjects. Check it out - it is a great resource...
