As it says on the tin, Andy King takes through his construction of AK Interactive's 35th scale FJ43 SUV with hard top. See it come together before paint & weathering in Pt I...
Construction Review: FJ43 SUV with hard top.
From AK Interactive
SKU: AK35001
1/35th scale
Price: 38,95€ From the AK Interactive Website
.jpg)
AK Interactive's new kit #AK35001 represents a 1/35th scale version of the hard top Toyota FJ43, probably one of the most popular variants of the Land Cruiser's history. The hard top could be easily removed or refitted as conditions demanded, but it was a most useful asset under cold, rainy or dusty weather, both for military and civil users along the many decades of service of the vehicle.
The Subject: The FJ43 pickup
The FJ43 is part of the famous FJ40 series of 4x4s produced by the well-known Japanese company since 1953. The J40 series was a tremendous best seller around the globe, helping to build the reputation of the Japanese brand worldwide due to its sturdiness, economy and reliability. It was used for decades for military and civilian duties, and still remains service in across many countries.

It has become an icon due to its popularity in many conflicts, even coining the term “Toyota Wars”. Fitted with weapons improved in many ways, it has proven its value as a capable vehicle in the most complicated terrain and tasks. This series had many configurations. Official and extra official ones. During the years, the models had many changes and updates and is possible to see many vehicles with different parts, seats, wheels, etc.

FJ40 is the short wheel base, FJ43 is the medium wheels base, FJ45 is the long wheelbase and pickup J40 series can be done in several types depending on wheelbase and year of production FJ40, FJ43 and FJ45 can be done with hard top and soft top and even topless and in several year batches 1958 to 1960 / 1961 to 1965 / 1966 to 1977 / 1978 to 1981 / 1981 to 1985, in soft top and hard top.

There were many of the FJ cruisers employed throughout the year. There is scope for many more types in this series from AK Interactive.
.webp)
The Toyota FJ43 Land Cruiser 4x4 SUV proved very popular in third-world countries as a militarized 'technical' as it was much cheaper than an armoured vehicle and it had all sorts of weapons bolted on the rear from machine guns and mortars to Mil-24 helicopter rocket pods. This particular version has a hard top so was probably used more for carrying troops (or looted Iraqi gold).

The kit:
AK Interactive have been producing paints and weathering materials for a number of years now but have recently moved into injection-moulded kits. Some of their model kit range have come from other manufacturers such as the 1/48th scale MiG-21 PFM that was originally made by Eduard however the FJ43 Land Cruiser series is all-new tooling.
.jpg)
In the box you get seven sprues moulded in grey styrene, a clear sprue and a decal sheet nicely printed by Cartograf. Moulding quality is very good with no flash present however there are mould pin marks dotted around the model. These are mostly confined to hard-to-see areas but there are some under the front mudguards, the interiors of the side body panels, doors, roof and tail gate and will need filling unless you are having the doors closed.
The kit's features:
+ Over 170 plastic parts.
+ Decals for 3 painting/marking options.
+ Front wheels with optional steering.
+ Highly detailed interior.
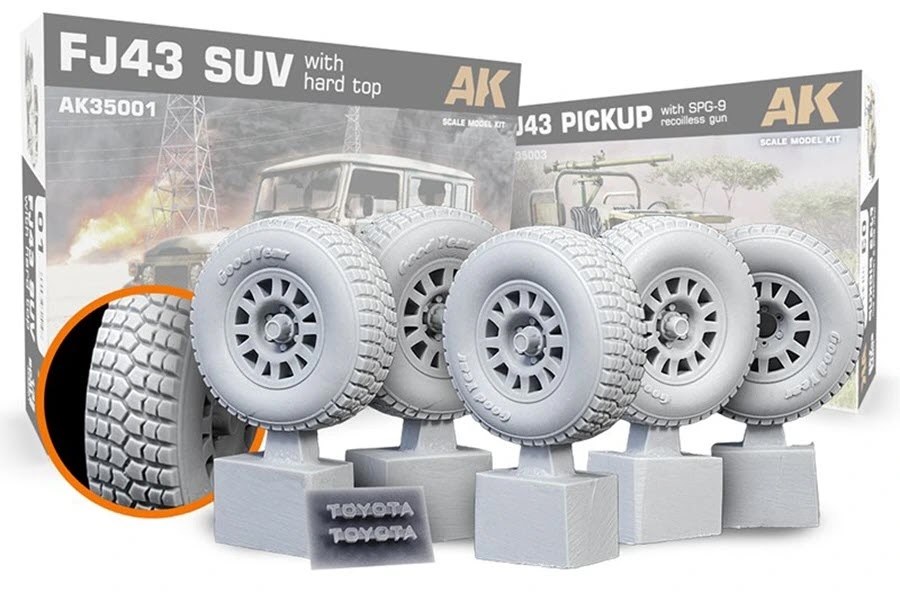
+ Two different wheels options.
+ Different parts for multiple versions
+ Three decals & marking choices.
.webp)
Another good thing I like about the kit are the three steering racks included as one is moulded in the straight ahead position, one turned to the left and the other turned to the right which saves some chopping as you would on other kits to portray the front wheels turned to either side.
.webp)
The three steering racks included (parts G21, 22 and 23)
.webp)
The first (option A) in a two-tone scheme of sand and green from the 18th Mechanized Brigade, Iraqi Republican Guards from the first Gulf War during 1991
Option B is an overall sand coloured FJ43 from the 3rd Armoured Division 'Saladin', Iraqi Army again during the first Gulf War.
The final one (option C) being an FJ43 in an overall light grey and white scheme for a TV/Press vehicle during the 1980s.
The final one (option C) being an FJ43 in an overall light grey and white scheme for a TV/Press vehicle during the 1980s.
.webp)
All the colour call outs including weathering and washes are from AK's own range.
Cartograf decals are provided, they are the best!
.webp)
.webp)
.webp)
.webp)
.webp)
It's not really clear on the instructions where part G9 locates and I initially glued it to the chassis cross-member however on the steering rack there is a small cut out for it so that is where it actually goes.
.webp)
This is what the front suspension should look like.
.webp)
.webp)
.webp)
.webp)
Luckily it didn't;
This also allowed me to fit the bonnet (or hood) and windscreen frame, however this threw up another issue as the frame would not sit properly. This was due to some plastic in the windscreen hinges that needed removing;
This was duly removed with a modelling chisel and scalpel...
1.webp)
.webp)
The body sides were not glued to the floor in this shot.
.webp)
.webp)
.webp)
There is no corresponding part on the other side but there are locating strips so you'll have to fill the area with a bag or something..webp) The front fenders were fitted but as Scott Gentry's snag sheet points out, the locating tabs need removing otherwise you end up with big gaps where the fenders fit the body sides. Of course I read this AFTER I fitted the fenders so I either have some filling to do or remove them completely, cut off the tabs then refit the fenders.
The front fenders were fitted but as Scott Gentry's snag sheet points out, the locating tabs need removing otherwise you end up with big gaps where the fenders fit the body sides. Of course I read this AFTER I fitted the fenders so I either have some filling to do or remove them completely, cut off the tabs then refit the fenders.
.webp) You only have a couple of options here, either shim the doors top and bottom or in my case have the doors open. One thing I have noticed in the photo is the rather chunky moulded-on door handle so I may replace that at the same time I'm messing with the front fenders.
You only have a couple of options here, either shim the doors top and bottom or in my case have the doors open. One thing I have noticed in the photo is the rather chunky moulded-on door handle so I may replace that at the same time I'm messing with the front fenders.
.webp)
The worst fitting parts are the rear doors as they are too short in height;
.webp)
A quick walk around of the kit put together so far...
.webp)
.webp)
.webp)
.webp)
.webp)
.webp)
.webp)
.webp)
Keep a look out for part two which will cover the painting and weathering.
Andy King
This kit and the wheels from MacOne are now available on the on the AK Interactive Website