
AMS/Zotz 32056 A-4C Conversion set
We have the latest images from AMS Resin and Zotz of their latest collaboration, a conversion for the Trumpeter A-4E or F kit to turn the model into an either US Navy or an Argentinian A-4C light fighter bomber. This set contains also a great set of decals which cover three US Navy birds and two Argentinian aircraft from the 1982 Falklands War.
I'll let the guys who created it tell the story of first the conversion and then the decals of each of these planes in turn and show you a few pictures i found of the aircraft (or as close as) researching this article that may be handy as well.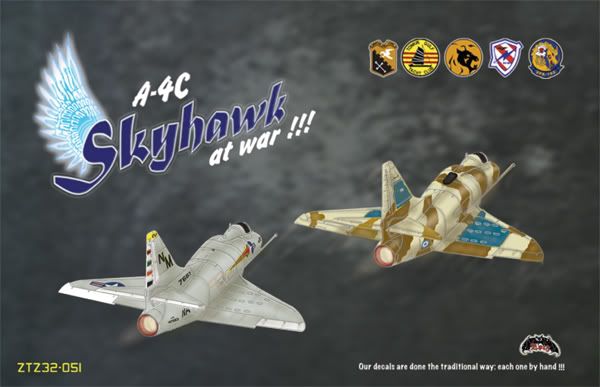
This conversion set is intended to modify the Trumpeter 1/32 A-4E or A-4F kits. It is the result of the collaboration of some scooter maniac’s: Harold Offield, Eli Raphael and Thierry Laurent.
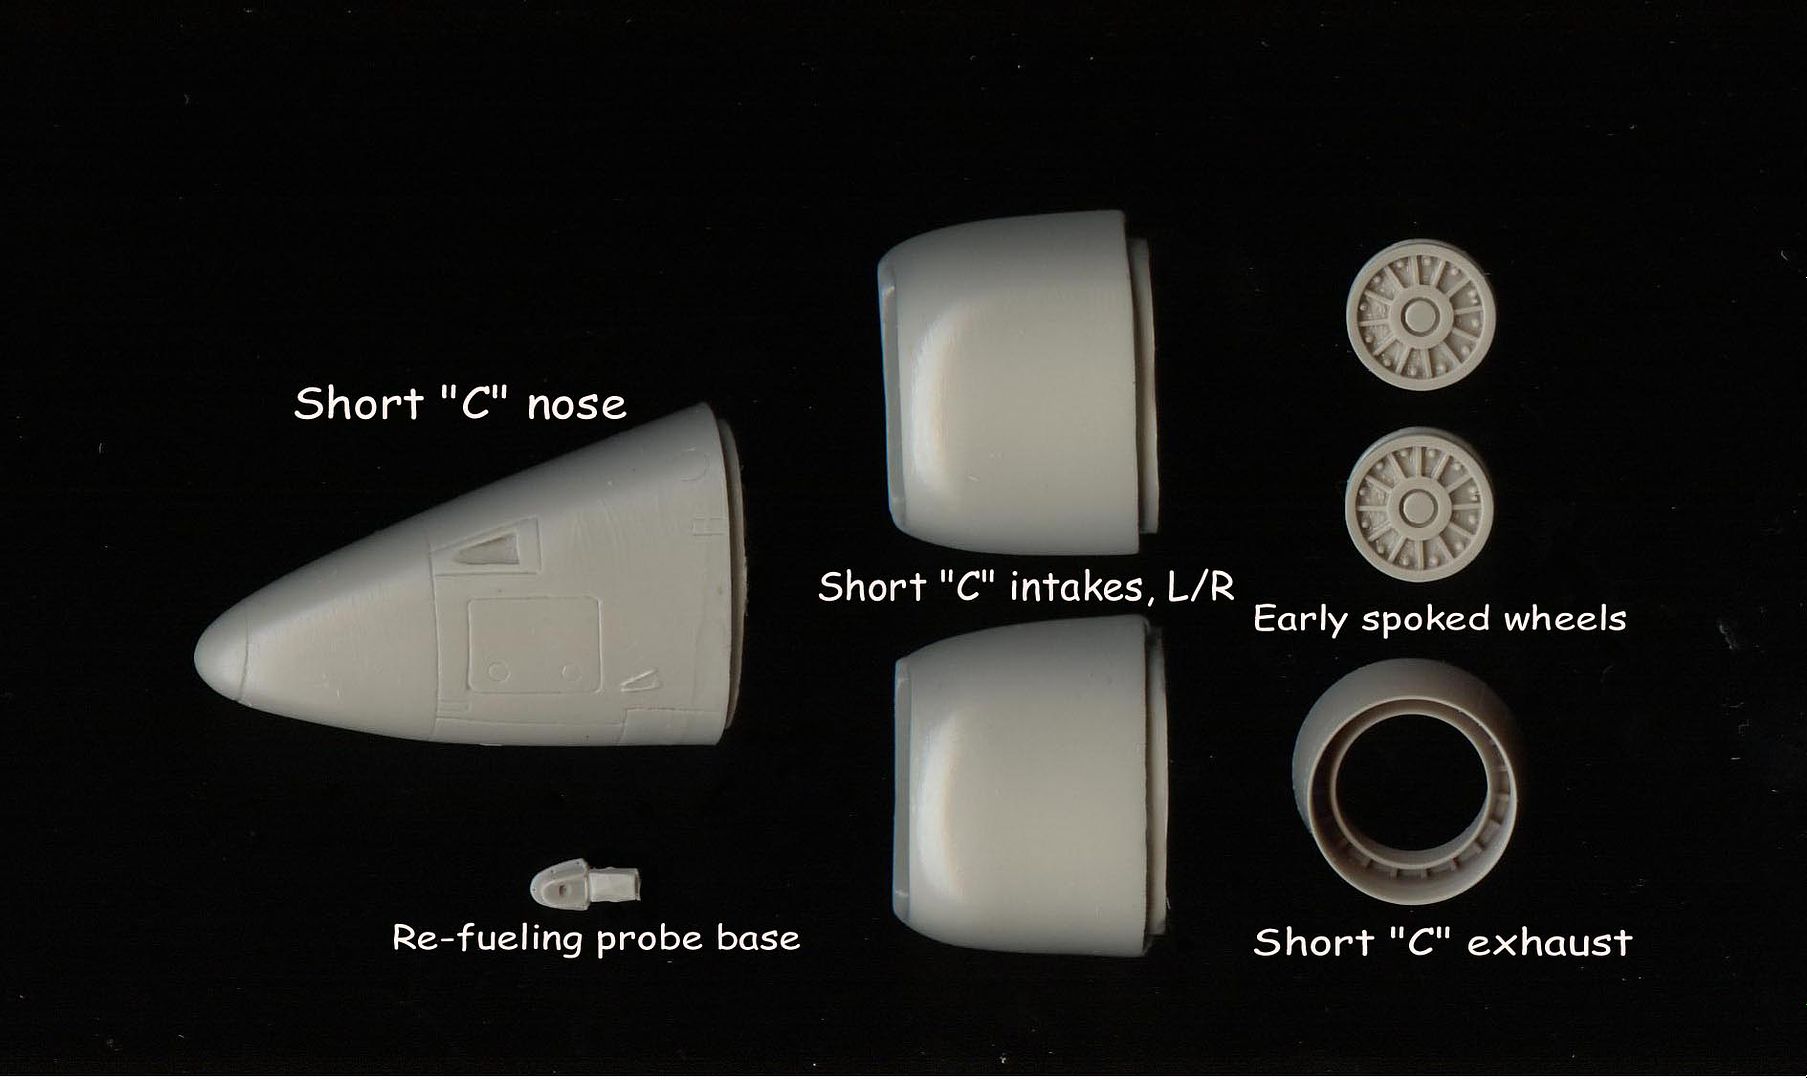
The set gives the main elements intended to get a "Charlie" mark. It does not correct the various kit errors such as the windscreen front shape (which should be oval) or the wing slat step.

 Moreover, some additional modifications should be done to get a fully accurate A-4C. Such changes could not be part of this set for two reasons. First, they ask for fuselage side changes as there were doors, panel lines and vent differences. Second, such changes were variable as 638 C airframes were built in six batches. The A-4C had no fuselage engine service door which appeared with the A-4E.
US Navy Version
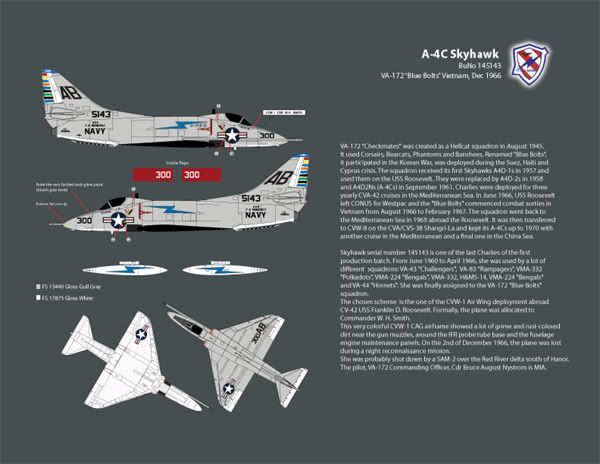
It used a service panel fixed by six screws. The fuselage had different types of small NACA flush or protruding intakes (similar to the A-4E) and oval or round shaped-vents as well as additional vortex generators. Note that some planes (such as the VA-172 CAG 145143 airframe) had no protruding intakes on the fuselage side. Accordingly, if you are a true nit-picker, you can modify your kit according to the chosen airframe. Keep in mind that the US Navy "Charlies" had only three pylons. Additional pylons were retrofitted on modernized A-4L and exported Charlies such as Argentina ones. So, for a Vietnam era A-4C, you should not use parts M4 & M5 and the wing pylon attachment points should be filled and sanded.
 Except some Marines modified airframes, Charlies had no JATO fixtures on the airbrakes. So the kit ones should be filled and sanded.
Air intakes should be added before assembling both fuselage sides. (do not remove the pouring blocks, trim around edges and inside if necessary) You will have to remove the boundary layer plate spacers and some plastic as the Charlie intakes were flush. Go slow and check often for fit. If you take your time and fit the intakes flush. the only filler needed will be in front of the intake. The small plate on the fuselage is to be sanded smooth.
Cut the A-4E nose after assembly of both fuselage halves. (or taping together before gluing, however, it is rather flimsy) You will have to remove some of the kits locater's on the inside of the fuselage.

Remove the area indicated of the pouring block to clear the nose gear well. (leave the rest of the pouring block) Add the new resin nose. It will be necessary to squeeze the fuselage halves to conform to the resin nose. Use a slow setting adhesive, A little bit of filler may be necessary.
Add the resin refuelling probe base (remove pouring block if present).

 The resin exhaust is copy of the kit part that has been shortened and thinned. It is closer to the actual dimensions of the Charlie. You may have to sand off the pouring block on the back side.
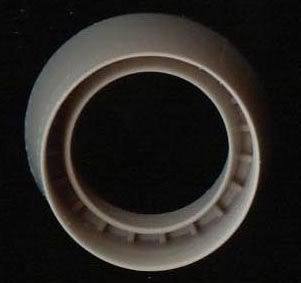
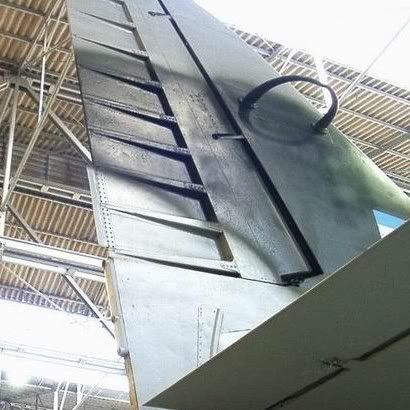
The picture below shows the different components of the wiper device as they shall be positioned on the kit:
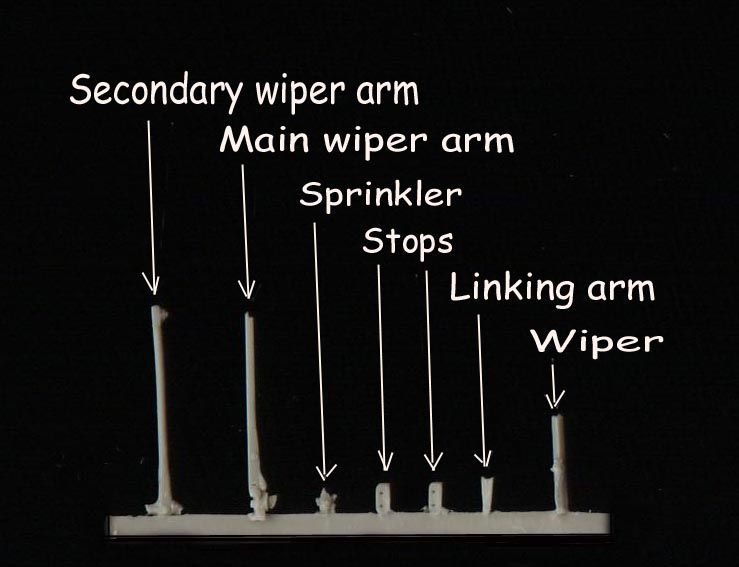
 The wiper
 - The main arm
- The secondary arm
- The linking arm
- The two stops
- An unidentified part
(probably a sprinkler)

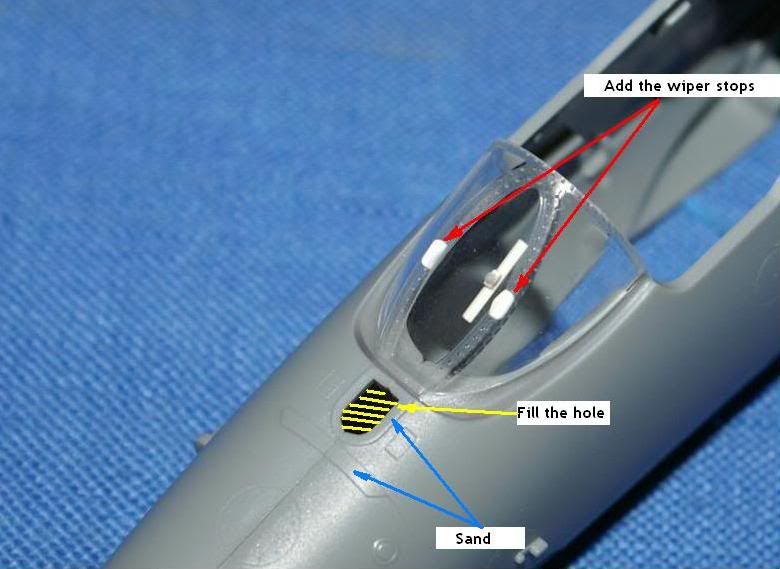
When the new resin nose has been mated to the fuselage, the hole in front of the windshield should be filled and the protruding strips sanded.
The sprinkler and wiper stops should be added during the kit assembly. However, it is
recommend adding the wiper parts at the end of the painting process as the assembly is fragile.
The wiper stops should be carefully glued on the edges of the windshield. Use varnish or Future. If you want to get a stronger bond, it is recommended to dip first the part in a Future/Klear bath before using superglue.
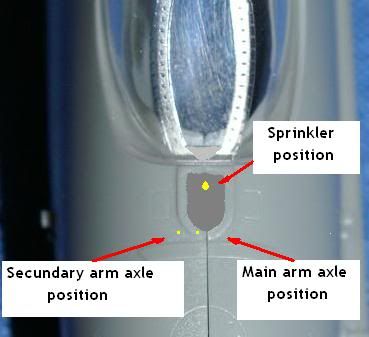
Note that the smaller end of the linking arm should be glued UNDER the secondary wiper arm end whereas the larger one is glued against the base of the wiper bolt. So the linking arm is glued on a diagonal. The end of the main wiper arm is to be glued against the edge of the oblong base of the wiper bolt. This picture shows the location of the sprinkler and the axles of both arms.
Colours are provided through an excellent sheet of decals from Zotz of which three aircraft of the US Navy are captured and two from the Argentinian Air force.

and the break down for the three US NAVY variants...
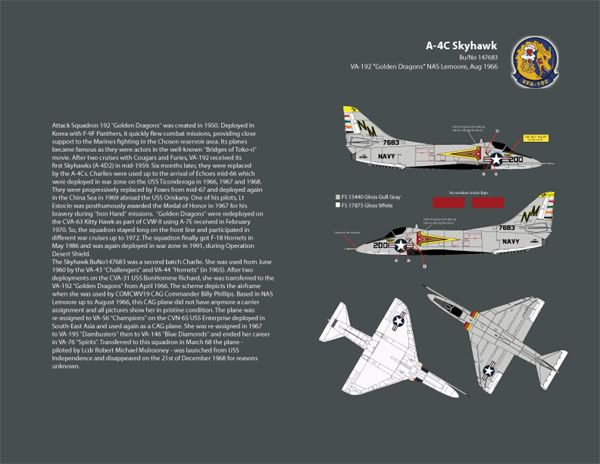
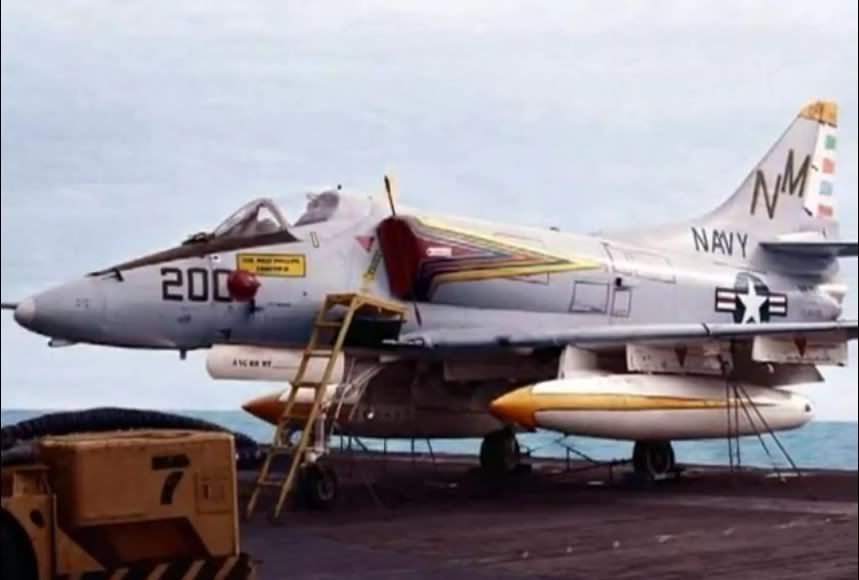
VA-192 Golden dragons 143683 "200" or "300"
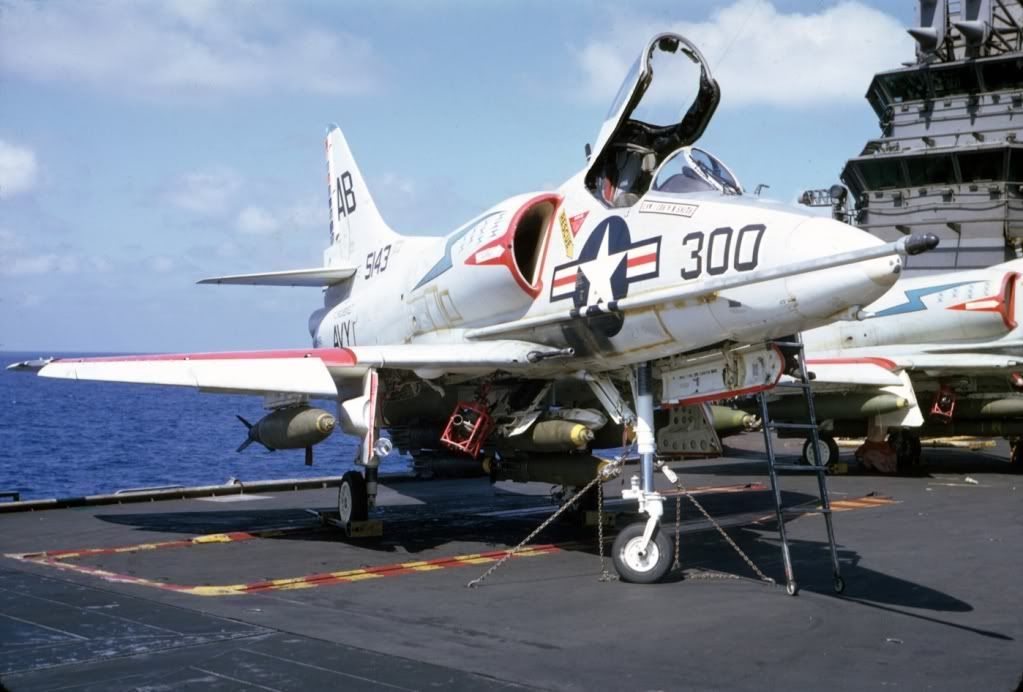
VA-172 Blue bolts aircraft 145143 "300"
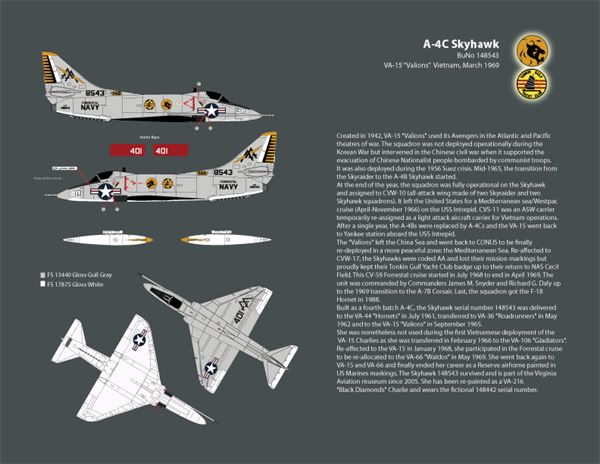
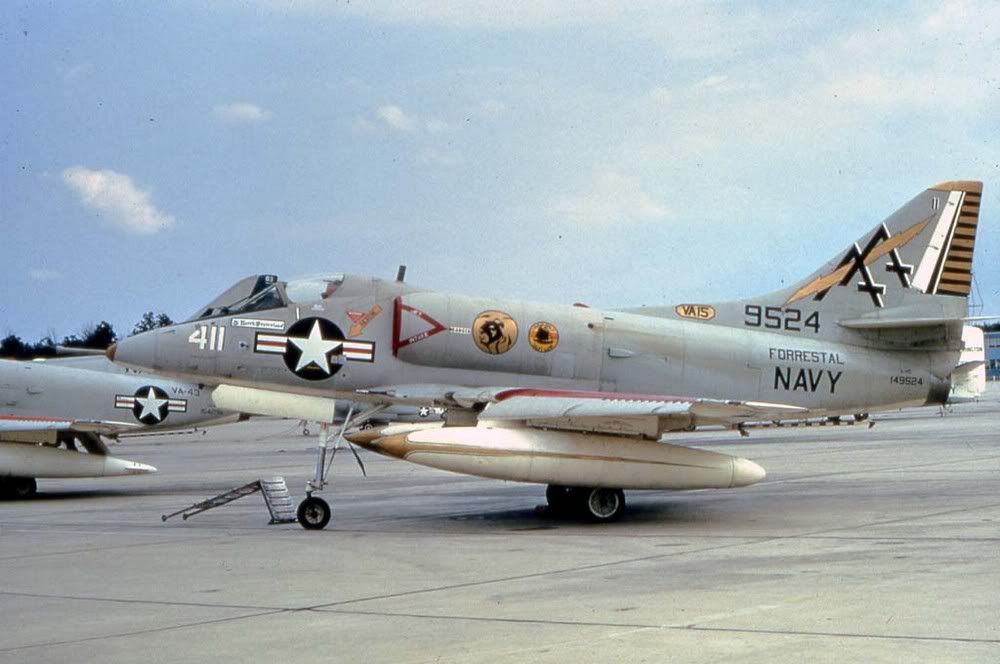
VA-15 Valions aircraft BuNo148543 "401"
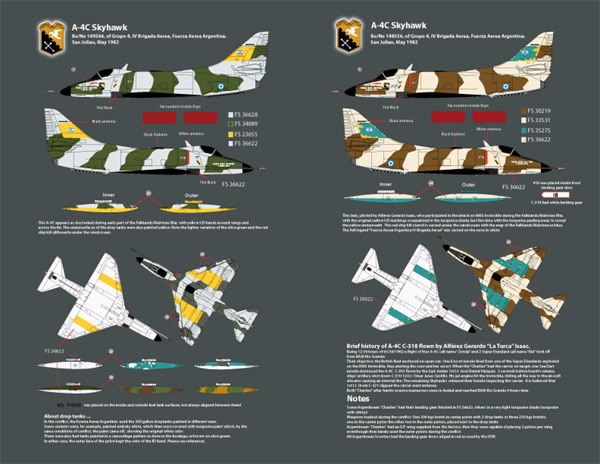
Argentinian Version


Parts for the Argentine conversion

The Argentine A4C was fitted with a loop type antenna on both sides of the fin. You can make it from wire or a strip of styrene.
Markings for these Argentinian birds in both sets of colours


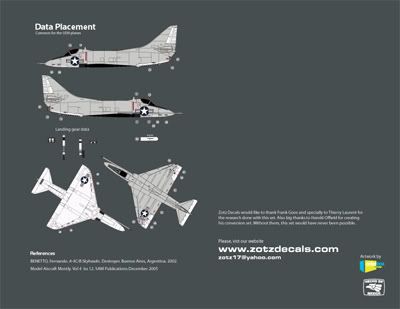
 Data Placement sheets is to be included...

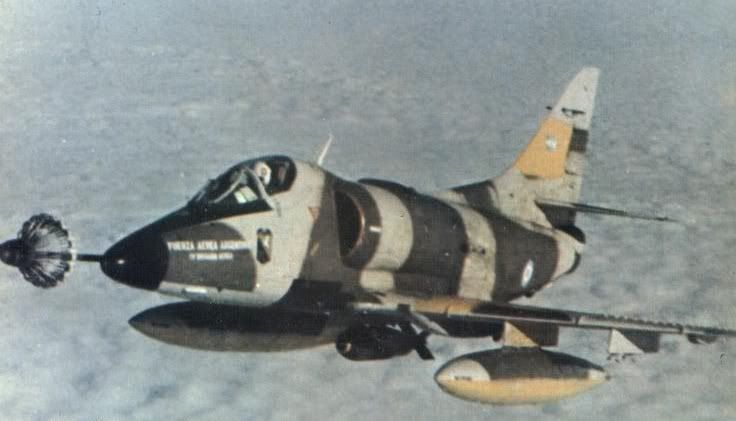
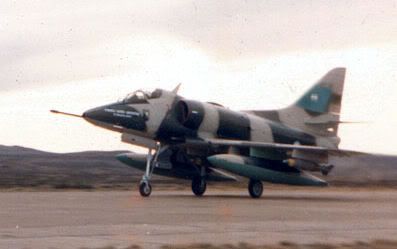
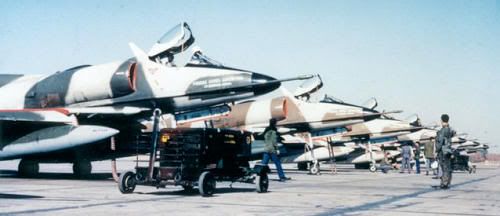
And some rather damaged in action shots from 1982
All of this in one special package is on sale now -Sprue Brothers and AMS will stock this conversion which sells for US$58 excluding shipping.

