

Francois loves a Belgian-centric kit – that is why Revell of Germany's new tool Leopard I kit in 35th scale hit his radar early on, (there are also Dutch & German Leos in this boxing as well.) So he got to building it to show you just what type of kit to expect, and how it all goes together...

Build Review: Leopard I MBT
From: Revell of Germany
1/35th scale
Kit number #03240
New Tool Kit
Vinyl Tracks
Four Marking Choices
Product Link
Product Link
There have been many Leopards before in the Revell catalogue, but in contrast with the previous ones, this new tool Leopard I in 35th scale is a completely new-tool kit from the German brand. This Level 4 kit is 27,3 cm long and comes in at only 260 parts., so the build will be simple, and hopefully worthy of a modern tooling of this, the first MBT from West Germany after WWII.

In all, there are 10 sprues in this kit, along with some vinyl tracks and tow cables. When you look at the instructions, don’t be surprised, because there’s a steel wire attached to it for the antennas! You can build 4 versions of the Leopard: two German, one Belgian (yeah we like that!!) and a Dutch Leo I as well. All of these countries used their Leopard I's to great success during the Cold War.
Here is a look at the parts of this new tooled kit:

A close-up of the turret and its texture. It is realistic enough that you will not have to make your own mix up to make it realistic.

You will have to be careful with the turret basket here - I would have not liked to have broken this and made my own metal ones! Ours survived O.K. though...

Lots and lots of wheels and other small parts of the running gear here. I’m not a dedicated tank modeller but these parts are really very nicely moulded with no real flash and some sharp detail in them.

Here’s another close-up of the road wheels showing them closer and in better detail:


These are the main components of the Leopards hull. A simple main four part construction will cut down the time and parts count on this one...

And a close-up of the aft engine deck part of the kit. Sure looks good to me, and no photo etch just for the sake of photo etch.

Lots of equipment that is placed onto the hull, spare tracks for the front glacis plate are in plastic here, along with picks and shovels, and every other large tool needed to fix, service and maybe give some spaced armour protection to the Leo are here.


The front guards. These are all very well represented both in the chequered metal and fake rubber mudguard pats on the front. They are quite detailed and they will take weathering and painting nicely.

The sprue houses the two rear decks you need in this boxing for four different Leo's, the side exhaust louvres and the dog-leg shaped suspension arms.

The louvres in detail (and in close-up):

The dog-legged suspension arms in close up as well

The tracks provided in this kit are moulded in vinyl, and they are okay, but there are quite a lot of injection marks.

They will be visible in the finished kit, so there’s a bit work there or a lot of weathering to be done there.

See the injection marks on them? A bit of a pity, but something can be done on them …


We asked our all-round modeller François if he would like to build this new Revell Leopard and before we could say “please”, he had opened the box and started inspecting it. The advantage of being an all-rounder is that he tries out a lot of different techniques, which helps every aspect of his work. We’re very jealous of his talent and speed…
The sprue map...


Building this Leopard is a lot about construction and very quickly, the turret and hull were glued together. In a few places, some putty had to be used...

...along with some new wiring, just like the real thing used...

Those turret basskets went on without breaking and much hassle...

The other details added to the turret, like the smoke dispenser and sighting mechanisms added a lot of detial that give the tank a lot of depth...

...and here she is ready to paint..

With all major components glued, the Leopard gets a coat of primer, after which some pre-shading is done.

There proved to be a bit of work to be done cutting and sanding and pre-shading, then preparing the wheels. A lot more of those to be done, but nothing like the interleaved wheels on Tigers and Panthers from WWII era.

François used Revell Aqua Colors for this kit, with olive green as the basis. He used yellow and white to get lighter shades of green in order to bring live into the kit. Make sure you do this in a subtle way, these tanks were kept in a pretty good condition. No WW2 style of weathering is needed here.

Decals for the four following versions are included with this boxing:
Leopard 1 (2 Baulos ), Bundeswehr, PzBtl 194, Handorf, 1969
Leopard 1 (4 contract section), Bundeswehr, PzBtl 153, Koblenz, 1972
Leopard 1, 4th Lancers Reg, 16e Pantser Div, Soest, 1969
Leopard 1, A squadron / 41 Tankbataljon, Bergen-Hohne, 1977


Picking up speed, François painted the details and gave the kit a coat of varnish. With the decals done – Belgian version of course - he got ready to give the kit a wash with oils to bring depth to the details.

Even in Belgium, where most of the ground is in concrete and asphalt, you have some dots of dirt and mud. Those were very nicely done by François.

There aren’t any clear parts in this kit, so the transparent parts had to be painted trompe-l’oeil. For this, blue and green paint, combined with gloss varnish was used. It did the job.

More weathering – this time with pigments – was done on the tracks. By doing this, the ejection marks disappeared.

The tail lights were an easy fix with acrylic colours...

Look how those tracks bend! They did not turn out too bad for vinyl tracks, huh?
Highlights were mixed with Revell Aquacolours which are just great and go on well after thinning with the brush.
 A final coat of matt varnish finished the kit...AcrylicVallejo was used here...


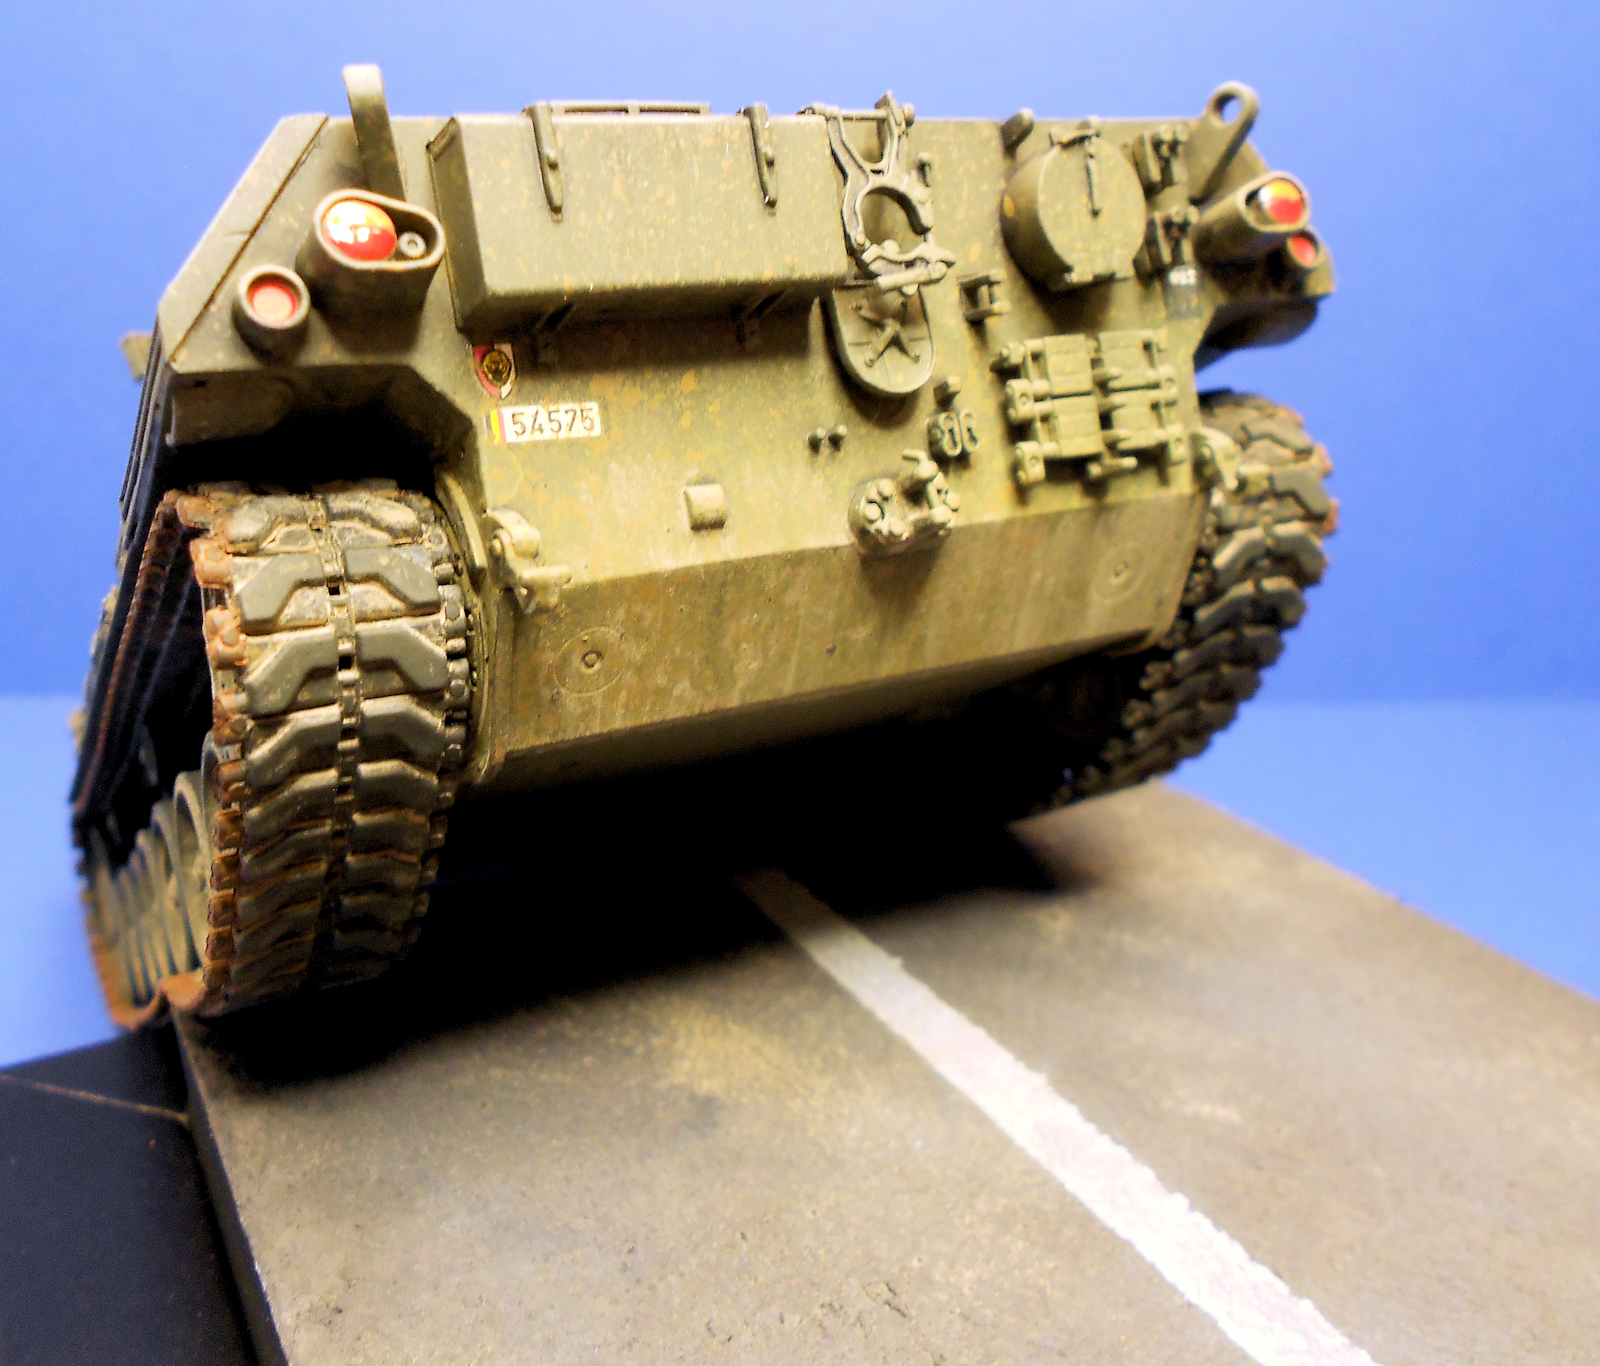
The base Francios thought might just be a bit of Belgian roadway. He made this up with a simple mix of foam he used an inexpensive photo frame for the surround.

After an undercoat, a grey road was made with some wear and tear in earth colours, whilst a rough white tarmac line was made with yes you guessed it, another bit of cheap foam....


Here is the finished base after some weathering.


...and so here are a couple of photos of the finished Leopard.


The conclusion of this new tool Leopard: the positive things of this kit are the new tool engineering and the incredible price, which is well below 30 euro. It is well detailed, and has a very straightforward construction. Specialists told me that the running gear needs some work in order to make it more realistic, but that after market parts are available.
Bottom-line: great value for money kit from Revell yet again !

Model by François laloux
Thanks to Revell for sending the kit for us to review & Build – you can get this little tank now from Revell's Distributors Worldwide.