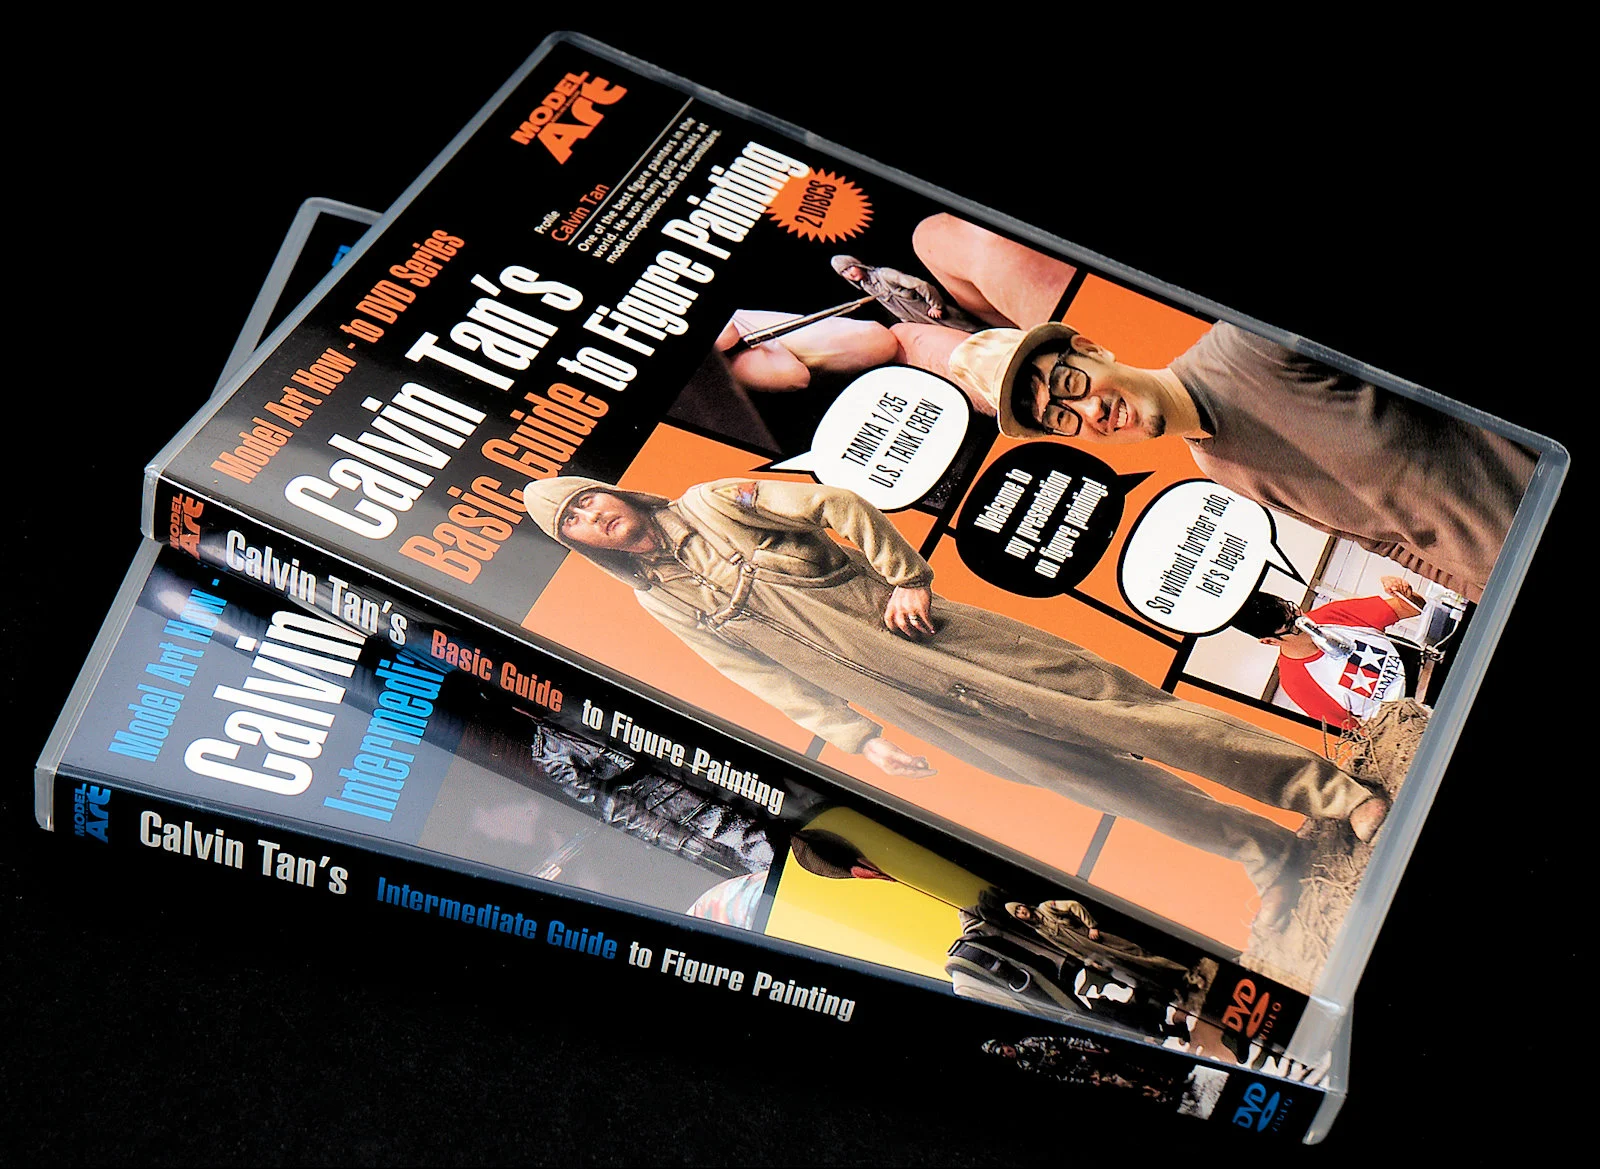
We got some spare time recently for a bit of DVD watching so we could take you through "Calvin Tan's Basic Guide to Figure Painting" 2 DVD set. See what's in the video and whether the learning from it is effective or not in our review...
DVD Review: Calvin Tan's Basic Guide to Figure Painting
Published by: Model Art
2 DVD Set
#DVD MDV-005
available in both Japanese and English.
Length: 210 minutes.
Available from this link for 3,333 Japanese Yen/ $29 USD/ $41 AUD/ £24 GBP/ €26 Euro (plus P&P)
Today we are looking at the new DVD from Calvin Tan, distributed through Model Art Japan that gives us an understanding of how to paint scale model figures. We had the pleasure of watching the DVD a few times so we could take it all in, and we thought that to share what we saw would be worthwhile to all budding figure painters out there. This is what we found...
Synopsys:
"This instructional DVD was developed for the beginner armour and diorama modeller in mind; in which I will demonstrate a variety of easy to master techniques employed to attain this final result. Topics include proper paint application techniques, choice of brushes as well as some little tricks and shortcuts I have developed over the years painting figures. Bear in mind that it is not a continuous record of the painting process but a showcase of techniques for any modeller of different skill levels to incorporate into their repertoire of techniques" by Calvin Tan
Wait - who the hell is Calvin Tan?
Calvin Tan is a Singapore resident who is a world renown painter of model miniatures. Through his work on his website, and from commission and boxart work for such companies as Alpine Miniatures, Fer Miniatures and Young Models to name a few, Calvin has become a popular figure on the modelling circuit, multiple gold medal winner at Euro Militaire, but beyond that he is always glad to talk to modellers at shows and he is known to be one of the more friendly and relaxed characters in the hobby.
Here is the trailer for the video:
We get a brief introduction from the man himself, with a snippet of his personality thrown in which brought a big smile to my face - love it! "So - without further ado - let's begin!"
Each of these chapters has it's own little title plate which lets you know that the narrative is moving on and serves as a visual guide.

Chapter I: Making a Wet Palette
Calvin shows us how to make our own wet pallets, with the use of some sponge, tissue paper, baking paper and some water in a Tupperware container. He shows us and lets us know the reasons why these are used and how you know you have a working wet palette ready to paint with and to stay moist throughout the operation.
Layers are applied over these shades to blend all of the effects together. With that, we move on to the next chapter.
DVD Review: Calvin Tan's Basic Guide to Figure Painting
Published by: Model Art
2 DVD Set
#DVD MDV-005
available in both Japanese and English.
Length: 210 minutes.
Available from this link for 3,333 Japanese Yen/ $29 USD/ $41 AUD/ £24 GBP/ €26 Euro (plus P&P)
Today we are looking at the new DVD from Calvin Tan, distributed through Model Art Japan that gives us an understanding of how to paint scale model figures. We had the pleasure of watching the DVD a few times so we could take it all in, and we thought that to share what we saw would be worthwhile to all budding figure painters out there. This is what we found...
Synopsys:
"This instructional DVD was developed for the beginner armour and diorama modeller in mind; in which I will demonstrate a variety of easy to master techniques employed to attain this final result. Topics include proper paint application techniques, choice of brushes as well as some little tricks and shortcuts I have developed over the years painting figures. Bear in mind that it is not a continuous record of the painting process but a showcase of techniques for any modeller of different skill levels to incorporate into their repertoire of techniques" by Calvin Tan
Wait - who the hell is Calvin Tan?
Calvin Tan is a Singapore resident who is a world renown painter of model miniatures. Through his work on his website, and from commission and boxart work for such companies as Alpine Miniatures, Fer Miniatures and Young Models to name a few, Calvin has become a popular figure on the modelling circuit, multiple gold medal winner at Euro Militaire, but beyond that he is always glad to talk to modellers at shows and he is known to be one of the more friendly and relaxed characters in the hobby.
Here is the trailer for the video:
This video forms the first part of two videos on the subject of painting miniatures published by Japanese hobby giant Model Art. The second video focusses on Intermediate skills for the modeller. That will be reviewed sometime soon here on TMN also. Let's look at this first video first though...
Calvin Tan's Basic Guide to Figure Painting DVD in its physical form:
Well it is a dual DVD, isn't it? The simple case comes with two DVD's inside with nothing else to note...
The rear cover...
I fired up the DVD player (thank god it only took me a month to find one I could use lol :-) to find a general chapter selection pointing out for quick reference the part of the painting process you want to know about. The Chapter selection helps you skip to the part of the video you need to catch up on, or to navigate quickly from the home screen. Each of the chapter title cards are animated in this fashion with highlighted text when the cursor is drawn over them.We get a brief introduction from the man himself, with a snippet of his personality thrown in which brought a big smile to my face - love it! "So - without further ado - let's begin!"
Each of these chapters has it's own little title plate which lets you know that the narrative is moving on and serves as a visual guide.

Chapter I: Making a Wet Palette
Calvin shows us how to make our own wet pallets, with the use of some sponge, tissue paper, baking paper and some water in a Tupperware container. He shows us and lets us know the reasons why these are used and how you know you have a working wet palette ready to paint with and to stay moist throughout the operation.
Chapter II Basic Brush Painting Technique:
The next chapter has Calvin teaching us some of the bare bone skills you need to be able to paint successfully with brushes.
We look at the types of brushes used, and we start off with whites on the figure he has set up just to practice and demonstrate on. Do you see in the picture below how he gradually builds opacity in the centre of the painting demonstration?
Chapter III: Priming the model:
Priming is a necessary part of the process, and Calvin then shows us the basic concept of evening out the figure int he direction of the light that hits the body and where to guide us when the model is hand painted.
Chapter IV: Painting the face:
Calvin then takes us through the first and probably most important thing we all need to practice on our figures - Painting the face. Firstly the colours we need are laid out from lightest to darkest...
From the base coat of the basic colour and a mix for the water to keep things flowing in the thinnest of layers he lays down the paint, with the camera in close showing you just how he is working and also from the side on showing you his pose and the way he is sitting and working at the figure.
The base coat is added to with a darker layer in the "shadows" of the figure, from the way that the light hits the face Calvin shows us where to darken the base shades. The light dabbing technique of making a lighter shade on the face of the figure gives us light and shade on the face and sets us on the way to further detail the skin tone. "Slow and Light" dabbing technique to all of the lighter areas that catch the light first is discussed and shown here.
Calvin talks us through the next part of the figure, brush selection and a new colour in a shade that is lightly touched on the face in a shade that is between the darker and brighter tones to soften the face. Brush choices and paint subtleties are as important as colours and Calvin explains this process and his thoughts behind the steps in his work.
The three easy steps to guide us through light and shade on the face are described carefully by Calvin as we progress. He talks us through the complete process over this chapter which is quite long: 30 minutes of tutorial here. This chapter wraps up with the black lining on the brows and eyes.
Chapter V: Painting of the Hands
We look at the other flesh on show right now, with the same colours for the face being used on the hands of the figure. Calvin talks us through paint viscosity and brush selection again as we look at this still, a very important part of the figure.
In this 15 minute chapter, we are given all the information we need to follow Calvin as he progresses through the process. from the base colours, the lighter knuckle highlighting, a wash after that to soften the appearance and contrast of the colours.
Chapter 6: Painting of the Uniform - The Front:
Calvin next lines up the colours that he will use in painting the front of the uniform of the US tanker figure. The variation of light hitting the figure from the front helps him choose the paints he uses in this chapter which takes up the rest of this disk's running time (45 minutes).
More of the same processes that were used for the hands and face are repeated here, but this time with the peculiarities of the uniform. Calvin explains the uses of which brushes and why, the thickness of the paint and the viscosity of the flow of the paint and why he uses these materials at these points in the model.
The overalls, the shirt underneath and the light blue shirt under that are shown from start to finish. Calvin gives the viewer lessons throughout, how and when to use retarder, the uses of rounded brushes, the working of the light and shade and at what time to apply these to the figure. Highlights and black browns finish off the figure's front in this chapter.
That is it for disk 1 - now onto the second disk...
DISK 2
Chapter 7: Painting of the Uniform Pt.2 - The Back:
Starting on the rear of the figure Calvin again get his paints ready. The video that covers the rear of this figure in this chapter is twenty-five minutes long, so a little shorter than the front. However, the techniques are very similar to the front. That does not stop Calvin from expressing new analogies on his thinking and techniques which shows that he is a great teacher, constantly adapting his approach to better explain his methods.
Working with the Filbert and round-headed brushes Calvin shows us after the base colours with some retarder medium we see how to paint the highlights and shadows of the rear of the body and uniform. We learn how to cope with mistakes with assorted bushes and to soften bold highlights by diffusing the edges of the paint.
Mud, food stains, oil and other things that may dirty the figure's rear end or any other parts of the uniform are discussed with where and why you might add them to weather and age the garment.
Chapter 8: Painting of the boots
Over a black undercoat, Calvin describes his approach to painting the leather boots of the figure before he shows us both the paints he uses and the method for doing this. The red-black colours he uses are shown being mixed and applied in this twelve-minute chapter tutorial.
Not just the colour, but dust, wear and dirt are applied to the boots, Calvin then distributes these colours to soften the colours so they appear more realist, and lastly to show the light highlights on the toes of the boots.
Chapter 9: Painting the Headgear (the hoodie)
Taking the same paint colours that he used on the uniform, Calvin disperses them into a small empty tablet pack to ensure the paint consistency. These smaller mixes fo colours are applied over the already primed hoodie of the figure. a variation of drybrushing, this highlighting method helps Calvin create the gradient between highlights and shadows of the highest part of the figure.
Chapter 10: Rendering Basic Light and Shadow
Using a variation of the dry bush effect we saw on the hoodie, Calvin lightly strokes his paintbrush over the figure starting from the feet and working upwards. The lightest strokes with a great analogy to describe the technique are explained here. An easy technique but explained well here by Calvin as he works, step by step towards the end of the figure.
We see the figure then painted - but is he truly finished? There is more to come in the final details and the "Special Features" section of bonuses parts of the video.
Chapter 11: Painting the final details
The collar & sleeves with their darker tones, the stubble on the face and lower portion of the figure's chin, the lighter ribbing of the cloth on his uniform and high contrast outlines on the edges of the figure's clothing edges are shown in action by Calvin who is always talking you through what is in his mind and what he is doing. There isn't a gap of more than five seconds in the video between sentences, but it never leaves you wondering and the commentary is insightful and interesting always.
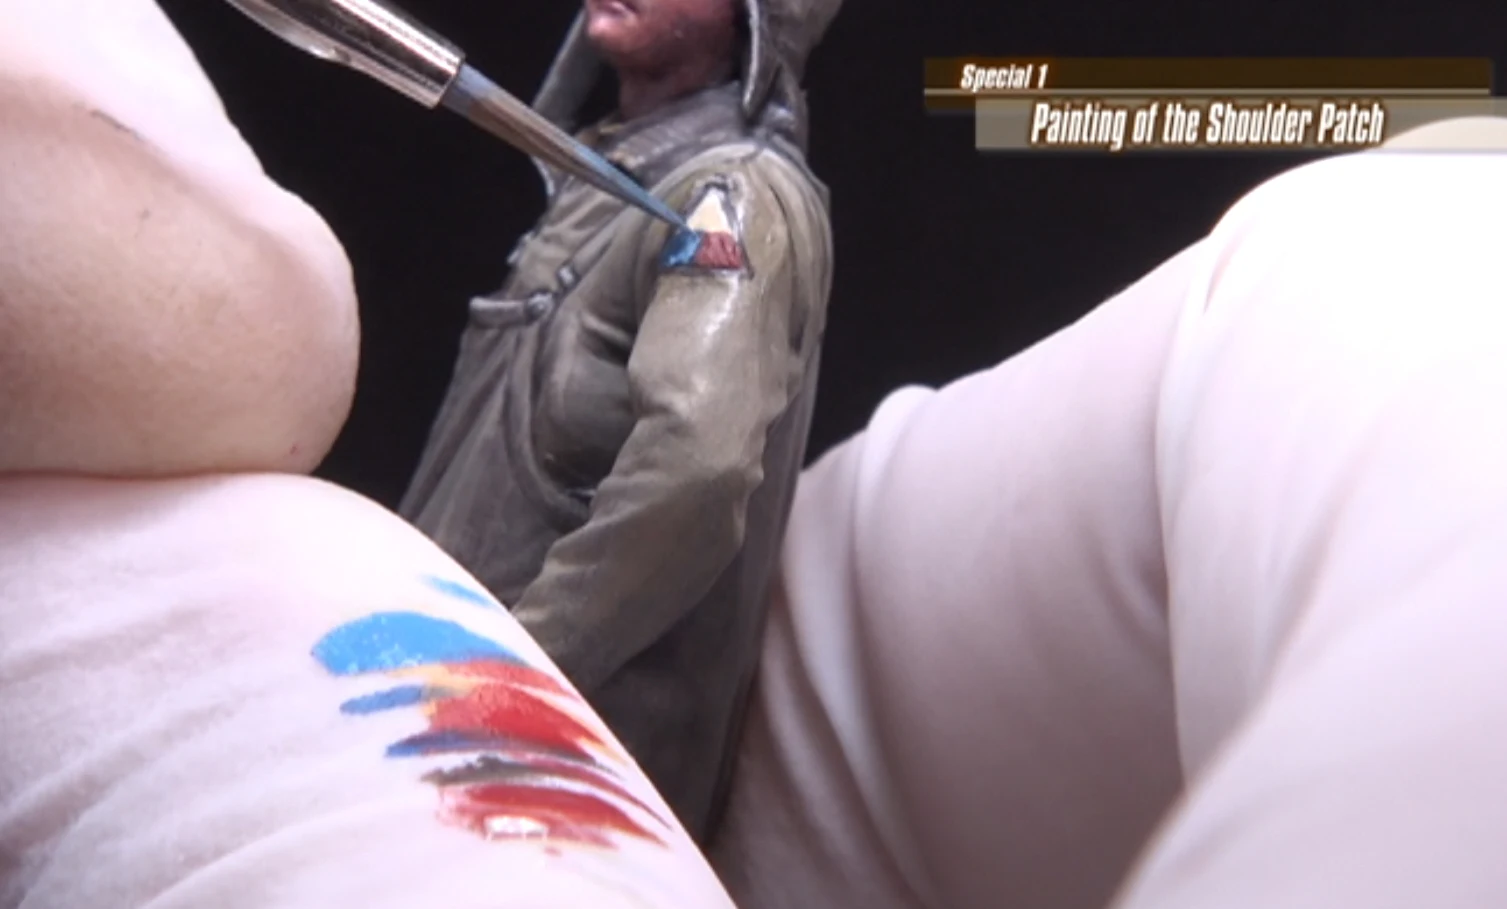
Special features - Painting of the shoulder Patch:
On to the extras of the video. These continue straight on from the other chapters so this is really the icing on the olive drab painted cake here. First Calvin paints the edges of the shoulder patch in with a fine brush, then carefully the yellow, then blue, then red shades of the patch before a lighter version of the colours to highlight the patch.
A vague impression of the writing and numbers are sewn into the patch is carefully added, with Calvin using his other hand as a steadying guide. It is easy to forget that this soldier is in 35th scale and the patch is TINY compared to what you are seeing zoomed in and in focus in front of you.
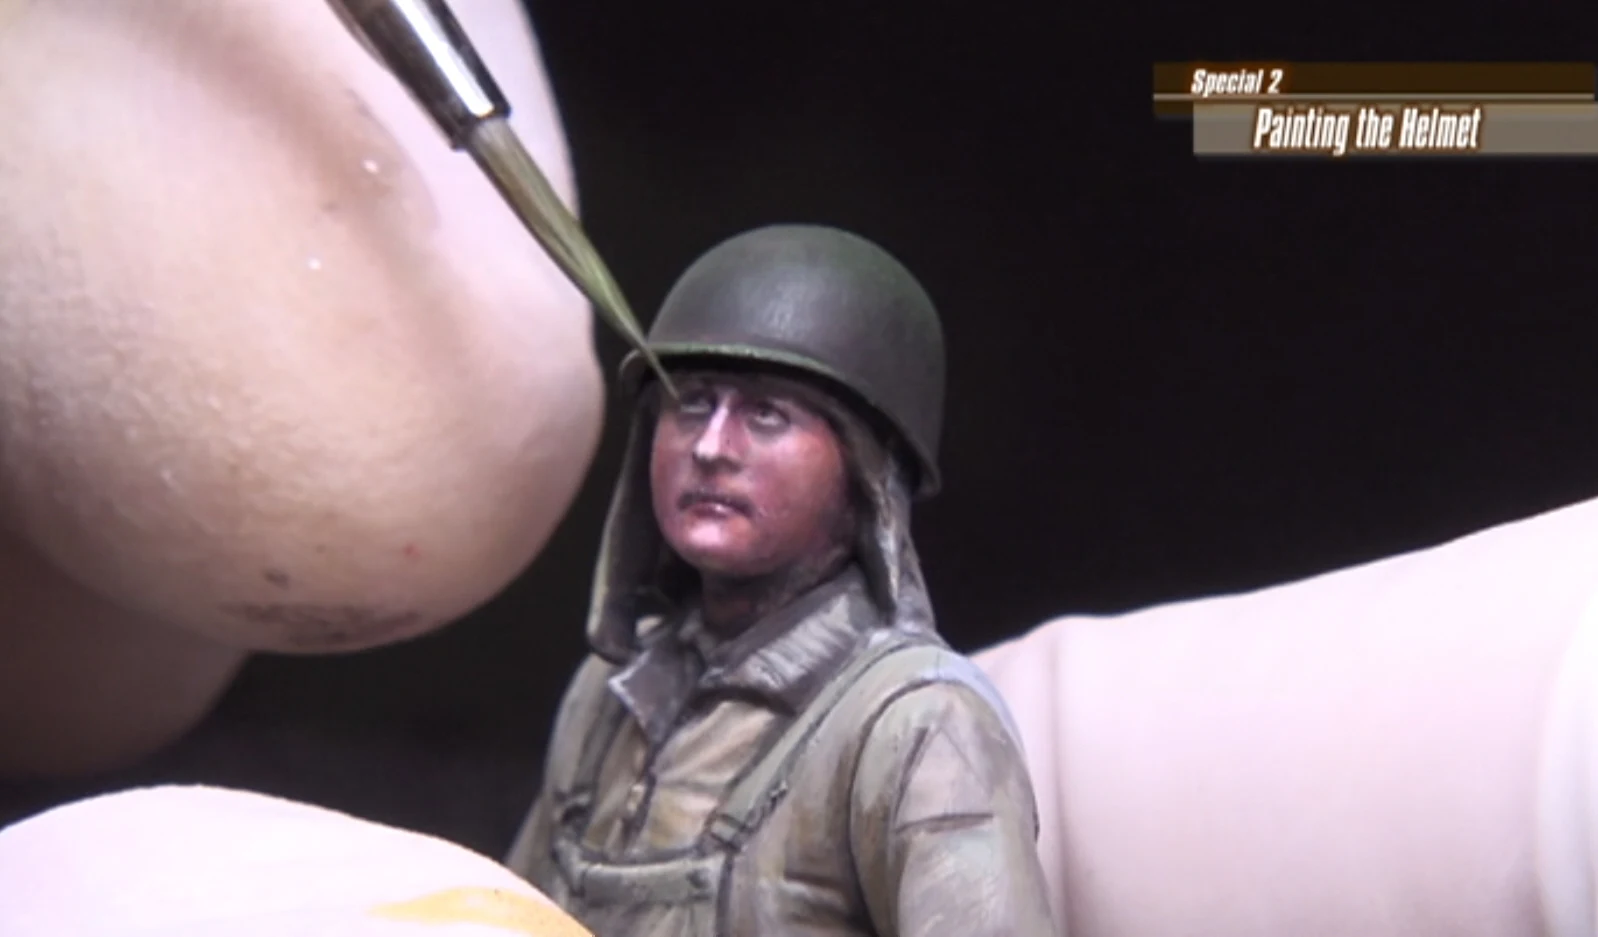
Special features - Painting the Helmet:
Although the figure is finished the extra helmet choice is added in this last chapter. Calvin takes us through a process of first base coat, colour application and then a variation of the drybrushing technique to give us a helmet that looks varied in colour, both filled with highlights and shadows where needed and completely realistic.
We see then a conversation with Masahiro Dio and Calvin discussing pleasantries and a few questions about the filming and the process for Calvin of filming his first video tutorial top off the presentation side of things.
This video...how to round it off?
I am sorry to all you readers and to Calvin, arranged for me to look at this video months ago for how long it took me to work out the best way to present the DVD. The review itself has also been a little long winded. It is quite hard to talk about just what is described without being too brief or too in-depth int he description of what is going on in front of you as you watch. I decided to be as in-depth as the video and show you step by step what is going on in this, the Beginner's Guide.
In short, it is a great video that shows you how to get the best out of acrylic paints. This is a perfect one one one tutorial that you can just watch, pause, rewind, and play over again as you paint your own figure. The format, the delivery and the package as a whole
This first part in the two-part series of beginner's techniques is a wonderful presentation that taught me a hell of a lot about figure painting. I am now starting to watch Part II of the series which shows us the intermediate techniques from Mr Tan. If it is anything like this video we can all be mater partners...with a little practice and maybe some rewinding and re-watching...
Adam Norenberg
Thanks to Calvin for arranging this video to be sent to review. You can get the video from a few places - but it is Available from this link for 3,333 Japanese Yen/ $29 USD/ $41 AUD/ £24 GBP/ €26 Euro (plus P&P)
You can also check out Calvin's excellent website that is a great resource in its own...


