
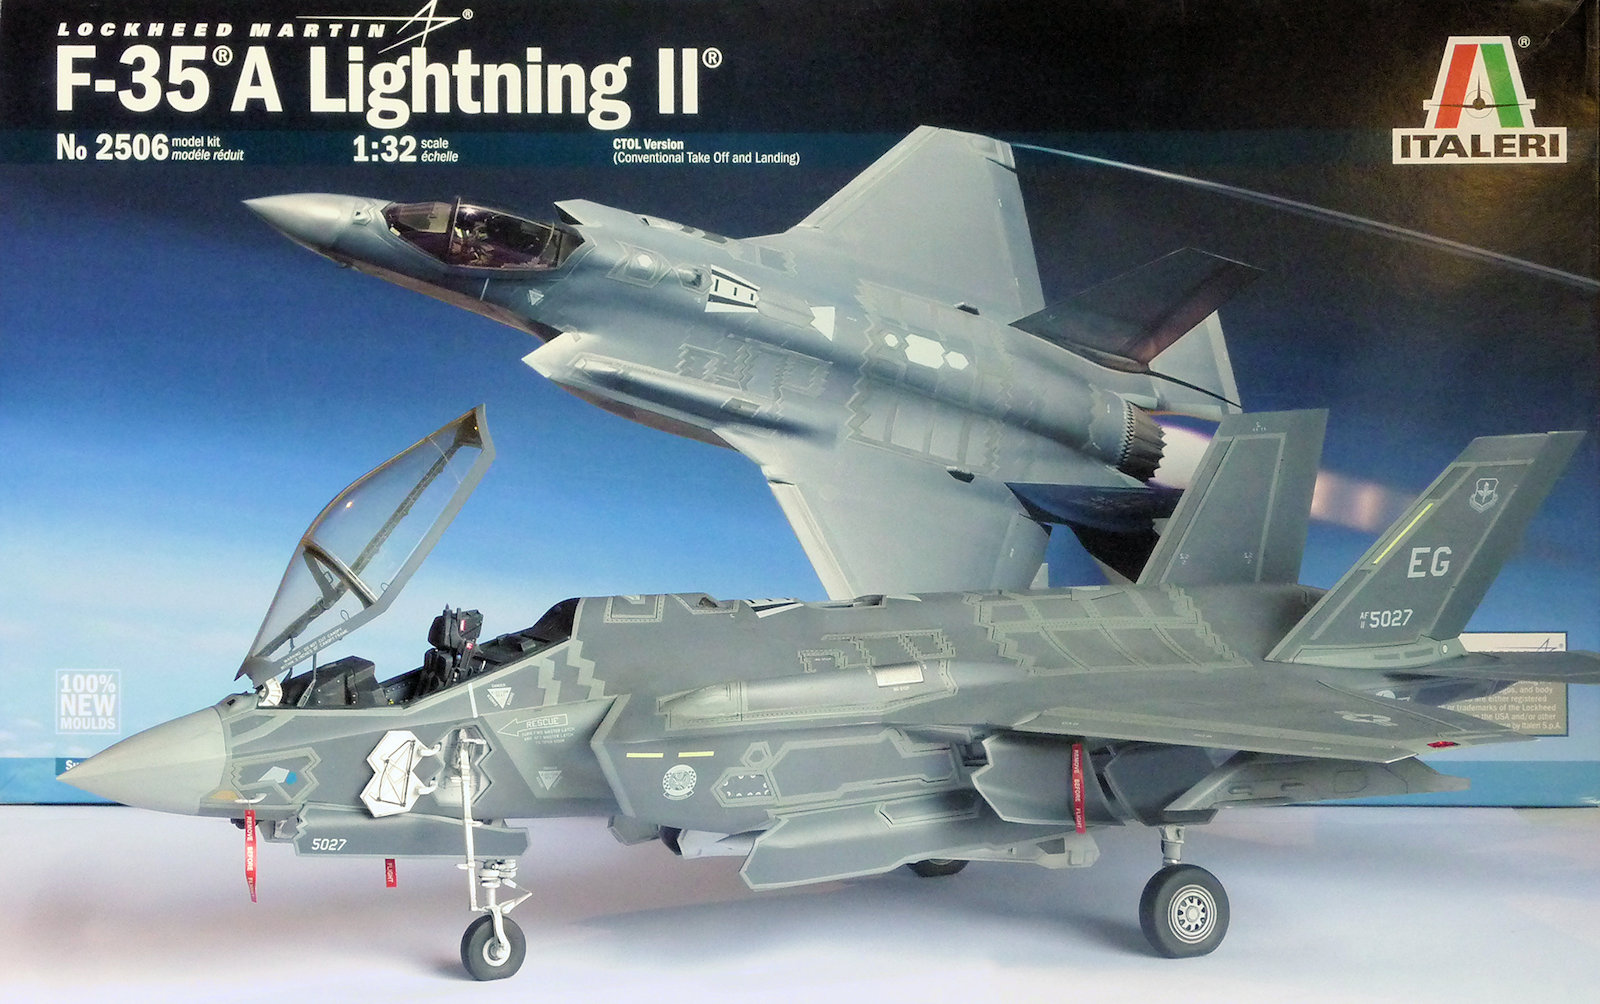

F-35A Lightning II
From: Italeri Models
1/32nd scale
Kit No# 2506
Model Dim.: 49,0 cm
Box Dim.: 560 x 280 x 115 mm
Markings are provided for six subjects
Photo-Etched Parts included

Today: Building Italeri’s 1/32 F-35 Part III "Queen of the masking tape"
Yeeeeaaassss !!!!! She is finally done !! And what a long road it has been. Having done some 30 kits in 1/32, I have to say that was probably the biggest challenge so far. Not so much because of the kit – Italeri did quite a good job on this kit – but because of the insane amount of masking that is involved in painting it.
So, this is how it went...
First: mixing the right colours to get the best possible base colour of dark grey. For this, I used mixed Revell Aquacolors.
 There is a tremendous amount of masking needed for this F-35. Italeri provides some masks, but not nearly enough to do the entire aircraft. If ever there is one thing you’ll need for this, it is a lot of masking tape. And what’s more: you need to cut it into very tiny pieces!
 With the dark grey base colour applied, I started masking the kit. I didn’t do it all at once, the masking (and painting the lighter grey colour) was done in 4 or 5 steps. Just so that I didn’t go crazy…


 Here you see the end of part 1 of the masking. It took me about 4 nights, half a season of Game of Thrones and 3 cans of Dr. Pepper to get here.


 Little by little, the kit started to look like the real thing. Of course, once the masks are removed, there still is some retouching to do. At this stage, I wanted the thing to look really okay.
 With the masks off, the cockpit comes to life. The canopy – which opens to the front - is still going to be a tricky, though…
 The canopy attachment consists of 4 points: the two slim ones you see here in the photo and two larger ones that go to the front.
 The canopy framing provided in the box is rough. You need to sand it completely and add all the rivets. You can use some of the rivet decals, but being an old bugger, I used a punch and die set and glued every rivet one by one. Italeri provides a metal etched frame for the centre part. This is a tricky part to glue, but with some patience, it worked fine. Test fitted the whole thing about a thousand times before the paint went on, but, hey: it’s the result that counts, right?
 With the masks of the underside removed, the weapons bays and wheel bays look really busy. Here are a few more shots of this area:

 Time for the decals. You’ll find quite a few possibilities inside the Italeri kit. I picked for a USAF jet based at Eglin in Florida. Basically, all F-35 A’s look alike and stencils and marking are all light grey…


 Added a couple of Remove Before Flight tags, just to get a little colour to the kit. The landing gear is finished with some good looking main gear wheels. Careful painting and you have an additional eye-catcher.


 It has been a long trip to get this Italeri F-35A kit finished, and that is due to two things: there isn’t a lot of info available on this aircraft, so adding detail takes quite a bit of time and it is a hell of a job to paint it, because of all the masking that is needed. I think these are also the reasons why you don’t see many finished kits, even though I am sure it is a very popular Italeri release.
 For me, this is Italeri’s best kit in 1/32. The fit is good, except for the wing-to-fuselage joints that need some putty, and the details are up to what you can expect from a modern 1/32 scale kit. The decals are the best you can imagine and the instructions are top notch. It is a big kit and the price is correct according to me.
This isn’t a hard kit to build, you only need a lot of patience for the painting. I do apologise that it took so long, but she’s standing pretty cool on my desk, next to Trumpeters F-117. Now, wouldn’t it be great to have a 1/32 kit of that third stealth jet, the F-22? Ow well, it isn’t a crime to dream right?
In the meantime, I look forward to the announced 1/32 Tornado from our Italian friends.

So, this is how it went...
First: mixing the right colours to get the best possible base colour of dark grey. For this, I used mixed Revell Aquacolors.
Next, I painted the nose, just because it was the easiest to mask.


Tweezers, tape, a very sharp eye and a lot of patience are all that you need.

Some parts are reeeaaaaally small…


Because I was slowly crazy, François helped me with some masking…


In this photo, the little added detail to the wings shows that it was worth it.

The vertical tails and painted exhaust.


The first time that the canopy got on the kit:

Time for a few shots of the finished kit:


This isn’t a hard kit to build, you only need a lot of patience for the painting. I do apologise that it took so long, but she’s standing pretty cool on my desk, next to Trumpeters F-117. Now, wouldn’t it be great to have a 1/32 kit of that third stealth jet, the F-22? Ow well, it isn’t a crime to dream right?
In the meantime, I look forward to the announced 1/32 Tornado from our Italian friends.
Nicolas & François
Thanks to Italeri for sending this kit to Nico to build for you all. You can see Italeri’s kits come to life and look at older releases on their website and the Italeri Facebook page...
